...

Go Back   Lateral-g Forums > Lateral-G Open Discussions > Project Updates
User Name
Password


Reply
 
Thread Tools Display Modes
  #41  
Old 01-10-2019, 11:27 PM
jasonz28camaro jasonz28camaro is offline
Member
 
Join Date: Aug 2017
Posts: 94
Thanks: 2
Thanked 6 Times in 5 Posts
Default

I got it all cleaned up with my sand blaster and wire wheel and sprayed some paint inside the box prior to me sealing it up.

I cut off the flange from the new box I purchased and cut out the old flange, got it fitted and welded. Also welded the outer skin in place.

For some reason I decided to grind down the welds on this side and it turned out good. I ran out of seam sealer so I'll catch all the seams after I get some more.


Reply With Quote
  #42  
Old 01-10-2019, 11:38 PM
jasonz28camaro jasonz28camaro is offline
Member
 
Join Date: Aug 2017
Posts: 94
Thanks: 2
Thanked 6 Times in 5 Posts
Default

I thought I'd share this with you... I did all this hard work and the entire time I smelt an awful smell of death but could not find the culprit. Turns out this rat made his final resting place on top of my cars carpet I have sitting in my garage. Hope I can get the smell out.
Reply With Quote
  #43  
Old 01-12-2019, 07:15 PM
jasonz28camaro jasonz28camaro is offline
Member
 
Join Date: Aug 2017
Posts: 94
Thanks: 2
Thanked 6 Times in 5 Posts
Default

I smartened up a bit and put the car back on the blocks so I don't break my back.

Went ahead and started to remove this section of firewall to insert my DSE smooth panel. I cleaned out the seam sealer and spot welds to start then cut out a preliminary area to test fit the panel. While I was test fitting the area I found that the firewall and cowl were pushed back roughly 2" to fit the old distributor so I had to find a tool to fix this. I ended up borrowing my friends slide hammer that screws into the sheet metal rather than spot welds to he sheet metal. This worked good for pulling out the majority of the large dented section but the amount of holes needed was going to destroy the cowl so I left it as is once I got the firewall and cowl pretty much in line with the rest of the cowl. I'll acquire a spot welder in the near future and finish up the smaller dents. All holes were filled on the firewall lap and cowl and ground down flush prior to welding the panel in place. I'll need to go back later and fill the throttle petal hole and a couple other areas down low on the firewall. Also addressed the rust around the whiper motor hole.

Once I got it fitted I went ahead and welded the panel in place then went back and ground down the welds a bit.


The burn marks on the panel you see is my sweet nut I welded on the backside to bolt up the Vintage Air motor.

Last edited by jasonz28camaro; 01-12-2019 at 07:26 PM.
Reply With Quote
  #44  
Old 01-12-2019, 07:35 PM
jasonz28camaro jasonz28camaro is offline
Member
 
Join Date: Aug 2017
Posts: 94
Thanks: 2
Thanked 6 Times in 5 Posts
Default

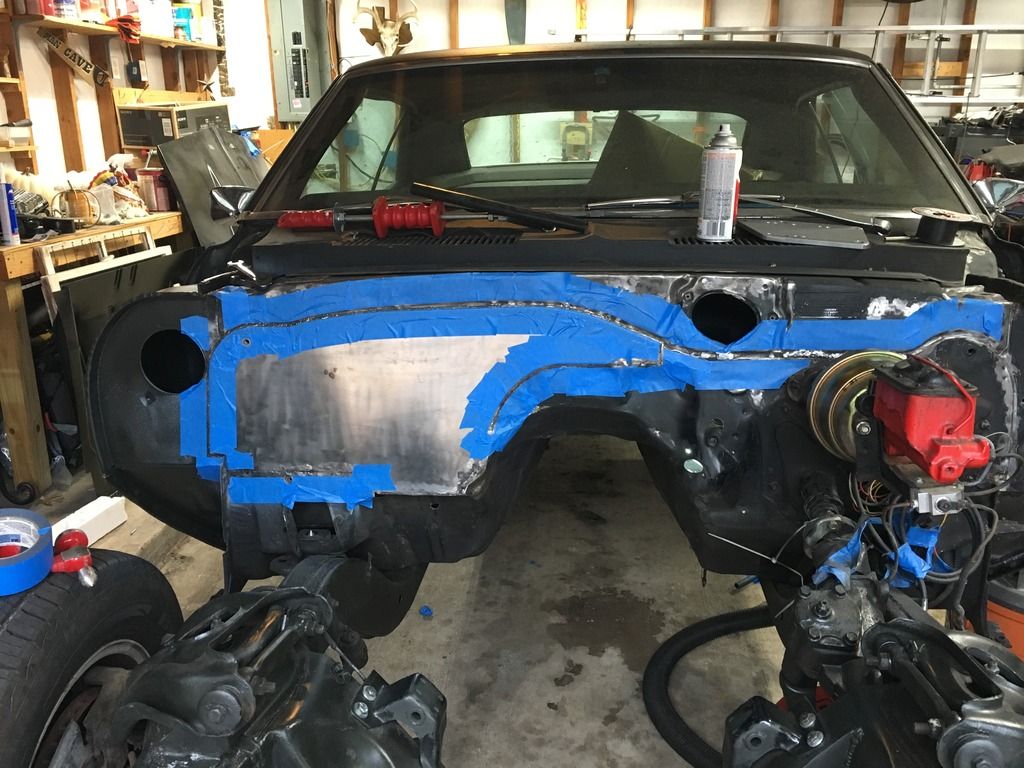
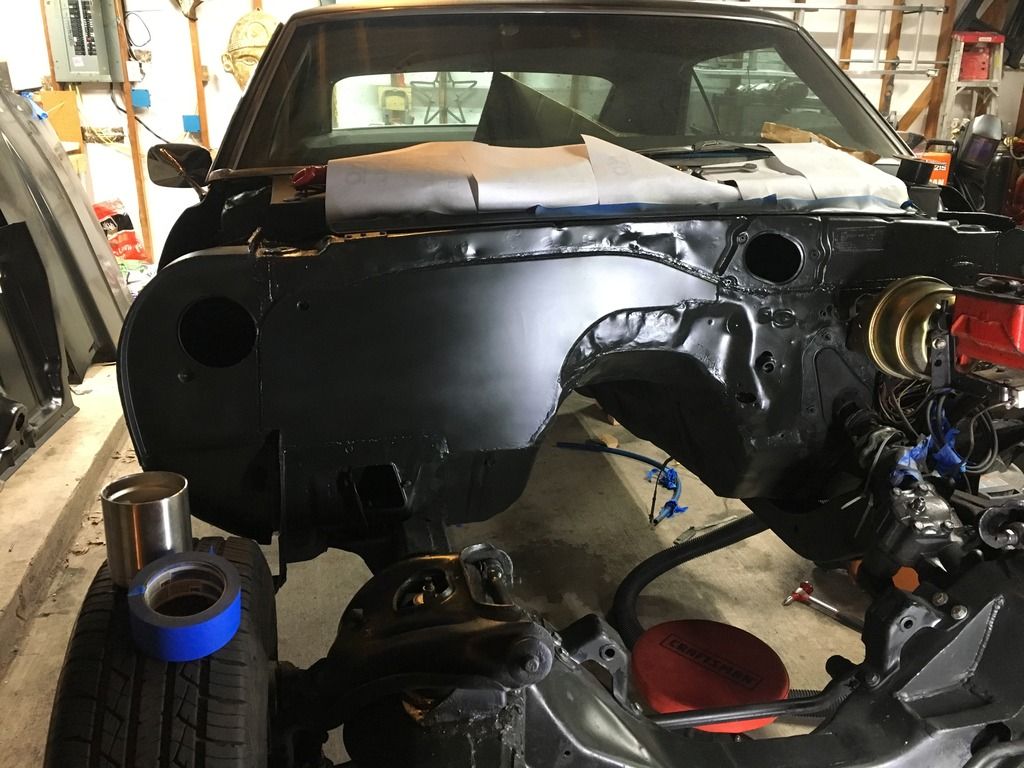
The next day I cleaned it up real good and applied seam sealer and put some primer on it. Applied seam sealer to a few areas on the tunnel along the welds used to make the tunnel higher too.

Like I said, I'll need to go back and pull the cowl out a bit to get it straight. You can see I also did not get it completely flush with the cowl, I was not going for that, I just wanted to get rid of the heater box and make it look a little better.

I don't have a picture but my Vintage Air motor had to be moved over about an inch from the original position due to fitment issues with the raised tunnel. I also welded a nut to the back of the new panel to secure the motor and it fits good now.


Reply With Quote
  #45  
Old 01-12-2019, 07:50 PM
tubbed69's Avatar
tubbed69 tubbed69 is offline
Lateral-g Supporting Member
 
Join Date: May 2010
Posts: 2,122
Thanks: 8
Thanked 37 Times in 33 Posts
Default

Nice work,great progress
Reply With Quote
  #46  
Old 01-12-2019, 08:01 PM
jasonz28camaro jasonz28camaro is offline
Member
 
Join Date: Aug 2017
Posts: 94
Thanks: 2
Thanked 6 Times in 5 Posts
Default

Thanks!

I got a few more weeks worth of body fab work to do then I'll jump back on the motor and I be installing a new AAW harness.

Just got word that the headers are done and should be shipped back to me soon so I'll need to see if they fit now. The only issue I see is a problem with the headers is that the motor now sits lower so we'll have to wait and see.
Reply With Quote
  #47  
Old 01-14-2019, 08:11 AM
CMillwheels's Avatar
CMillwheels CMillwheels is offline
Member
 
Join Date: Mar 2016
Location: Wilsonville, Oregon
Posts: 49
Thanks: 6
Thanked 50 Times in 24 Posts
Default

Very nice work. Messing around with that firewall is great fun isn’t it?!

Hopefully I’ll have some ideas for you next weekend on that ECU mounting location!

Chris
__________________
Cmillwheels - Oregon

The Toys -

1968 Camaro
1968 C10
1969 Dodge Sweptline
2014 Porsche 911 Carrera S (sold)
2009 Corvette ZR1
Reply With Quote
  #48  
Old 01-30-2019, 05:08 AM
jasonz28camaro jasonz28camaro is offline
Member
 
Join Date: Aug 2017
Posts: 94
Thanks: 2
Thanked 6 Times in 5 Posts
Default

I got the headers in and the final product looks nice!

I stuck the motor back in real quick to check the fitment and they slid in like a glove. They make a little contact with the PS box where the cast lines running vertically on the outside of the housing as seen in the photos. I'll end up grinding those areas down a little and it should give me enough room, if not I'll massage the tubes a little. The revisions Ultimate Headers would have worked perfect had we not dropped the motor down more. They said they would adjust the headers more if needed but I think I can get it going

I don't have a photo but the tube is very close the the knock sensor bolt and I'm going to need to swap out the bolt for something smaller, maybe an allen key style fastener and all will be good.


Reply With Quote
  #49  
Old 01-30-2019, 11:21 PM
jasonz28camaro jasonz28camaro is offline
Member
 
Join Date: Aug 2017
Posts: 94
Thanks: 2
Thanked 6 Times in 5 Posts
Default

The Dynamat Extreme was covering the trunk floor and had to be removed. This stuff is such a pain in the ass to remove! I did some research on how to remove this stuff and it basically came down to heat or dry ice. I did the heat trick when I did the tubs and it took a while so I decided to try dry ice this go around. Long story short, this tar doesn't like to freeze. The ice would freeze the top metal layer of the Dynamat and the sheet metal below but the tar would still be sticky and would not come off. With the top layer freezing it would release from the tar but the tar would remain in place, just made more of a mess really in my case. I purchased 10lbs and crushed it up and even tried to just lay the block of ice in one area and it did not help. I ended up using heat to get off the majority of it then a wire wheel to get to bare metal.

After I got some of the Dynamat off I took off the trunk support bracket.


Last edited by jasonz28camaro; 01-30-2019 at 11:24 PM.
Reply With Quote
  #50  
Old 01-30-2019, 11:33 PM
jasonz28camaro jasonz28camaro is offline
Member
 
Join Date: Aug 2017
Posts: 94
Thanks: 2
Thanked 6 Times in 5 Posts
Default

I then trimmed the pan around my mini tubs and set it in place to check the fitment and it looked good other than sitting a little high with the original still in there.

The original pan had a larger lip that sat up taller than the new pan and I didnt realize this until I made a mess drilling out all the spot welds on the back panel. I'll need to get a chill bar and fill in a few dozen holes later on...

After all those holes I made more to release the gas tank supports from the bottom of the pan and then cut out the majority of the pan to start fitting it up better. In one of the last pictures you can see the Ridetech airbar supports the trunk supports perfectly where it bolts through the trunk floor, this will help me to get it fitted correctly too.
​​​​​​​


Reply With Quote
Reply

Thread Tools
Display Modes

Posting Rules
You may not post new threads
You may not post replies
You may not post attachments
You may not edit your posts

BB code is On
Smilies are On
[IMG] code is On
HTML code is Off

Forum Jump


All times are GMT -5. The time now is 03:48 PM.


Powered by vBulletin® Version 3.8.11
Copyright ©2000 - 2024, vBulletin Solutions Inc.
Copyright Lateral-g.net