...

Go Back   Lateral-g Forums > Lateral-G Open Discussions > Project Updates
User Name
Password


Reply
 
Thread Tools Display Modes
  #61  
Old 02-23-2018, 08:35 AM
BlackAttack BlackAttack is offline
Junior Member
 
Join Date: Jan 2017
Location: Marietta, Georgia
Posts: 6
Thanks: 0
Thanked 0 Times in 0 Posts
Default

This is an awesome build. I just bought an 88 firebird. So, I will be following the progression very closely.

One comment/question about the sub frame. I know that on first gen's, the budget way to add strength to the sub frame is to seam weld it. Is this feasible for the 3rd gen's? I have also seen it done on dirt modifieds with Chevelle clips. It might be worth it since its already out.

Keep up the good work!
Reply With Quote
  #62  
Old 02-23-2018, 09:40 AM
SSLance's Avatar
SSLance SSLance is offline
Senior Member
 
Join Date: Oct 2013
Location: Peoria, AZ
Posts: 2,668
Thanks: 72
Thanked 337 Times in 211 Posts
Default

Looks great! Cool that you got some good weather to get it outside and cleaned up.

Not sure if you have decided on coating materials for the underhood area but I really like and recommend Eastwood products. While their aerosol paint cans are a bit pricier than other options, they go a lot further and lay down a much nicer and stronger coating. I usually clean with their "Pre", put a coat of "rust encapsulator" down if surface is suspect and final coat with either "chassis black" or "underhood black" which are both very nice factory looking finishes.

Since you've gone this far you should go that extra step to really make those areas pop before reinstalling all of the things to cover them up.
__________________
Lance
1985 Monte Carlo SS Street Car
Reply With Quote
  #63  
Old 02-24-2018, 05:41 PM
gofastwclass gofastwclass is offline
Senior Member
 
Join Date: Feb 2012
Location: Behind the wheel in KCMO
Posts: 362
Thanks: 118
Thanked 40 Times in 37 Posts
Default

Quote:
Originally Posted by SSLance View Post
Since you've gone this far you should go that extra step to really make those areas pop before reinstalling all of the things to cover them up.

Here we go with the "might as well disease..."

Just kidding.

Actually Lance is completely right, this is the perfect time to knock that stuff out. I did an LS swap on my daily in 2009. After getting it all sorted I was going to add a cam, clean up the wiring, fill some holes and respray the engine compartment. Yeah, well here we are nine years later and it never happened because I was too busy driving wheels off the thing or working on other projects and despite my best efforts it never broke.
__________________
I build my own junk...
Reply With Quote
  #64  
Old 02-25-2018, 07:57 PM
garage_engineer's Avatar
garage_engineer garage_engineer is offline
Senior Member
 
Join Date: Jun 2015
Location: Mass
Posts: 144
Thanks: 10
Thanked 40 Times in 26 Posts
Default

Quote:
Originally Posted by BlackAttack View Post
This is an awesome build. I just bought an 88 firebird. So, I will be following the progression very closely.

One comment/question about the sub frame. I know that on first gen's, the budget way to add strength to the sub frame is to seam weld it. Is this feasible for the 3rd gen's? I have also seen it done on dirt modifieds with Chevelle clips. It might be worth it since its already out.

Keep up the good work!
Thanks for the comments! Glad to see another 3rd gen F-body getting into the scene. I'll keep that in mind for the K-member... I haven't seen that done but doesn't mean it's not a good idea. I'll definitely look into it.

Quote:
Originally Posted by SSLance View Post
Not sure if you have decided on coating materials for the underhood area but I really like and recommend Eastwood products. While their aerosol paint cans are a bit pricier than other options, they go a lot further and lay down a much nicer and stronger coating. I usually clean with their "Pre", put a coat of "rust encapsulator" down if surface is suspect and final coat with either "chassis black" or "underhood black" which are both very nice factory looking finishes.
Thanks for the tips Lance. I'm actually in the process of researching what paint to use. I've used the Eastwood regimen in the past like you mentioned and it worked awesome. It is pricey though, and I have a bunch of pieces to paint. I've also heard good things about Farm and Implement paint... looks a lot cheaper but I haven't used it yet. POR15 is another option as well but also big bucks.
Reply With Quote
  #65  
Old 02-25-2018, 08:21 PM
garage_engineer's Avatar
garage_engineer garage_engineer is offline
Senior Member
 
Join Date: Jun 2015
Location: Mass
Posts: 144
Thanks: 10
Thanked 40 Times in 26 Posts
Default

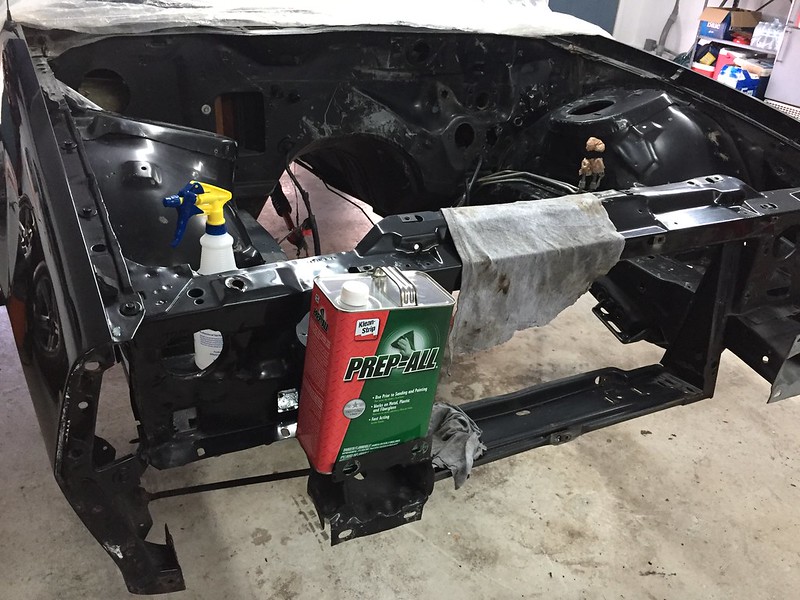
Making a little more progress. I'm waiting on some paint supplies to keep going with the engine bay, so I've moved on to working on numerous "little projects" that need to get done. I've decided that breaking things into little projects will help me keep moving forward.

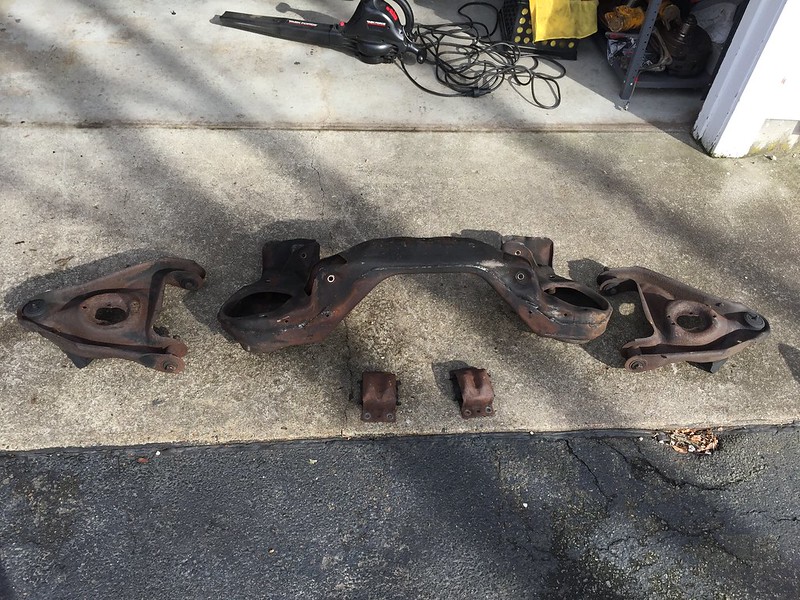
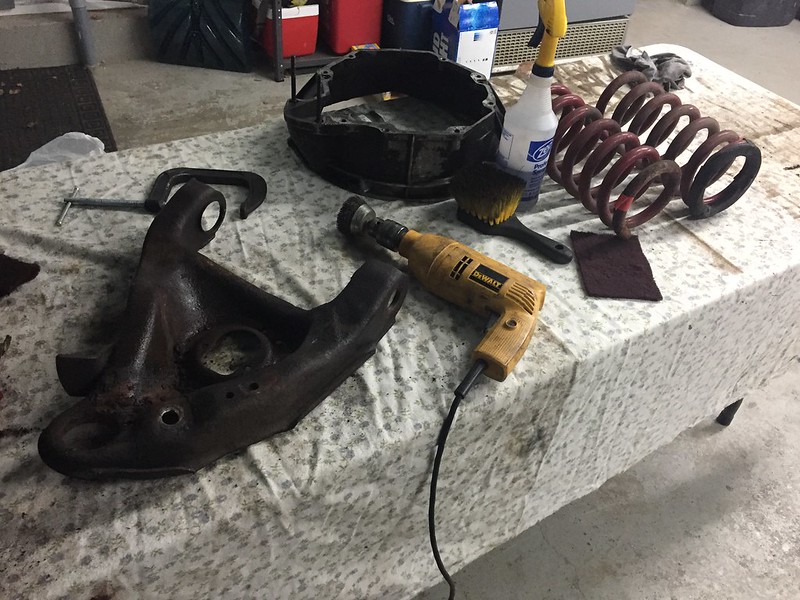
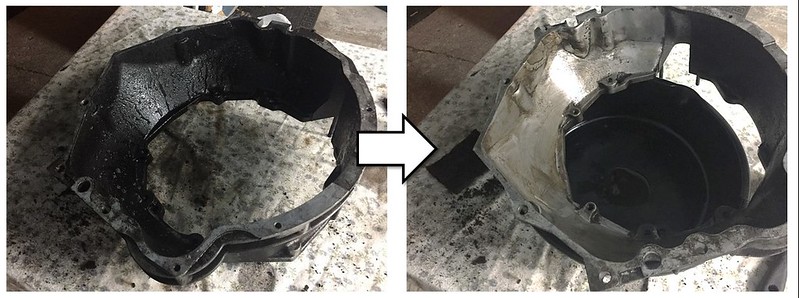
My first project is tackling the K-member. I used the same degreaser I used on the engine bay and hit it with the wire wheel and the paint came flying off! I have a little more work to do on it, and need to figure out a way to get the grime out of the inside of the K-member... might need to get creative there.

K-member all disassembled:


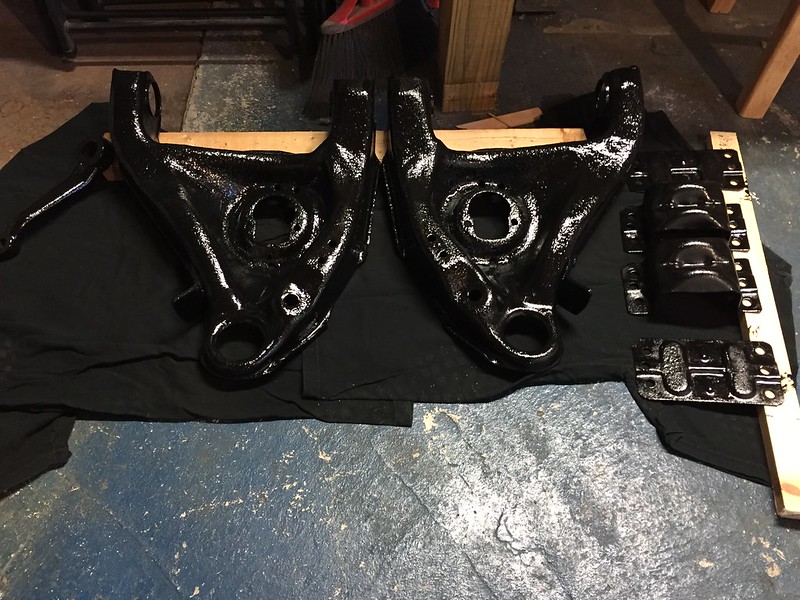
Stripping it down for paint:


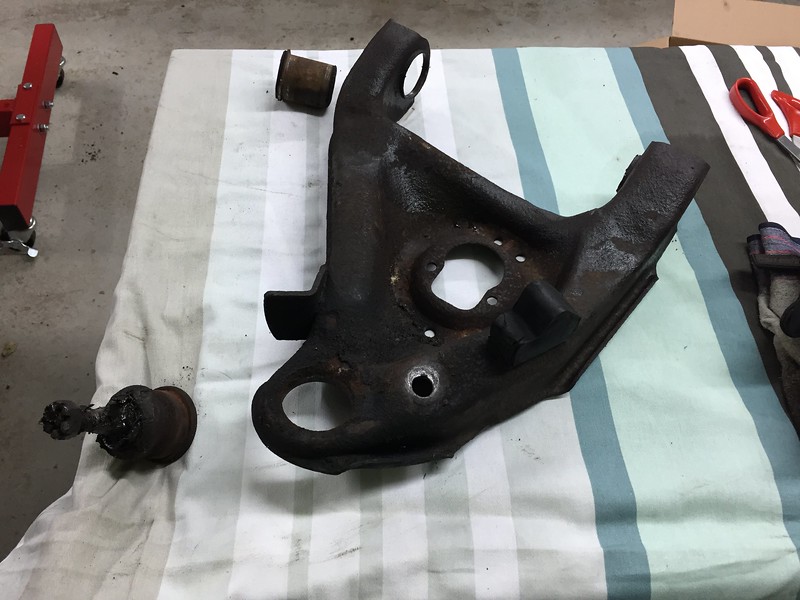
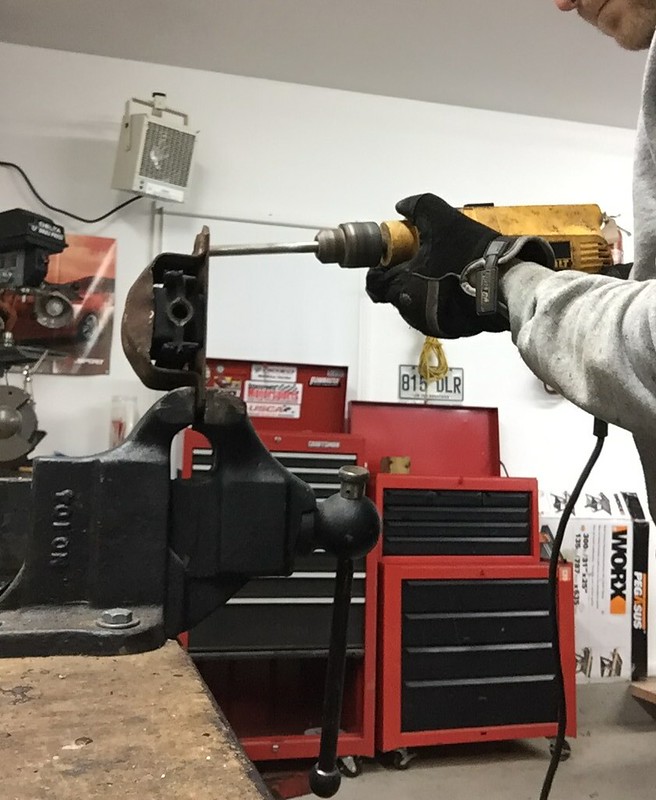
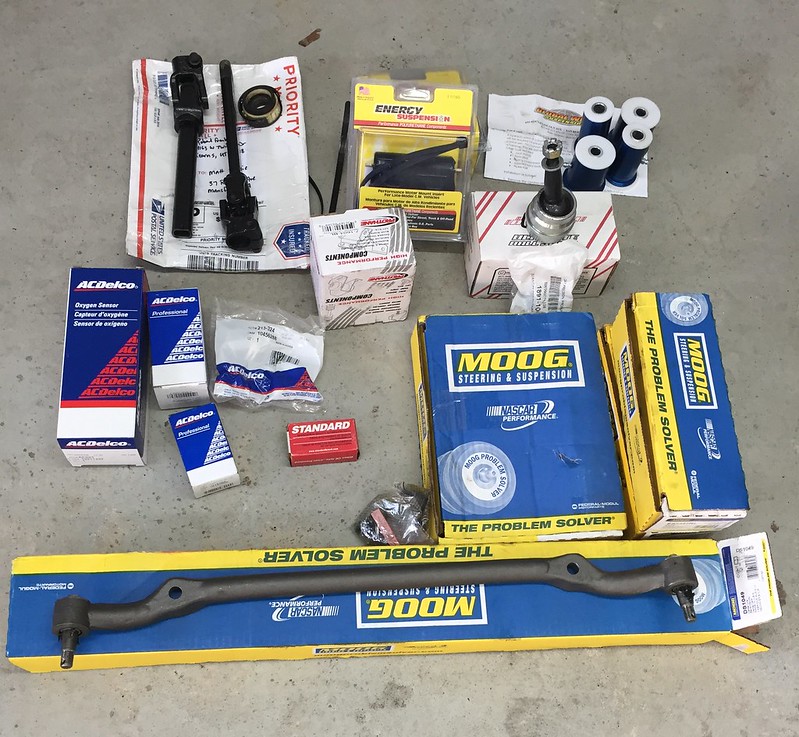
I had a busy week, so in order to keep moving forward I dropped my lower control arms off at a local garage to get the bushings and ball joints pressed out. I would have loved to have done them myself and learned a bit in the process, but I have to pick and choose my battles if I ever want to get this done!


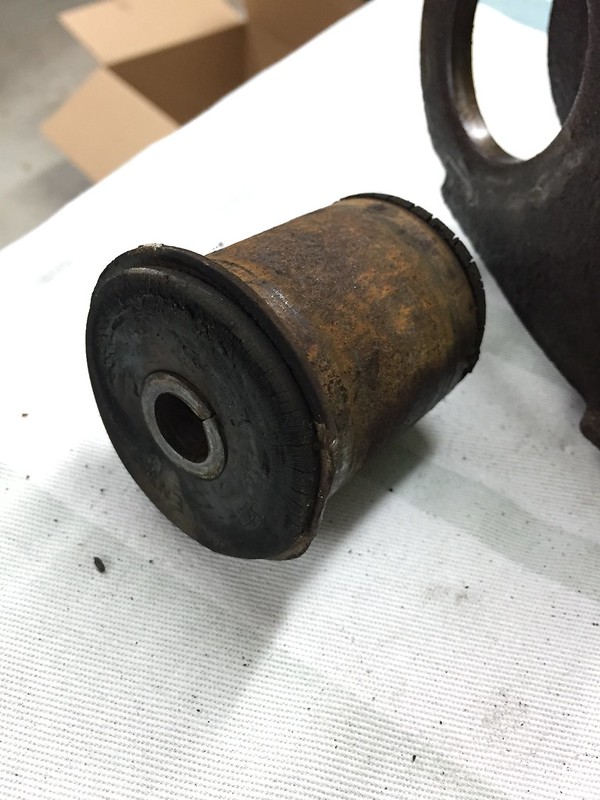
In staying with my budget theme, I'm going to be keeping the stock lower control arms but rebuilding them with new components. For bushings, I am going to go with Delrin ones from Global West. Haven't tried them on anything and I am basing my decision purely on reading, but they seem to be the go-to upgrade for these cars. I like the no-binding benefits and am looking forward to seeing how they feel.

For ball joints, I am still torn. Since my car is lowered, it's causing my lower control arm to be at a different angle than factory (with the ball joint higher than the mounting point on the frame). In order to restore the stock geometry (which is essentially a horizontal lower control arm) and keep my lowered ride height, I believe I need to use a taller ball joint. However, I've been having trouble finding the proper part number and if these are even necessary. I'm going to keep searching, but if anyone has any info to save me some time it would be greatly appreciated!
Reply With Quote
  #66  
Old 03-06-2018, 07:33 PM
garage_engineer's Avatar
garage_engineer garage_engineer is offline
Senior Member
 
Join Date: Jun 2015
Location: Mass
Posts: 144
Thanks: 10
Thanked 40 Times in 26 Posts
Default

Not a very exciting update this time but I'm in the cleaning and prepping phase right now so posting updates keeps me motivated! We just a had a big storm up here in Mass over the weekend with lots of trees coming down and power being out for multiple days as well, but not excuses! The show must go on!

I've started to prep the engine bay for paint by first wiping it down with a solvent and then scuffing it up with a maroon Scotch Brite pad.


No turning back now!


All scuffed up:


It's still a little too cold to get started with painting the engine bay, and my supplies haven't come in yet so that's about as far as I can go with that for now.

I moved on to cleaning up some other parts and getting them prepped for paint. I don't have my hose hooked up right now (still too cold) so I've going at it with just some degreaser, a wire wheel, some scuff pads and a ton of elbow grease!


Scraping the layer of oil and crud off the inside of the bellhousing. Think my rear main seal is leaking??


Getting the control arms cleaned up:


Hoping to get some of this parts painted this week so I can start reassembling them! Thanks for following along.
Reply With Quote
  #67  
Old 03-11-2018, 08:18 PM
garage_engineer's Avatar
garage_engineer garage_engineer is offline
Senior Member
 
Join Date: Jun 2015
Location: Mass
Posts: 144
Thanks: 10
Thanked 40 Times in 26 Posts
Default

Busted out the power washer again this weekend, but this time on the engine, transmission and some other components that needed a degreasing. I was really nervous about getting any water in the engine, so I took some time to really seal it up with some rags and tape. I also left all of the spark plugs and old sensors in there to act as plugs for those threads... I'll be putting in new ones anyway before the engine goes back in.

Plugging up the exhaust ports:


All sealed up:


I hit the parts with degreaser and let them sit for a bit before blasting them with the power washer:


And the aftermath:


I was so happy to get this done this weekend, since we're supposed to get some cold temps for the next week or so. The big layers of grease and oil are off, so I can just work on the smaller intricate areas in my garage.

I also tackled a small job of taking apart the engine mounts. I'm going to be replacing the stock rubber pieces with polyurethane so I need to split them open. For those that haven't done this (I'm sure most of you have, but it was a first for me) you have to drill out the rivets that hold the 2 halves of the mounts together:


The rivets that need to be drilled out:


I know my drill looks crooked here!


And last but not least, I FINALLY got to throw some paint on some parts! Sunday we had a break in the weather and the temp got up to about 50deg so I took advantage and got some paint on my K-member, lower controls arms and a couple other odds and ends that needed a coat. Felt great to get some color on there after scraping rust and grease off for the last couple of weeks. I had a can of Eastwood Rust Encapsulator lying around so I used that as my base coat on the bare metal. I'm still debating on whether to go with satin or gloss for the top coat.


Very pumped to have these pieces cleaned and sealed up! Can't wait to get going with reassembly.
Reply With Quote
  #68  
Old 03-18-2018, 08:37 PM
garage_engineer's Avatar
garage_engineer garage_engineer is offline
Senior Member
 
Join Date: Jun 2015
Location: Mass
Posts: 144
Thanks: 10
Thanked 40 Times in 26 Posts
Default

More progress! I have the final coat of paint on my K-member, the control arms and a few other pieces. I had to move everything into my basement as it's still pretty cold up here in the northeast. I'm using a Farm and Implement paint I got at Tractor Supply... it was super cheap and is apparently tough as nails. I'm not sure if I'm sold on the gloss finish though... I may switch over to a satin for the detail pieces in the engine bay.


I've also been ordering a bunch or parts that have started to come in. Even though I'm on a budget, I've been trying to order quality parts for important things like steering/suspension components and for pieces that are hard to get to once the engine and trans are back in the car:


Next I started going through a few of my subsystems to see what I need to order next...

I was hoping someone on here could help me assess the health of my clutch. I tried to take some detailed pictures below. I have been contemplating switching over to an AL flywheel and perhaps swapping out my slave cylinder for something with a stiffer feel. I am going to call SPEC this week to see what I'm working with here but if anyone has any comments that'd be awesome:

Clutch Disk:


Pressure Plate:


Flywheel Surface:


I also need to think about if I should repair my AC box or try to look for a replacement. I'm thinking I could maybe patch up these cracks with some epoxy and then paint it. Has anyone done something like this?
Here is a pic of the cracks:


The last thing I'm struggling with is how to clean up my AL heads. They're covered in a bunch of grime and a bit of paint overspray. I'd like to be able clean them up and leave them bare but I've tried a bunch of things and nothing seems to get them clean enough. Any thoughts?


Thanks for keeping up with my progress! Trying to bust my way through this boring stuff so I can start putting the car back together!

Last edited by garage_engineer; 03-18-2018 at 08:39 PM.
Reply With Quote
  #69  
Old 03-19-2018, 11:14 AM
LS1-IROC's Avatar
LS1-IROC LS1-IROC is offline
Senior Member
 
Join Date: Sep 2007
Location: Grand Rapids MI
Posts: 132
Thanks: 5
Thanked 4 Times in 2 Posts
Default

This is what i used, works great!
Attached Images
 
Reply With Quote
  #70  
Old 03-19-2018, 08:57 PM
garage_engineer's Avatar
garage_engineer garage_engineer is offline
Senior Member
 
Join Date: Jun 2015
Location: Mass
Posts: 144
Thanks: 10
Thanked 40 Times in 26 Posts
Default

Quote:
Originally Posted by LS1-IROC View Post
This is what i used, works great!
That looks awesome! I have some of that in my stash of detailing supplies and will give it try.
Reply With Quote
Reply


Posting Rules
You may not post new threads
You may not post replies
You may not post attachments
You may not edit your posts

BB code is On
Smilies are On
[IMG] code is On
HTML code is Off

Forum Jump


All times are GMT -5. The time now is 10:53 PM.


Powered by vBulletin® Version 3.8.11
Copyright ©2000 - 2024, vBulletin Solutions Inc.
Copyright Lateral-g.net