...

Go Back   Lateral-g Forums > Lateral-G Open Discussions > Project Updates
User Name
Password


Reply
 
Thread Tools Display Modes
  #941  
Old 05-27-2015, 08:22 AM
GregWeld's Avatar
GregWeld GregWeld is offline
Lateral-g Supporting Member
 
Join Date: Jul 2005
Location: Scottsdale, AriDzona
Posts: 20,642
Thanks: 504
Thanked 1,077 Times in 385 Posts
Default

I've seen guys not only install them upside-down --- I've seen it where they place the adjuster in what would be "toward the outside"... so that the adjuster is absolutely impossible to get to. LOL
Reply With Quote
  #942  
Old 05-27-2015, 10:08 AM
Sonar Chief's Avatar
Sonar Chief Sonar Chief is offline
Senior Member
 
Join Date: Dec 2011
Location: Greater Denver area
Posts: 1,332
Thanks: 245
Thanked 161 Times in 71 Posts
Question Huh?

Quote:
Originally Posted by Vince@MSperfab View Post
The sleeves do not fit together. its 1/2 (what you can male) to 1/2 male top and 5/8 to 5/8 bottom. **
You have the right parts....The 1/2" ones go on top and the 5/8" go on the bottom. One 5/8" washer on eash side. So stud, washer, 5/8 spacer, shock, 5/8 spacer, washer then nut. Also real racers position the adjuster at the bottom.
Vince .... I'm not a smart man, my picture 2 is what is installed on the top to take the bearing from 5/8 to 1/2 .... duhhhh, check image below!


The lower mount just change up the order? Install washer on the outside of the sandwich? I didn't know that's where they went, I just grabbed two washers.

Adjusters on the INSIDE bottom (Weld's comment) got it!

Now there is interference w the shock and the mount .... what's next? Longer shock stud to push the spring out away from the mount?


Thanks ...

Michael
__________________
JUST PICTUREShttps://imageshack.com/user/mcavery


Let the house go .... NEVER give up your car!!!!

Last edited by Sonar Chief; 05-27-2015 at 12:29 PM. Reason: added photos!
Reply With Quote
  #943  
Old 05-28-2015, 03:01 AM
Vince@Meanstreets's Avatar
Vince@Meanstreets Vince@Meanstreets is offline
Senior Member
 
Join Date: Nov 2004
Location: Bay Area, California
Posts: 5,466
Thanks: 13
Thanked 18 Times in 12 Posts
Default

Quote:
Originally Posted by Sonar Chief View Post
Now there is interference w the shock and the mount .... what's next? Longer shock stud to push the spring out away from the mount?


Thanks ...

Michael
Check your piuion angle. The lower mount should be at 90 degrees with the pinion 2 degrees down.

Your a smart guy....you just took this literally didn't you.
Attached Images
 
__________________
MEANSTREETS PERFORMANCE

Dealer for
ACCUAIR rideheight control systems
ENTROPY RADIATORS XXX radiators for your pro-touring vehicle
FORGELINE MOTORSPORTS Highline custom 3 piece wheels
WEGNER AUTOMOTIVE Custom engines and LSX drive systems
SPEEDTECH PERFORMANCE Bay Area stocking dealer

NEVER FORGET -11
Reply With Quote
  #944  
Old 06-04-2015, 07:58 PM
LanceL LanceL is offline
Member
 
Join Date: Mar 2008
Posts: 75
Thanks: 0
Thanked 1 Time in 1 Post
Default

Chief, do you have any pics of how the dash and cowl come together? On a nova they are welded, does the camaro do the same?
Reply With Quote
  #945  
Old 06-04-2015, 10:53 PM
Sonar Chief's Avatar
Sonar Chief Sonar Chief is offline
Senior Member
 
Join Date: Dec 2011
Location: Greater Denver area
Posts: 1,332
Thanks: 245
Thanked 161 Times in 71 Posts
Smile

Quote:
Originally Posted by Vince@MSperfab View Post
Check your piuion angle. The lower mount should be at 90 degrees with the pinion 2 degrees down.

Your a smart guy....you just took this literally didn't you.

Vince ... I called RT and Josh sent me out the correct spacers for the lower shock mounts. I did read the directions, they were not that specific ... they were actually outdated considerably, offered to send new pics to update their instructions.

Quote:
Originally Posted by LanceL View Post
Chief, do you have any pics of how the dash and cowl come together? On a nova they are welded, does the camaro do the same?
Lance ... the dash and the cowl panel are welded on the top. My front and rear AMD glass just came into town, figured I'd mock it up first before I welded them together. Same thing for the rear glass, trial fit before the quarters go on .... OCD!

WOW ... had a flash back looking for these pics, glad it doesn't look like that now!


__________________
JUST PICTUREShttps://imageshack.com/user/mcavery


Let the house go .... NEVER give up your car!!!!
Reply With Quote
  #946  
Old 06-05-2015, 09:19 AM
paulk68 paulk68 is offline
Senior Member
 
Join Date: Feb 2005
Location: CT
Posts: 719
Thanks: 49
Thanked 40 Times in 26 Posts
Default

How does the AMD glass look and fit are you happy with it?
Reply With Quote
  #947  
Old 06-05-2015, 03:49 PM
LanceL LanceL is offline
Member
 
Join Date: Mar 2008
Posts: 75
Thanks: 0
Thanked 1 Time in 1 Post
Default

Thanks for those two pics. That was the before correct? Do you have any pics that show what it looks like after? Do I make holes and "spot" weld it or tack it in all the way across and then grind down? I'm sorry for the ignorance on this one? I'm just not sure how to move forward because my dash was already pulled apart and I cant tell how it was together?
Reply With Quote
  #948  
Old 06-05-2015, 06:20 PM
Sonar Chief's Avatar
Sonar Chief Sonar Chief is offline
Senior Member
 
Join Date: Dec 2011
Location: Greater Denver area
Posts: 1,332
Thanks: 245
Thanked 161 Times in 71 Posts
Post

Quote:
Originally Posted by paulk68 View Post
How does the AMD glass look and fit are you happy with it?
I haven't picked up the glass yet ... the AMD rep used their glass on his Duster, said it fit well!

Quote:
Originally Posted by LanceL View Post
Thanks for those two pics. That was the before correct? Do you have any pics that show what it looks like after? Do I make holes and "spot" weld it or tack it in all the way across and then grind down? I'm sorry for the ignorance on this one? I'm just not sure how to move forward because my dash was already pulled apart and I cant tell how it was together?
No problem ... in the first pic you can see where the 2" band of rust goes across the cowl, that is where the upper dash came to and I just drilled out the spot welds to remove that strip. I will use my hole punch to prep the upper dash for spot welding.

I need to fit the front glass to make sure the angle at the bottom is in-line with the A pillars when the glass is set inside the opening ... I may have to sharpen the or change the angle to match the A pillar.

Michael
__________________
JUST PICTUREShttps://imageshack.com/user/mcavery


Let the house go .... NEVER give up your car!!!!
Reply With Quote
  #949  
Old 06-06-2015, 08:07 AM
LanceL LanceL is offline
Member
 
Join Date: Mar 2008
Posts: 75
Thanks: 0
Thanked 1 Time in 1 Post
Default

I got ya now. So it is spot welded between the two. Thanks a lot!!!
Reply With Quote
  #950  
Old 06-07-2015, 09:34 PM
Sonar Chief's Avatar
Sonar Chief Sonar Chief is offline
Senior Member
 
Join Date: Dec 2011
Location: Greater Denver area
Posts: 1,332
Thanks: 245
Thanked 161 Times in 71 Posts
Question Need some help

with the front shock setup! Lat G members I need some help figuring out spring clearance on the front, I thought I had it figured out and fabbed up some adapter plates to move the shock mounting point AFT 5/8".

Few days ago I started on the front shocks and found the spring hit the UCA ... hmmmm, I checked the static camber on the driver's side, added some washers to get -0.7, good now. Found out that if I moved the shock mount aft 5/8" the spring would clear UCA during travel. So I fabbed up a 1/4" plate and welded the RT mount on it!

Kool ... checked the passenger side camber, it was different, didn't need any additional washers to push the UCA out (see where this is going?) to get static camber at -0.7. NOW both sides have different thickness spacers .... should I be worried? Started making the same mount for the passenger side ... checking it the spring doesn't clear the UCA at all.

Part of this is due to the thickness of my adapter plate and the RT mount which pushes the mounting point out away from the frame ...

???? Should I account for the camber? Am I on the wrong track here?

I know what I need to do but don't know the best way .... I need to hack off the original mount and move it AFT 5/8" and possibly inward a little to give more angle of the dangle and clearance for the spring.

Any suggestions? Take a look at the pics I took and chime in with positive ideas to fix this.


Passenger side static camber with less washers than the drivers side!

Passenger side washers .... spring hits UCA.

Clearance on the DRIVERS side ... 3/16"?

Drivers side camber washers and clearance!

This is the RT mount I welded onto the plate to move the CL over 5/8"
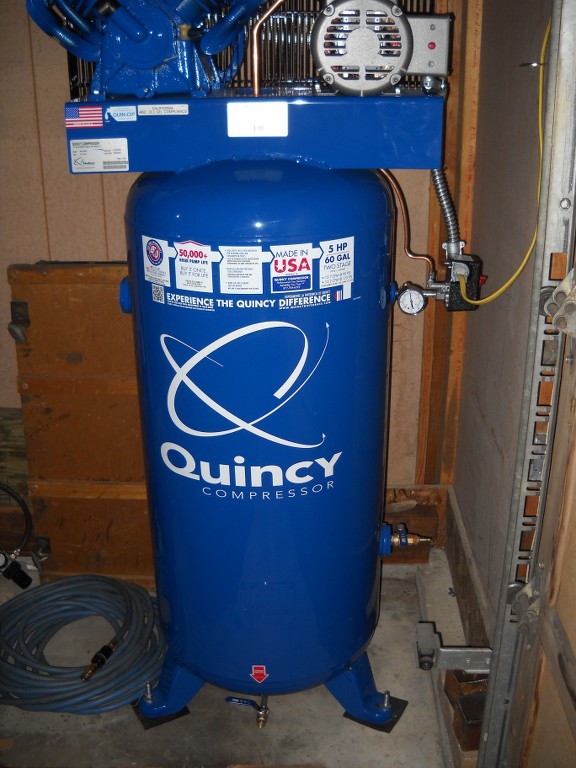
Oh yeah ... got my compressor in and bolted to the floor ... back in business!!

I know there is a lot going on here, hopefully the pics help visualize things here. I didn't want to hack off the frame mount just to move the shock aft 5/8" .... but I am outa options.

Any suggestions would be appreciated ...

Thanks for looking and helping me out ....
__________________
JUST PICTUREShttps://imageshack.com/user/mcavery


Let the house go .... NEVER give up your car!!!!
Reply With Quote
Reply


Posting Rules
You may not post new threads
You may not post replies
You may not post attachments
You may not edit your posts

BB code is On
Smilies are On
[IMG] code is On
HTML code is Off

Forum Jump


All times are GMT -5. The time now is 07:32 PM.


Powered by vBulletin® Version 3.8.11
Copyright ©2000 - 2024, vBulletin Solutions Inc.
Copyright Lateral-g.net