...

Go Back   Lateral-g Forums > Lateral-G Open Discussions > Project Updates
User Name
Password


Reply
 
Thread Tools Display Modes
  #1461  
Old 12-03-2019, 04:20 PM
Sonar Chief's Avatar
Sonar Chief Sonar Chief is offline
Senior Member
 
Join Date: Dec 2011
Location: Greater Denver area
Posts: 1,332
Thanks: 245
Thanked 161 Times in 71 Posts
Default Well, plan B ...

Quote:
Originally Posted by syborg tt View Post
That sucks
Yeah it does .... now to plan B the bonded AMD fender didn't fit. So plan B, use the original fenders that came with the car cuz I know they fit well!

So, the fun begins, stripped down the skin side to determine where it needs help ... what fun

The passenger side is the worst but not too bad, need hammer and dolly work in a couple of areas but it's not the end of the world. I ordered a patch panel and the brace from Classic so I'll get each fender prepped before the parts get here.

Take a look ....


Man I am so fed up with the repo sheetmetal

thanks for looking ...
__________________
JUST PICTUREShttps://imageshack.com/user/mcavery


Let the house go .... NEVER give up your car!!!!
Reply With Quote
  #1462  
Old 12-22-2019, 07:14 PM
Sonar Chief's Avatar
Sonar Chief Sonar Chief is offline
Senior Member
 
Join Date: Dec 2011
Location: Greater Denver area
Posts: 1,332
Thanks: 245
Thanked 161 Times in 71 Posts
Smile Update 12/22

Mechanical abrasion is APTIA! Well. after 6 hours of d/a and fiber discs on the passenger fender, I realized I could never get the fenders as clean as I needed [read between the skin and the brace] so I sent them off to get chemical stripped.

Should have saved my time and sent them out sooner ... the driver's side did need some extra disc work to get the last of the lacquer paint off. Take a look ...
Still needs some work!

I could never get! this clean with fiber discs

Like working with new metal ....

Out with the old ...

In with the new ...


Well. that's all I have, for now, heading to NM for Xmas and some desert riding on the XR650R. I hope all have a great Xmas with those that mean the most ... thanks for looking!
__________________
JUST PICTUREShttps://imageshack.com/user/mcavery


Let the house go .... NEVER give up your car!!!!
Reply With Quote
The Following 2 Users Say Thank You to Sonar Chief For This Useful Post:
Roscoe03 (12-26-2019), Spiffav8 (01-30-2020)
  #1463  
Old 01-15-2020, 07:31 PM
Sonar Chief's Avatar
Sonar Chief Sonar Chief is offline
Senior Member
 
Join Date: Dec 2011
Location: Greater Denver area
Posts: 1,332
Thanks: 245
Thanked 161 Times in 71 Posts
Cool SPT Inner Wheel Tubs

Since no one has posted up the process ... I'll post installing Speedtech Inner wheel houses for their extreme subframe. This is how I did it, which is not the only way to install the fiberglass tubs but this is how I did it.... couple calls to Vince to assist was helpful, thanks Vince!


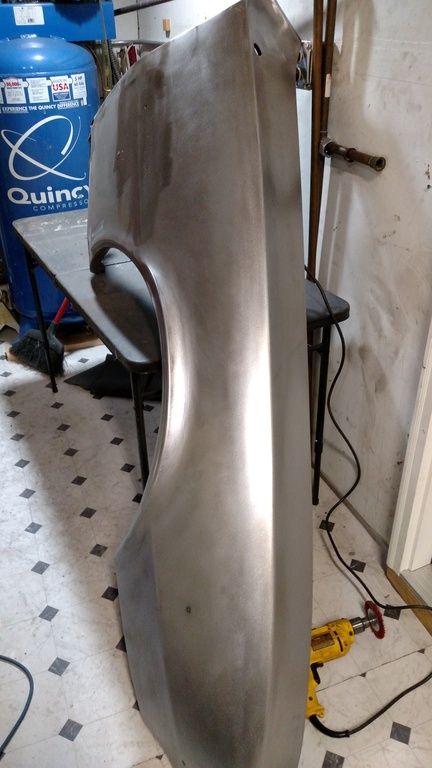
Well, the Glasstek tubs are close they do need some attention, specifically, the radius to match the OEM wheel arch is not the best, in fact,

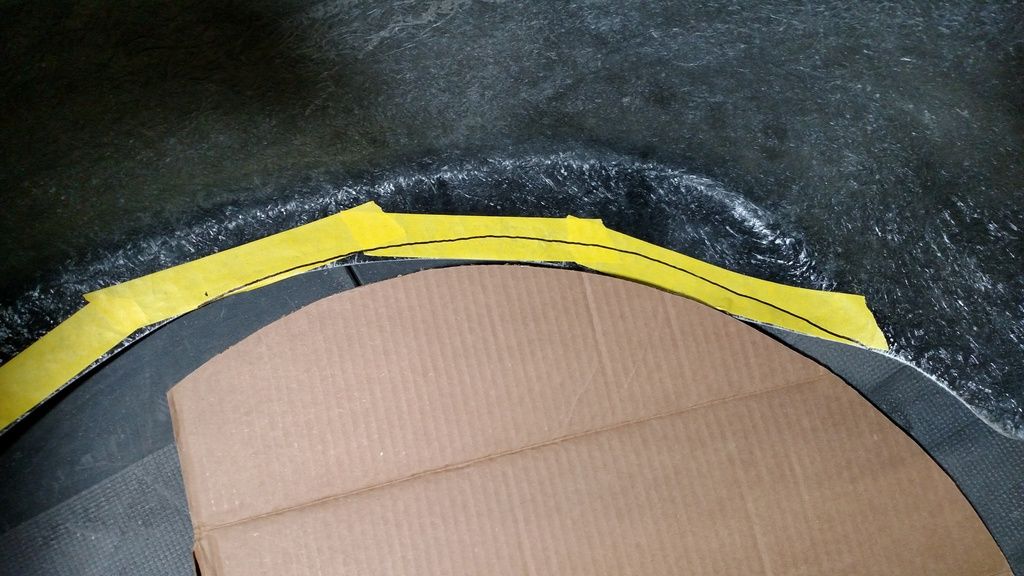
the whole mold is too wide as compared to the OEM wheel arch. No biggy, I drew the arch on the fiberglass and sanded it down to more resemble the OEM arch.


I did grind off the OEM steel wheel lip by 3/16 and hammer and dolly the radius to vertical.

As well as to hammer and dolly the upper mounts to the more horizontal plane to match the Glasstek tubs.


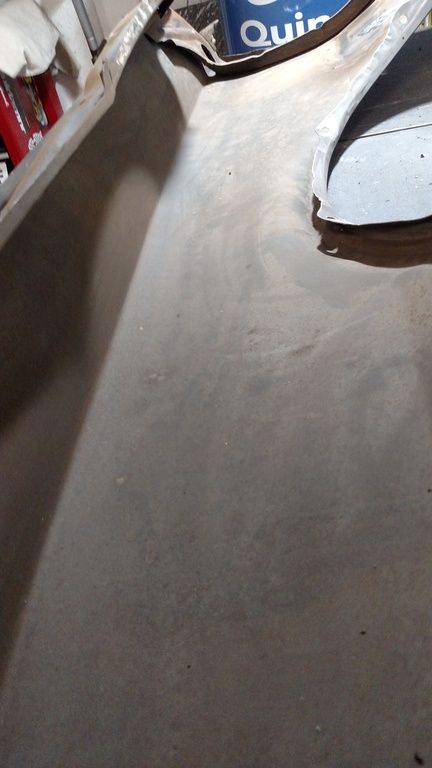
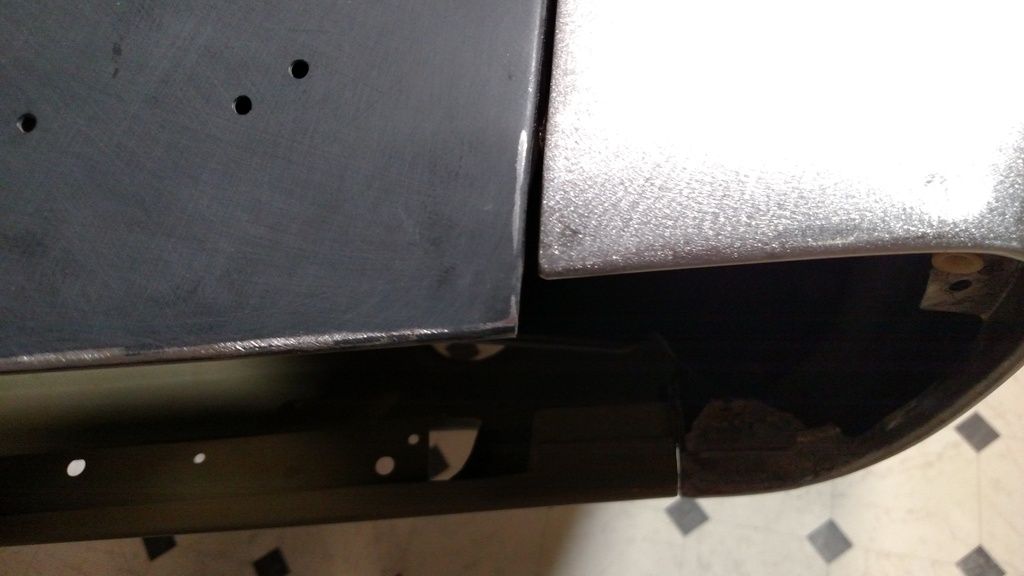
The Glasstek was a good mold for references such as the front drop off panel and the radiator support with dimples in the fiberglass that could be drilled out with confidence.


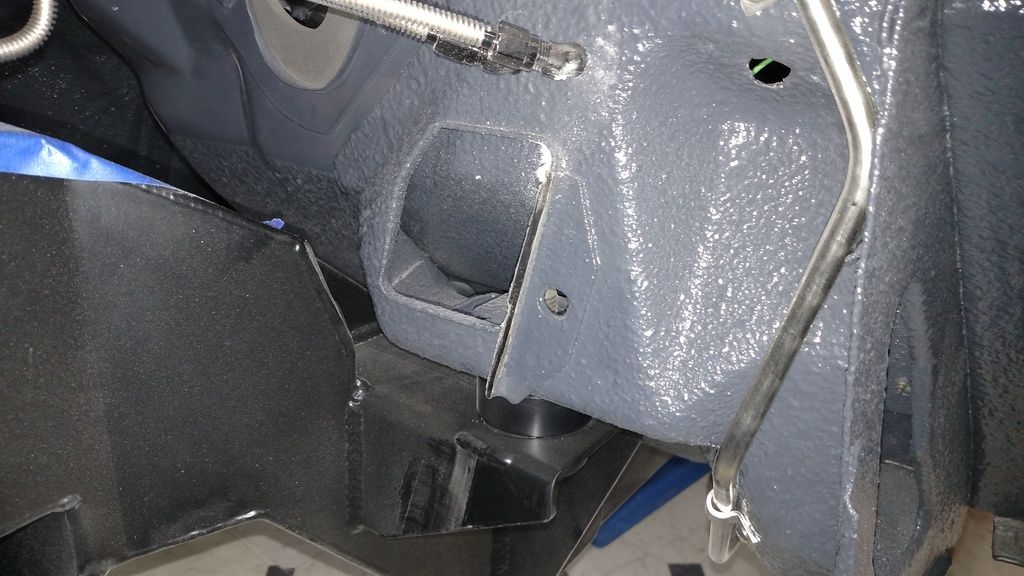
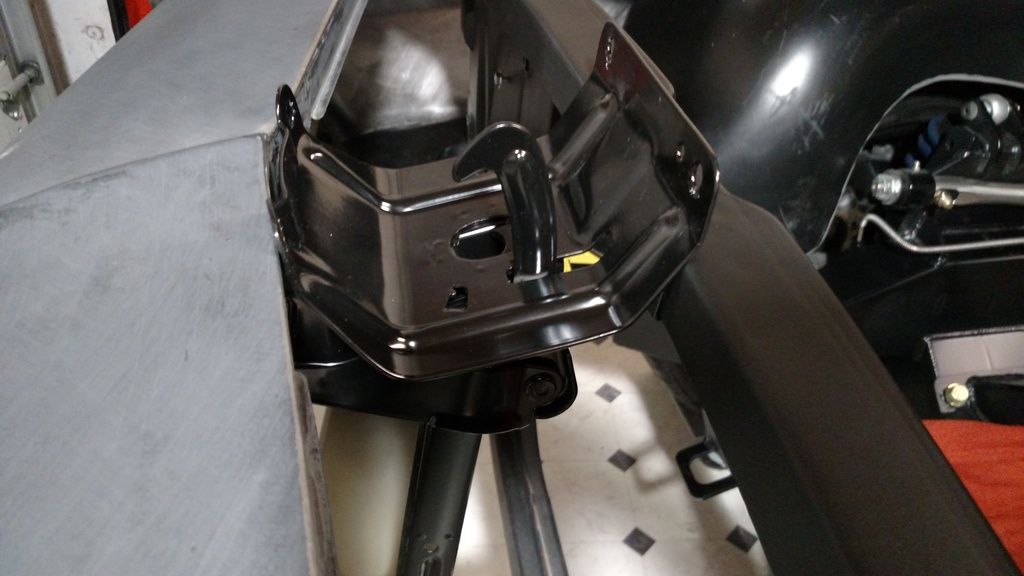
The only real difficulty was the tub to fender attachment, while the inner had the clearance it still needed to mate up the top brace like the OEM, I even used the OEM fender washers.

Once fitted to the fender I fit the tub to the car and marked the location for the top bolts to the fender brace.

You do need to cut off the OEM fender brace coming off the firewall to allow clearance for the tub.

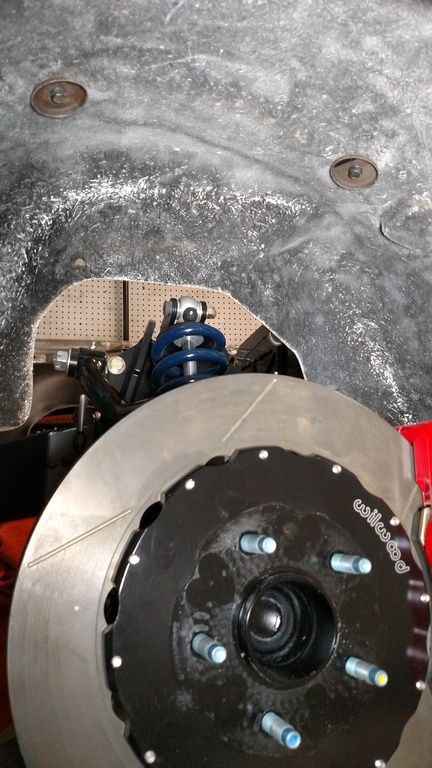
And my brake lines have to be redone because of the tub that came too close to the MC.

I bent the existing brake lines to exit the right side and enter the right side of the MC .... not sure I like them but for now, they'll do.

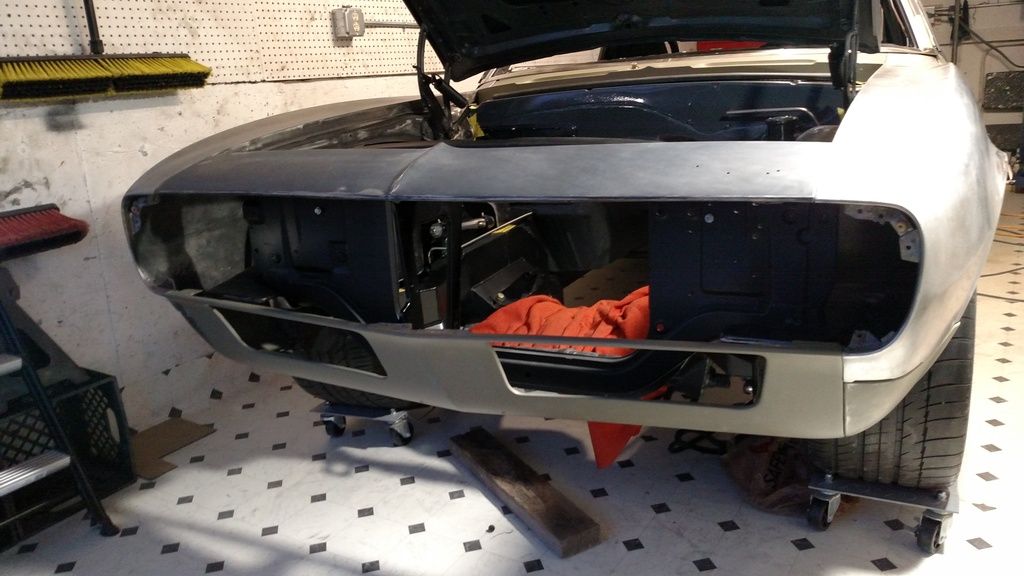
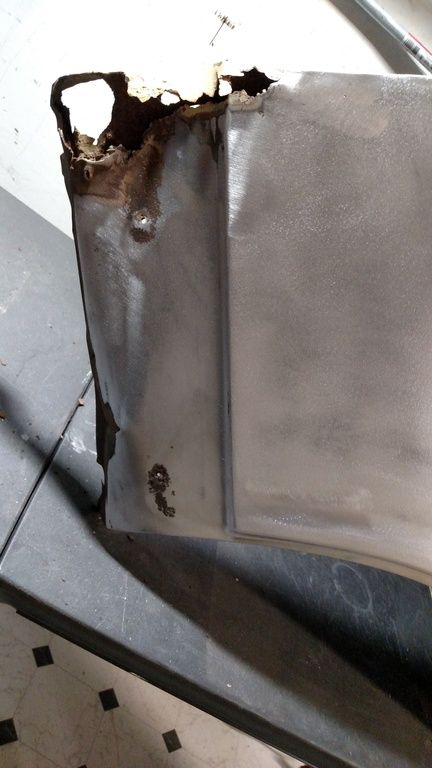
Of course, I repaired the OEM fenders with patches from Classic with the brace.


And then I mounted the entire front end ...


Thanks for looking ...
__________________
JUST PICTUREShttps://imageshack.com/user/mcavery


Let the house go .... NEVER give up your car!!!!

Last edited by Sonar Chief; 01-15-2020 at 07:48 PM. Reason: added pix
Reply With Quote
The Following 2 Users Say Thank You to Sonar Chief For This Useful Post:
Spiffav8 (01-30-2020), syborg tt (10-23-2020)
  #1464  
Old 01-15-2020, 08:53 PM
Goosesdad's Avatar
Goosesdad Goosesdad is offline
Lateral-g Supporting Member
 
Join Date: Apr 2015
Posts: 588
Thanks: 981
Thanked 521 Times in 255 Posts
Default

Well done!
__________________
Have a great day!
John

My Build Thread:
https://lateral-g.net/forums/showthread.php4?t=53320
Reply With Quote
  #1465  
Old 01-15-2020, 09:24 PM
waynieZ's Avatar
waynieZ waynieZ is offline
Lateral-g Supporting Member
 
Join Date: Oct 2006
Location: Ma
Posts: 8,424
Thanks: 908
Thanked 336 Times in 229 Posts
Default

Nice job ,you got it fitting pretty good.
__________________
_Wayne________

___________________________________
https://lateral-g.net/forums/show...ghlight=FNQUIK
Reply With Quote
  #1466  
Old 01-16-2020, 07:15 PM
Sonar Chief's Avatar
Sonar Chief Sonar Chief is offline
Senior Member
 
Join Date: Dec 2011
Location: Greater Denver area
Posts: 1,332
Thanks: 245
Thanked 161 Times in 71 Posts
Question

Quote:
Originally Posted by Goosesdad View Post
Well done!

Thanks, it was kinda intimidating at first but what the heck .... just jump in


Quote:
Originally Posted by waynieZ View Post
Nice job ,you got it fitting pretty good.
Yeah I think it came out ok, just wanted to share in case someone else was intimidated looking at these without instructions


Now I need some help .... trying to get the hood latch assembly to play nice with the header panel. The latch will not just "fall in place" seems the distance between the header panel and the core support (5.779") and the latch support reads 6.082 ....hmmmm.

The puzzling thing is all the parts on the front end are from this car, except the hood, didn't figure on this mismatch.

I'm no rocket surgeon so if anyone has suggestions fire away ...


If I unbolt the fenders from the header and bolt the latch assembly to header and THEN bolt both to the core it pushes the header panel out past the fenders ...


Suggestions ?? Other 67 measurements header to core support???


Thanks again ....
__________________
JUST PICTUREShttps://imageshack.com/user/mcavery


Let the house go .... NEVER give up your car!!!!
Reply With Quote
  #1467  
Old 01-16-2020, 07:26 PM
Sonar Chief's Avatar
Sonar Chief Sonar Chief is offline
Senior Member
 
Join Date: Dec 2011
Location: Greater Denver area
Posts: 1,332
Thanks: 245
Thanked 161 Times in 71 Posts
Cool Cool pic

Beauty shot after a lot of work ....

__________________
JUST PICTUREShttps://imageshack.com/user/mcavery


Let the house go .... NEVER give up your car!!!!
Reply With Quote
The Following User Says Thank You to Sonar Chief For This Useful Post:
Roscoe03 (01-17-2020)
  #1468  
Old 01-17-2020, 08:32 PM
WSSix WSSix is offline
Lateral-g Supporting Member
 
Join Date: Nov 2008
Location: Dunwoody, GA
Posts: 6,298
Thanks: 662
Thanked 581 Times in 471 Posts
Default

Wish I could help with the hood latch. You've come a long way. The car is looking great! Keep up the good work.
__________________
Trey

Current rides: 2000 BMW 540i/6 and 86 C10.

Former ride: 1979 Trans Am WS6: LT1/T56, Kore 3 C5/6 brakes, BMW 18in rims
Reply With Quote
  #1469  
Old 01-17-2020, 10:31 PM
JD67SS's Avatar
JD67SS JD67SS is offline
Member
 
Join Date: Jul 2016
Posts: 78
Thanks: 11
Thanked 17 Times in 17 Posts
Default

So what’s the new part? The Core support?
That’s my guess at the problem...

Let me know if you need measurements for anything

JD
Reply With Quote
  #1470  
Old 01-19-2020, 08:39 AM
joeko23 joeko23 is offline
Member
 
Join Date: Oct 2011
Posts: 61
Thanks: 0
Thanked 28 Times in 21 Posts
Default

Your aftermarket front clip should have 2 locations for bolting up the front core support. The first location (closest to the firewall) should be for 67-68 camaro and Novas and the second location a few inches forward should be for a 69 Camaro. I think you just bolted the core support in the 69 Camaro location. I may be wrong but on my Chris alstons frame it has 2 locations to bolt up the core support. If that doesn’t work I would just bend the latch assembly since that’s what looks like is pushing the header panel forward that 1/2” or so.

Last edited by joeko23; 01-19-2020 at 08:54 AM.
Reply With Quote
Reply

Thread Tools
Display Modes

Posting Rules
You may not post new threads
You may not post replies
You may not post attachments
You may not edit your posts

BB code is On
Smilies are On
[IMG] code is On
HTML code is Off

Forum Jump


All times are GMT -5. The time now is 06:07 AM.


Powered by vBulletin® Version 3.8.11
Copyright ©2000 - 2024, vBulletin Solutions Inc.
Copyright Lateral-g.net