HellWig Makes Towing A Snap
Trailer queens are not synonymous with Pro Touring cars. We drive our cars to the max to find out their limits and then go back home to increase the limits in the garage. While we definitely drive our cars, most of us trailer them too. Minus the few diehard folks, driving their cars thousands of miles to an event just isn’t that enjoyable. We prefer to throw them on a trailer and take the extra plush ride in a truck.
Towing in your truck isn’t too terribly complicated, but there are a few things that you can do to make that ride even more comfortable and safe. For us, the shop truck is a 2000 GMC Sierra SLT, extended cab. It’s comfy, plenty of power and it’s paid for. Sure – we’d love a diesel, but the pink slip in our hands is hard to beat at the moment.
For all intents and purposes, our truck handles everything we throw at it. Even towing a 3,000 lb. car it does with relative ease. However we wanted to upgrade the truck to help it tow a little easier and more comfortable. With that in mind, we called up Hellwig Products to help us with our goals. After 71years in the business, they know a thing or two about upgrading trucks.
Catching up with Mike Hallmark he told us all about the air springs and sway bars. “Our air springs compliment the factory rear suspension and help distribute the bed load between the factory springs and our air springs. This ensures the truck rides level while loaded, towing or driving in normal daily conditions. By keeping the vehicle level it ensures proper weight distribution over all four wheels giving better control for a safer and more comfortable driving experience.”
Continuing on, “our sway bars are designed to reduce body roll which gives the vehicle better stability and control in turns. The torsional effect of our sway bars transfer the pressure exerted on the inboard wheels to the outboard wheels distributing the weight more evenly over all four wheels. This results in a stable and predictable driving platform, instilling confidence and control in the driver.”
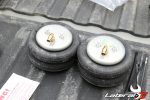
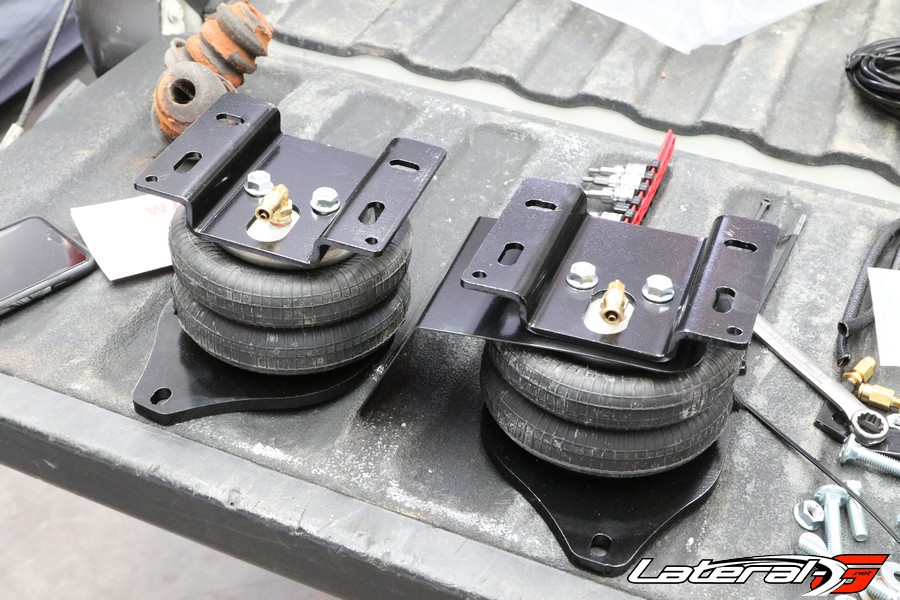
After talking with Mike Hallmark, the decision was made to get a set of air springs along with a rear sway bar for our shop truck. We were excited to as these are both bolt in products that we would be able to install in an afternoon. The air springs themselves mount in-between the leaf springs and frame rails. The rear sway bar mounts to the rear differential and up to a rear cross member. The air springs don’t increase the load capacity of the truck, but keep the truck level when hauling a heavy load. Not only does it provide a smoother ride, it’s safer as the truck remains level instead of squatting in the rear. The sway bar helps to maintain the truck from losing traction in the rear and side to side leaning, just like a front sway bar.

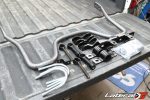
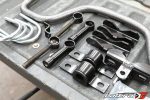
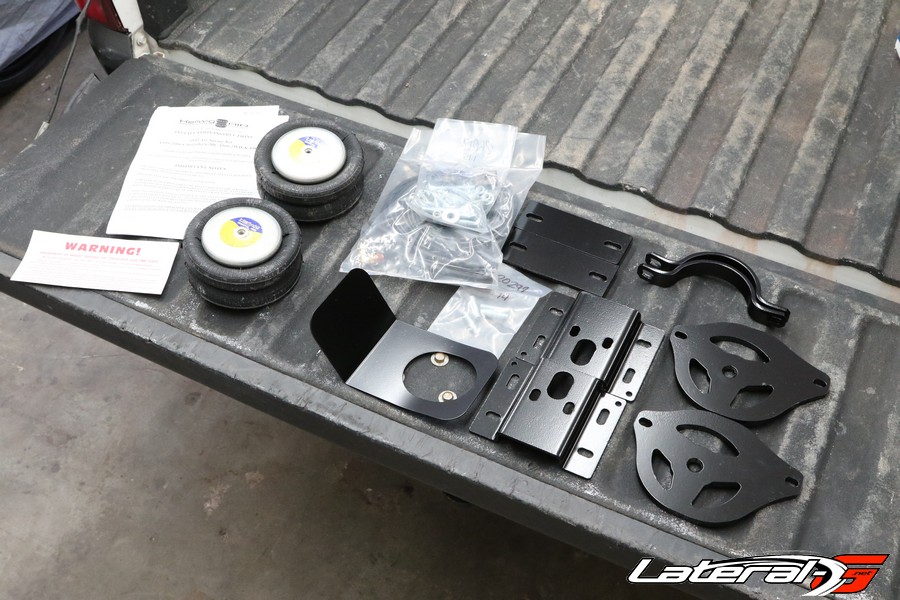
After arriving we laid out everything and saw that both of these kits included 100% of everything we needed to get the job done. Mike Hallmark explained the air springs and rear sway bar a bit more for us.
“Our air spring kits feature heavy duty ‘bullet proof’ brackets to ensure maximum strength and durability. Our air spring kits come complete with everything needed for easy install. The air pressure can be changed to your current load condition by either manually inflating each one or by using one of our onboard air solutions. Hellwig sway bars are the easiest, most cost effective way to improve your vehicle’s cornering and handling performance. Every sway bar is specifically designed for each application for optimal control, safety and drivability,” explained Hallmark.
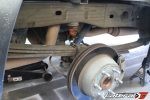
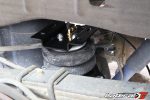
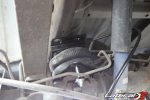
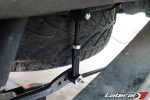
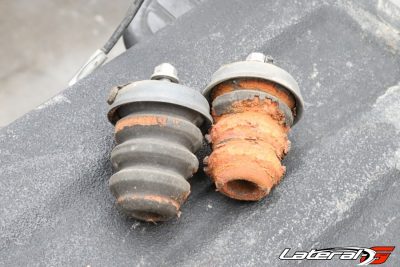
Every nut and bolt was provided, making this an easy installation. We started with the air springs first by jacking up the rear end on jack stands and removing the rear wheels. From here we removed the factory bump stops, or what was left of them.
Goodbye Squatting Truck

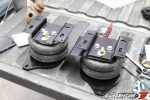
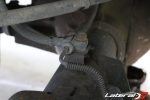
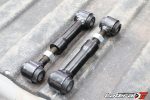
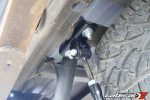
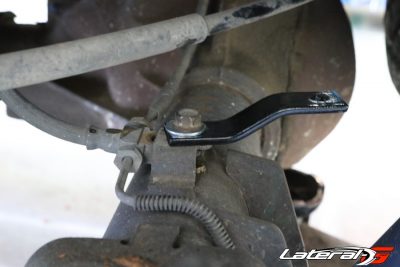
Now it was time to prep the air springs by installing the mounting brackets to them along with the air fitting. The brackets are thick, high quality pieces that are laser cut and powder coated. The “U” shaped bracket mounted on the top and has a slot in it for the 1/4″ air line fitting. On the bottom, a large thick bracket attaches. One special note is that on the passenger side air bag there is a shield that also gets installed to protect the air bag from the heat of the exhaust. On the drivers side the brake line has to be moved to provide some clearance but Hellwig supplies an extension bracket to make that easy.


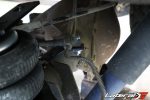
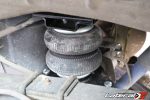
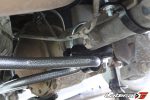
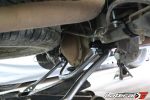
With the air spring prepped, we simply slid them in-between the frame and leaf spring. Using the supplied bolts we attached the top of the air bag to the frame using the supplied bolts and the factory holes in the frame. On the differential side, two carriage bolts and a “U” shaped strap keep the air bag positioned and attached to the differential.

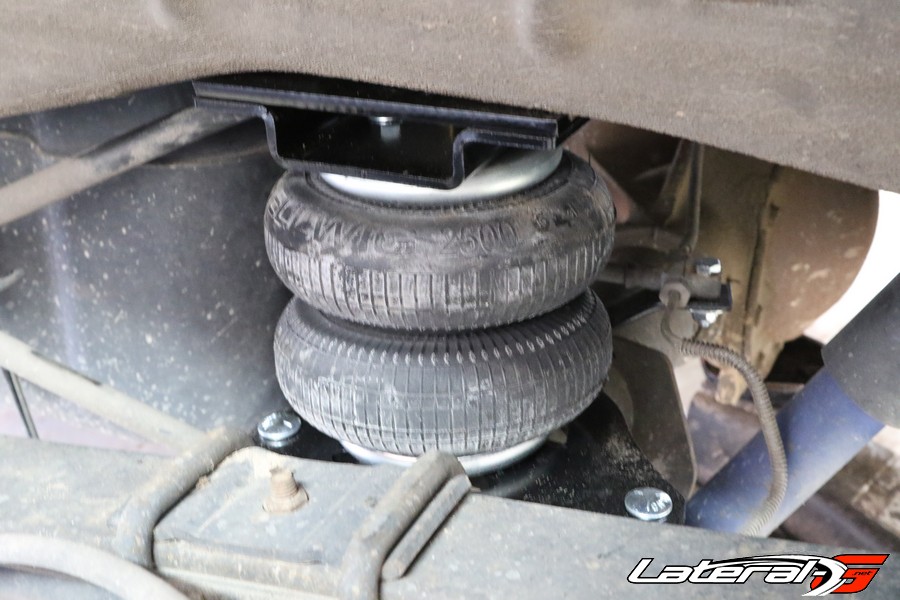
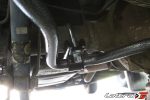
Now that the air springs are in place, the last step was to attach the air lines. The fittings allow you to push the line into the fitting making the connections a snap. Hellwig supplies more than enough line to install the fittings wherever you’d like. We chose to install them on the rear bumper, to the side of the license plate. Somewhere that’s convenient but out of the way as well.
No More Sway
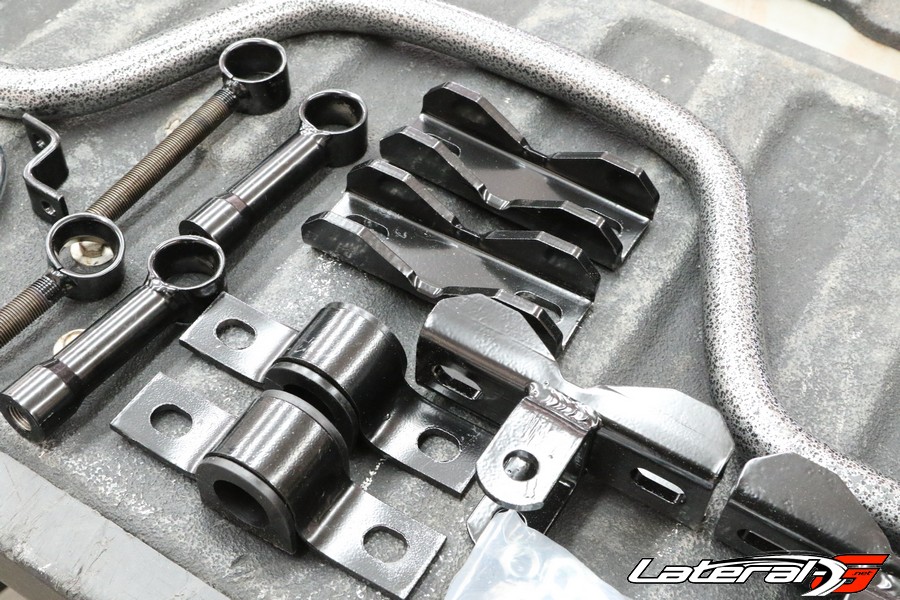
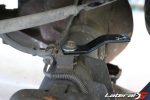
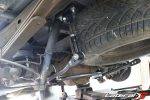
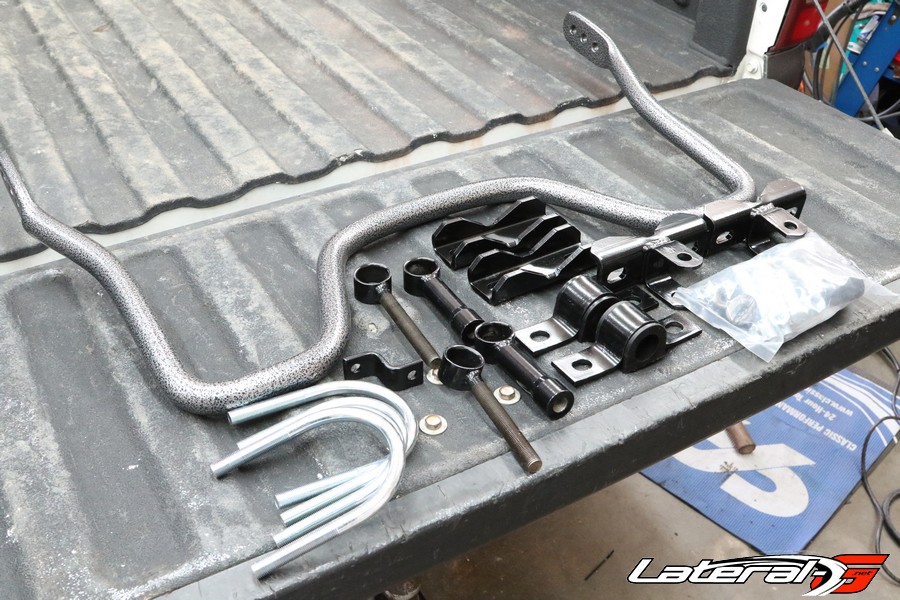
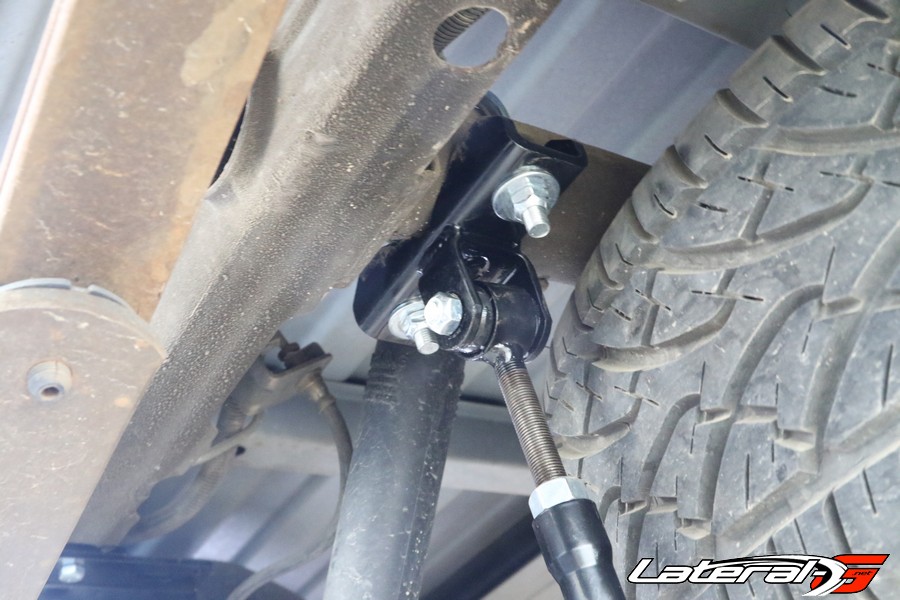
Moving onto the rear sway bar, we laid out all the pieces to see how things worked and would be installed. “Our rear sway bar part number 7800 is 1-1/8”dia. It is made from solid, hot-formed and heat treated 4140 chrome moly steal. This sway comes with three mounting points for the end links so you can fine tune the amount of roll reduction desired for your use,” stated Hallmark.
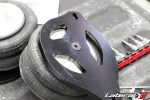
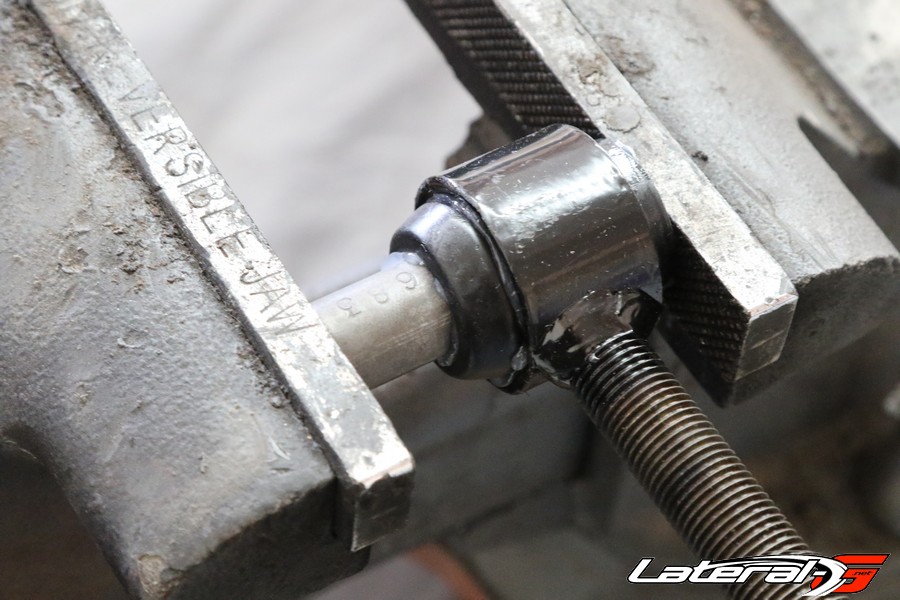
A little bit of prep was required here too with assembling the sway bar end links. All that was required here was to screw the two pieces together and install the poly urethane bushings. With the prep part out of the way, we climbed under the truck with the sway bar to get things mounted up.

The sway bar mounts to the rearend with two brackets via two U-Bolts. We installed these but left them a little loose so we could adjust the bar left to right. On the ends we installed the end links then bolted those to the frame using the supplied bracket and U-Bolt. Once everything was in place, we checked clearance around everything before torquing all the bolts down to the proper specs.

The last step was to install the rear wheels and lower it back down. Driving around with no load we could tell the rear end rode a little more firm, but was just as comfortable as before. Obviously all this work was really going to shine once we added a heavy load, and did we ever. Our first trip to the lumber yard was a success. We aired up the springs and once all the wood was in the bed, the truck remained level and smooth riding as ever. The next week we put three tons of broken concrete in the bed. This still made the truck squat a little bit, but we were able to safely make the trek to the county dump.
Towing a trailer though, the truck rode beautifully. There was zero swaying and with the truck level, we had much more confidence going down the road in how the truck rode and stopped.
For more information or to look up your application give Hellwig Products a call at (800) 367-5480 or hop on their site at HellwigProducts.com