Got some good and bad news...
First the bad- my professor has had some hereditary heart issues for most of his life but he never told any of us. After a recent check up the docs told him he needed a heart valve and part of his aorta replaced like yesterday. Sounds like it's common procedure but we may not see him for the rest of the semester. We're all praying for him that all will go well. On a side note the sub we have is there more to cover Cris' notes in lecture time and open the shop for us. They don't have Cris' knowledge and the shop now closes at 12:00 instead of 3:00 so I'll be dropping my weekly shop time by about 15 hours. As a result there will be a couple things, such as narrowing the 9" rear, I need to hold off on until I get out to Georgia and start working at Bulldawg. Joe has stepped up and has assured me that all the help I may need is waiting for me there. It's nice knowing I'm going from one shop to another, otherwise finishing my car would take a whole lot longer. I guess I just got a reminder of what it's like to build a car on the side as a hobby instead of basically full time. That's a bit humbling and a big pat on the back for all you guys who are persistent and get the garage builds done.
Now the good news...
More chassis work completed. First off I took a break from the rear half and fixed a common G-body problem: LS headers hitting the right frame rail requiring the header tube to be modified. For now I have a set of cheapie used Flowtech headers I got for next to nothing. I really didn't want to bang them up and cause potential flow issues and eventually I will switch to Pacesetters, so I opted to fix the issue itself. With the motor out, a cut off wheel, a 5lb sledge hammer and a welder anybody can do this simple mod. First I used the plasma cutter to cut a triangle shape from the frame. Notice I cut a vertical line to make room for the two sides to come together, and I scored the rail with the cut off wheel on either side to control the bending motion and make sure I didn't affect the control arm mount position at all. Once to this point I simply banged on it a bit with the small sledge hammer which closed up all the gaps and created about 1/2" of clearance.

Next I did some preliminary welding and repeated the process to get a little more movement inward.

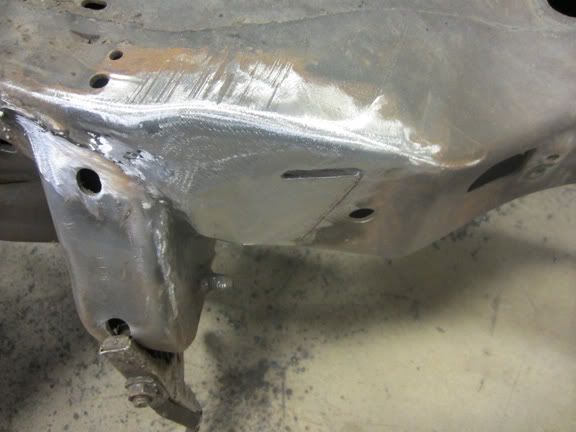
Here's the end result after welding all gaps, score lines, and grinding it all smooth. It made quite a difference.