A lot of progress this weekend!
Friday night we finished up the cutout in the subframe for the alternator.
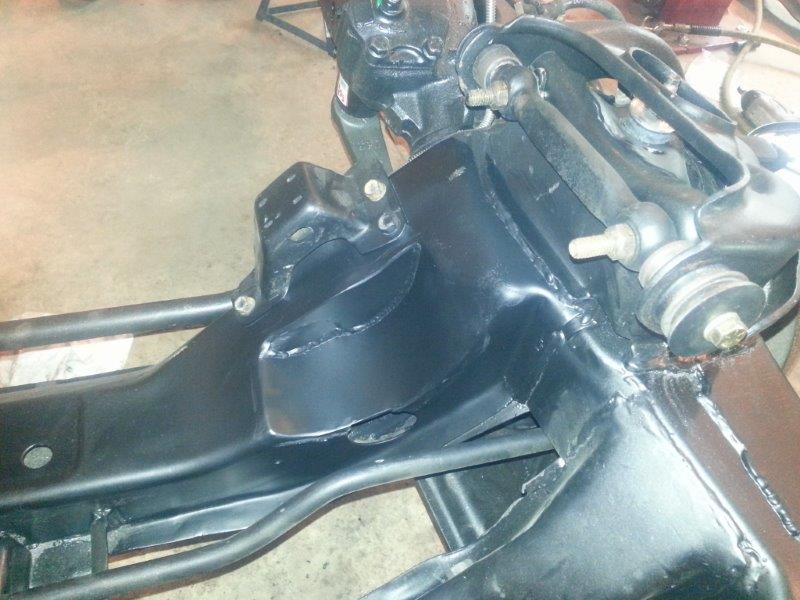
It turned out pretty nice. I did have to mess up the nice powdercoating but the paint I used matched really well. You would never be able to tell.
After the alternator cutout we worked on the transmission crossmember.
The middle part is from the donor 2004 GTO and I'm using a new GTO mount as well.
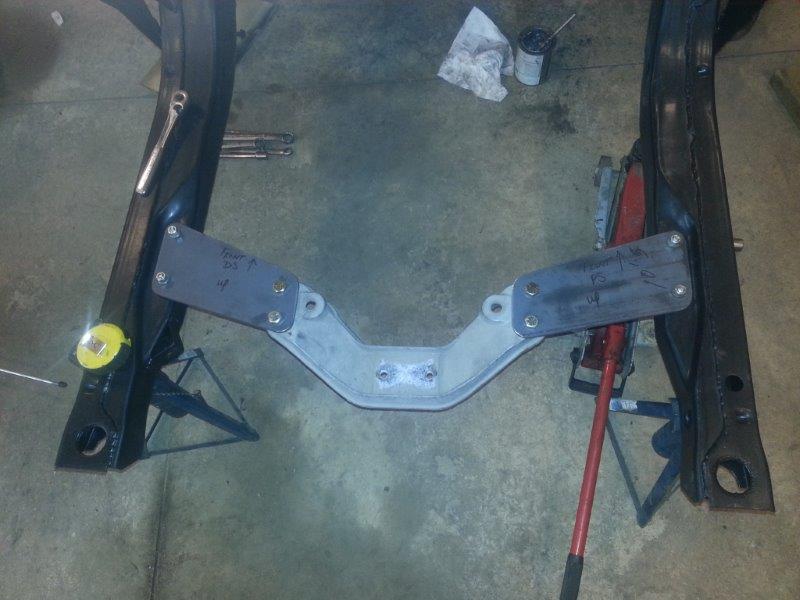
It may need a little strengthening or bracing later, but for now it looks like it will work really well.
On Saturday we worked on getting the subframe up underneath the car again, and getting all the brake stuff hooked up. I did have one little SNAFU in that I didn't get the right rag joint for the 3rd gen steering box I'm using. I've got it (GM 7826542) on order now at the local auto parts store.
After the Easter family stuff we decided to play with the car some more and actually install (hopefully I won't have to take it out anytime soon) the engine and transmission.
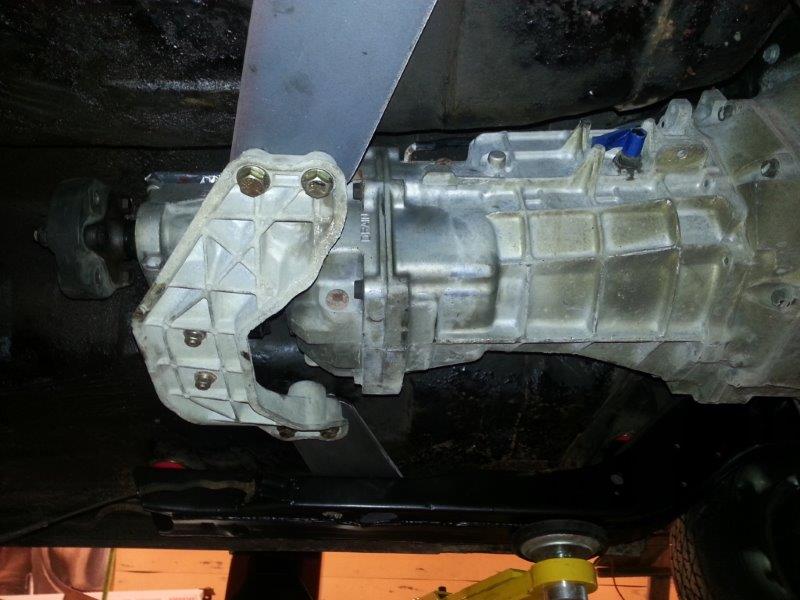
Here's the transmission mounted under the car.
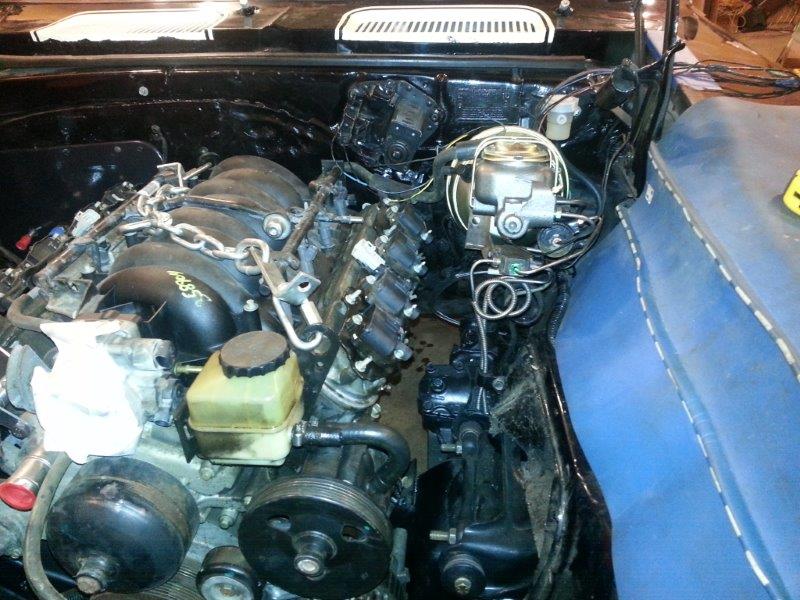
And Here's the engine in it's new home.
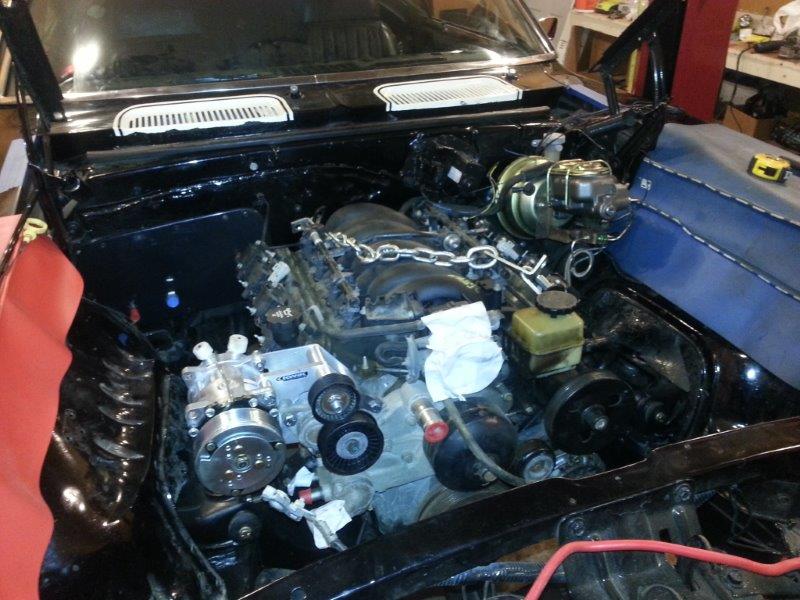
It fit pretty well. I have probably around a 3 to 4 degree downward angle on it and the trans fits pretty tight. I'm going to remove some of the welded in nuts in the body for a little clearance and do a little cutting around the reverse lockout solenoid.
Here's the alternator resting nicely in it's new home.
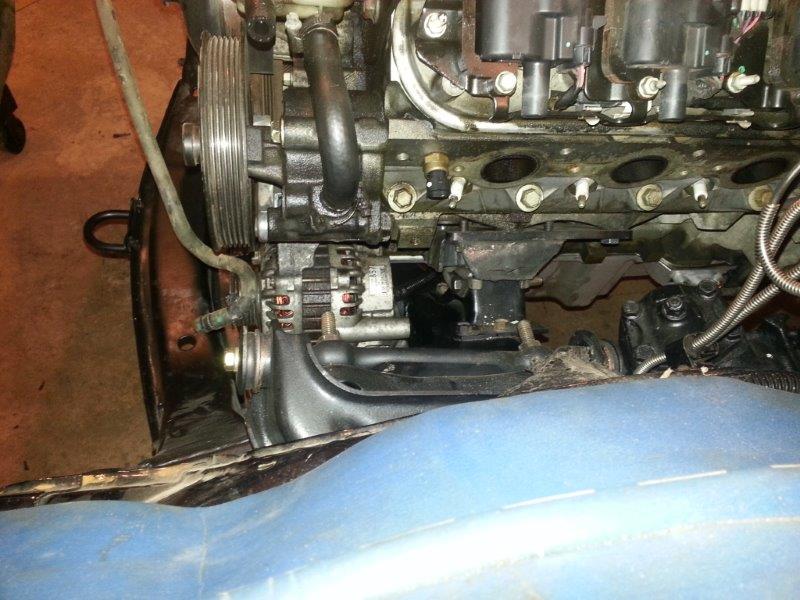
To remove it, you just need to remove the bolts that attach it to the engine first and pull out the whole assembly towards the front of the vehicle. Then you can unhook the wires and it pops right out.
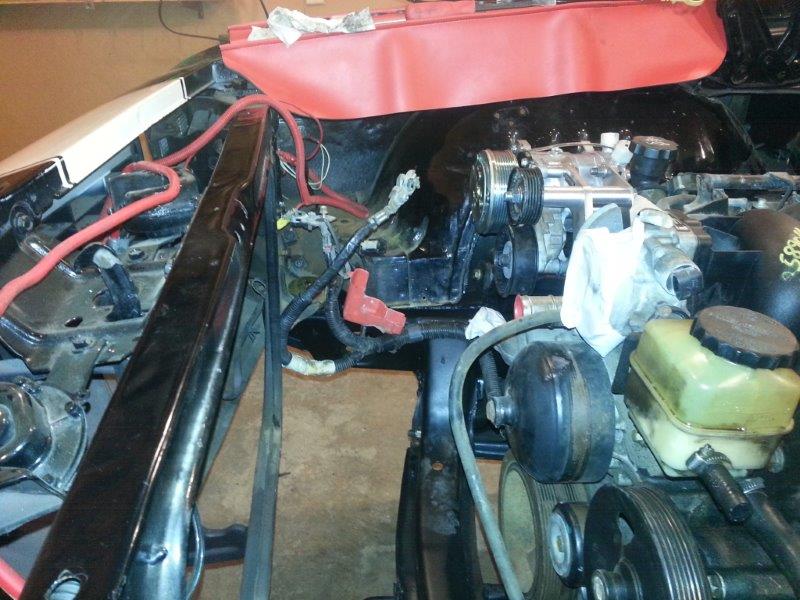
Here's a pic of the new master and 8" booster. No clearance issues there anymore.
This wasn't planned but turned out really good for me. The wiring harness from the GTO that went to the alternator starter and battery looks like it will end up right where my battery is in the Camaro. That will save me some time and headaches!
I'm starting to get a little excited, and I'm hoping things keep going smoothly even though I'm planning that they won't.

Now I've got to order some fuel line and fittings. My radiator should be here this week. Next though, is the wiring from hell! That's what I'm most worried about at this point. I'm hoping to get some pointers and help from this forum on that.
Until the next update: May the Schlitz be with you!