continued from above
CAMBER PLATES & SPRING CHANGES
While the above brake system upgrades were being done we were also developing a production version of our existing 5th gen Camaro camber plates.


This Camaro already had Bilstein PSS10 monotube inverted coilovers installed by a previous shop, from before Joe met Vorshlag. Like most PSS kits, these Bilsteins came with a "hybrid" spring that is 60mm ID at the bottom and is larger at the top, to fit inside the OEM upper spring perch and strut top mount. Jason rated the spring (roughly 350 #/in with some rate variability) and we spec'd out a firmer rate from Hyperco (450 #/in straight rate 60mm springs - still a very reasonable rate for street use). We left the rear springs alone for the time being.

Having the OEM (upper) sized spring and factory top mount installed on this car let us develop both an OEM perch solution (with no change in ride height) as well as a coilover solution (for 2.25", 60mm and 2.5" ID coilover springs). The prototypes on Joe's car are polished aluminum units shown below but the production units are red anodized aluminum main plates and also red OEM perches. We made Joe's pre-production prototypes in March and have had to make two production batches of 5th gen plates since then - more popular than we had expected. Most have been sold for folks using the stock springs or OEM-style lowering springs.

Unlike most modern McStrut cars, the 5th gen Camaro has no bolt holes for attaching the stock top mount. Instead GM went old school and had a VW style "clamshell mount" that sandwiches the top mount above and below a hole in the strut tower.


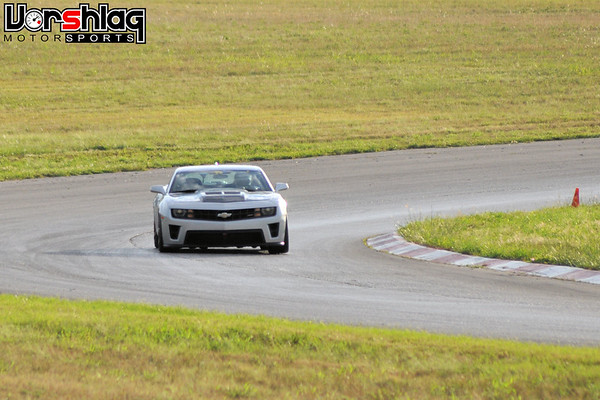
We installed the firmer 450#/in Hyperco springs when we installed the camber plates and used a conservative -2.5° front camber setting for a mix of street, road course and autocross use. Joe isn't an autocrosser but he was out of the country for over a month and wanted us to test his car while he was gone, so we ran it at a couple of autocrosses (see below) over the summer to try to dial in the setup, before going to MSR-Cresson for some track testing in September.

We had high hopes that the firmer front springs and added camber would transform this 3800 pound V8 pony car into a more nimble cone carver and road course HPDE ride.

Shortly after making the pre-produciton set for Joe's 1LE, we made another polished set with custom engraving for a long time friend, CAM autocrosser and Optima racer Doug Willie's 2013 1LE affectionately named "Big Snoopy". This car had the OEM shocks and springs and needed camber badly. With these camber plates and 315mm Rival-S tires the car picked up a lot of speed and kept from eating the shoulders of the front tires.
RACING SEATS, HARNESSES & WHEEL TESTING
"The Incident" led Joe to listen to not only our suggestions of better brake cooling but also our calls for better safety gear. I had pushed hard for a semi-gutted interior and proper roll cage, after the air bags had been popped. Headliners and interior panels often get borked-up when the bags pop happens.

But I didn't win that battle. Joe insisted on keeping the interior (it was repaired) and supplied this Sparco harness bar for us to install instead. This unit is well made, and is fine for autocross use, but questionable at road course speeds. How will this bar deform in a real road course shunt into a hard object? Joe luckily only does HPDE events on Texas road courses, which are very safe; most turns here have 100s of yards of flat run off... so in this situation, it was acceptable. His "off" at ECR was one of the few times I've seen someone find a tire barrier on a Texas track. It is the exception, not the norm, like we see on many East coast tracks (which all seem to be lined with concrete walls, trees or armco).
 Typical road courses in Texas have no trees, tire walls, barriers, or other things to hit
Before the 2015 "off" Joe had purchased a pair of Cobra Suzuka GT racing seats from us. These are composite (Kevlar) FIA approved fixed back seats suitable for racing, and they CAN be used for street use - if you install them correctly + re-install the OEM seat belts.


Joe brought these to us when the car returned from the body shop and he had purchased some off-the-shelf brackets made for the 5th gen Camaro. These brackets included a lower bracket to bolt to the chassis (mostly), included sliders and side brackets that were made to fit "most" racing seats. The lower brackets were made of plate steel and were somewhat heavy, as shown in the weight above right (this is a 19 pound seat).


We installed these brackets with the Cobra seats per the instructions but also added provisions for the anti-sub harness anchors onto the lower steel plate. That laser-cut steel plate was PLENTY thick so it was appropriate. There wasn't a good place on the aluminum side brackets to add anchors for the lap belts so we added Schroth anchors in the floor.
continued below