continued from above


The dash had already been clearanced on the outer edges for the A-pillar bars but to fit into this tight space it would need to be put into 3 sections. The best cut locations were chosen and marked, then Ryan carefully cut the dash panel with a body saw, down along the complex shape of the dash.


To re-join these 3 sections inside the car, the outer two "ends" of the fiberglass dash had "doubler plates" added, which were hand made from aluminum sheet. These were Cleco'd to the panels and tested/fitted, before being epoxy bonded and riveted to the main composite panel. The center section of the dash will unbolt from threaded rivnuts added to the doubler plates.


Here the 3-piece dash was fitted and assembled between the jungle gym of cage tubes, joined along the two joints / doubler plates with Clecos. Once this was fitted and mocked up in the car, the outer dash sections' mounting brackets could be built to attach to the cage.


Above left you can see one of the steel mounting brackets being fitted. This was then TIG welded to the roll cage bar and Clecos joined it to the dash panel (which will be replaced by bolts and nuts at final assembly). Above right is the other bracket, welded to the cage and Cleco'd to the left end of the dash. The 3-piece dash is now re-assembled and mounted into the car. The seams where the dash join together are tight, and once bolted together with more than a few Clecos, it will have an even cleaner finished look.

The dash was mostly mounted at this point, with a bit of a bow in the fiberglass on the unsupported bottom edge. We added additional mounts to the dash when the forward transmission tunnel was completed (shown out of order above). A bit more trimming was necessary at the bottom of the dash, due to the extreme driver setback and long steering column length. The dash panel is there for cosmetic reasons, as there will be a digital dash mounted to the column closer to the driver.
DEFROSTER MOUNTING
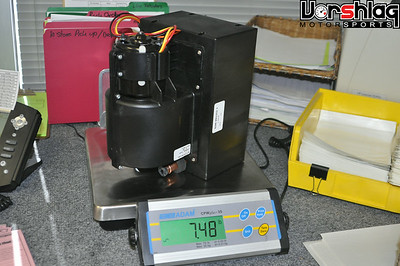
At the beginning of this project we discussed with the customer about moving to an aftermarket heater box, which can provide "defrosting". We have done the same compact heater box on many of our race car builds. The brand new, lightweight, and compact heater core + blower motor box will be mounted (and completely hidden) underneath the VFN dash panel then ducted to the front defroster vent sections at the base of the windshield. You can see the weight below (7.48 pounds), as well as a modern S197 Mustang factory heater/evap core blower box, which is huge (and 20.7 pounds).

On colder/wetter track days this will be invaluable. We started on the defroster mounting along with the central dash mount and trans tunnel tubing structure at the same time. The heater box is one of the last things that needs to be mounted before we can start plumbing various systems.
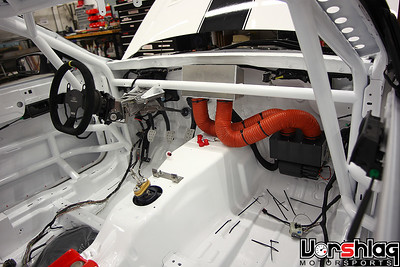
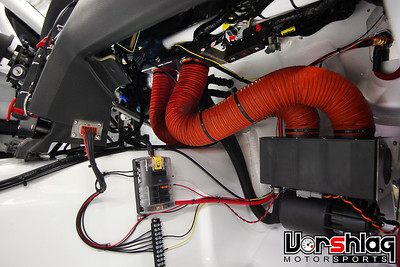
This is the same heater box unit mounted into an S197 Mustang race car we built a few years ago. Plumbed into a custom plenum that pumps heat through the defrost vents at the base of the windshield, this unit has performed flawlessly for over 4 years.


The fiberglass dash will also be trimmed around the original cowl holes for at least two defroster vents, as shown above at left. The unit will be mounted behind the faux dash panel and on top of a plate mounted to the transmission tunnel.
continued below