continued from above
THROTTLE PEDAL ADDED
For a while we had been discussing EFI options with the customer. We weren't sure if he would go with a Motec/Emtron/similar aftermarket "Motorsports" grade EFI, which can have unique capabilities like launch control, traction control, power-by-gear, etc. The other option was a less costly and less complex GM based LS3 computer, harness, and sensor package. He made a choice - keep it simple - so we started rounding up the OEM LS3 based bits plus a custom engine harness. It makes sense, since this is just a 480 hp crate motor LS3. That decision allowed us to pick which throttle pedal to use for the drive-by-wire LS3 throttle...

We had added bottom mount Tilton pedals for the clutch and brake already, so we "borrowed" one of the pedal covers and picked up an LS3 DBY throttle pedal sensor.


Ryan made an aluminum bracket to mount the sensor and a pedal arm assembly, to get the height of the gas pedal to match the Tilton brake and clutch pedals. Then we ordered another matching pedal cover from Tilton to use on this 3rd pedal location.
MOTORSPORTS HEATER/DEFROSTER ADDED
Even here in Texas, we have some race dates that can be cold and nasty. Our NASA season opener is usually the last weekend in January, plus our March NASA dates can be cold and foggy, at least in the mornings. I've been fogged in at more than a few events.
 Jamie Beck's S197 Mustang ST3 classed race car, which we built in 2013
One invaluable tool to combat the fogging of your windshield is a lightweight defroster box like this. We have been adding these to every race car we build for the past 6 years, and they really work. The Mustang above we built for Jamie Beck back in 2013 got one of these and it has saved him from "driving blind" on track, on more than few occasions.
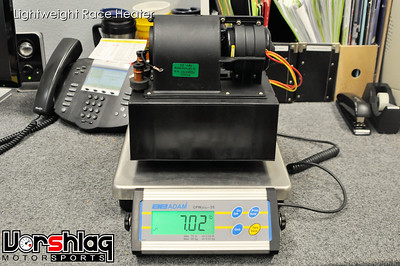

We use
this Summit Racing heater assembly that weighs a whopping 7 pounds. It has a heater core, 3 fans speeds, can flow up to 260 CFM, and will put out as much as 28,000 BTUs of heat. This compares nicely to the nearly 21 pound heater box in a late model Mustang, shown above. The Summit unit is a lot more compact and easier to mount, too.

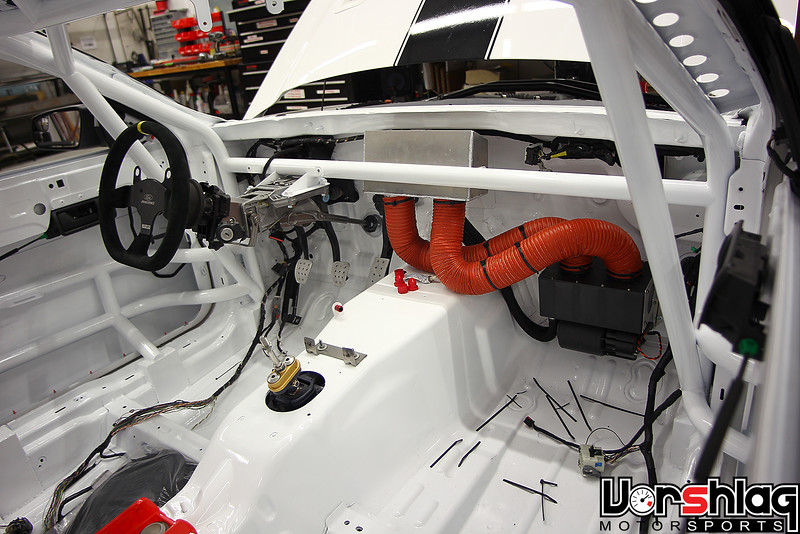
I've shown a little bit of the install of this defroster on the 69 Camaro before, but I'm sharing the link to the part, weights, and final install this time. This was fairly straightforward. Ryan built a little sheet metal box to mount the heater box assembly right onto the tunnel, under the dash, which I showed before.


The twin 3" diameter outlets for warm air mate up perfectly to 3" high temp brake duct hose, which we can then direct to vents at the base of the windshield. Ryan made two aluminum defroster vent "boxes" that have a 3" round hose end for the feed and mate up to the under long oval openings on the factory metal dash (see below left). These will mount with two small button head bolts from above, but are held in place by Clecos here.


Above left is the view from above, down into the factory defrost vent openings. The above right picture is the view from the driver's compartment with the fiberglass dash face removed.

Two heater hoses were later added with bulkhead connectors to feed the inlet and outlet of this heater core from the water pump, as seen here. I will cover a lot of plumbing work in the next update
continued below