OK here's my update for tonight. I am not yet finished with fitting my wheels under the fenders front and rear, so I will save that info for now and do a complete post on the process once I'm done.
In the meantime, I got to work putting my front bumper support and bumper cover back on the car. This was a huge relief to get this back on the car so that it not only started to look like a car again, but that I could get it off my garage floor!


Once that was complete, I double checked my headlights were working and ran into some issues. Throughout this project, I have gotten much better at electrical troubleshooting and being able to systematically work through electrical systems to find the problem. This really tested my skills however! First, nothing worked when I pulled the switch. I was able to track this down to a bad headlight dimmer switch on the column (the one that switches between low and high beams) by by-passing the switch altogether and confirming the headlights came on. So, drop the column and install a new switch:

Then, only one light was working. Then both would work. Then just the other one. I tracked this down to a bad ground, after confirming that both lights were getting power and they would both work if I grounded them right to the battery with a jumper wire. So, fixed that and now I had headlights:

Lastly, none of my parking lights were working. Turned out one of them had a bad socket and one had a bad bulb, so all is good now with the lights! By the way... I have an older HID kit on my car and while I like the looks of the clear lenses, I don't like to blue bulbs. If anyone has a suggestion for a whiter bulb I can use, I'm all ears!

Next I re-installed my intake with its fresh new paint job. I had been waiting around for a new set of runner to base gaskets from Lingenfelter as they are on backorder. I lost patience and ordered a set of Edelbrock gaskets for their high-flow TPI intake they fit pretty well with just a bit of trimming.

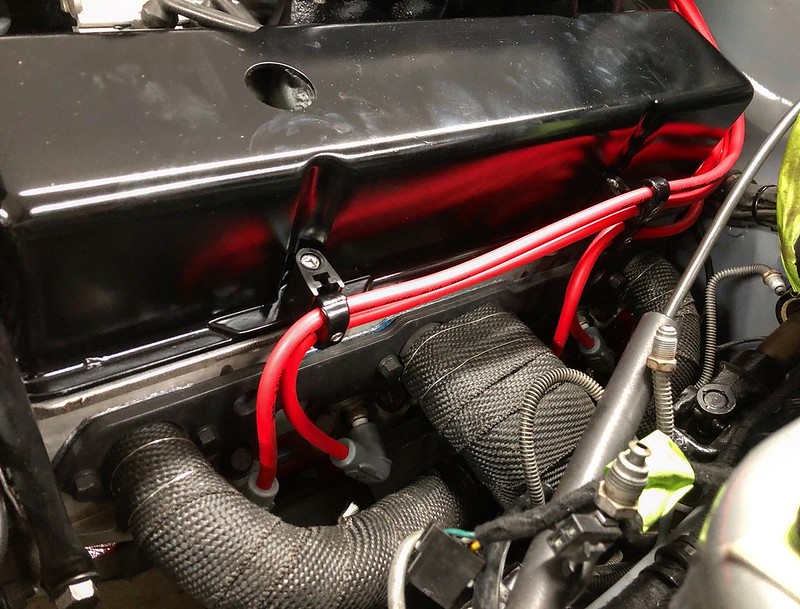
Once the intake was back in, I could get started on making custom spark plug wires. I personally don't like it when spark plug wires are too long and hang all over the place in an engine bay, so this is a project I was looking forward to taking on. Here is what I used:
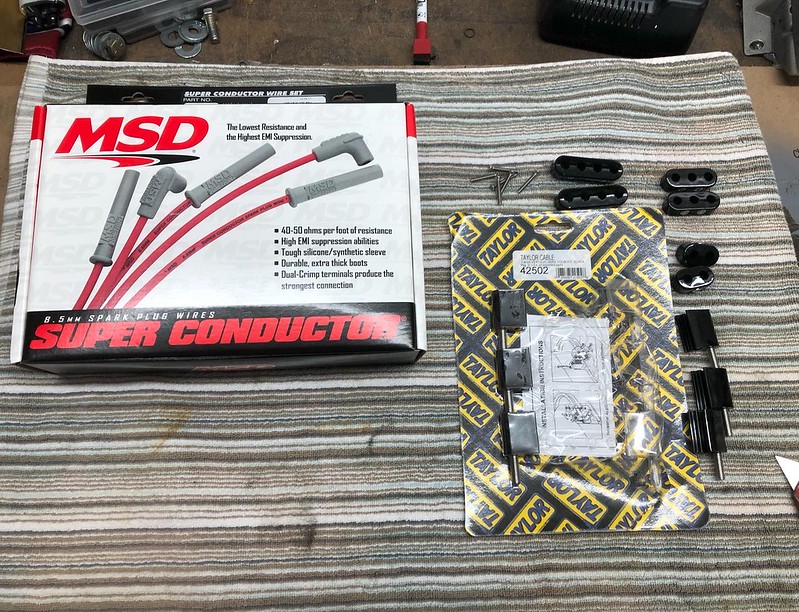
The MSD kit was really nice, and came with everything you needed to make the wires, including the tool to strip the right amount of insulation and then crimp the terminals in your vice. There are extra terminals and boots included as well in case you mess one up. I ended up using the double crimp style terminal, but they also include the old school single crimp style:


The first couple of wires went a little slow, as I struggled a bit with figuring out where to strip the wires so they ended up in the right place. Once I got the hang of it though, I had my little assembly area set up and I was cranking them out!

Here is the final look. I'm super happy with how clean it looks! I wasn't sure if the red was going to be too much, but I think it adds just the right amount of color to the engine bay.