...

Go Back   Lateral-g Forums > Lateral-G Open Discussions > Project Updates
User Name
Password


Reply
 
Thread Tools Display Modes
  #31  
Old 10-29-2020, 10:16 PM
bkswede bkswede is offline
Senior Member
 
Join Date: Oct 2013
Posts: 163
Thanks: 6
Thanked 140 Times in 83 Posts
Default

Quote:
Originally Posted by 64G-lark View Post
Thanks Brian I am going to run a LS3 intake and injectors as my engine is LS3 based. I am planning for a Holley Terminator Max ECU.

Makes sense... should’ve caught that when you noted the 4.125” stroke in your earlier post. The Terminator Max is a great ECU... really capable and affordable.


Sent from my iPad using Tapatalk
__________________
63 Chevy II - Build in Progress
2017 Camaro ZL1
2010 Mercedes C63 AMG
Reply With Quote
  #32  
Old 10-30-2020, 07:16 PM
WSSix WSSix is offline
Lateral-g Supporting Member
 
Join Date: Nov 2008
Location: Dunwoody, GA
Posts: 6,298
Thanks: 664
Thanked 581 Times in 471 Posts
Default

Yes, we do have a large Caffeine and Octane show every month just down the street from me. Covid hasn't really slowed it down. I'm not sure if that's a good thing or not, lol. I've been staying home typically. Let us know if you ever make it down for the show. Rustomatic(Paul) and Che70velle(Scott) are in the area, too.
__________________
Trey

Current rides: 2000 BMW 540i/6 and 86 C10.

Former ride: 1979 Trans Am WS6: LT1/T56, Kore 3 C5/6 brakes, BMW 18in rims
Reply With Quote
The Following User Says Thank You to WSSix For This Useful Post:
syborg tt (10-31-2020)
  #33  
Old 10-30-2020, 11:51 PM
64G-lark's Avatar
64G-lark 64G-lark is offline
Senior Member
 
Join Date: Jun 2005
Location: Mapleton, IL.
Posts: 104
Thanks: 9
Thanked 74 Times in 41 Posts
Default

Good to know Trey. I will have to check out sometime when I’m down that way.

The assembled front ready to go back in.


Some tape on the firewall for some protection along with some moving blankets on the engine. Don’t need paint scars at this point!


I coaxed my wife, Robin to come out and help me balance and line up everything for assembly.


Last edited by 64G-lark; 10-31-2020 at 09:59 AM.
Reply With Quote
The Following 3 Users Say Thank You to 64G-lark For This Useful Post:
Gmachine1911 (10-31-2020), Roscoe03 (08-21-2021), syborg tt (10-31-2020)
  #34  
Old 10-31-2020, 07:24 AM
syborg tt's Avatar
syborg tt syborg tt is offline
Lateral-g Supporting Member
 
Join Date: Jun 2005
Posts: 8,131
Thanks: 4,575
Thanked 1,566 Times in 851 Posts
Default

What an inspiring thread. I love all the details that you are sharing. However, the parts in the dishwasher is definitely a “Win” for me.


Sent from my iPhone using Tapatalk
__________________
marty-mj
Is a car ever really done???? It's like a ball of yarn unwinding, that has no end... Author DKz Garage

Projects - Syborg TT 4.3l v6 Mini-Truck, 2nd Chance Camaro & SLP575 Bumble Bee - 4Sale
Reply With Quote
  #35  
Old 11-01-2020, 11:12 AM
214Chevy's Avatar
214Chevy 214Chevy is offline
Lateral-g Supporting Member
 
Join Date: Jul 2008
Location: DALLAS, Texas
Posts: 4,544
Thanks: 296
Thanked 537 Times in 339 Posts
Default

Very nice. I like everything you're doing. Keep up the good work.
__________________
'68 C10 swb
'69 Camaro convertible
'72 Chevelle

Reply With Quote
  #36  
Old 11-02-2020, 02:58 PM
64G-lark's Avatar
64G-lark 64G-lark is offline
Senior Member
 
Join Date: Jun 2005
Location: Mapleton, IL.
Posts: 104
Thanks: 9
Thanked 74 Times in 41 Posts
Default

Thanks Marty. I spent a few nights looking over your Camaro build. Awesome project and love your details. Especially the blue tape .

Thanks 214Chevy
Reply With Quote
  #37  
Old 11-03-2020, 09:58 PM
64G-lark's Avatar
64G-lark 64G-lark is offline
Senior Member
 
Join Date: Jun 2005
Location: Mapleton, IL.
Posts: 104
Thanks: 9
Thanked 74 Times in 41 Posts
Default

Picture of the brake and clutch pedals. I had to drill a few holes to improve the looks and decrease the weight. The clutch pedal required some changes . I raised the clutch pick-up point higher to better align with the clutch master cylinder this caused me to remove part of the clutch stop arm. I cut back the area to reduce the thickness to allow the yoke to go around then beefed up the welds. I use Wilwood yokes for the brake and clutch as they are aluminum and just work well.


I am using a compact 3/4” Wilwood clutch master 260-13619. It is setup for a 3/8-24 Banjo fitting.

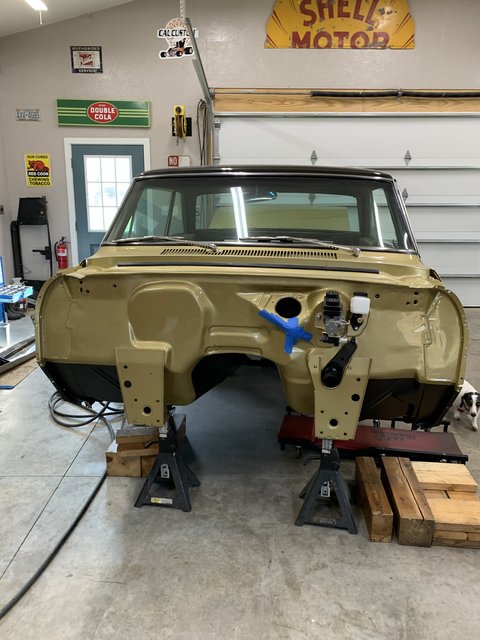
I am going manual brakes and would normally use a Wilwood master cylinder for the brakes. I have used them in the past and my only complaint is the lid. I guess it’s a pet peeve, but I don’t like to use tools to remove a lid to check the fluid level. The mounting location is very close to the left valve cover so I researched an alternative.
I ended up using Dorman M39736 that was used on 87-95’ Dodge and Chrysler vehicles. It has the 7/8” bore size I wanted, its compact and aluminum. The side benefit is its cheap ($39.00) and readily available. The hole spacing is just a little tighter than GM, but its Easy to open up a bit to fit. I used a universal pushrod from Wilwood. I know the risk is low but I always think about what could happen if the rod came out of the master cylinder. I weld a washer to the rod and then drill and tap the back of the master cylinder to accept a washer that has a hole smaller than the washer I welded on the rod. No chance of it coming out!


I’m using a Wilwood proportioning valve and I had to cut the mounting bracket and extend it some to fit.

Last edited by 64G-lark; 11-04-2020 at 08:48 AM.
Reply With Quote
  #38  
Old 11-03-2020, 10:10 PM
64G-lark's Avatar
64G-lark 64G-lark is offline
Senior Member
 
Join Date: Jun 2005
Location: Mapleton, IL.
Posts: 104
Thanks: 9
Thanked 74 Times in 41 Posts
Default

New wheels arrived after a long wait to be made. Had to throw them on to see how they looked. Weld RT-S S77 18 x 9.5 front and 18 x 10 rear. Thanks to Randy Johnson at D & Z Customs.


Reply With Quote
  #39  
Old 11-04-2020, 05:23 AM
TomM's Avatar
TomM TomM is offline
Lateral-g Supporting Member
 
Join Date: Mar 2009
Location: Baytown, Texas
Posts: 265
Thanks: 7
Thanked 10 Times in 6 Posts
Default

Nice work...

Question...is there a reason for mounting the prop valve backwards?

T,
Reply With Quote
  #40  
Old 11-04-2020, 08:21 AM
64G-lark's Avatar
64G-lark 64G-lark is offline
Senior Member
 
Join Date: Jun 2005
Location: Mapleton, IL.
Posts: 104
Thanks: 9
Thanked 74 Times in 41 Posts
Default

Thanks Tom, I would love to see the pictures in your build threads.

Good catch. I should have mentioned that earlier. Yes a couple reasons. The port configuration on the master cylinder is the main reason. The rear port of the master cylinder is for the front brakes. The other reasons are to make access to the adjuster knob easy, and I didn't like the brake light sender and wires sitting front and center.

Last edited by 64G-lark; 11-04-2020 at 08:43 AM.
Reply With Quote
Reply


Posting Rules
You may not post new threads
You may not post replies
You may not post attachments
You may not edit your posts

BB code is On
Smilies are On
[IMG] code is On
HTML code is Off

Forum Jump


All times are GMT -5. The time now is 04:26 AM.


Powered by vBulletin® Version 3.8.11
Copyright ©2000 - 2024, vBulletin Solutions Inc.
Copyright Lateral-g.net