...

Go Back   Lateral-g Forums > Lateral-G Open Discussions > Project Updates
User Name
Password


Reply
 
Thread Tools Display Modes
  #311  
Old 06-13-2020, 10:26 PM
SlowProgress's Avatar
SlowProgress SlowProgress is offline
Lateral-g Supporting Member
 
Join Date: Jan 2011
Posts: 391
Thanks: 0
Thanked 27 Times in 10 Posts
Default

Yeah that thing is huge and like you I didn't think it looked so big in the photos. Good news it should keep the power steering fluid nice and cool with all that extra volume!
Reply With Quote
  #312  
Old 06-15-2020, 12:09 PM
waynieZ's Avatar
waynieZ waynieZ is offline
Lateral-g Supporting Member
 
Join Date: Oct 2006
Location: Ma
Posts: 8,424
Thanks: 908
Thanked 336 Times in 229 Posts
Default

Nice job on the bracket. I've been looking at the PSC and was worried about the size too.
__________________
_Wayne________

___________________________________
https://lateral-g.net/forums/show...ghlight=FNQUIK
Reply With Quote
  #313  
Old 01-14-2023, 12:05 AM
SlowProgress's Avatar
SlowProgress SlowProgress is offline
Lateral-g Supporting Member
 
Join Date: Jan 2011
Posts: 391
Thanks: 0
Thanked 27 Times in 10 Posts
Default Started working on the car again and it Feels Good

Well I retired last year in March and went to New Mexico for the Summer. Back in AZ now and decided to really work on the Camaro while the weather is cool. My goal is to start the engine by the end of February to simply get me motivated to take the next steps. I won’t be able to drive it yet but that is the next step before blowing it apart for painting.

Bringing the electrical system up one circuit at a time works best for me to avoid becoming overwhelmed. The engine wires will be the last thing I do when everything else is figured out.

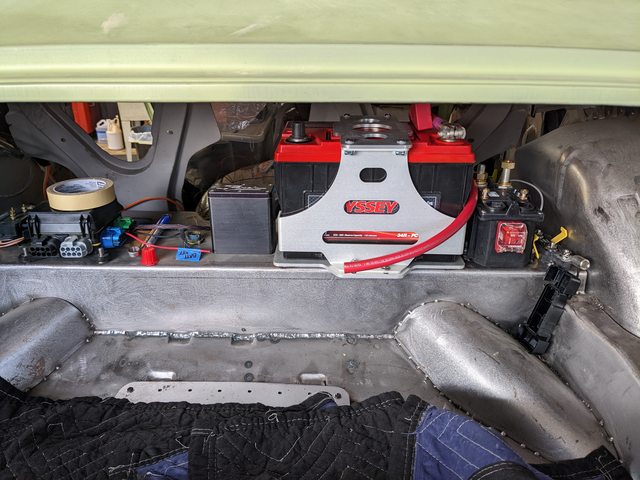
I decided to put in a trunk contactor so I can isolate the electrical circuits when the car isn’t in use. I will have a constant battery circuit for the GMPP ECU.

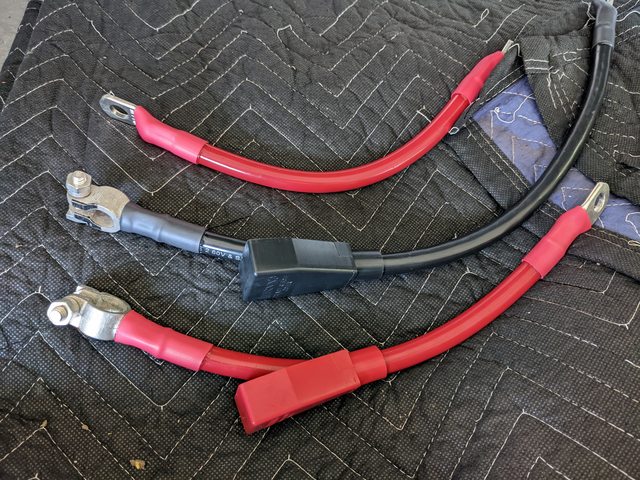
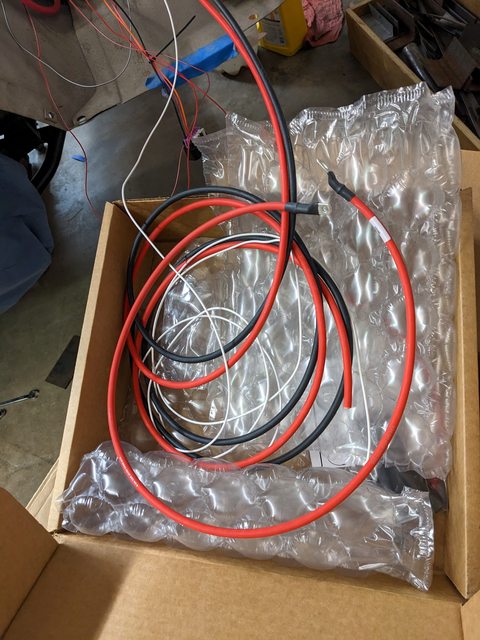
The battery, contactor and a 500AMP main fuse to protect the battery cable are all installed. There is a local place that makes really nice cables.


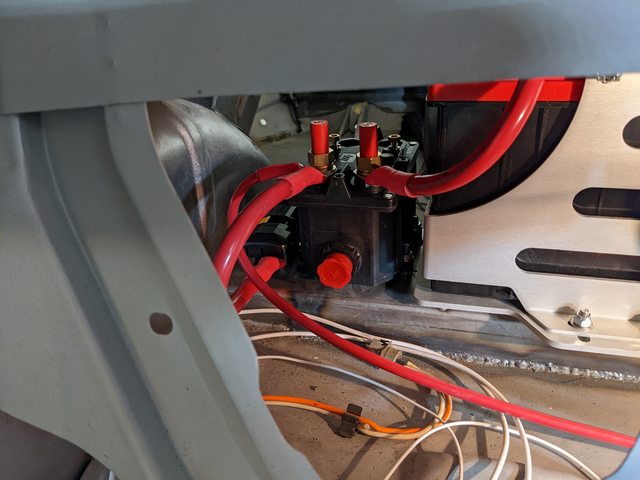
With the contactor I can manually close the relay with a push button and turn it off when not needed. The trunk aux. fuse box and fuel pump PWM controller can be powered now.


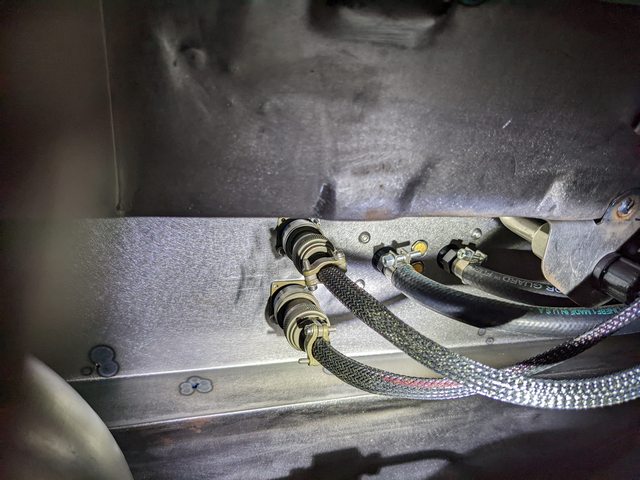
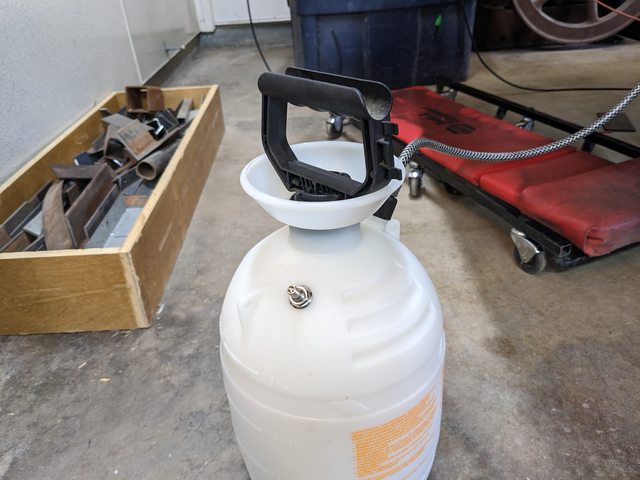
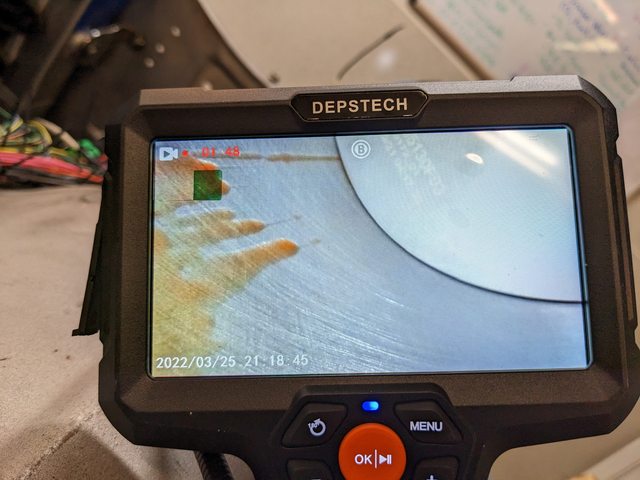
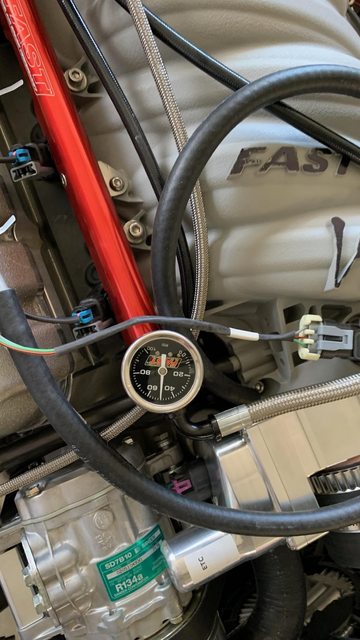
I bought a new power probe and it is a really convenient way to power individual circuits. I finished the fuel pump wiring and was finally able to spin the fuel pump in the tank by simulating an ECU pump turn on signal with the power probe.


My son also bought me a nice Fluke meter for Christmas.


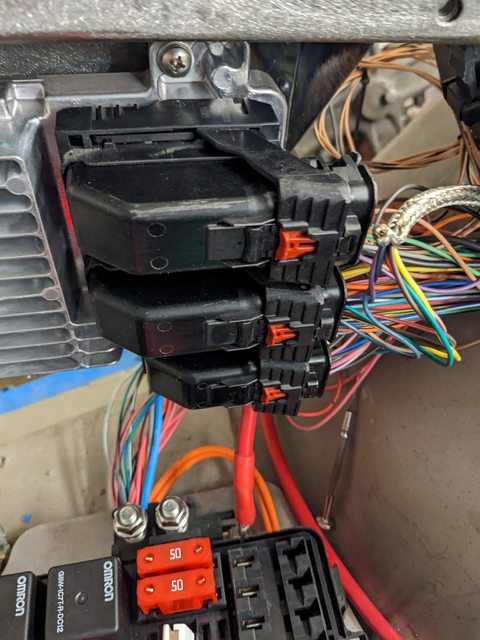
I ran a new power wire from the trunk panel to the original GM fuse box so fuse box power now comes from the trunk panel and not the horn relay in the engine bay. I made a temporary splice to get the engine running but will add a fuse later in the trunk to make it safe. The wires look old and worn out but they are soft and don't have any nicks or corrosion since the car was stored inside most of its life. The stock harness and fusebox will mostly be accs. and lighting circuits. All the engine circuits will be new, modern wiring for reliability.


It was really nice to have the Ignition key working and all the battery and Accs circuits working. Feels like the car is slowly coming alive again.
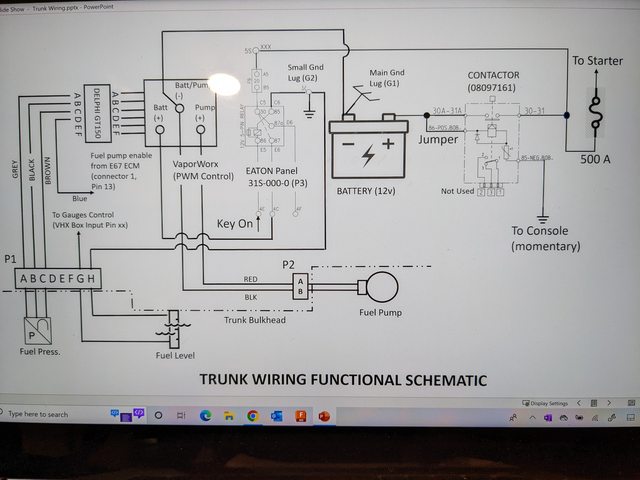
I created a schematic so I would not forget how it is all hooked up (again).


I decided to play with the power probe and hooked up the DSE multi-speed wiper circuits and tested them. Everything works fine and I still need a lot of wire clean-up.


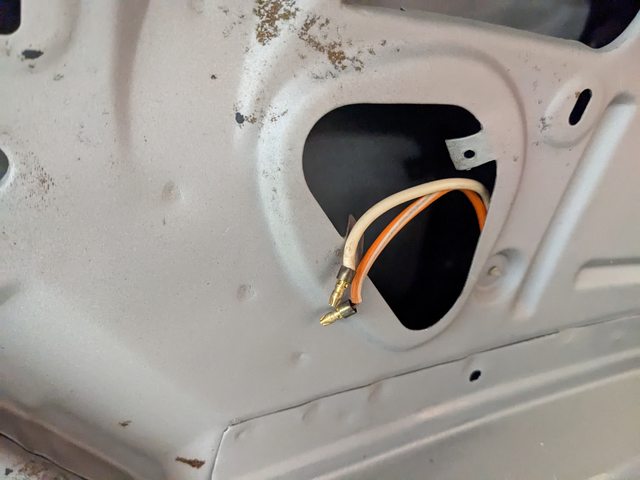
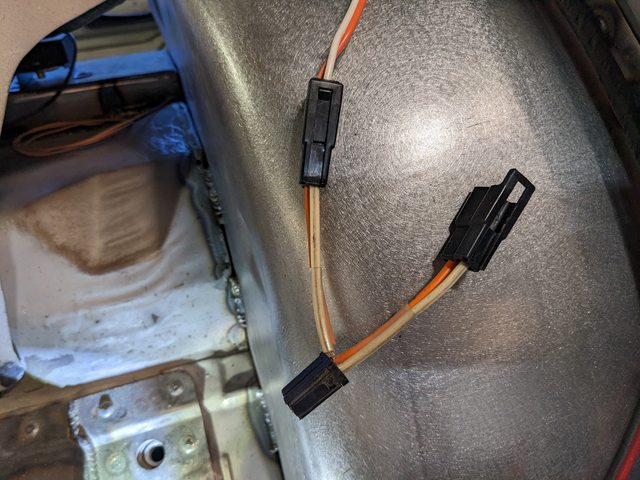
The RS sail panel lighting was always pretty lacking and I decided to add a dome light circuit and the under-dash courtesy lights. To have both a dome and sail panel light harness meant I needed to make some sort of pigtail adapter. I was going to reuse the original sail panel light harness but it was too stiff after all the years. I bought a new repro. harness and used part of the old harness to make the pigtail to power dome and sail lighting.


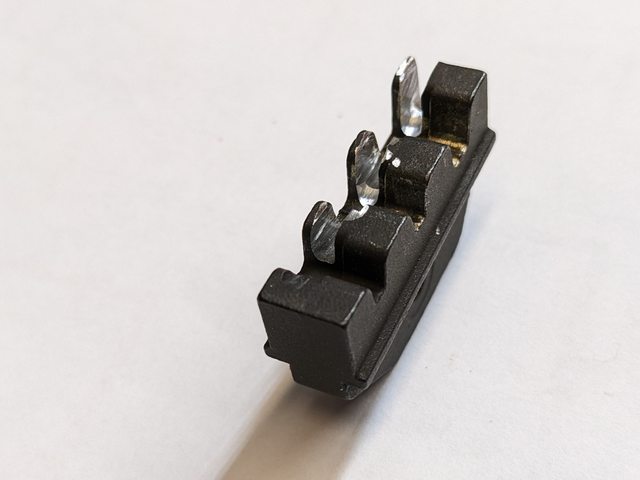
What should have been a 30 minute job turned into several hours trying to figure out the crimping arrangement. I thought I had the right tools but the MSD crimper mangles the little terminal tabs.
I did a little online research and found someone who just modified their crimper inserts by grinding a groove so I grudgingly did that to mine. Hopefully they will still work for normal terminals with a tab clearance groove cut into the one jaw.


The simplest of circuits is done and all the interior lights work now.


The dash lights also work except the VintageAir panel is too dim. I hope there is a burned bulb, or something easy causing that.


Next week I am going to wire up the Dakota dome light dimmer circuit.


Then I will bring power to the Dakota under-dash control box for the gauges. I also want to get the battery cable to the starter and power up the GMPP fuse panel in the engine bay.
Once the engine bay panel is powered the first thing I want to do is get the drive-by-wire throttle pedal working. That will seem like a big milestone.
Reply With Quote
The Following 4 Users Say Thank You to SlowProgress For This Useful Post:
camcojb (01-14-2023), Goosesdad (02-20-2023), Roscoe03 (01-14-2023), waynieZ (01-21-2023)
  #314  
Old 01-14-2023, 08:13 AM
WSSix WSSix is offline
Lateral-g Supporting Member
 
Join Date: Nov 2008
Location: Dunwoody, GA
Posts: 6,298
Thanks: 664
Thanked 581 Times in 471 Posts
Default

Nice work. It's good to be making progress. .

I put a main circuit breaker on my Trans Am that powered all the accessories. It had a push button to open the circuit. I used it for whenever the car was parked as both a theft deterrent since it was hidden and to prevent battery drain

Good luck continuing to move forward. Enjoy retirement!
__________________
Trey

Current rides: 2000 BMW 540i/6 and 86 C10.

Former ride: 1979 Trans Am WS6: LT1/T56, Kore 3 C5/6 brakes, BMW 18in rims

Last edited by WSSix; 01-14-2023 at 08:16 AM.
Reply With Quote
The Following 3 Users Say Thank You to WSSix For This Useful Post:
camcojb (01-14-2023), Roscoe03 (01-14-2023), waynieZ (01-21-2023)
  #315  
Old 01-14-2023, 12:28 PM
camcojb's Avatar
camcojb camcojb is online now
Administrator
 
Join Date: Jul 2004
Location: Wilton, CA.
Posts: 12,585
Thanks: 4,285
Thanked 1,455 Times in 629 Posts
Default

__________________
Jody

PAST CAR PROJECTS

Like Lateral-G on Facebook!

Follow Lateral-G on Instagram!

SPECIAL THANKS TO:
Jacob Ehlers and Amsoil for the lubricants and degreasers for my 70 Chevelle project
Shannon at Modo Innovations for the cool billet DBW bracket
Roadster Shop for their Chevelle SPEC Chassis
Dakota Digital for their Chevelle HDX Gauge Package
Painless Performance for their wiring harness

Ron Davis Radiators for their radiator and fan assembly.
Baer Brakes for their front and rear brakes

Texas Speed and Performance for their 427 LS Stroker
American Powertrain for their ProFit Magnum T56 kit
Currie Enterprises for their 9" Third Member
Forgeline for their GF3 Wheels
McLeod Racing for their RXT street twin clutch
Ididit for their steering column
Holley for their EFI and engine parts
Lokar and Clayton Machine for their pedals and door and window handles
Morris Classic Concepts for their 3 point belts and side mirrors
Thermotec for their heat sleeve and sound deadening products
Restomod Air for their Tru Mod A/C kit
Mightymouse Solutions for their catch can
Magnaflow for their 3" exhaust system
Aeromotive for their dual Phantom fuel system
Vintage Air for their new Mid Mount LS front drive
Hydratech Braking for their hydroboost system
Borgeson for their stainless steering shaft and u joints
Eddie Motorsports for their hood and trunk hinges and misc parts
TMI Products for their seats, door panels, and dash pad
Rock Valley Antique Auto Parts for their stainless fuel tank
Reply With Quote
  #316  
Old 01-30-2023, 12:16 AM
SlowProgress's Avatar
SlowProgress SlowProgress is offline
Lateral-g Supporting Member
 
Join Date: Jan 2011
Posts: 391
Thanks: 0
Thanked 27 Times in 10 Posts
Default Roughed in the ECU wiring

Made pretty good progress this week. I got the ECU wiring all roughed in. It still needs all the zip ties removed to clean it up. Check outs were successful.


The Engine light illuminates in the fuse box with ignition power and I can feel the fuel pump relay shut off after a few seconds. The code reader connects with my phone when connected to the OBD port.


It was really nice to hear the electronic throttle reset with power on and I probably played with the electronic pedal more than I would like to admit.
There is a short Video below. It was a great milestone to have the throttle respond to the pedal.


Still working to start the engine by the end of February to build up the motivational stoke!

Last edited by SlowProgress; 01-30-2023 at 12:22 AM. Reason: Fixed busted Youtube
Reply With Quote
The Following 3 Users Say Thank You to SlowProgress For This Useful Post:
camcojb (01-30-2023), Goosesdad (01-30-2023), WSSix (02-02-2023)
  #317  
Old 02-20-2023, 12:50 AM
SlowProgress's Avatar
SlowProgress SlowProgress is offline
Lateral-g Supporting Member
 
Join Date: Jan 2011
Posts: 391
Thanks: 0
Thanked 27 Times in 10 Posts
Default Oil Pressure Finally

I made a bit more progress toward starting the engine. Made a pressure lube tank out of my weed sprayer by adding a Schrader valve.


Simple connection to one of these LS adapters from Amazon.


This worked well pushing oil all the way up top and even registered decent pressure on the HP Tuners dashboard which was convenient.


I also checked all the cylinders with the borescope to make sure nothing slipped inside due to the manifold being off and on several times. Cylinders looked good even after several years. Plenty of oil left inside. Also installed the dipstick.


I finally ordered the clutch so I can crank the engine over and bought the Vintage Air 850W fan harness to get my fan connected. I tried to find the 9.5mm Yazaki terminals and make my own fan harness but struck out. The VA harness is really nice looking, using 6Ga wire which is correct for the GM fan.


Goal is to keep plugging away and do a motivational start-up by the end of February, so far on track for that.
Reply With Quote
The Following 4 Users Say Thank You to SlowProgress For This Useful Post:
andrewb70 (02-21-2023), Goosesdad (02-20-2023), Roscoe03 (02-20-2023), srode1 (02-21-2023)
  #318  
Old 02-21-2023, 11:42 PM
SlowProgress's Avatar
SlowProgress SlowProgress is offline
Lateral-g Supporting Member
 
Join Date: Jan 2011
Posts: 391
Thanks: 0
Thanked 27 Times in 10 Posts
Default Clutch is in

I realized I was missing dowel pins for the block and had some brought over to my local GM dealer. I used dry ice to freeze both the dowel pins and the pilot bearing to help the installation a little.


I have had bad luck hammering pilot bearings in so I tack welded studs onto flywheel bolts bought at the local auto supply.


I had to tap the pilot bearing in to square it up (after freezing). The press tool did a good job once the pilot bearing was started and square.

The flywheel and clutch went in fairly straight forward. The Dyad seems like a nice product!


Now if the bell housing will fit and the trans will stab ok I can move back onto the last few tasks to get this engine started.
Reply With Quote
The Following 3 Users Say Thank You to SlowProgress For This Useful Post:
camcojb (02-23-2023), Goosesdad (03-01-2023), WSSix (02-24-2023)
  #319  
Old 02-24-2023, 08:12 PM
WSSix WSSix is offline
Lateral-g Supporting Member
 
Join Date: Nov 2008
Location: Dunwoody, GA
Posts: 6,298
Thanks: 664
Thanked 581 Times in 471 Posts
Default

Very nice looking clutch. It should work well for you from what I have read.
__________________
Trey

Current rides: 2000 BMW 540i/6 and 86 C10.

Former ride: 1979 Trans Am WS6: LT1/T56, Kore 3 C5/6 brakes, BMW 18in rims
Reply With Quote
  #320  
Old 03-01-2023, 12:30 AM
SlowProgress's Avatar
SlowProgress SlowProgress is offline
Lateral-g Supporting Member
 
Join Date: Jan 2011
Posts: 391
Thanks: 0
Thanked 27 Times in 10 Posts
Default First Attempted Engine Start

I put the top end together for the final time before engine start.
There was a minor interference between the throttle body and water pump I hadn't noticed before. Good thing I caught it. I had to grind a little of the throttle body and the water pump to make it better.


Today was supposed to be first start. It was a gorgeous day in the Phoenix area. Everything appeared to be working but one of my stainless connections stared dripping gas. We decided to not risk starting a fire and will pull that fitting apart and try again in the next few days.

I was still a fun day.


Some bonus video of the 850 W Cadillac fan running. It is pretty impressive at maximum power. I am not happy with the wiring and plan to clean it up as a future project before putting the car on the road. Actually all the wires need a major clean up.

Reply With Quote
The Following 2 Users Say Thank You to SlowProgress For This Useful Post:
camcojb (03-01-2023), Goosesdad (03-01-2023)
Reply

Thread Tools
Display Modes

Posting Rules
You may not post new threads
You may not post replies
You may not post attachments
You may not edit your posts

BB code is On
Smilies are On
[IMG] code is On
HTML code is Off

Forum Jump


All times are GMT -5. The time now is 12:01 PM.


Powered by vBulletin® Version 3.8.11
Copyright ©2000 - 2024, vBulletin Solutions Inc.
Copyright Lateral-g.net