...

Go Back   Lateral-g Forums > Lateral-G Open Discussions > Project Updates
User Name
Password


Reply
 
Thread Tools Display Modes
  #41  
Old 12-03-2019, 12:30 AM
jaba jaba is offline
Member
 
Join Date: May 2015
Posts: 34
Thanks: 7
Thanked 39 Times in 17 Posts
Default

A few posts coming up to fit all of this amazing work in.

One of the biggest sheet metal projects is now ticked off the list. Having pushed the motor and gearbox back I've had to recess the firewall 2" to give clearance behind the motor for sensors, wiring and a pair of bulkhead connectors.

Another issue with pushing the motor back is header clearance on the drivers side foot well / kick board. As I've gone to a Wilwood pedal setup I no longer need the additional clearance the factory provides on the drivers side so I have had it modified by the masters at The Panel Shop in Bibra Lake, WA to match the passenger side.

This also means the new firewall can be symmetrical instead of having a step out at the bottom to match the D/S kick board.

The factory floor was removed and replaced along with the reinforced frame mount section being extended in a similar way the P/S was built from factory.


Reply With Quote
The Following User Says Thank You to jaba For This Useful Post:
syborg tt (05-18-2020)
  #42  
Old 12-03-2019, 12:39 AM
jaba jaba is offline
Member
 
Join Date: May 2015
Posts: 34
Thanks: 7
Thanked 39 Times in 17 Posts
Default

With the floor sorted the guys could move onto sorting out the actual firewall.

It was made out of two pieced formed in a buck (the firewall and recess) then welded, planished and metal finished.

A small section of the cowl area was removed in order to fit the recess, this took a little bit of working out as the Raingear wiper system also required that real estate and on top of that i have modified the cowl openings in the panel to have a more uniform shape (and to get rid of the ugly plastic grill that barely stops leaves!) Thankfully there is just enough space for everything to fit nicely, with 10mm or so clearance between the wiper arm and the firewall / cowl.


Everything was then epoxied and final welded into place.


Reply With Quote
The Following User Says Thank You to jaba For This Useful Post:
syborg tt (05-18-2020)
  #43  
Old 12-03-2019, 12:45 AM
jaba jaba is offline
Member
 
Join Date: May 2015
Posts: 34
Thanks: 7
Thanked 39 Times in 17 Posts
Default

And some final shots from when I got it home, had to throw on the intake and exhaust headers for a bit of a look.

I wasn't completely sold on the shape of the recess at first but now that I have seen it with the intake and manifolds mocked up i'm quite pleased with how its turned out.

The guys didn't have time before the Christmas / new year break to sort out the trans tunnel so i have brought it home to look into the steering components, driveshaft and maybe some wiring / plumbing mock up.

Cheers!


Reply With Quote
The Following 2 Users Say Thank You to jaba For This Useful Post:
Goosesdad (05-18-2020), syborg tt (05-18-2020)
  #44  
Old 12-03-2019, 06:49 PM
WSSix WSSix is offline
Lateral-g Supporting Member
 
Join Date: Nov 2008
Location: Dunwoody, GA
Posts: 6,298
Thanks: 664
Thanked 581 Times in 471 Posts
Default

Fantastic work on the firewall! Congrats on clearing this big hurdle.
__________________
Trey

Current rides: 2000 BMW 540i/6 and 86 C10.

Former ride: 1979 Trans Am WS6: LT1/T56, Kore 3 C5/6 brakes, BMW 18in rims
Reply With Quote
The Following User Says Thank You to WSSix For This Useful Post:
jaba (12-08-2019)
  #45  
Old 12-08-2019, 10:42 PM
jaba jaba is offline
Member
 
Join Date: May 2015
Posts: 34
Thanks: 7
Thanked 39 Times in 17 Posts
Default

Another job ticked off. Manned up and cut a hole for the column after measuring it at least 25 times with string lines, levels and a laser. Thankfully got it in the correct spot. Then went about connecting the column to the rack.


It required 3 uni joints and therefore a support bearing. I wanted to avoid having to weld to the frame or make a bracket so I drew up a small threaded extension that bolts to the frame and had it machined at a local shop. I just need to have two slots milled into it so i can fit a spanner on it to tighten everything down. At the time it didn't even cross my mind.


That was the tricky bit, after about 5 trips back and forth and some trial and error I finally found a setup that worked well.


Turned out pretty nice, moves nice and smoothly. Surprisingly I could actually turn the front wheels (when on jack stands) from rotating the column uni joint by hand, so I'm pretty confident once I sort a steering wheel there will be no issues. Pedal box next!

Something to note for anyone planning on doing this in the future. I used Borgeson Uni Joints and 3/4" Double D shaft for all parts except the Uni joint that fits the rack. I found the Borgeson shaft did not fit the Borgeson support bearing as the tolerance was too tight and therefore had to purchase another shaft of unknown brand. Sadly only found this out after I had cut the shafts to length!! Just a heads up to check everything fits together well before cutting up the shafts!

Last edited by jaba; 12-08-2019 at 10:45 PM.
Reply With Quote
The Following 6 Users Say Thank You to jaba For This Useful Post:
camcojb (12-08-2019), CCS (12-09-2019), Goosesdad (12-13-2019), slimjim (12-08-2019), syborg tt (05-18-2020), waynieZ (05-18-2020)
  #46  
Old 05-18-2020, 12:10 AM
jaba jaba is offline
Member
 
Join Date: May 2015
Posts: 34
Thanks: 7
Thanked 39 Times in 17 Posts
Default

Another thread revival, really need to keep on top of updating these forum threads of mine. None the less there has still been progress!

First up is the trans tunnel, since i had shortened the subframe bushings it has brought the motor / trans up higher into the cabin than a normal LS / T56 would sit resulting in a new tunnel front to rear being built. I made sure that the guys kept it as close to the trans as possible and to drop it down at the back of the trans as soon as possible, got to have room for cup holders!


Reply With Quote
The Following 2 Users Say Thank You to jaba For This Useful Post:
Goosesdad (05-18-2020), syborg tt (05-18-2020)
  #47  
Old 05-18-2020, 12:30 AM
jaba jaba is offline
Member
 
Join Date: May 2015
Posts: 34
Thanks: 7
Thanked 39 Times in 17 Posts
Default

Moving into the boot / trunk area, i had an Accusump, battery, fuel and diff breathers to mount.

Decided to simply mount the Accusump directly to the rear bulkhead with the supplied brackets and some plates with taped holes in them welded to the car.


I then decided the best place for the fuel and diff breathers was just in front of that, however there was no flat surface large enough to mount them too as they are a bulkhead style canister that protrudes under the floor. I wanted it to look like a factory hump in the floor so i bought a cheap shrinker stretcher and set about making the piece with nice radiused edges to match the round canisters. Working with these metal shaping tools gives you a massive appreciation for the professionals who make it look oh so easy! Either way I'm quite happy with the results, i will grind down the welds to make it look like a factory pressed piece later.


Finally it was time for a battery tray, a lot of people sink them into the floor, however in Aus modifying the factory frame rails would be an issue for registration. So i have built a mount to level the battery even with the car. I could have simply bolted the billet bracket to the floor, but I'm trying to avoid having any fasteners / unnecessary holes pass through the body.

I again matched the contour of the billet bracket with the shrinker stretcher and welded captive nuts to the underside. I built a flange onto it so I can plug weld this to the car once i have decided on a final position for it and seam sealed beneath it.


All that's left in this area now is a fuel pump access hatch once i have had my fuel tank modified to fit the intank setup.


Last edited by jaba; 05-18-2020 at 12:36 AM.
Reply With Quote
The Following 3 Users Say Thank You to jaba For This Useful Post:
camcojb (05-18-2020), Goosesdad (05-18-2020), waynieZ (05-18-2020)
  #48  
Old 05-18-2020, 12:46 AM
jaba jaba is offline
Member
 
Join Date: May 2015
Posts: 34
Thanks: 7
Thanked 39 Times in 17 Posts
Default

Now for something a little unrelated to the build but something i thought would be cool to share. I scored an awesome prep trolley from a friend of mine that i thought would make an awesome welding / metal work cart.

It has a large storage area at the back, two large drawers and a wire frame designed to hold orbital sanders. Perfect for my small orbital electric sander and 4" grinders. I built a shelf for the welder, small bracket to hold the files and wire brush, and then covered the surfaces in non slip mat to stop everything rattling around on when moving it.


Last edited by jaba; 05-18-2020 at 12:55 AM.
Reply With Quote
The Following 3 Users Say Thank You to jaba For This Useful Post:
Goosesdad (05-18-2020), syborg tt (05-18-2020), Thumpt (06-24-2020)
  #49  
Old 05-18-2020, 01:09 AM
jaba jaba is offline
Member
 
Join Date: May 2015
Posts: 34
Thanks: 7
Thanked 39 Times in 17 Posts
Default

Few small jobs in this one, first up mounting the Turbosmart FPR.

A pet peeve of mine is FPR's and catch can's etc on a smooth firewall, I went with this unit as its super compact and can still flow 2000HP of fuel. More than enough for my little LS3!

Decided to mount it to the back of the intake manifold with a few fittings, unfortunately no matter how hard i searched i could find a 120 degree female to male union, so i chopped up a 180 degree fitting i had and welded a male bung to it. I then bent up a small bracket and bang, all done and nicely hidden away yet still accessible to adjust the fuel pressure if needed.


I plan on having the frame / engine / gearbox as easy to remove as possible so i have opted for a set of bulkhead connectors to quickly release the engine loom from the body when required. Unfortunately these connectors i quite bulky so i built a small recess for them with some 2.5" exhaust tubing, that will be welded to the firewall once final placement is decided.

The last image shows how far out into the engine bay the connector would sit if it wasn't recessed, imagine the edge of the grey tubing as the firewall.


Reply With Quote
The Following 3 Users Say Thank You to jaba For This Useful Post:
Goosesdad (05-18-2020), streetbird (05-21-2020), syborg tt (05-18-2020)
  #50  
Old 05-18-2020, 01:22 AM
jaba jaba is offline
Member
 
Join Date: May 2015
Posts: 34
Thanks: 7
Thanked 39 Times in 17 Posts
Default

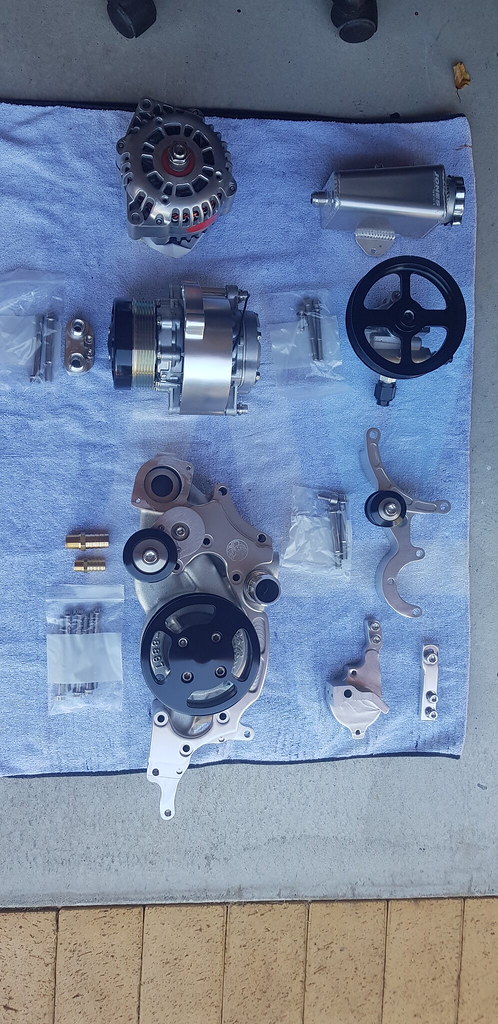
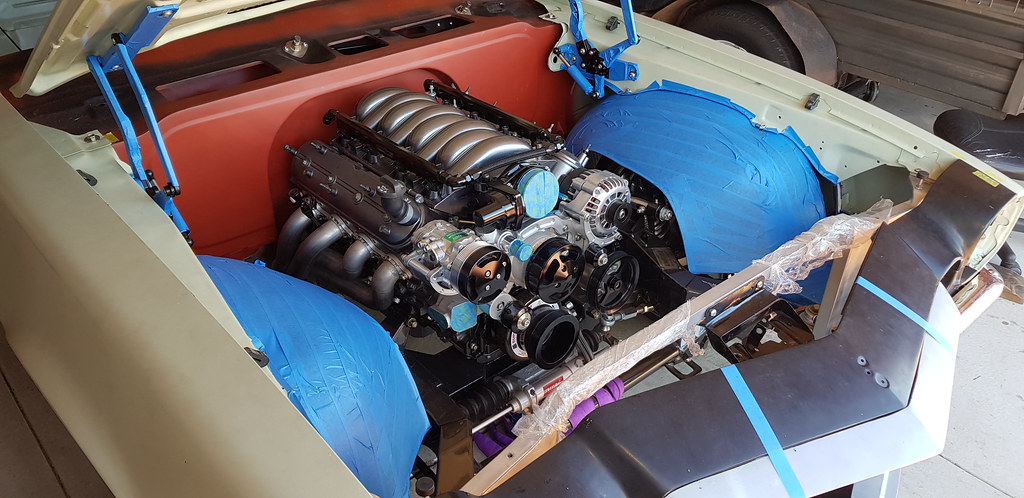
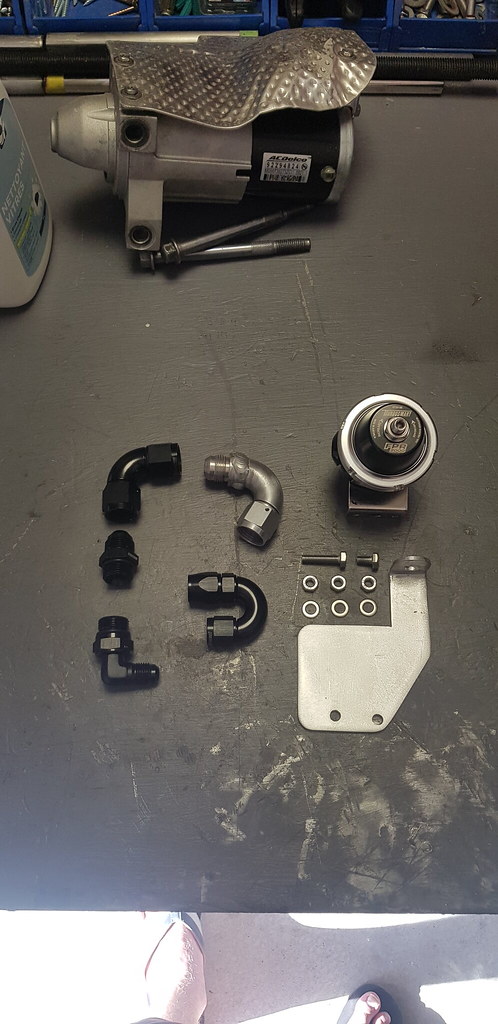
Final post for now, mock up of some shiny bits!

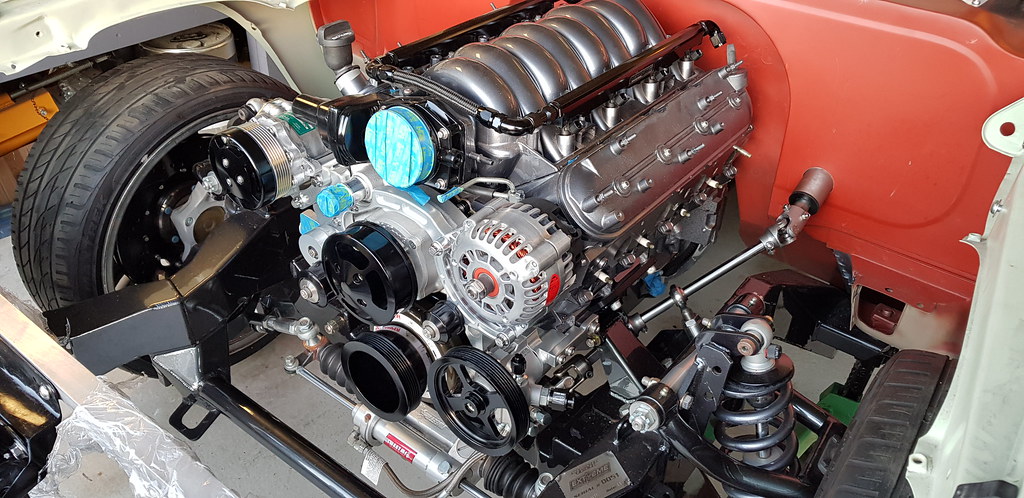
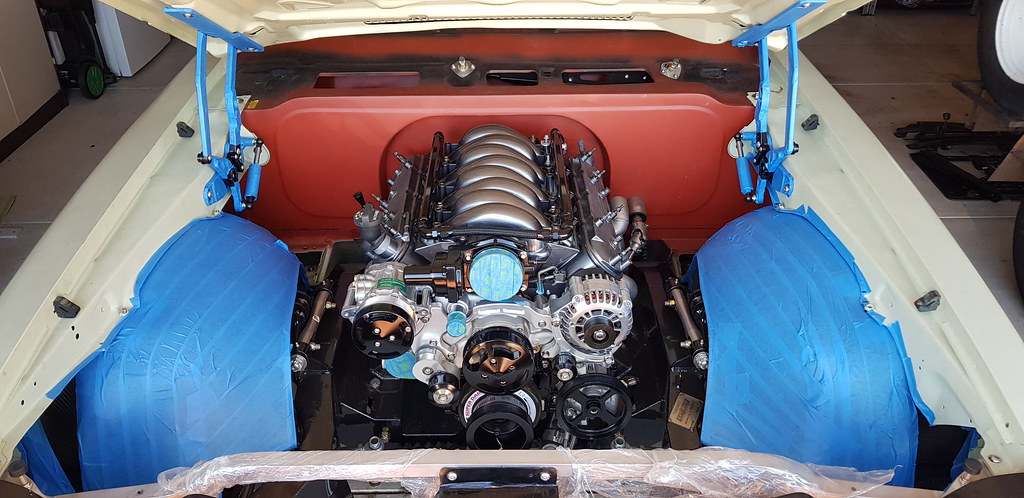
I custom ordered the Drive Junky setup with brushed components and black pulleys to break up the silver a little bit, matches well with the scheme I'm going for. Absolutely beautiful kit, great instructions, everything went together perfectly.


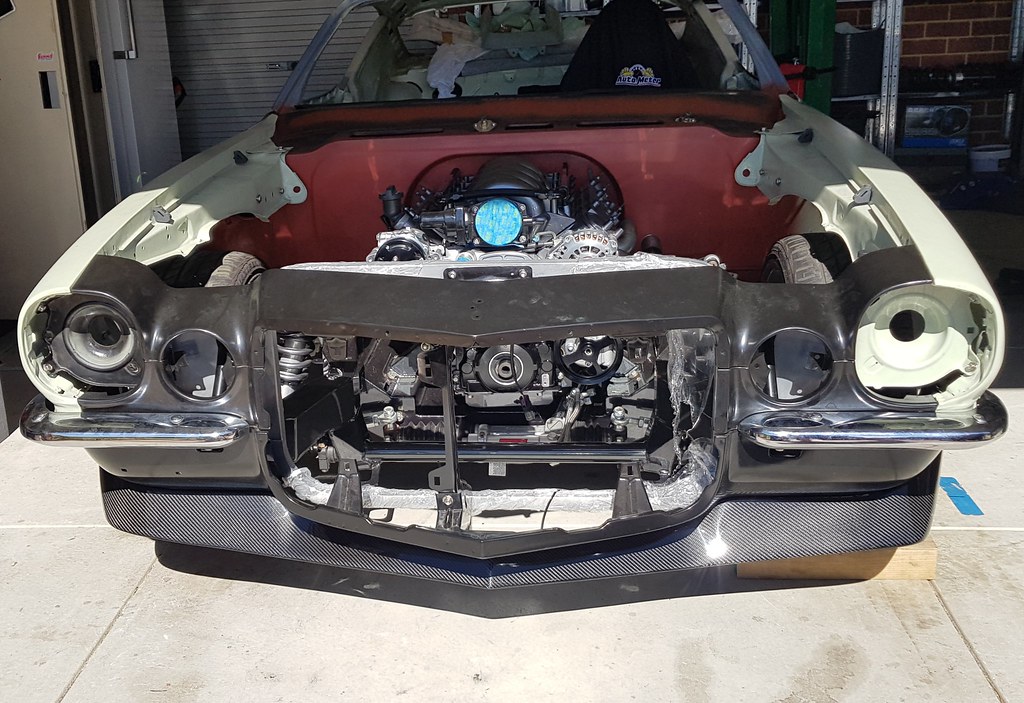
Next up is some carbon from Anvil auto, front spoiler and inner fenders, front spoiler fits decent, may need a little adjustment but that may be due to my aftermarket sheetmetal.

The inner fenders are a little disappointing in quality / fitment in my opinion, thankfully the areas of concern are not visible and can therefore be modified / worked, cant deny they look great though, even when covered in tape. I was concerned they would hit the frame with the modified subframe mounts but they tuck in nicely with the Speedtech Extreme frame.


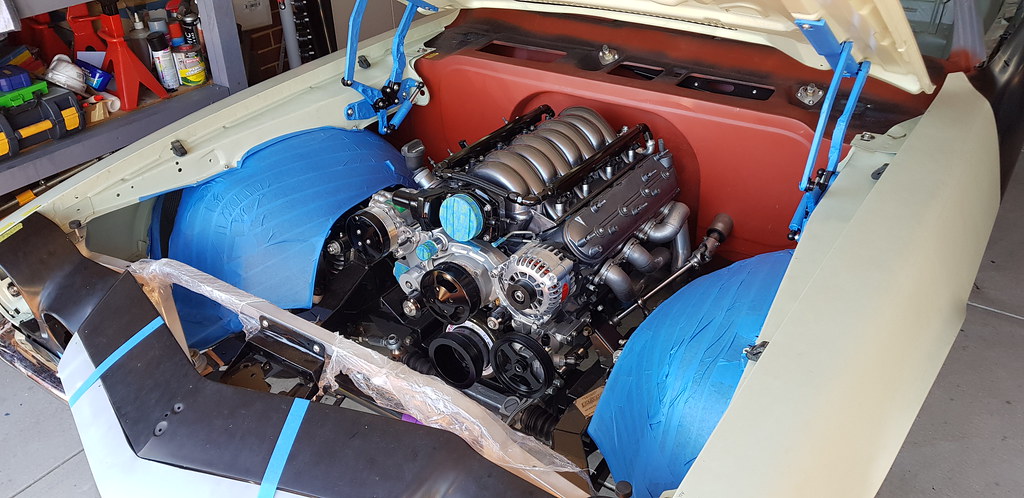
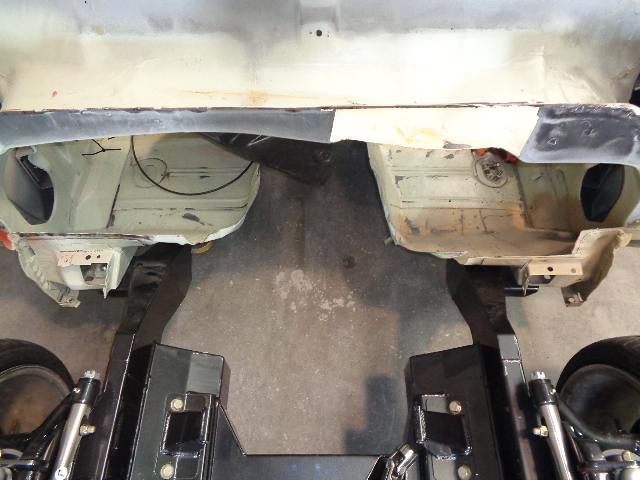
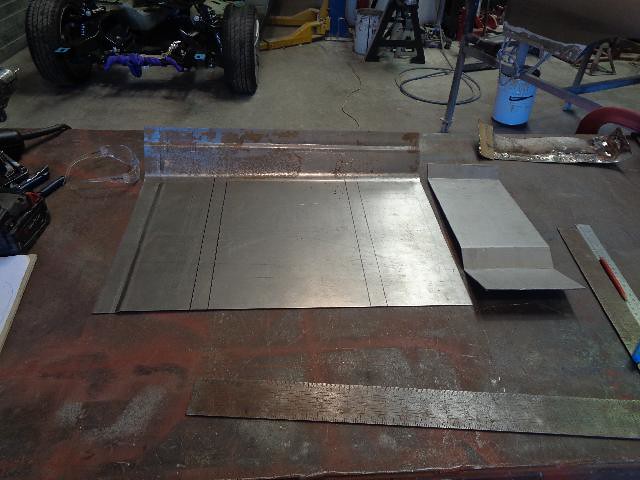
That's all for now, the car is currently having all the gaps sorted out ready for some extended rockers, an idea i can't deny i have blatantly stolen from Goosesdad's absolutely fantastic build. The end of the metal work stage is in sight! Cheers, guys.
Reply With Quote
The Following 6 Users Say Thank You to jaba For This Useful Post:
ADY (05-18-2020), camcojb (05-18-2020), Goosesdad (05-18-2020), ScotI (05-18-2020), syborg tt (05-18-2020), WILWAXU (05-18-2020)
Reply

Thread Tools
Display Modes

Posting Rules
You may not post new threads
You may not post replies
You may not post attachments
You may not edit your posts

BB code is On
Smilies are On
[IMG] code is On
HTML code is Off

Forum Jump


All times are GMT -5. The time now is 08:04 AM.


Powered by vBulletin® Version 3.8.11
Copyright ©2000 - 2024, vBulletin Solutions Inc.
Copyright Lateral-g.net