...

Go Back   Lateral-g Forums > Lateral-G Open Discussions > Project Updates
User Name
Password


Reply
 
Thread Tools Display Modes
  #151  
Old 05-06-2023, 05:56 AM
syborg tt's Avatar
syborg tt syborg tt is online now
Lateral-g Supporting Member
 
Join Date: Jun 2005
Posts: 8,131
Thanks: 4,584
Thanked 1,566 Times in 851 Posts
Default

Very nice


Sent from my iPhone using Tapatalk
__________________
marty-mj
Is a car ever really done???? It's like a ball of yarn unwinding, that has no end... Author DKz Garage

Projects - Syborg TT 4.3l v6 Mini-Truck, 2nd Chance Camaro & SLP575 Bumble Bee - 4Sale
Reply With Quote
The Following User Says Thank You to syborg tt For This Useful Post:
andrewb70 (05-07-2023)
  #152  
Old 05-07-2023, 12:00 PM
andrewb70's Avatar
andrewb70 andrewb70 is offline
Lateral-g Supporting Vendor
 
Join Date: Jul 2005
Posts: 852
Thanks: 209
Thanked 444 Times in 201 Posts
Default

Now that the car is back, I felt the need to go out there and do something, even if it is something small. Keeping in mind that I will be doing a lot of wiring under the dash, a removable steering wheel hub seemed like a good idea. My friend Tom had a NRG steering wheel hub on his 70 GTO and I really liked it.

I started by removing the horn button and removing the Momo steering wheel from the Momo hub.


Then I removed the nut that was holding the hub in place.


I had to use a 3 jaw puller to get the hub off the steering shaft.


This is the Momo adapter hub for a GM steering column. If anyone needs it, PM me.


This is the new NRG hub. None of these parts came with any instructions. I am not exactly sure why the hub has a ground wire on it...


This is the hub that bolts to the steering wheel and snaps on the receiver that is bolted to the steering shaft.


This is the finishd column with the receiver hub bolted to it.


To release the steering wheel from the column, the ring under the steering wheel is pulled back...


and the steering wheel comes off, along with the hub.


It will be a lot easier to work under the dash without the steering wheel in the way and it adds a small level of theft protection to the whole car.

Andrew
__________________
Instagram @projectgattago
I offer remote Holley EFI tuning.
I deliver what EFI promises.
Please get in touch if I can be of service.
My YouTube Channel
Reply With Quote
The Following 5 Users Say Thank You to andrewb70 For This Useful Post:
camcojb (05-07-2023), Goosesdad (05-07-2023), Ketzer (05-08-2023), syborg tt (05-12-2023), WSSix (05-11-2023)
  #153  
Old 05-11-2023, 08:35 PM
WSSix WSSix is offline
Lateral-g Supporting Member
 
Join Date: Nov 2008
Location: Dunwoody, GA
Posts: 6,298
Thanks: 664
Thanked 581 Times in 471 Posts
Default

Fantastic work on the exhaust. Good luck making September, Andrew.
__________________
Trey

Current rides: 2000 BMW 540i/6 and 86 C10.

Former ride: 1979 Trans Am WS6: LT1/T56, Kore 3 C5/6 brakes, BMW 18in rims
Reply With Quote
The Following User Says Thank You to WSSix For This Useful Post:
andrewb70 (05-12-2023)
  #154  
Old 05-12-2023, 09:17 PM
andrewb70's Avatar
andrewb70 andrewb70 is offline
Lateral-g Supporting Vendor
 
Join Date: Jul 2005
Posts: 852
Thanks: 209
Thanked 444 Times in 201 Posts
Default

With the car now in my home garage I am able to spend a hour or two here and there and knock out little projects. Just like the old saying about how one might eat an elephant...

This picture is at a little bit of an odd angle, but it shows the finished turbo drain. While the car was at Hotrod Express, I asked Josh to put a bead in the 5/8" stainless tube that we used to extend the drain pipe. There is also a little section of 5/8" oil safe rubber hose that goes from the tube to the oil drain on the side of the oil pan. I used Gates heat shrink clamps on the hose. The stainless tube also has a silicone/fiberglass fire shield over it.


This picture is also at a bit of an odd angle, but it shows how the heater hoses come down from the water pump and under the up-pipe. There is fire sleeving over the top of the hose where it passes closest to the up-pipe.


Here is the view from the top. Everything fits very closely together, but there is just enough room to turn fasteners and fittings. I also used the Gates heat shrink clamps on the heater hoses.


I took the intake off again so that I can clean everything and get it ready for Cerakote. Here I am mocking up the little silicone plugs that I will use to seal off machined and tapped holes.


She is looking more apart than before, but progress is being made.


Andrew
__________________
Instagram @projectgattago
I offer remote Holley EFI tuning.
I deliver what EFI promises.
Please get in touch if I can be of service.
My YouTube Channel
Reply With Quote
The Following User Says Thank You to andrewb70 For This Useful Post:
camcojb (05-12-2023)
  #155  
Old 05-13-2023, 09:43 PM
andrewb70's Avatar
andrewb70 andrewb70 is offline
Lateral-g Supporting Vendor
 
Join Date: Jul 2005
Posts: 852
Thanks: 209
Thanked 444 Times in 201 Posts
Default

I have been watching the weather forecast, looking for a partly sunny day, with low wind and no rain. Well, today was that perfect day. I got started in the morning and started my Cerakote shop.


I had 4 parts to coat: compressor housing, charge pipe, intake lid and intake base (not pictured).


This guy was super helpful for cleaning. I filled it up with acetone, pressurized the can, and it sprayed a beautiful, fine mist that cleaned the parts well. Everything was already bead blasted before hand. I just sprayed everything down, used a red 3M pad to clean, and sprayed again. Then I used a MAP gas torch to heat the parts and evaporate all of the acetone.


I am using the Cerakite C coating, in the same burnt bronze color that I used on the valley cover and the front cover. You put down a light coat and immediately go over it with a heavier coat. It looks amazing in the sun, because the burnt bronze has a ton of gold and copper flakes in it.


I decided to leave the intercooler in raw aluminum, but I went over all of the surfaces with the red 3M pad to give it a brushed look.


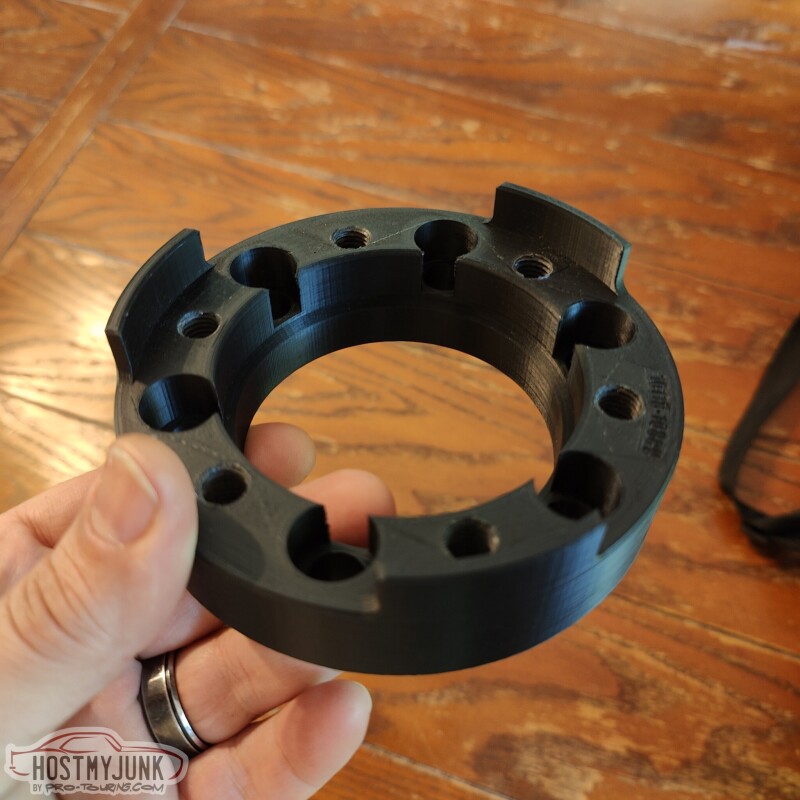
I taped off the plate with my business logo, so it would stay natural. The engraving would lose all the detail if I was to paint it.


I set everything back on the engine so that the Cerakote can fully cure.
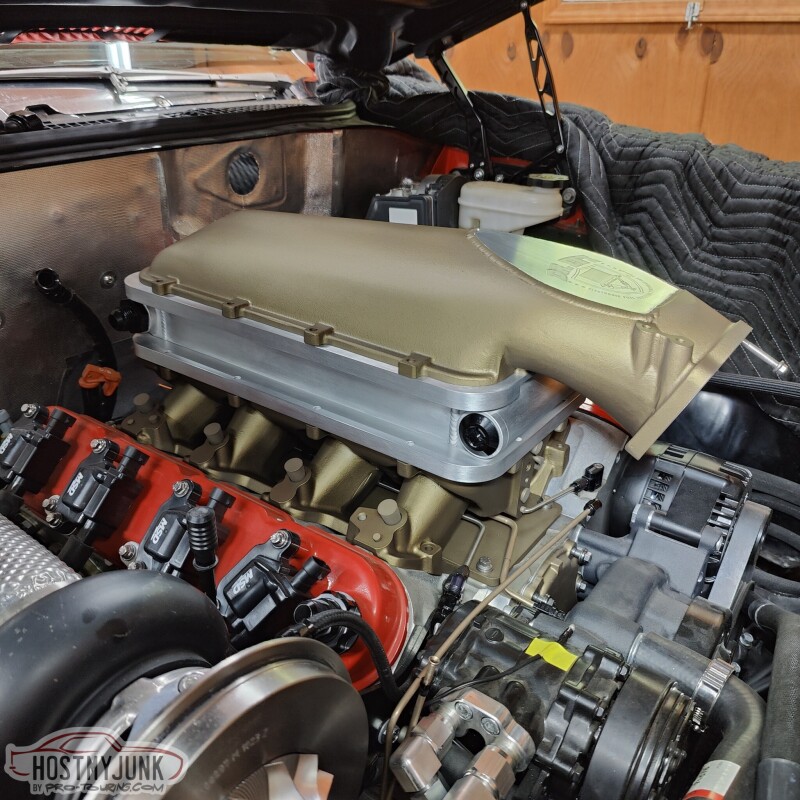


Different angle...


Here is a shot showing the compressor housing.


I did not mess around with the charge pipe because I want it to fully cure. Now, if I can only find all of the o-rings that I need to finally assemble everything....

Andrew
__________________
Instagram @projectgattago
I offer remote Holley EFI tuning.
I deliver what EFI promises.
Please get in touch if I can be of service.
My YouTube Channel
Reply With Quote
The Following 5 Users Say Thank You to andrewb70 For This Useful Post:
214Chevy (05-14-2023), camcojb (05-13-2023), dhutton (05-14-2023), Goosesdad (05-15-2023), syborg tt (07-24-2023)
  #156  
Old 05-13-2023, 10:50 PM
camcojb's Avatar
camcojb camcojb is online now
Administrator
 
Join Date: Jul 2004
Location: Wilton, CA.
Posts: 12,585
Thanks: 4,289
Thanked 1,456 Times in 630 Posts
Default

Looks nice Andrew.
__________________
Jody

PAST CAR PROJECTS

Like Lateral-G on Facebook!

Follow Lateral-G on Instagram!

SPECIAL THANKS TO:
Jacob Ehlers and Amsoil for the lubricants and degreasers for my 70 Chevelle project
Shannon at Modo Innovations for the cool billet DBW bracket
Roadster Shop for their Chevelle SPEC Chassis
Dakota Digital for their Chevelle HDX Gauge Package
Painless Performance for their wiring harness

Ron Davis Radiators for their radiator and fan assembly.
Baer Brakes for their front and rear brakes

Texas Speed and Performance for their 427 LS Stroker
American Powertrain for their ProFit Magnum T56 kit
Currie Enterprises for their 9" Third Member
Forgeline for their GF3 Wheels
McLeod Racing for their RXT street twin clutch
Ididit for their steering column
Holley for their EFI and engine parts
Lokar and Clayton Machine for their pedals and door and window handles
Morris Classic Concepts for their 3 point belts and side mirrors
Thermotec for their heat sleeve and sound deadening products
Restomod Air for their Tru Mod A/C kit
Mightymouse Solutions for their catch can
Magnaflow for their 3" exhaust system
Aeromotive for their dual Phantom fuel system
Vintage Air for their new Mid Mount LS front drive
Hydratech Braking for their hydroboost system
Borgeson for their stainless steering shaft and u joints
Eddie Motorsports for their hood and trunk hinges and misc parts
TMI Products for their seats, door panels, and dash pad
Rock Valley Antique Auto Parts for their stainless fuel tank
Reply With Quote
The Following User Says Thank You to camcojb For This Useful Post:
andrewb70 (05-14-2023)
  #157  
Old 05-14-2023, 10:28 AM
SSLance's Avatar
SSLance SSLance is offline
Senior Member
 
Join Date: Oct 2013
Location: Peoria, AZ
Posts: 2,668
Thanks: 72
Thanked 337 Times in 211 Posts
Default

Looking good Andrew! Final stretches now...
__________________
Lance
1985 Monte Carlo SS Street Car
Reply With Quote
The Following User Says Thank You to SSLance For This Useful Post:
andrewb70 (05-14-2023)
  #158  
Old 05-14-2023, 11:08 AM
214Chevy's Avatar
214Chevy 214Chevy is offline
Lateral-g Supporting Member
 
Join Date: Jul 2008
Location: DALLAS, Texas
Posts: 4,544
Thanks: 296
Thanked 537 Times in 339 Posts
Default

Very nice Andrew!! I love the bronze color on stuff...wheels, brake calipers, engine parts, you name it.
__________________
'68 C10 swb
'69 Camaro convertible
'72 Chevelle

Reply With Quote
The Following User Says Thank You to 214Chevy For This Useful Post:
andrewb70 (05-14-2023)
  #159  
Old 05-17-2023, 07:34 PM
WSSix WSSix is offline
Lateral-g Supporting Member
 
Join Date: Nov 2008
Location: Dunwoody, GA
Posts: 6,298
Thanks: 664
Thanked 581 Times in 471 Posts
Default

Agreed, the bronze is a great color choice.
__________________
Trey

Current rides: 2000 BMW 540i/6 and 86 C10.

Former ride: 1979 Trans Am WS6: LT1/T56, Kore 3 C5/6 brakes, BMW 18in rims
Reply With Quote
The Following User Says Thank You to WSSix For This Useful Post:
andrewb70 (05-20-2023)
  #160  
Old 05-24-2023, 09:37 PM
andrewb70's Avatar
andrewb70 andrewb70 is offline
Lateral-g Supporting Vendor
 
Join Date: Jul 2005
Posts: 852
Thanks: 209
Thanked 444 Times in 201 Posts
Default

I have ben working with The DriveShaft Shop for about 15 years on various projects. They were the ones that made the custom axles for my RX7 when installed a Ford Cobra Mustang rear diff in it. They were also the ones that made the single CV driveshaft for my GTO back in 2013 and also the dual CV driveshaft in the Cougar.

This time around they will be building a dual CV driveshaft for the GTO, but with a twist. They have some new, super strong CVs that they want to use on this project. The front slip yoke is already configured for it, but the rear needs an adapter, because the CV pinion yoke was made for the smaller CV. That said, they designed an adapter for me and sent me a 3D printed prototype for test fitting.


We live in truly amazing times. As Vic likes to say "That's some Buck Rogers S**t!"

Andrew
__________________
Instagram @projectgattago
I offer remote Holley EFI tuning.
I deliver what EFI promises.
Please get in touch if I can be of service.
My YouTube Channel
Reply With Quote
The Following 3 Users Say Thank You to andrewb70 For This Useful Post:
camcojb (05-24-2023), Ketzer (05-25-2023), syborg tt (07-24-2023)
Reply


Posting Rules
You may not post new threads
You may not post replies
You may not post attachments
You may not edit your posts

BB code is On
Smilies are On
[IMG] code is On
HTML code is Off

Forum Jump


All times are GMT -5. The time now is 01:36 PM.


Powered by vBulletin® Version 3.8.11
Copyright ©2000 - 2024, vBulletin Solutions Inc.
Copyright Lateral-g.net