|
|

12-13-2011, 10:15 AM
|
 |
Senior Member
|
|
Join Date: Dec 2011
Location: Fresno, CA
Posts: 108
Thanks: 0
Thanked 1 Time in 1 Post
|
|
Man, that was a lot of pages... but worth it!!!! Looks fantastic. Love the wheels/ stance. Killer. Great job.
|
12-13-2011, 04:48 PM
|
|
Senior Member
|
|
Join Date: Mar 2005
Location: Santa Ynez, CA
Posts: 886
Thanks: 2
Thanked 0 Times in 0 Posts
|
|
You need to change the thread title to "...... now at JCG"
--Eric
__________________
ET
62 Nova Coupe
62 Nova Convertible @ Ironworks Speed & Kustom
|
12-13-2011, 07:48 PM
|
 |
Lateral-g Supporting Member
|
|
Join Date: Jul 2005
Location: Scottsdale, AriDzona
Posts: 20,642
Thanks: 504
Thanked 1,077 Times in 385 Posts
|
|
Quote:
Originally Posted by DRJDVM's '69

Before heading back Tuesday, Cris and I will go over the car again after he had some time to process and brainstorm off my list, and then tie up the details.... Then we head back homeward and the ball is in his court
Now I just need to keep myself within my budget.....
|
Glad to see it's moving along Ned....
I'll have to get over there to see how it's coming when Rudy and I are down for the Grand National!
|
12-13-2011, 10:00 PM
|
 |
Senior Member
|
|
Join Date: Jul 2004
Location: Manteca, CA
Posts: 1,299
Thanks: 2
Thanked 48 Times in 26 Posts
|
|
Ok before I start a Part III build thread, I figured I would do some updates of stuff I got done before I dropped it off at JCG.
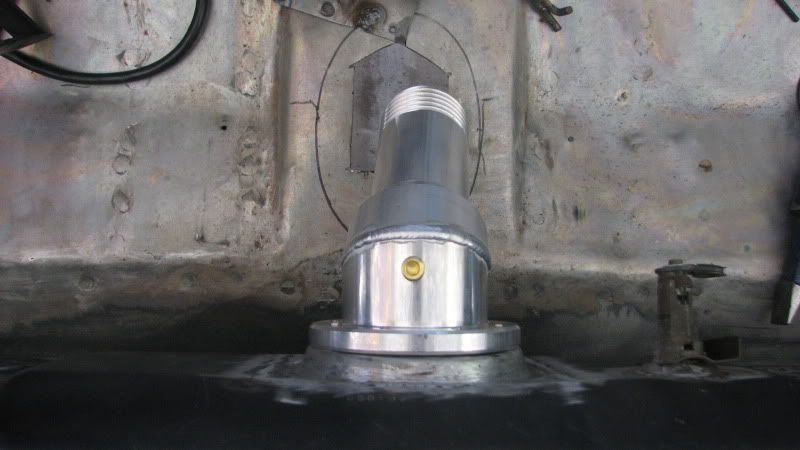
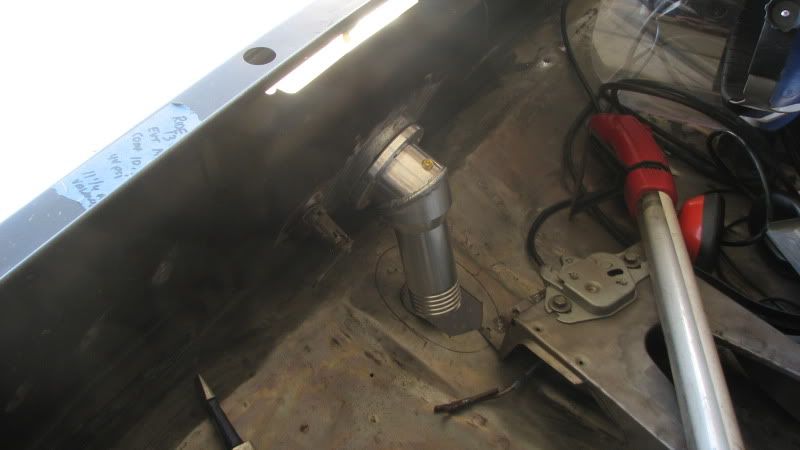
First I adapted a RideTech/Coachworks camaro fuel filler neck to work with my tailpan. I used the tailpan section from a '68 Camaro and cut out the recessed section of the donor piece and cut out a matching section on my Cuda tailpan...then it was dialed in and fully welded.


I removed all the original mounts for the stock license plate and am currently building an aluminum license plate holder that will be held on with magnets  That way I can pop it on and off easily and have the tailpan look totally clean when I want to....and fill the car with gas.....
Last edited by DRJDVM's '69; 12-13-2011 at 10:36 PM.
|
12-13-2011, 10:06 PM
|
|
Senior Member
|
|
Join Date: Jul 2004
Location: Manteca, CA
Posts: 1,299
Thanks: 2
Thanked 48 Times in 26 Posts
|
|
|
12-13-2011, 10:13 PM
|
|
Senior Member
|
|
Join Date: Jul 2004
Location: Manteca, CA
Posts: 1,299
Thanks: 2
Thanked 48 Times in 26 Posts
|
|
|
12-13-2011, 10:19 PM
|
|
Senior Member
|
|
Join Date: Jul 2004
Location: Manteca, CA
Posts: 1,299
Thanks: 2
Thanked 48 Times in 26 Posts
|
|
Then it was time for the air intake tube....decided to go with the 4 inch and keep in clean and simple....down straight from the TB, parallel to the radiator base and under the frame and into the wheelwell. I mocked it all up and Rob tacked it together for me. I'll get a good TIG man to final weld it all up
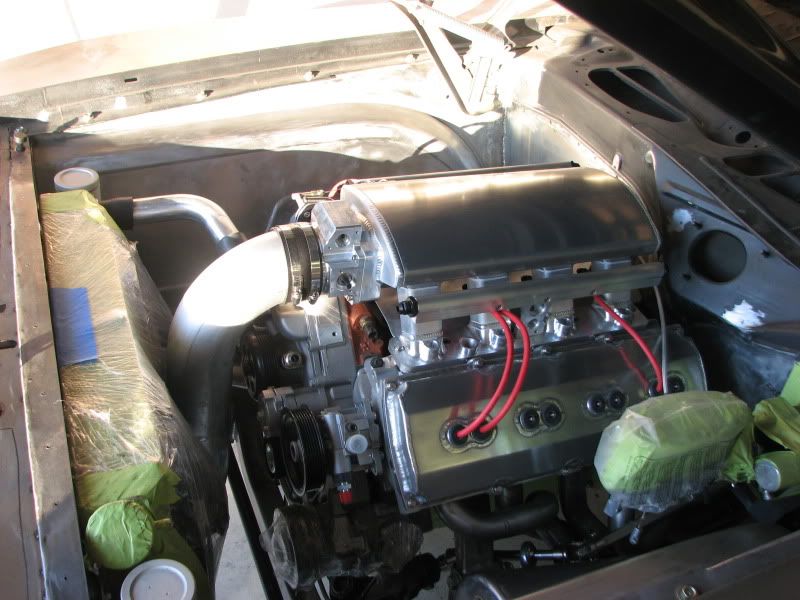


You can just barely see the tube at the corner of the front valance....I'm going to black coat the tube going into the wheelwell, so you will never see it...the car is really low too, so it should disapper pretty good.
|
12-13-2011, 10:21 PM
|
|
Senior Member
|
|
Join Date: Jul 2004
Location: Manteca, CA
Posts: 1,299
Thanks: 2
Thanked 48 Times in 26 Posts
|
|
|
12-13-2011, 10:26 PM
|
|
Senior Member
|
|
Join Date: Jul 2004
Location: Manteca, CA
Posts: 1,299
Thanks: 2
Thanked 48 Times in 26 Posts
|
|
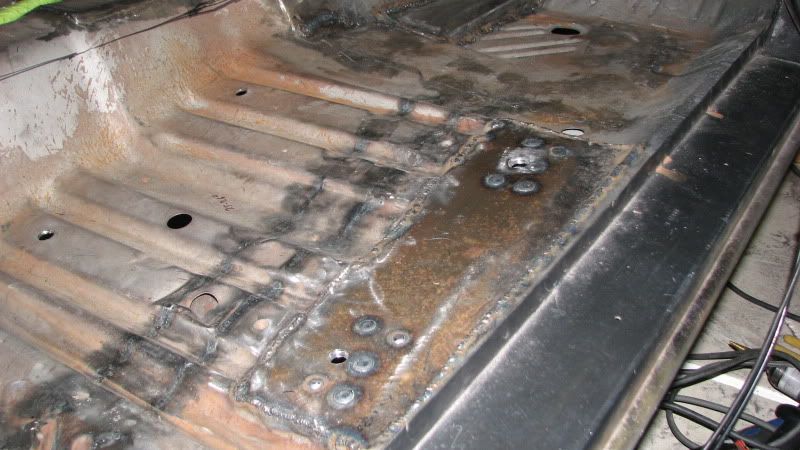
Mark at BentFab made me some frame passthrough for my fuel and brake lines... the car is really low and I didnt want to run my lines under the frame, so I used the original holes for the torsion bars and made some small block off plates.
Mounted up my fuel filter too..


Cris thinks the 10 AN line is way overkill for my 600 HP N/A motor and dealing with making the huge SS hardlines will be more hassle than its worth..so we may step down to 1/2 inch and tweak this are alittle.
Last edited by DRJDVM's '69; 12-13-2011 at 10:39 PM.
|
12-13-2011, 10:29 PM
|
|
Senior Member
|
|
Join Date: Jul 2004
Location: Manteca, CA
Posts: 1,299
Thanks: 2
Thanked 48 Times in 26 Posts
|
|
Well I think thats most of my updates.... the car is now in the passionate and capable hands of all the guys at JCG....
So once some progress is made there, I'll start a new post.... My Cuda Project Part III...now at JCG
Last edited by DRJDVM's '69; 12-13-2011 at 10:39 PM.
|
 Posting Rules
|
You may not post new threads
You may not post replies
You may not post attachments
You may not edit your posts
HTML code is Off
|
|
|
All times are GMT -5. The time now is 03:05 AM.
|


 Brian Hobaugh SCCA National Tour June 2014
 First Hemi 'Cuda Convertible Ever Built
 Short clips: Goodguys Pleasanton autocross and pit videos


 Linear Mode
