...

Go Back   Lateral-g Forums > Lateral-G Open Discussions > Project Updates
User Name
Password


Reply
 
Thread Tools Display Modes
  #81  
Old 04-02-2023, 04:10 PM
Cramer4918's Avatar
Cramer4918 Cramer4918 is offline
Senior Member
 
Join Date: Nov 2021
Posts: 152
Thanks: 102
Thanked 172 Times in 97 Posts
Default

Quote:
Originally Posted by 214Chevy View Post
The smiles on those kids faces says it all. Makes everything well worth it.
Without a doubt! They keep asking when it will be done so I can drive them to school.
__________________
-Matt-

'61 Biscayne ~ AKA BISKWIK
Reply With Quote
The Following User Says Thank You to Cramer4918 For This Useful Post:
Che70velle (04-02-2023)
  #82  
Old 04-16-2023, 09:04 PM
Cramer4918's Avatar
Cramer4918 Cramer4918 is offline
Senior Member
 
Join Date: Nov 2021
Posts: 152
Thanks: 102
Thanked 172 Times in 97 Posts
Default

I was also able to make a little more progress on the AC and heater hoses.


This is a rough beginning for the mock up of the pass through, but hopefully it turns out how I’m picturing it to go.


Sent from my iPhone using Tapatalk
__________________
-Matt-

'61 Biscayne ~ AKA BISKWIK
Reply With Quote
The Following 2 Users Say Thank You to Cramer4918 For This Useful Post:
Goosesdad (05-02-2023), syborg tt (07-31-2023)
  #83  
Old 04-18-2023, 04:36 PM
CHJNCSU CHJNCSU is offline
Member
 
Join Date: May 2021
Location: Indy
Posts: 46
Thanks: 2
Thanked 22 Times in 16 Posts
Default

Absolutely amazing car! I can't wait to see it finished!
Reply With Quote
The Following User Says Thank You to CHJNCSU For This Useful Post:
Cramer4918 (04-18-2023)
  #84  
Old 05-01-2023, 11:36 AM
Cramer4918's Avatar
Cramer4918 Cramer4918 is offline
Senior Member
 
Join Date: Nov 2021
Posts: 152
Thanks: 102
Thanked 172 Times in 97 Posts
Default Introducing BISKWIK

Hello Everyone! Well, the cowl hood is no more. I ended up trading it for a steel hood. I really like the lines of the ‘61 hood, more than I like a cowl hood apparently. It is not perfect, but it is factory steel and I’m good with that. Pics are from the person I traded with.


Now that I have the hood, I need to do a little work to it. It does have a bad spot on the underbracing that I would like to repair. I do not have access to a bead roller nor do I know anyone around here. Do any of you all know anyone I could get a small patch piece from that would replace this section?


If you can or if you know someone who can, PLEASE let me know! Thank you!


Sent from my iPhone using Tapatalk
__________________
-Matt-

'61 Biscayne ~ AKA BISKWIK

Last edited by Cramer4918; 05-03-2023 at 02:06 PM.
Reply With Quote
  #85  
Old 05-01-2023, 11:47 AM
Cramer4918's Avatar
Cramer4918 Cramer4918 is offline
Senior Member
 
Join Date: Nov 2021
Posts: 152
Thanks: 102
Thanked 172 Times in 97 Posts
Default

I am also working on modifying a brake booster bracket to work for power brakes. I did not take pics of the interference, but let’s just say it was sitting in #7 coil.
I managed to butcher the bracket and modify the mount orientation to gain clearance.

This is the original bracket


This is what I was able to do. Forgive my skills, I am teaching myself how to weld with this build and I don’t have a bunch of fancy tools. Just getting things done!


It is just tacked in place now until I can check fitment.


Sent from my iPhone using Tapatalk
__________________
-Matt-

'61 Biscayne ~ AKA BISKWIK
Reply With Quote
The Following User Says Thank You to Cramer4918 For This Useful Post:
andrewb70 (05-07-2023)
  #86  
Old 05-01-2023, 11:50 AM
Cramer4918's Avatar
Cramer4918 Cramer4918 is offline
Senior Member
 
Join Date: Nov 2021
Posts: 152
Thanks: 102
Thanked 172 Times in 97 Posts
Default

The bracket modification gained about 1 1/2” more clearance outward.


I did not feel like dealing with dripping brake fluid, so I just bent the master cylinder out of the way. I am making new brake lines anyway.

This is my next hurdle to clear…


Wish me luck!


Sent from my iPhone using Tapatalk
__________________
-Matt-

'61 Biscayne ~ AKA BISKWIK
Reply With Quote
The Following 3 Users Say Thank You to Cramer4918 For This Useful Post:
214Chevy (05-10-2023), Roscoe03 (01-14-2024), syborg tt (07-31-2023)
  #87  
Old 05-01-2023, 04:13 PM
ScotI ScotI is offline
Senior Member
 
Join Date: Feb 2005
Location: Dallas TX
Posts: 623
Thanks: 68
Thanked 165 Times in 122 Posts
Default

Much can be assumed just looking @ images.
What exactly is the 'next hurdle' ?
Reply With Quote
  #88  
Old 05-01-2023, 07:10 PM
Cramer4918's Avatar
Cramer4918 Cramer4918 is offline
Senior Member
 
Join Date: Nov 2021
Posts: 152
Thanks: 102
Thanked 172 Times in 97 Posts
Default

Quote:
Originally Posted by ScotI View Post
Much can be assumed just looking @ images.
What exactly is the 'next hurdle' ?

That was my mistake. I posted before finishing my statement.

I need to work on the clearances for the mounting bolt and brake booster pushrod. The linkage will need to share the same general area and I need to figure out the geometry of how I can get everything to work cohesively.


Sent from my iPhone using Tapatalk
__________________
-Matt-

'61 Biscayne ~ AKA BISKWIK
Reply With Quote
The Following User Says Thank You to Cramer4918 For This Useful Post:
syborg tt (07-31-2023)
  #89  
Old 07-29-2023, 05:18 PM
Cramer4918's Avatar
Cramer4918 Cramer4918 is offline
Senior Member
 
Join Date: Nov 2021
Posts: 152
Thanks: 102
Thanked 172 Times in 97 Posts
Default

Man! It has been a minute since I’ve updated. I do apologize for that. The kids got out from school and I haven’t worked on it since they’ve been out until today. I got a little bit accomplished.

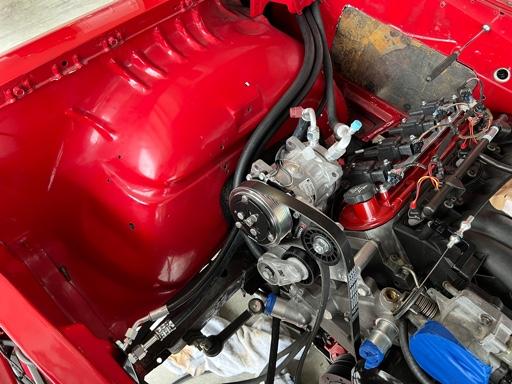
I put some heat shield on the starter wires that run by the manifold.


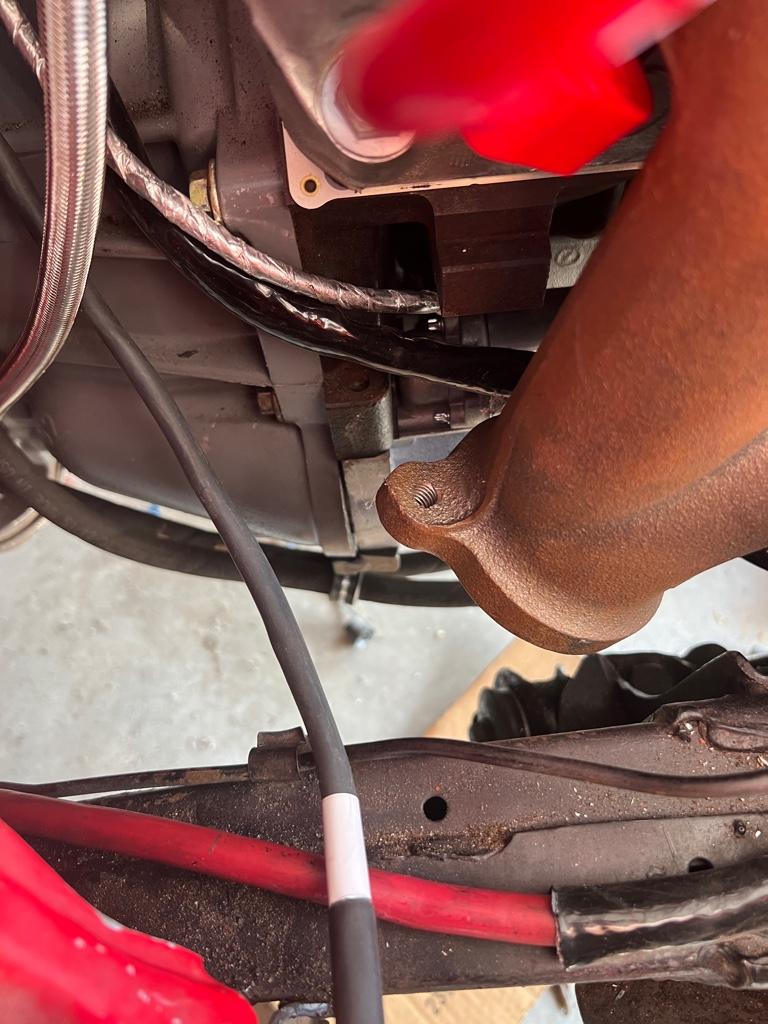
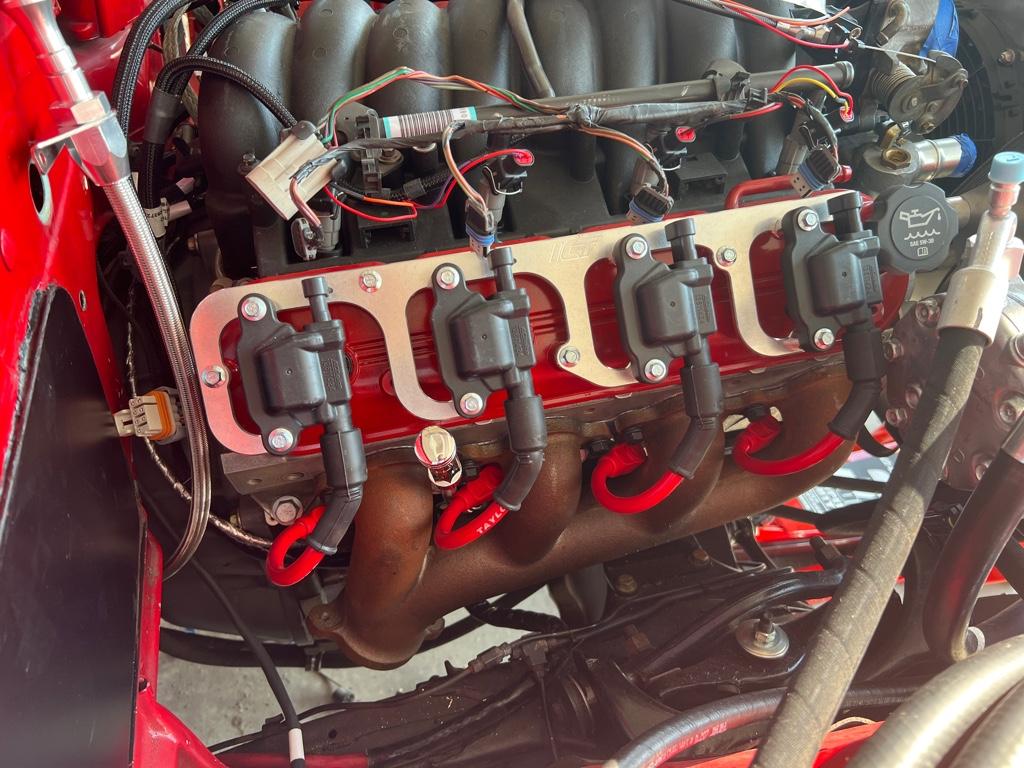
As you can see, I have the passenger manifold installed finally along with the oil dipstick, installed the plugs and checked the fit of the plug wires. These will do for now, but I my go with a ceramic boot in the future.


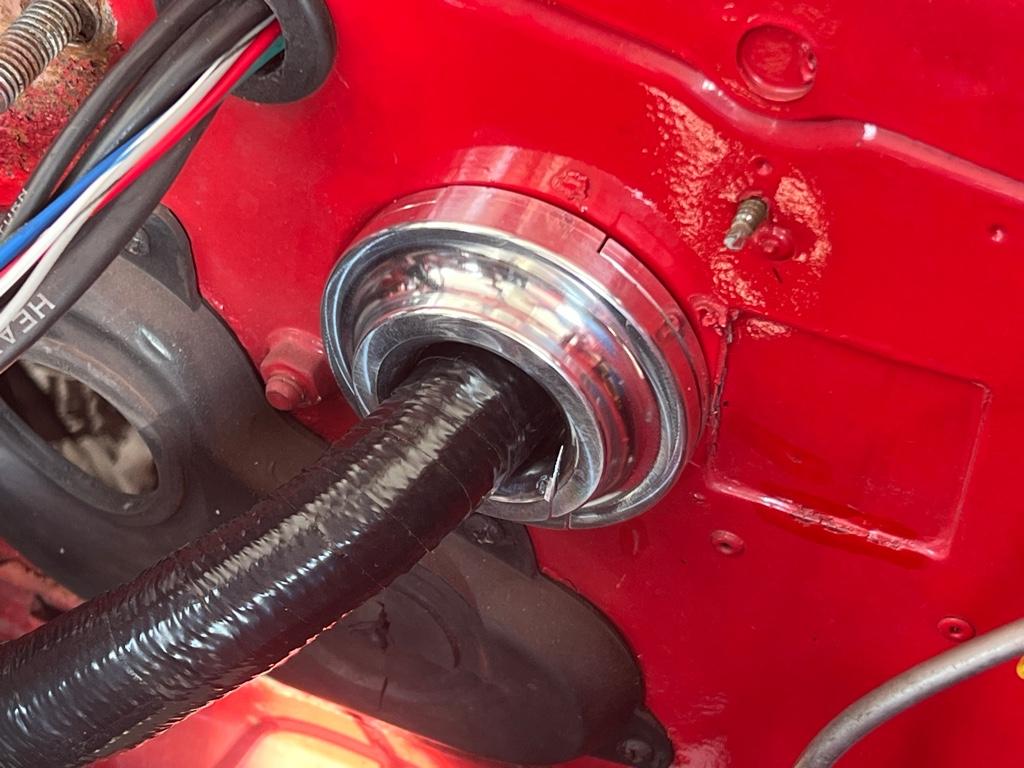
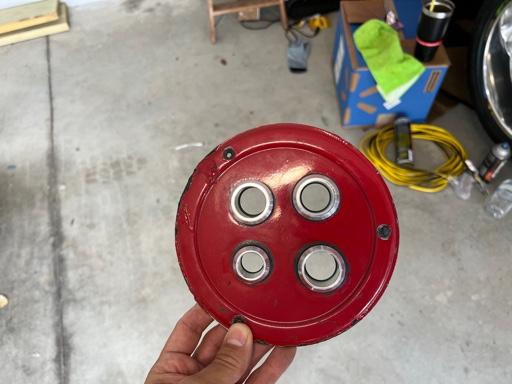
I did not like how I had the Terminator Max harness ran into the engine compartment, so I purchased the billet bulkhead from Sharpe Performance. It s a really nice piece and install was fairly simple.


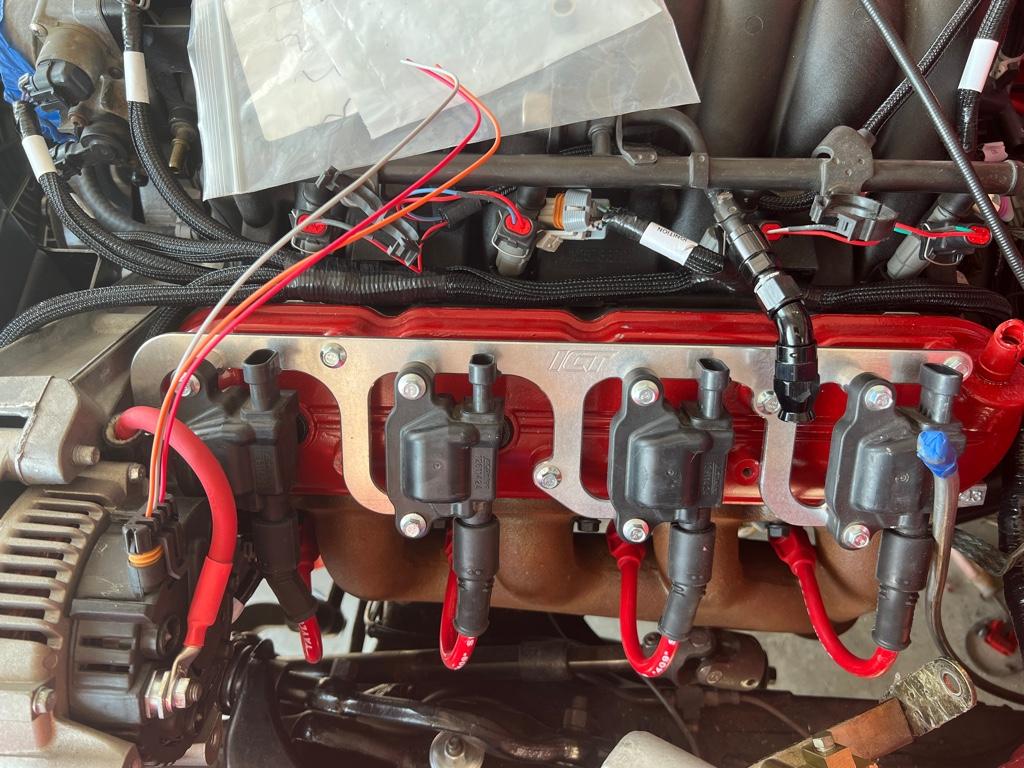
I picked up a couple more coils that I was lacking and installed them. There is plenty of clearance on the driver’s side for the plug wire boots. I also ran my charge cable from the alternator. I just need to wire it up next.


I also managed to get a little more of the sound deadener installed. I will be tidying up the wiring shortly and installing the gauge cluster.


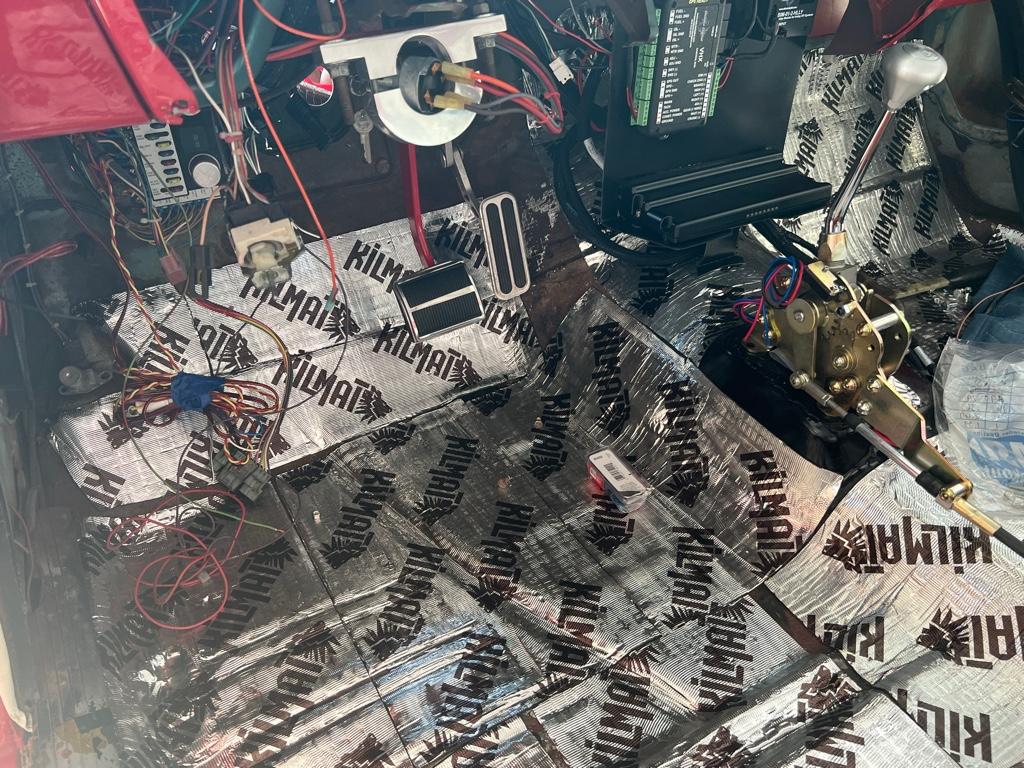
The Vintage Air unit will be installed but not wired up. The harness for the controls is for an AC equipped car. Mine did not have AC originally, so I will need to purchase the correct harness and controls. That will be put on the back burner as I need to allocate funds to getting BISKWIK running. Hopefully I’ll be able to fire it up soon!

I’ll try to get more work done soon and update everyone when I can.


Sent from my iPhone using Tapatalk
__________________
-Matt-

'61 Biscayne ~ AKA BISKWIK

Last edited by Cramer4918; 10-10-2023 at 09:27 PM.
Reply With Quote
The Following 3 Users Say Thank You to Cramer4918 For This Useful Post:
camcojb (07-29-2023), Roscoe03 (01-14-2024), syborg tt (07-31-2023)
  #90  
Old 07-31-2023, 09:45 PM
syborg tt's Avatar
syborg tt syborg tt is online now
Lateral-g Supporting Member
 
Join Date: Jun 2005
Posts: 8,132
Thanks: 4,596
Thanked 1,567 Times in 852 Posts
Default

I would reach out to Boris at Street Machinery in Ohio as he would be the guy.

https://www.facebook.com/street.machinery

Tell him Marty said hi (( we sold him a 62 Bubble Top ))

Quote:
Originally Posted by Cramer4918 View Post
Now that I have the hood, I need to do a little work to it. It does have a bad spot on the underbracing that I would like to repair. I do not have access to a bead roller nor do I know anyone around here. Do any of you all know anyone I could get a small patch piece from that would replace this section?


If you can or if you know someone who can, PLEASE let me know! Thank you!


Sent from my iPhone using Tapatalk
__________________
marty-mj
Is a car ever really done???? It's like a ball of yarn unwinding, that has no end... Author DKz Garage

Projects - Syborg TT 4.3l v6 Mini-Truck, 2nd Chance Camaro & SLP575 Bumble Bee - 4Sale
Reply With Quote
The Following 2 Users Say Thank You to syborg tt For This Useful Post:
camcojb (08-01-2023), Roscoe03 (01-14-2024)
Reply


Posting Rules
You may not post new threads
You may not post replies
You may not post attachments
You may not edit your posts

BB code is On
Smilies are On
[IMG] code is On
HTML code is Off

Forum Jump


All times are GMT -5. The time now is 03:15 PM.


Powered by vBulletin® Version 3.8.11
Copyright ©2000 - 2024, vBulletin Solutions Inc.
Copyright Lateral-g.net