|
I recently owned and sold my �68 Pro-Touring Camaro. I had
this car for about 4 years, so after growing tired of it I wanted to do
something else. I found a barn fresh �66 Chevelle, in great condition. I had
planned on starting the build on this car very soon, but this �70 Nova fell into
my lap, and I just couldn�t pass up an original, non screwed up car.
_small.JPG)
_small.JPG)
_small.JPG)
_small.JPG)
So, I bought the car from the original owner who was from my
home town of Wentzville MO. My first car was a �72 Nova, so I always had my e_small.jpg) ye
on this once, since I�ve always been attracted to original untouched cars to use
as a builder. That was about 13 years ago, and it did end up in my hands. The
car look much better 50 feet away then it was up close. Obviously the old guy
that owned it had a few fender benders. At one time he had wrecked the front end
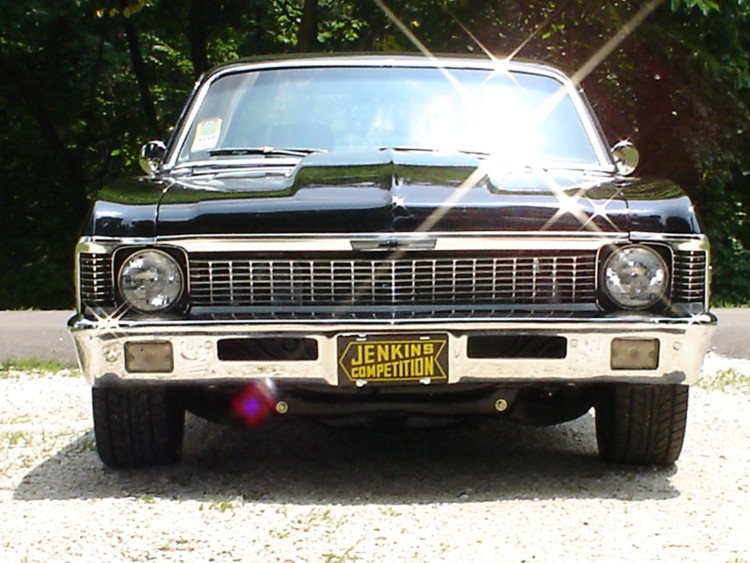
bad enough to need different front fenders, and hood. I ye
on this once, since I�ve always been attracted to original untouched cars to use
as a builder. That was about 13 years ago, and it did end up in my hands. The
car look much better 50 feet away then it was up close. Obviously the old guy
that owned it had a few fender benders. At one time he had wrecked the front end
bad enough to need different front fenders, and hood. I
_small.jpg) realized
this when I disassembled the car. It was then I noticed the smaller front fender
turn signal markers, from the �68-69 model, and the �Chevy II� emblem on the
hood, which was only available on the �68 models. The drivers� side fender still
had some pretty serious damage, so they either put a damaged fender on it, or he
had a different accident. Luckily there was no frame damage. The passenger side
rear quarter was also replace somewhere along its life. realized
this when I disassembled the car. It was then I noticed the smaller front fender
turn signal markers, from the �68-69 model, and the �Chevy II� emblem on the
hood, which was only available on the �68 models. The drivers� side fender still
had some pretty serious damage, so they either put a damaged fender on it, or he
had a different accident. Luckily there was no frame damage. The passenger side
rear quarter was also replace somewhere along its life.
Working out of the 2 car area of my homes 3 car garage, all
the work was done there. From tear down, engine assembly, body and paint, to
final assembly. I started on the car right aroun_small.jpg) d
the 1st of the year, and I knew I wanted it done by the first weekend of July
for GoodGuys DesMoines. Since I�d only be able to work nights and weekends, I
knew were all my free time would be spent. Luckily I had help from other members
of my family. My brother and I did all the body work, he did all the painting,
and also helped with final assembly. My parents Allen and Agnes did the interior
work. My wife Erin didn�t mind all the time I put into the car, and at times
kept me motivated to keep at it. d
the 1st of the year, and I knew I wanted it done by the first weekend of July
for GoodGuys DesMoines. Since I�d only be able to work nights and weekends, I
knew were all my free time would be spent. Luckily I had help from other members
of my family. My brother and I did all the body work, he did all the painting,
and also helped with final assembly. My parents Allen and Agnes did the interior
work. My wife Erin didn�t mind all the time I put into the car, and at times
kept me motivated to keep at it.
Doing all the work myself, or with the help of a family
member really help keep costs down, as the only labor spent on the car was at
the engine machine shop. But I still spent more then my original budget plan.
Once I realized how nice the car was turning out, I couldn�t cheap out on trying
to use some of the decent original parts, or by not using the style of wheels I
knew I wanted.
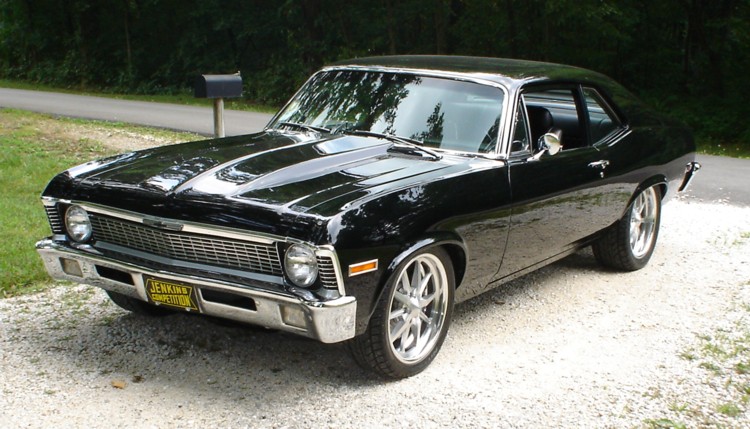
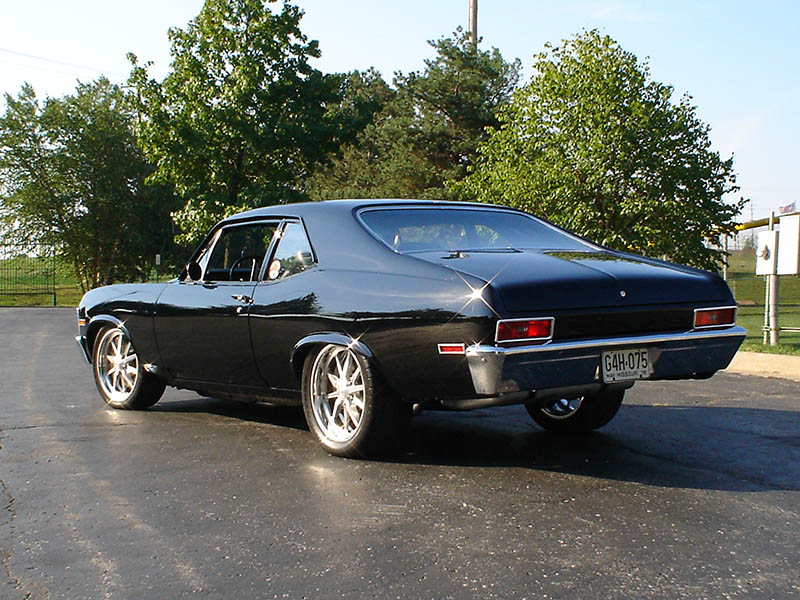
The body was in decent shape, but it was far from perfect. T_small.jpg) he
car needed front fenders, inner fenders, a core support and a hood. We also had
put a drivers side quarter panel on the car. Areas that I would consider typical
rust spots for these cars. But the rest of the body was in usable shape, as was
the floors, trunk, glass, stainless window moldings, and frame. Most of the
build time of this car was spent on the body. Since I knew I wanted it black, we
had to spend a lot of time on getting the body straight. he
car needed front fenders, inner fenders, a core support and a hood. We also had
put a drivers side quarter panel on the car. Areas that I would consider typical
rust spots for these cars. But the rest of the body was in usable shape, as was
the floors, trunk, glass, stainless window moldings, and frame. Most of the
build time of this car was spent on the body. Since I knew I wanted it black, we
had to spend a lot of time on getting the body straight.
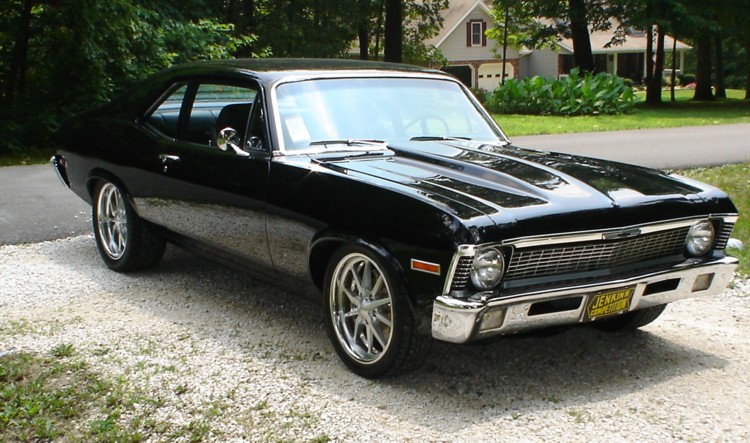
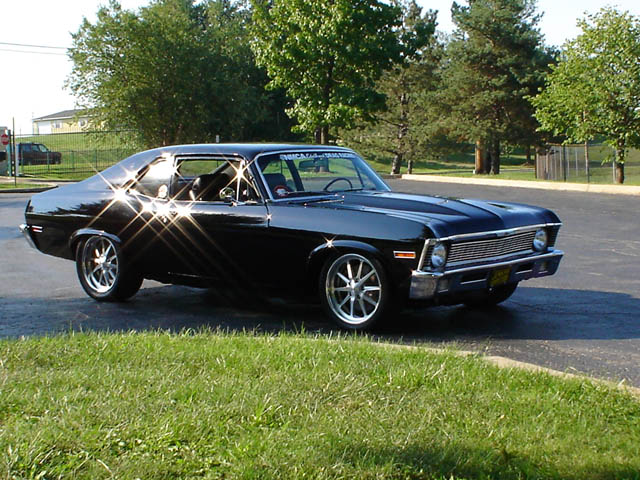
My whole idea for the car was to build it with updated
features such as brakes, suspension, transmission etc. but keep a retro type
theme to it. My version of �Retro-Touring.� I wanted to keep the bling to a
minimum, but I didn�t want a boring car either.
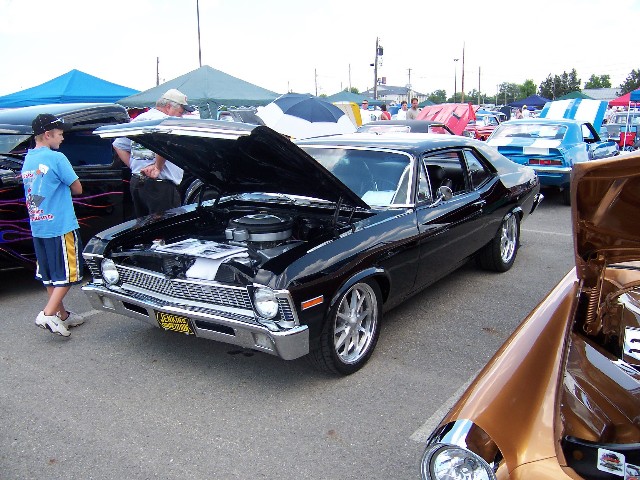
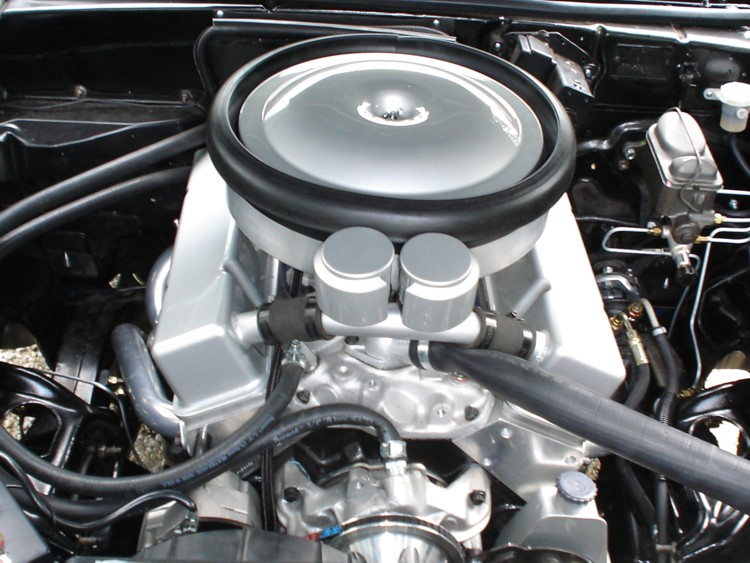
I didn�t want any chrome or billet under the hood, and I also
wanted to give the engine a vintage road race/stock look to it. For the stock
look I use the original style tower clamps, converted points distributor,
non-smoothed firewall, satin black paint on the inner fenders and firewall, and
a battery cover to make the new battery look like an original Delco unit. For
the road race look, I used a cowl induction pan and seal to utilize the cowl
hood, and I think the crossover breather tube on the valve covers help with the
road race look.
I wanted a good braking package, but I wanted to keep the
cost as low as possible. So I used rebuilt calipers from a �95 Corvette, I also
used the rotors from the corvette with the heavy duty brake option, which uses
the 13� rotors. For the rear, I wanted a good size rotor, and a caliper that has
a parking brake option. So I again used rebuilt calipers from a �93-97 LT1
Camaro. I also used rotors and caliper brackets from the same application. Since
the Nova has staggered shocks, two right side calipers and caliper brackets
where used to keep the bleeder screw pointing upwards. To continue the
�no-bling� theme, I used non cross drilled rotors, and cast non-painted or
polished calipers.
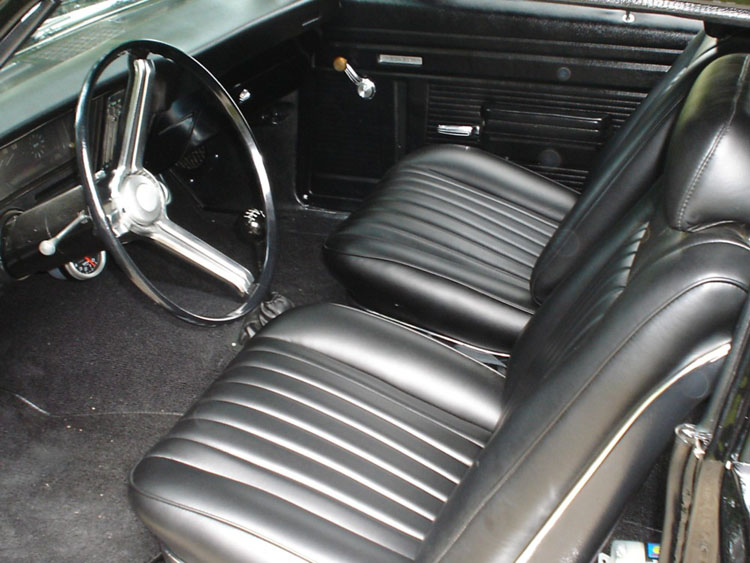
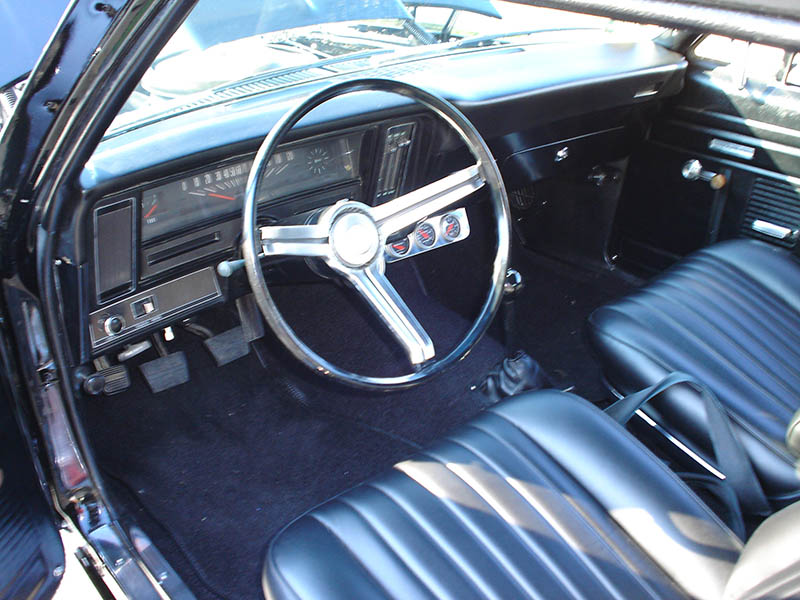
The interior was in very good shape. Since it was totally
stock, I wanted to keep that look. The car originally had a three speed manual
on the column. So I had to remove and fill the factory shifter attachment. I
knew the b_small.jpg) ench
wouldn�t offer much support in the turns, so I needed to find some buckets to
offer this support, and the fit the look I was after. After seeing what the
stock type buckets looked like, I knew they could be made to work. Since my
parents run an upholstery shop, I could modify the seats to fit my needs. To get
the seat I wanted, I had them put dense foam in the bolsters to help with
lateral support. I then picked out a stitching patter, and had them covered with
Ultra-leather. The seats do offer quite a bit of support, and they�re very
comfortable. The original am radio was still in the car and in great condition,
so I decided to keep it there, and install a more modern head unit in an unseen
area. ench
wouldn�t offer much support in the turns, so I needed to find some buckets to
offer this support, and the fit the look I was after. After seeing what the
stock type buckets looked like, I knew they could be made to work. Since my
parents run an upholstery shop, I could modify the seats to fit my needs. To get
the seat I wanted, I had them put dense foam in the bolsters to help with
lateral support. I then picked out a stitching patter, and had them covered with
Ultra-leather. The seats do offer quite a bit of support, and they�re very
comfortable. The original am radio was still in the car and in great condition,
so I decided to keep it there, and install a more modern head unit in an unseen
area.
For suspension, I wanted to keep it simple. I kept the stock
control arms, but modified the upper control arm per Guldstrand specs. I used
rubber bushings up front to avoid binding, and for a smoother ride. The front
rides on Moog 550/lb springs cut to desired ride height, and Bilstien shocks. A
Hotchkis sway bar helps control body roll. Rear suspension used Hotchkis leaf
springs, and Bilstien shocks. A 1� lowering block was addend for the desired
ride height.
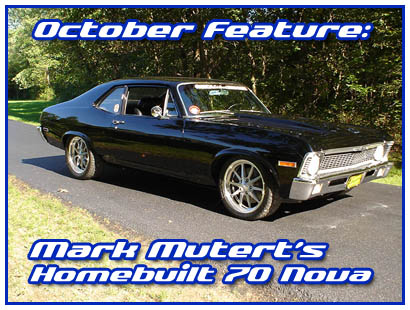
I wanted an 18� wheel, but I also didn�t want the large
wheels to make the car look too modern. So I decided on a set of Budnik
�Gassers.� I think they have a vintage style to them, and too cut down on the
flash, I ordered these with the polished hope and the satin centers.
For the engine, I wanted decent power, but I also wanted to
keep the cost down. So I decided on a 383 small block chevy. I already had the
T56 transmission, and flywheel from an LT1 camaro. Knowing this, I used a later
model 350 block which uses a one piece rear main seal. Using this block allowed
me to use my factory T56 flywheel, saving me from buying an expensive
aftermarket flywheel for an early two piece rear main block. Another advantage
of using the later model small block, is that it uses a factory style hydraulic
roller cam, which makes running a roller cam much cheaper then using a retro-fit
roller cam. So I retained the factory roller set up, and had �Clay Smith� supply
the cam. Cylinder heads are Aluminum Pro-Toplines. I had Allied Motors in St.
Charles Mo. do the machine work to my block, and they also supplied my rotating
assembly, which consist of Scat crank and rods. I assembled the engine.
____________________
Frame off.
Body and frame stripped to bare metal. Car needed a quarter, front fenders and
inner fenders, core support and hood.
Engine: 383 one piece rear main. "Clay Smith" hydraulic roller cam. Crane
Roller Rockers, Crane Roller lifters, Pro-Topline heads, Probe forged pistons,
Scat crank and rods.
Tranny: LT1 T-56.
Rear: 4.11 posi 10 bolt
Interior: Stock style bucket seats, and stock rear seat covered in ultra
leather.
Wheels: Budnik Gassers, 18x7 w/4.75" bs, 235/40 18. 18x8 w/5.5" bs, 275/40 18.
Nitto 555 tires.
Suspension: Hotchkis rear springs. Moog 550 lb. front springs. Guldstrand
upper control arm mod. Bilstien shocks.
Brakes: Front; C4 13" rotor, and caliper. Rear; LT1 Camaro 12" rotors and
calipers.

|
.JPG)
.JPG)
.JPG)
.JPG)
.jpg)
.jpg)
.jpg)
.jpg)
.jpg)
.JPG)
.JPG)
.JPG)
.JPG)
.JPG)

.JPG)
.JPG)
.JPG)
.JPG)
.JPG)