So on to the rear setup. Like I mentioned, I had designed this setup with data points from Ron. One sacred cow (keep the back seat), kept me from getting a more ideal setup, but I was willing to make that sacrafice.
What I came up with was a 3-link to replace the factory tri-angulated 4-link with the addition of a Watt's link. It almost packages completely under the stock floor/trunk pan...I say almost because the upper 3rd link bracket needs a clearance area in the trunk "shelf" above the axle.
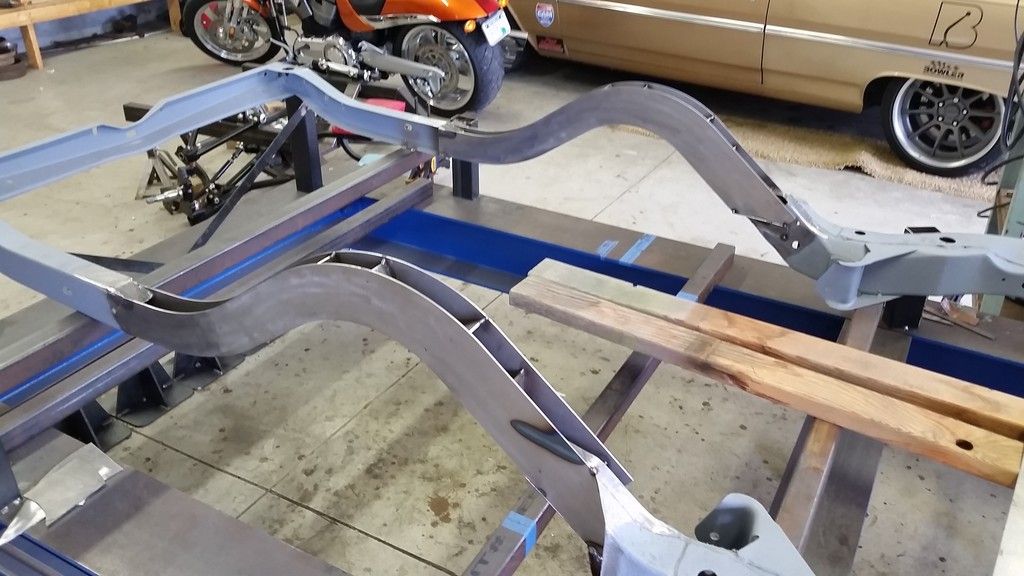
I jigged up the frame to a frame cart, setting it at ride height and tacking it down. After everything was squared up and true, I cut out the kick-up area over the axle. I drew up and had new frame rails laser cut out. They also utilize internal gusseting with tab-in-slot construction. They are really stout.
Here's the rear rail section during fab.
I originally had planned on a factory style tri-angulated 4-link with a Watts. But upon finding the CAD model going into bind with the addition of the Watts, and then confirming it with a few guys that actually had a Watts with a 4-link, I decided to go to the 3. Glad I did in hindsight, look for the link to the video below!
Ok here is the 3-link during fab/mock up (I know, the welds suck on the crossmber side plates...it was the very first thing I ever tig welded, I got better, honest!):
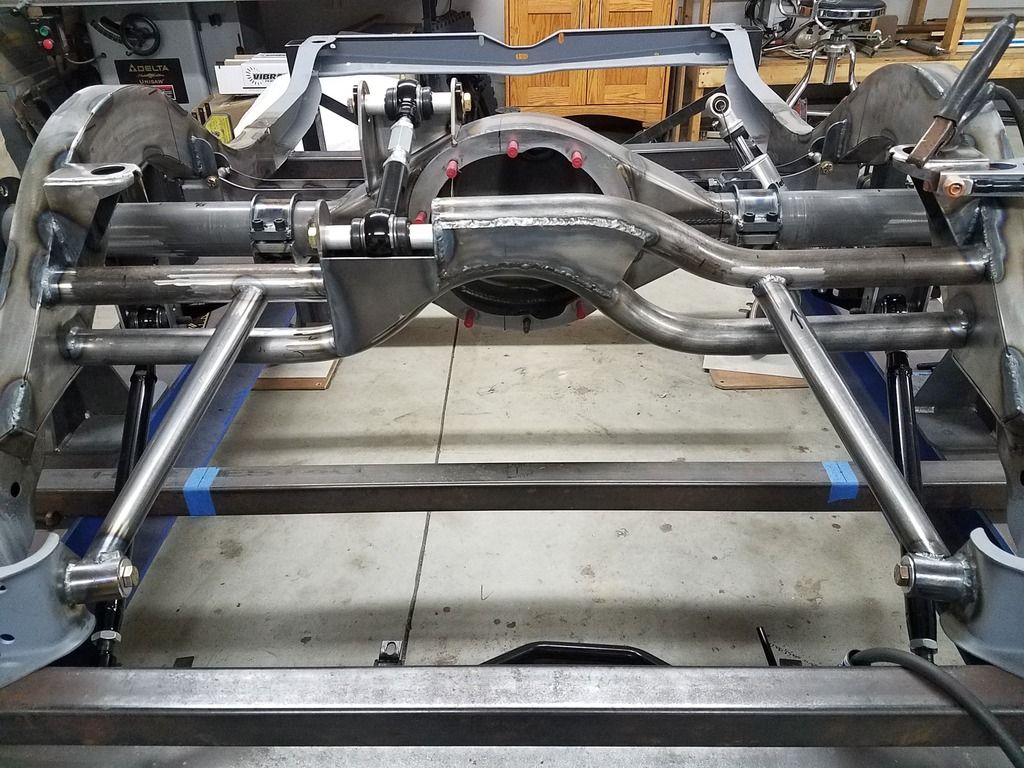
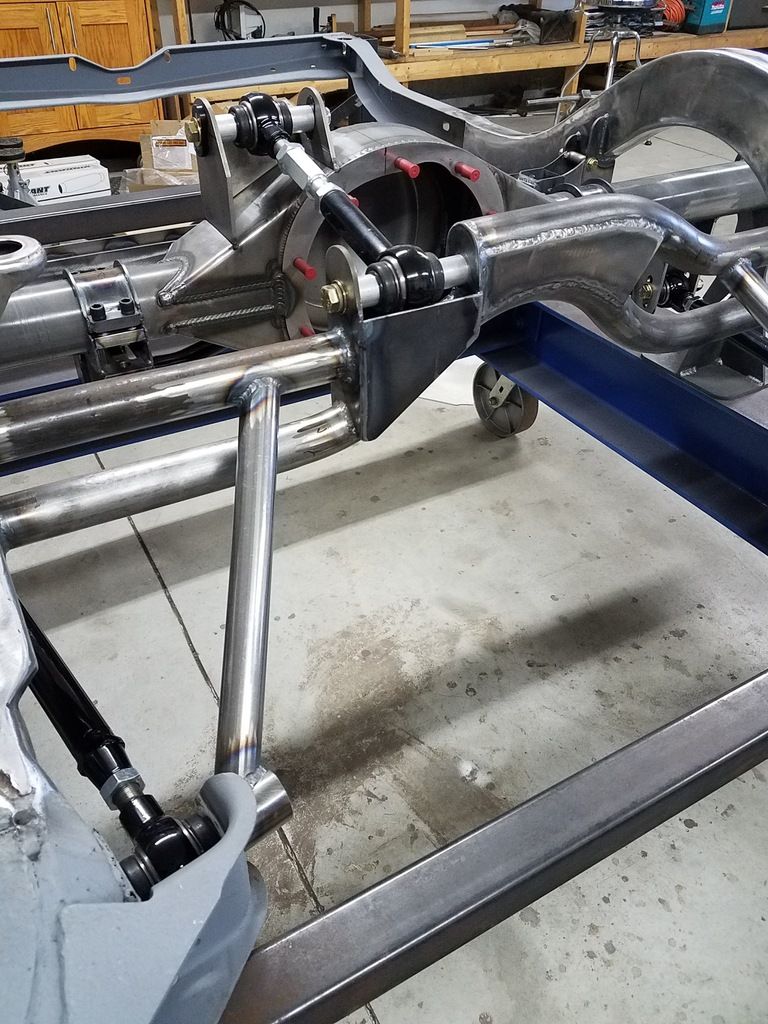
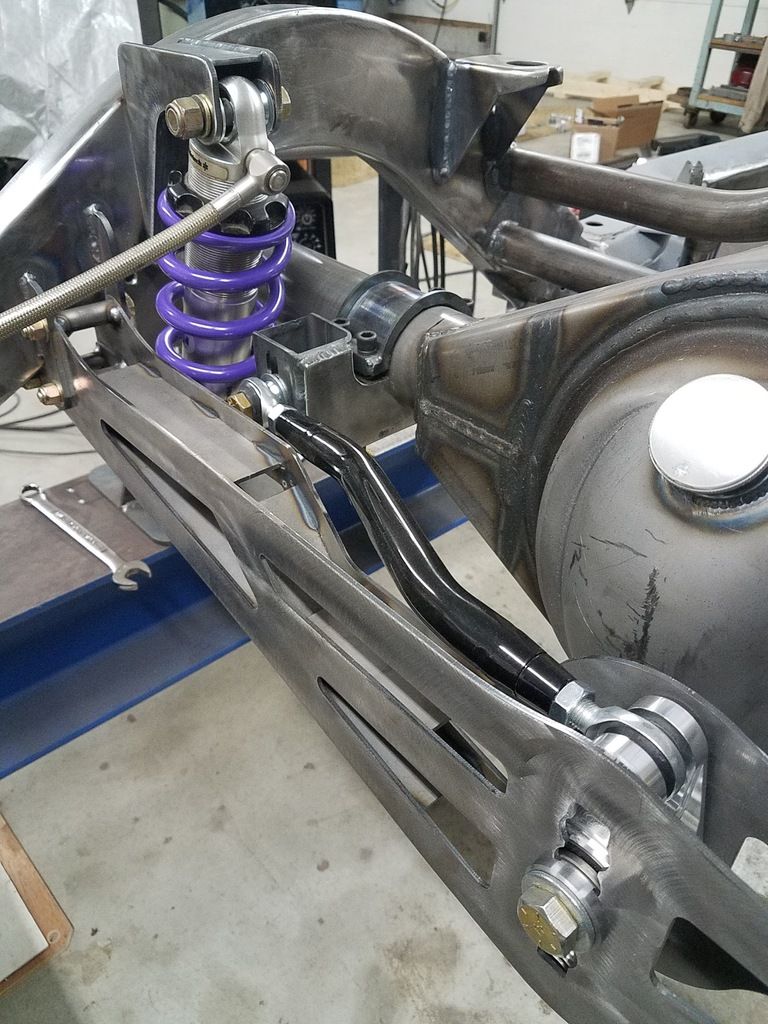
Once the axle was hung, I moved on to the Watts link, or Oberlink as it's been called. I wanted a chassis mounted bellcrank that packaged well, so this is what I came up with. It has rc adjustment from 7.5-12.5".
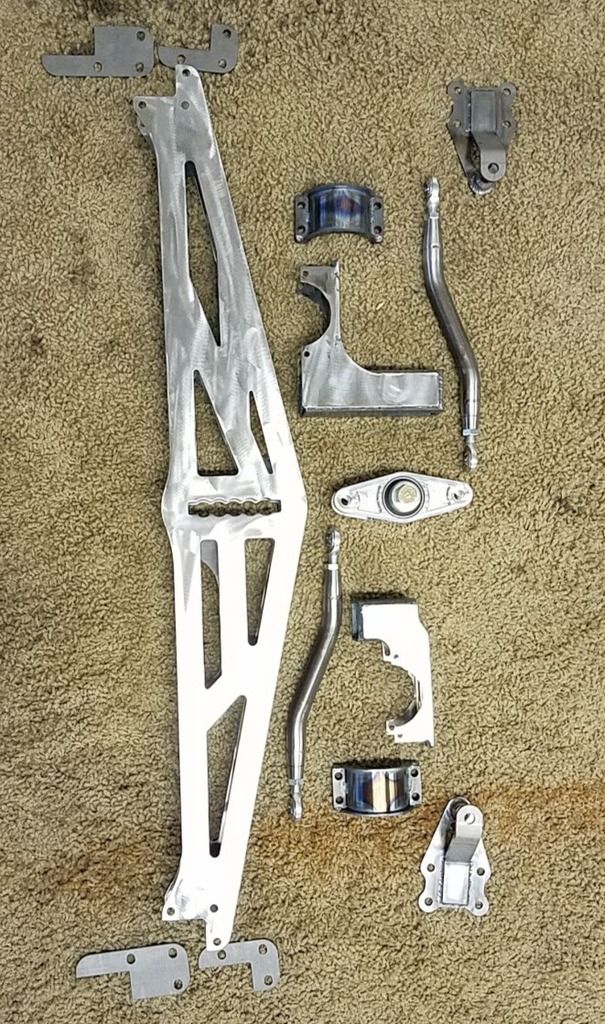
Pcs to build it (thanks UMI!):

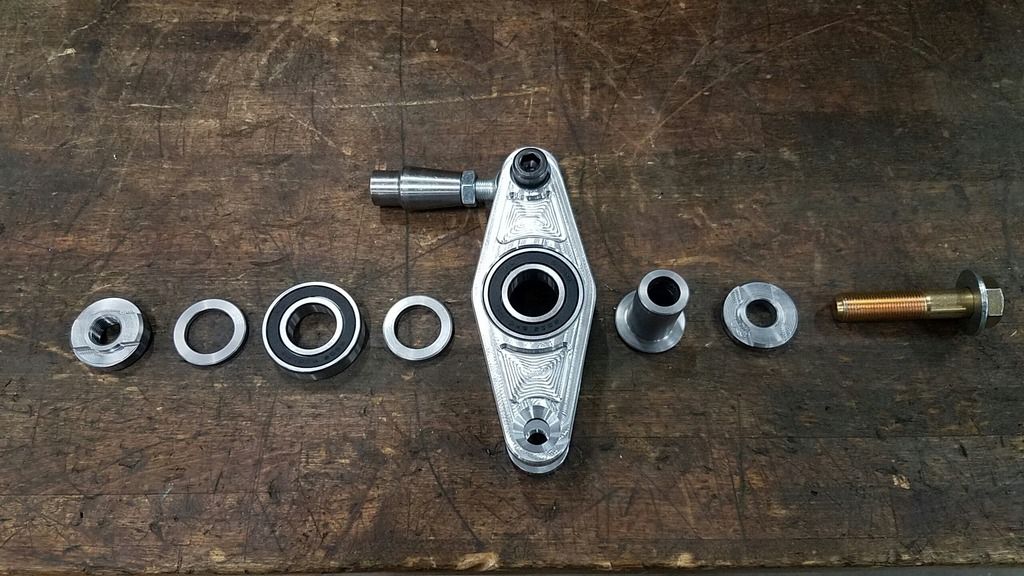
Bell crank assembly, built by myself:
Assembly:
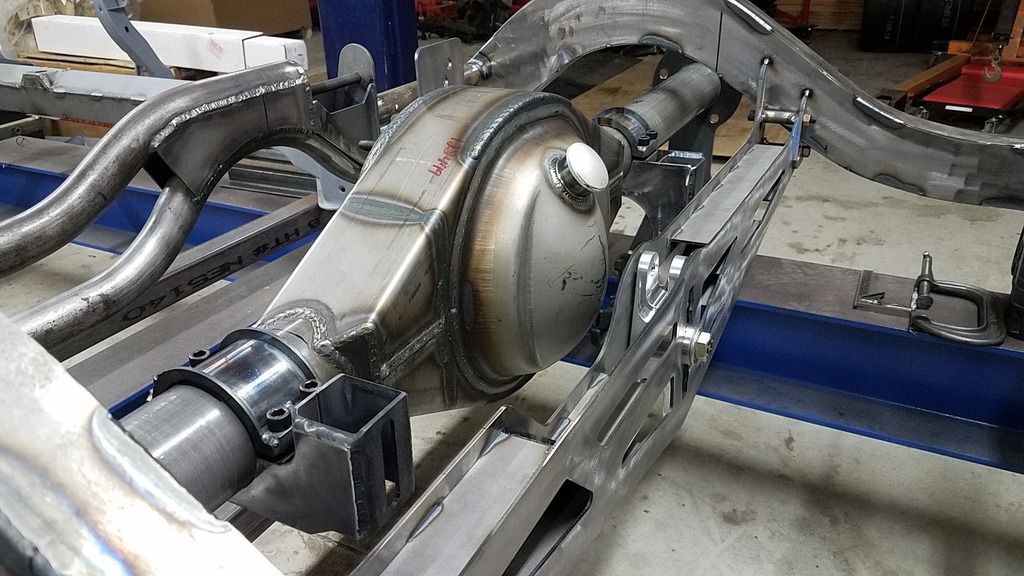
The last big part of the rear is the Strange housing and center section, a Pro HD aluminum case with a Detroit Locker and 3.70 gears, DSE C7 bearings and C6 brake brackets.

Mounted up:
And now, the cool part seeing it in action!
Next post I'll show some of the other parts that were custom made.