...

Go Back   Lateral-g Forums > Technical Discussions > Shop & Equipment
User Name
Password


Reply
 
Thread Tools Display Modes
  #1  
Old 04-22-2010, 08:30 PM
Sti_Guy's Avatar
Sti_Guy Sti_Guy is offline
Senior Member
 
Join Date: Feb 2010
Location: Renton,WA
Posts: 136
Thanks: 0
Thanked 1 Time in 1 Post
Default Mastercool Flaring Experts advice needed!

OK, so on all the forums all i hear is how great the Mastercool tool is for flaring SS lines. Sure the unit is expensive, but everyone says its great, and they wont use another tool.

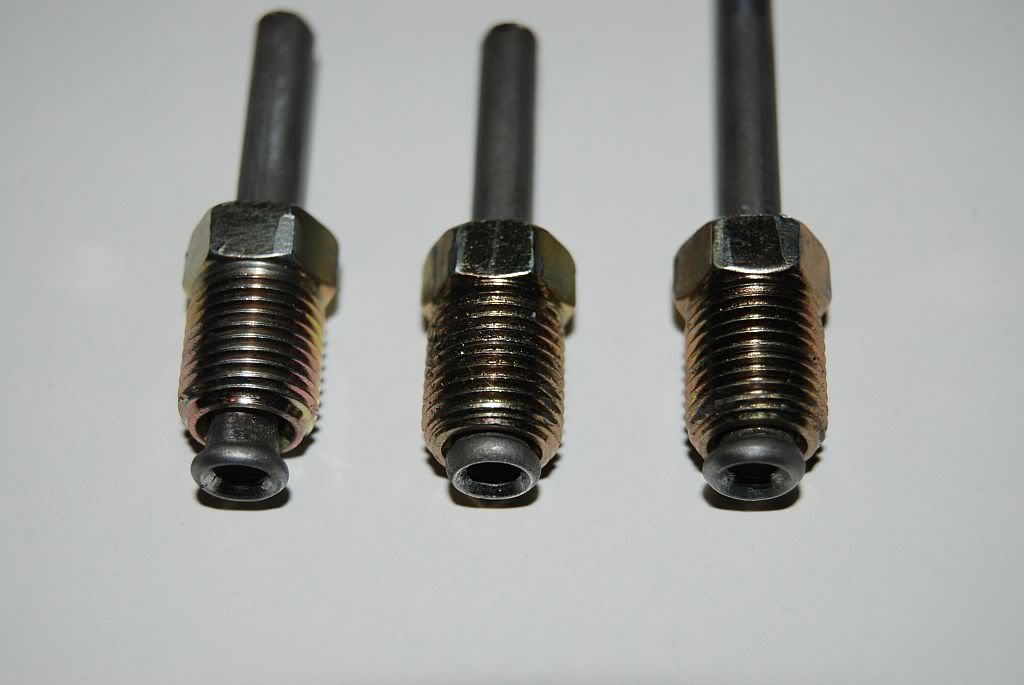
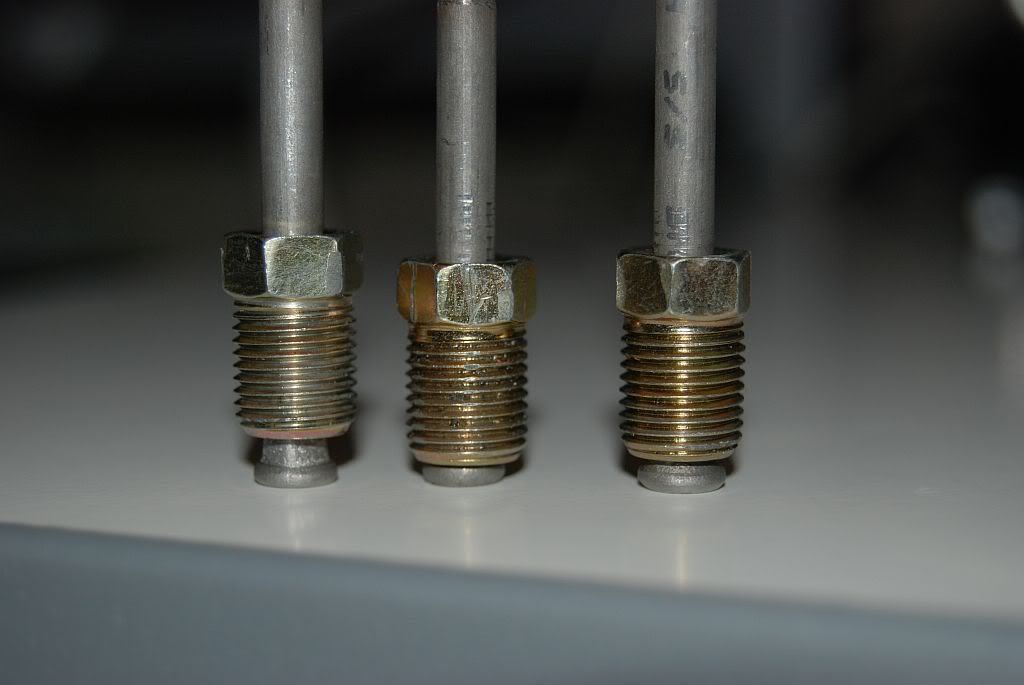
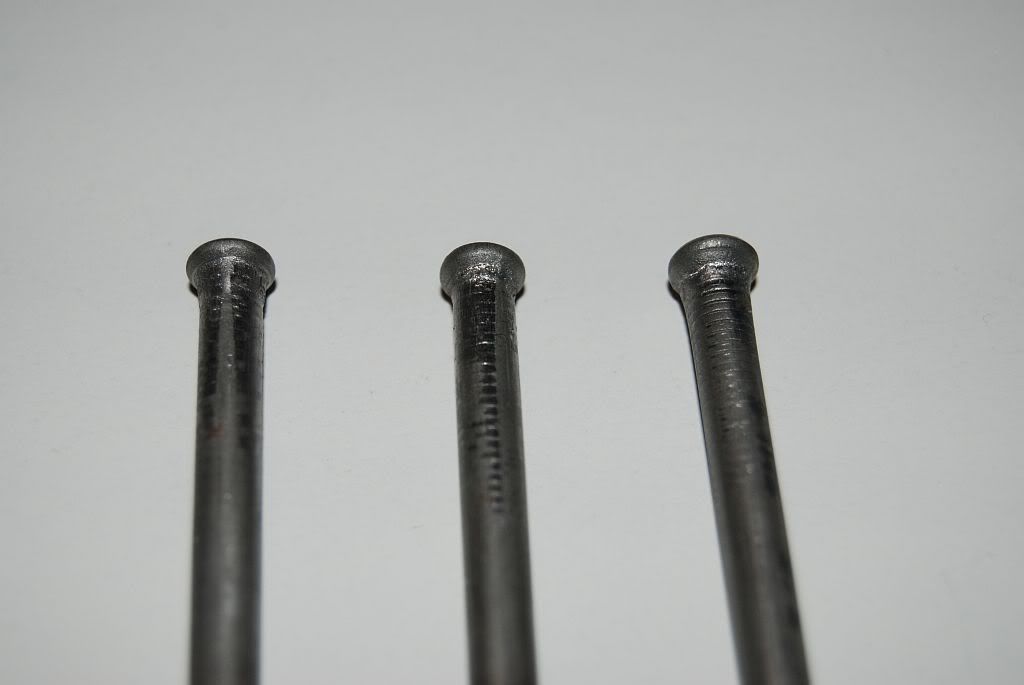
So lets see what kind of results you guys are getting, I went out and tooled up for some 3/16 inverted flare work. I'm using 3/16 304L .028 wall seamless tubing.

However i just cant seem to get what looks like a good flare.
Here are 3 examples,


My next option is to build some type of system that will allow me to test them at 1000psi
Reply With Quote
  #2  
Old 04-22-2010, 09:09 PM
GregWeld's Avatar
GregWeld GregWeld is offline
Lateral-g Supporting Member
 
Join Date: Jul 2005
Location: Scottsdale, AriDzona
Posts: 20,741
Thanks: 504
Thanked 1,080 Times in 388 Posts
Default

I made up two SS brake lines last week for a buddy -- for his new Wilwood master cylinder... they needed to be double flare to use his existing T block and Prop valve.... used my Mastercool tool -- they were perfect and didn't leak.

A couple of things - not sure how you're going about it from beginning to end - but here's what I do.

I only cut the tubing with my fine tooth body saw (tubing cutter will work harden the cut area)

I then square the end on my disc grinder (fine paper disc)

I then DEBUR the inside radius with a deburing bit on a drill

The "squaring up" on the disc grinder will turn the end (an 1/8" in) blue - that will re-anneal that end of the tube.

Then I do the double flare.

Looks like you may be clamping a bit "tight" as well...

Is the tubing you bought (are using) annealed?
Reply With Quote
  #3  
Old 04-22-2010, 10:20 PM
JRouche JRouche is offline
Senior Member
 
Join Date: Oct 2008
Location: Ventura County
Posts: 253
Thanks: 0
Thanked 0 Times in 0 Posts
Default

Ok, I shouldn't be posting cause Im no expert on ANYTHING.. But...

Ill be honest, the flares look good. #1 looks the best. The nut wont go down? Like Greg said, a lil too much clamping prolly. You raised the metal to form a burr on the outside of the tube. Thats still salvagable. Remove the burr and let the nut slide down.

#2 looks a lil short on the flare surface. Thats just a matter of getting the correct stick out. Im sure you used the same stick out for all three. So what I see is the bubble is large and limited the amount of metal for the inside flare section. Almost looks like the first op ( the bubble making operation was not far enough in, make a tighter bubble, compress it a lil more before you do the second op).

#3 doesnt look bad at all. Still maybe a lil short on the cup, but better than #2.

#1 looks like a good flare IMO. Remember, its ALL about the flare. The cup. The bubble is just there to resist the nut so it can clamp the inside flare cup to the male flare.

When doing the first op, forming the bubble, take it down far enough so it almost bends the outer edge in. Look to compress the bubble so you have an even angle on both sides of the bubble. Too short of a compression on the first stage will make for a short inner cup. The outer edge will bend before the back side of the bubble and make for a short cup.

I think you have it down. The first flare is a good one, besides the outside of the tube being a lil deformed. Looking good. JR
Reply With Quote
  #4  
Old 04-22-2010, 11:41 PM
Sti_Guy's Avatar
Sti_Guy Sti_Guy is offline
Senior Member
 
Join Date: Feb 2010
Location: Renton,WA
Posts: 136
Thanks: 0
Thanked 1 Time in 1 Post
Default

Thanks guys for the tips!
1. I'm not sure if the tubing is annealed or not.
2. Anyone notice the shoulder of the bubble it just doesn't look very clean.
3. Ill try and loosen the clamping force on the holding portion.

Anyone have a good way of knowing when, enough is enough when it comes to the pumping of the handle?

Can anyone confirm the thickness of there tubing .028 or .035?
Reply With Quote
  #5  
Old 04-23-2010, 07:33 AM
GregWeld's Avatar
GregWeld GregWeld is offline
Lateral-g Supporting Member
 
Join Date: Jul 2005
Location: Scottsdale, AriDzona
Posts: 20,741
Thanks: 504
Thanked 1,080 Times in 388 Posts
Default

When it stops -- you're done.

You are aligning the end of the tube with the holding/forming block to start right?

I thread the handle to have the die against the tube. Close the valve - pump the handle - when it stops - you should be done. Back off the valve - unthread the handle to back the die off - and put in step # 2 - and do it all over again. LOL

YOU MUST USE ANNEALED SS TUBING.... SS work hardens in nanoseconds... which is why - even though I use a very fine blade to cut the tubing... I re-anneal it with the disc grinder. This also serves the purpose of squaring up the tube end.

Your tube needs to be seamless - thin wall - annealed.
Reply With Quote
  #6  
Old 04-23-2010, 07:41 AM
GregWeld's Avatar
GregWeld GregWeld is offline
Lateral-g Supporting Member
 
Join Date: Jul 2005
Location: Scottsdale, AriDzona
Posts: 20,741
Thanks: 504
Thanked 1,080 Times in 388 Posts
Default

BTW -- That is some nasty looking SS tubing you're using...

It should look as if it's almost done being polished... and takes VERY LITTLE effort to buff to gleaming - sparkling - wonderful looking tube...

I buff mine BEFORE forming it - it's easier when it's straight - and just takes a little touch up after you've formed it and terminated it.

The gold anodized fittings will buff up like chrome with very little effort.
Reply With Quote
Reply

Thread Tools
Display Modes

Posting Rules
You may not post new threads
You may not post replies
You may not post attachments
You may not edit your posts

BB code is On
Smilies are On
[IMG] code is On
HTML code is Off

Forum Jump


All times are GMT -7. The time now is 06:22 AM.


Powered by vBulletin® Version 3.8.11
Copyright ©2000 - 2025, vBulletin Solutions Inc.
Copyright Lateral-g.net