...

Go Back   Lateral-g Forums > Lateral-G Open Discussions > Project Updates
User Name
Password


Reply
 
Thread Tools Display Modes
  #1  
Old 02-07-2011, 04:35 PM
tones2SS's Avatar
tones2SS tones2SS is offline
Lateral-g Supporting Member
 
Join Date: Sep 2006
Location: Massachusetts
Posts: 8,176
Thanks: 0
Thanked 6 Times in 5 Posts
Thumbs up

Looks great Ed.
I like the colors that you have on there now. Maybe a darker blue to add a bit more contrast, in my opinion. Good luck!
Reply With Quote
  #2  
Old 02-11-2011, 07:11 PM
eddiek eddiek is offline
Junior Member
 
Join Date: Oct 2007
Posts: 17
Thanks: 0
Thanked 0 Times in 0 Posts
Default

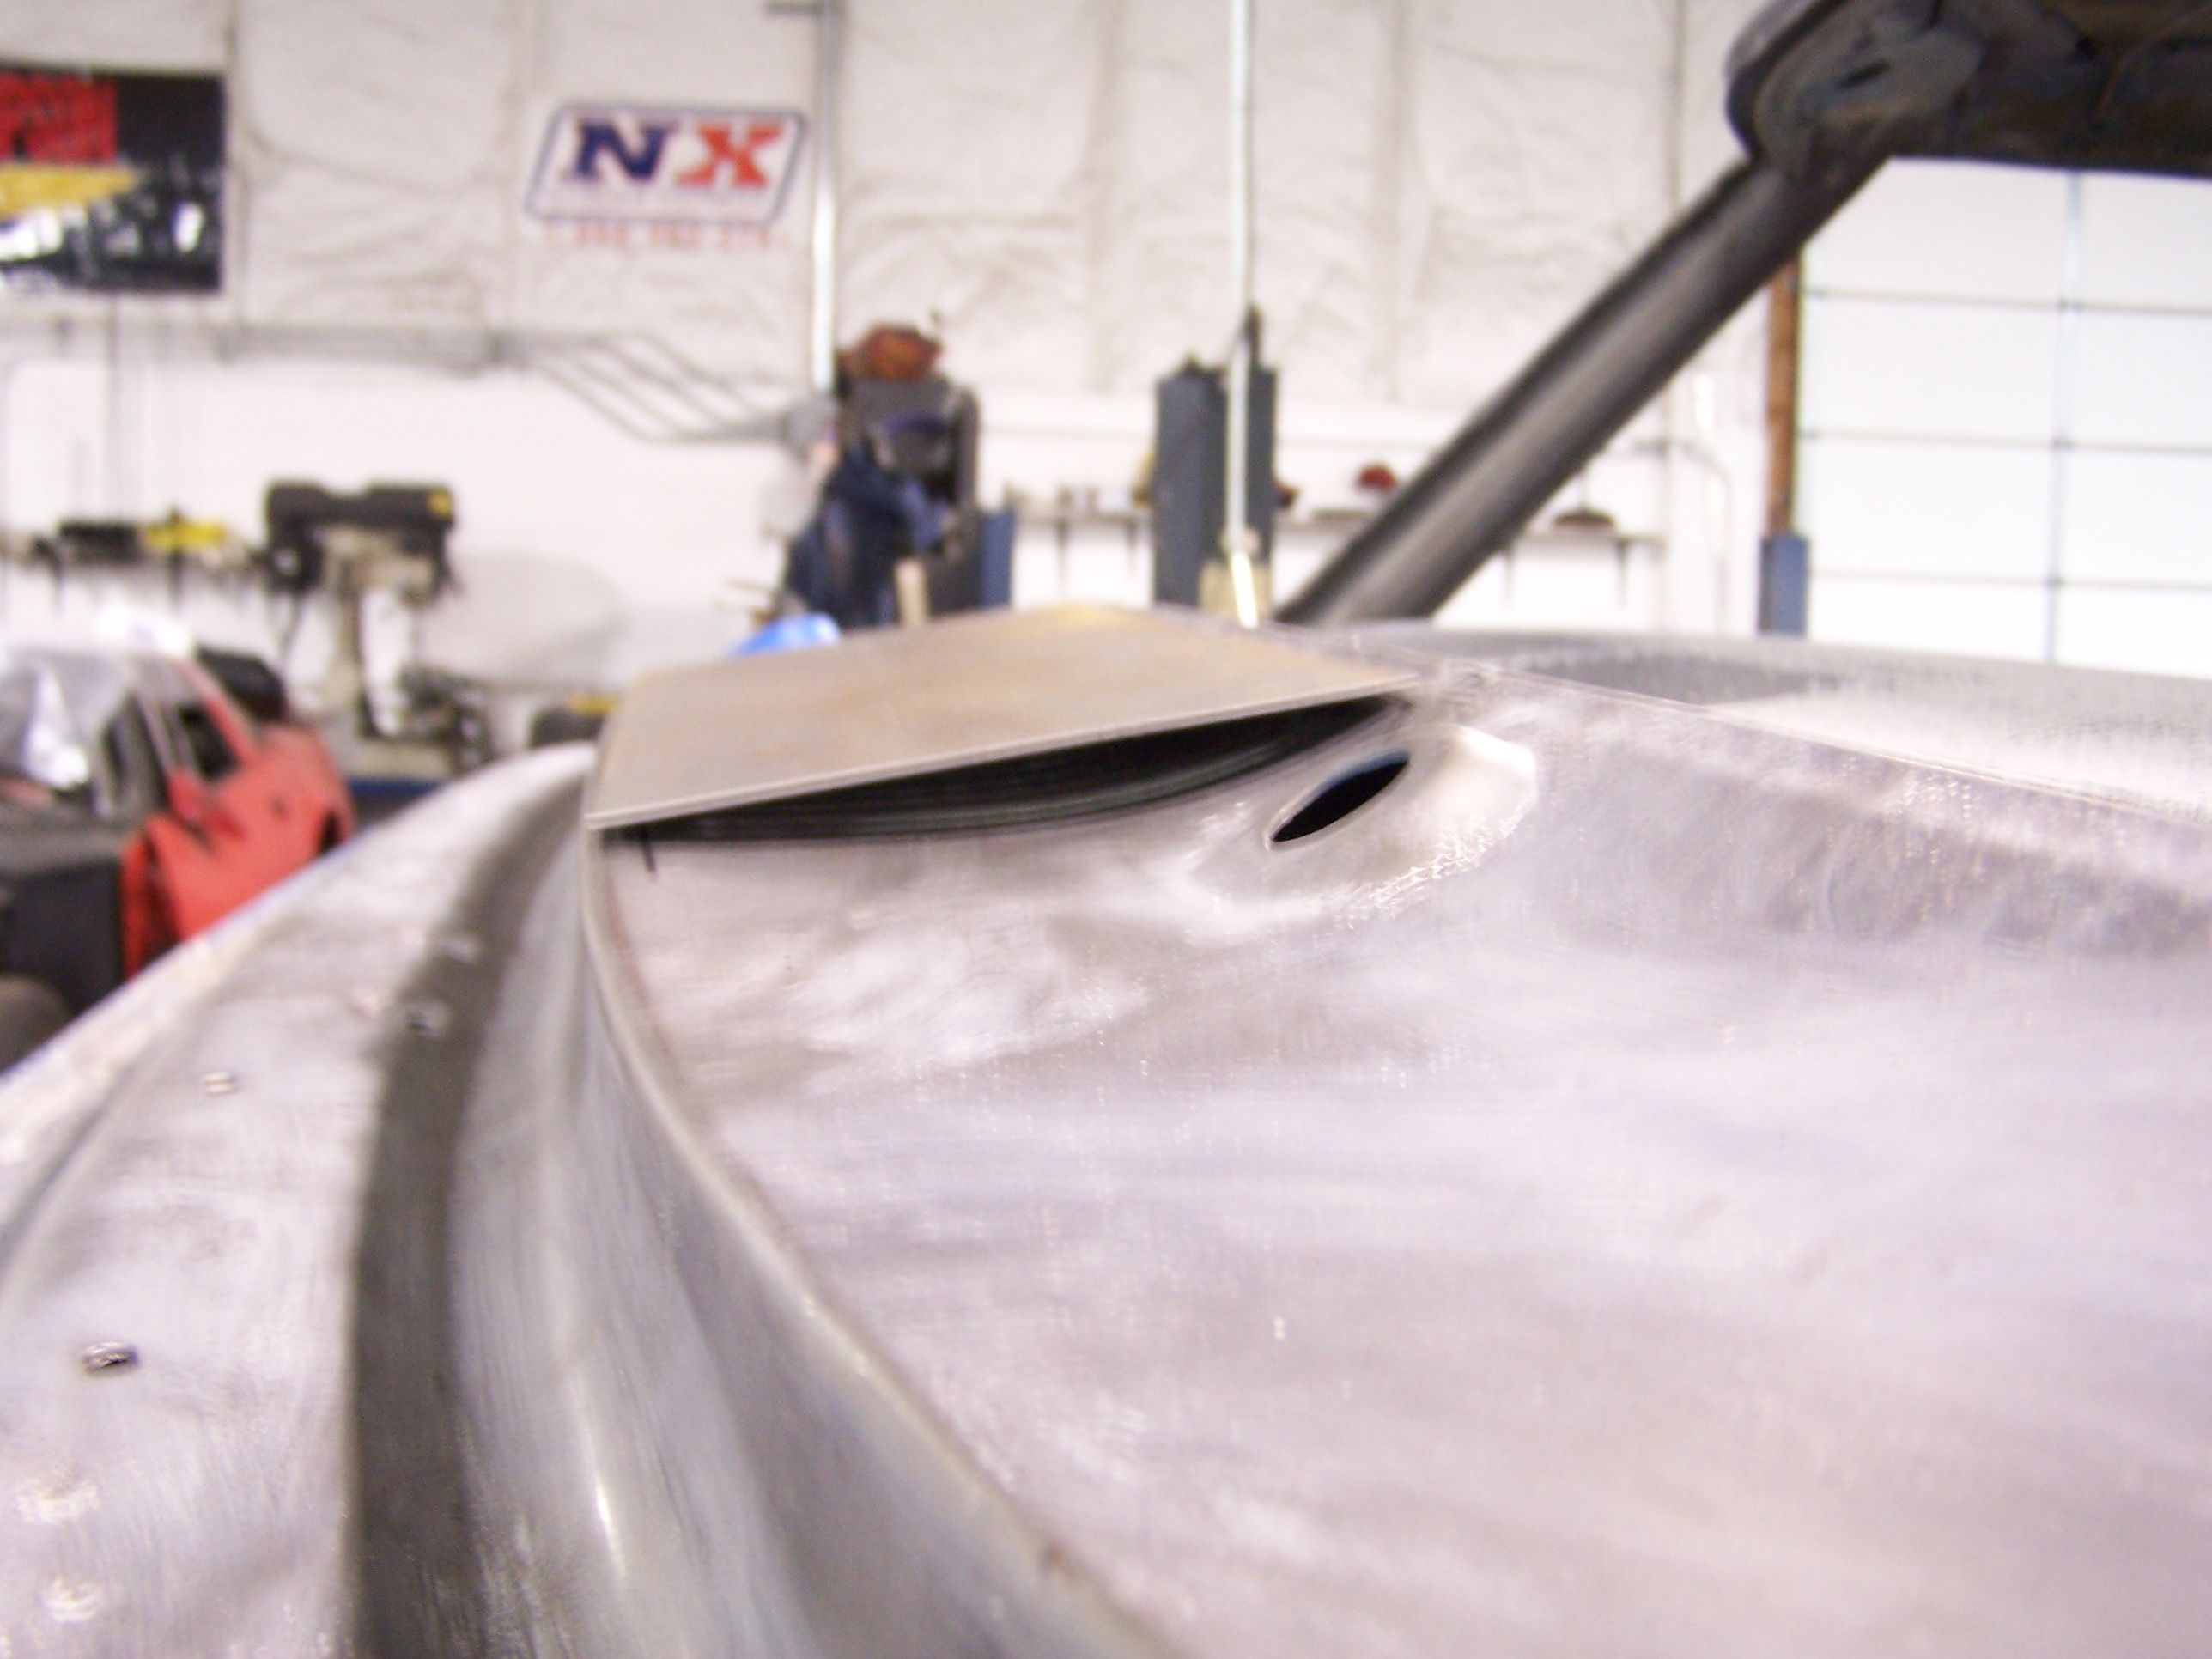
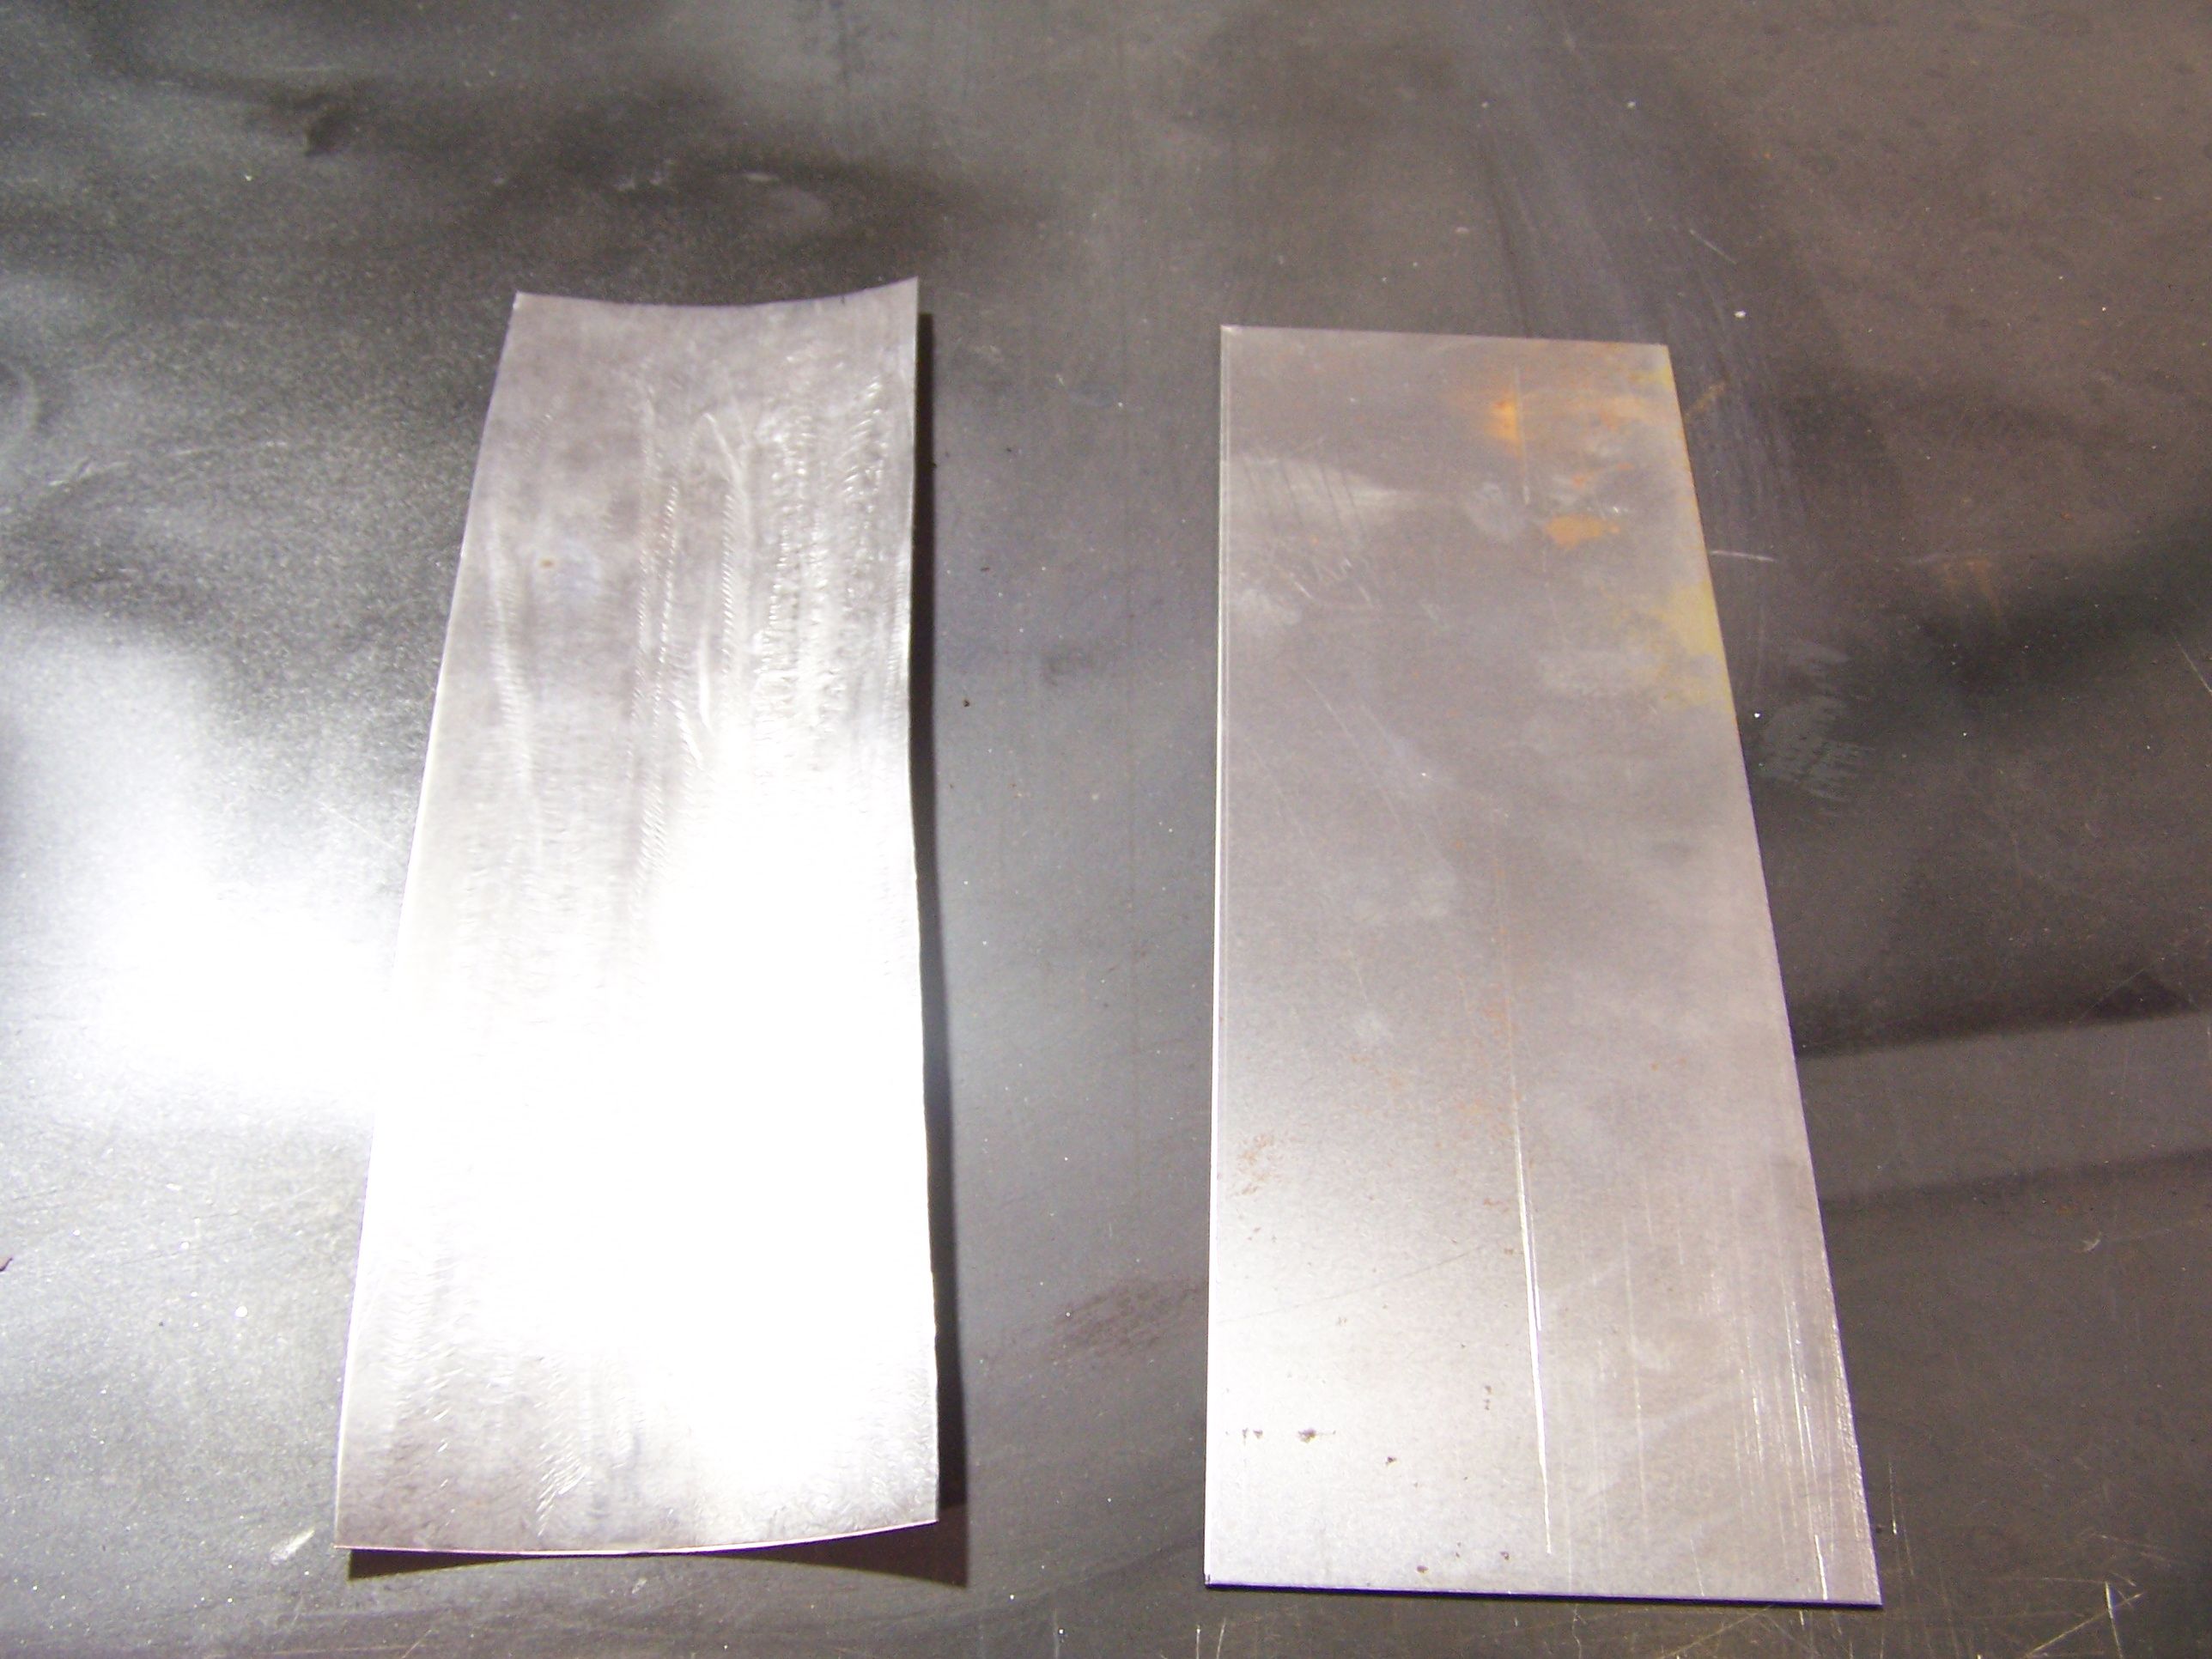
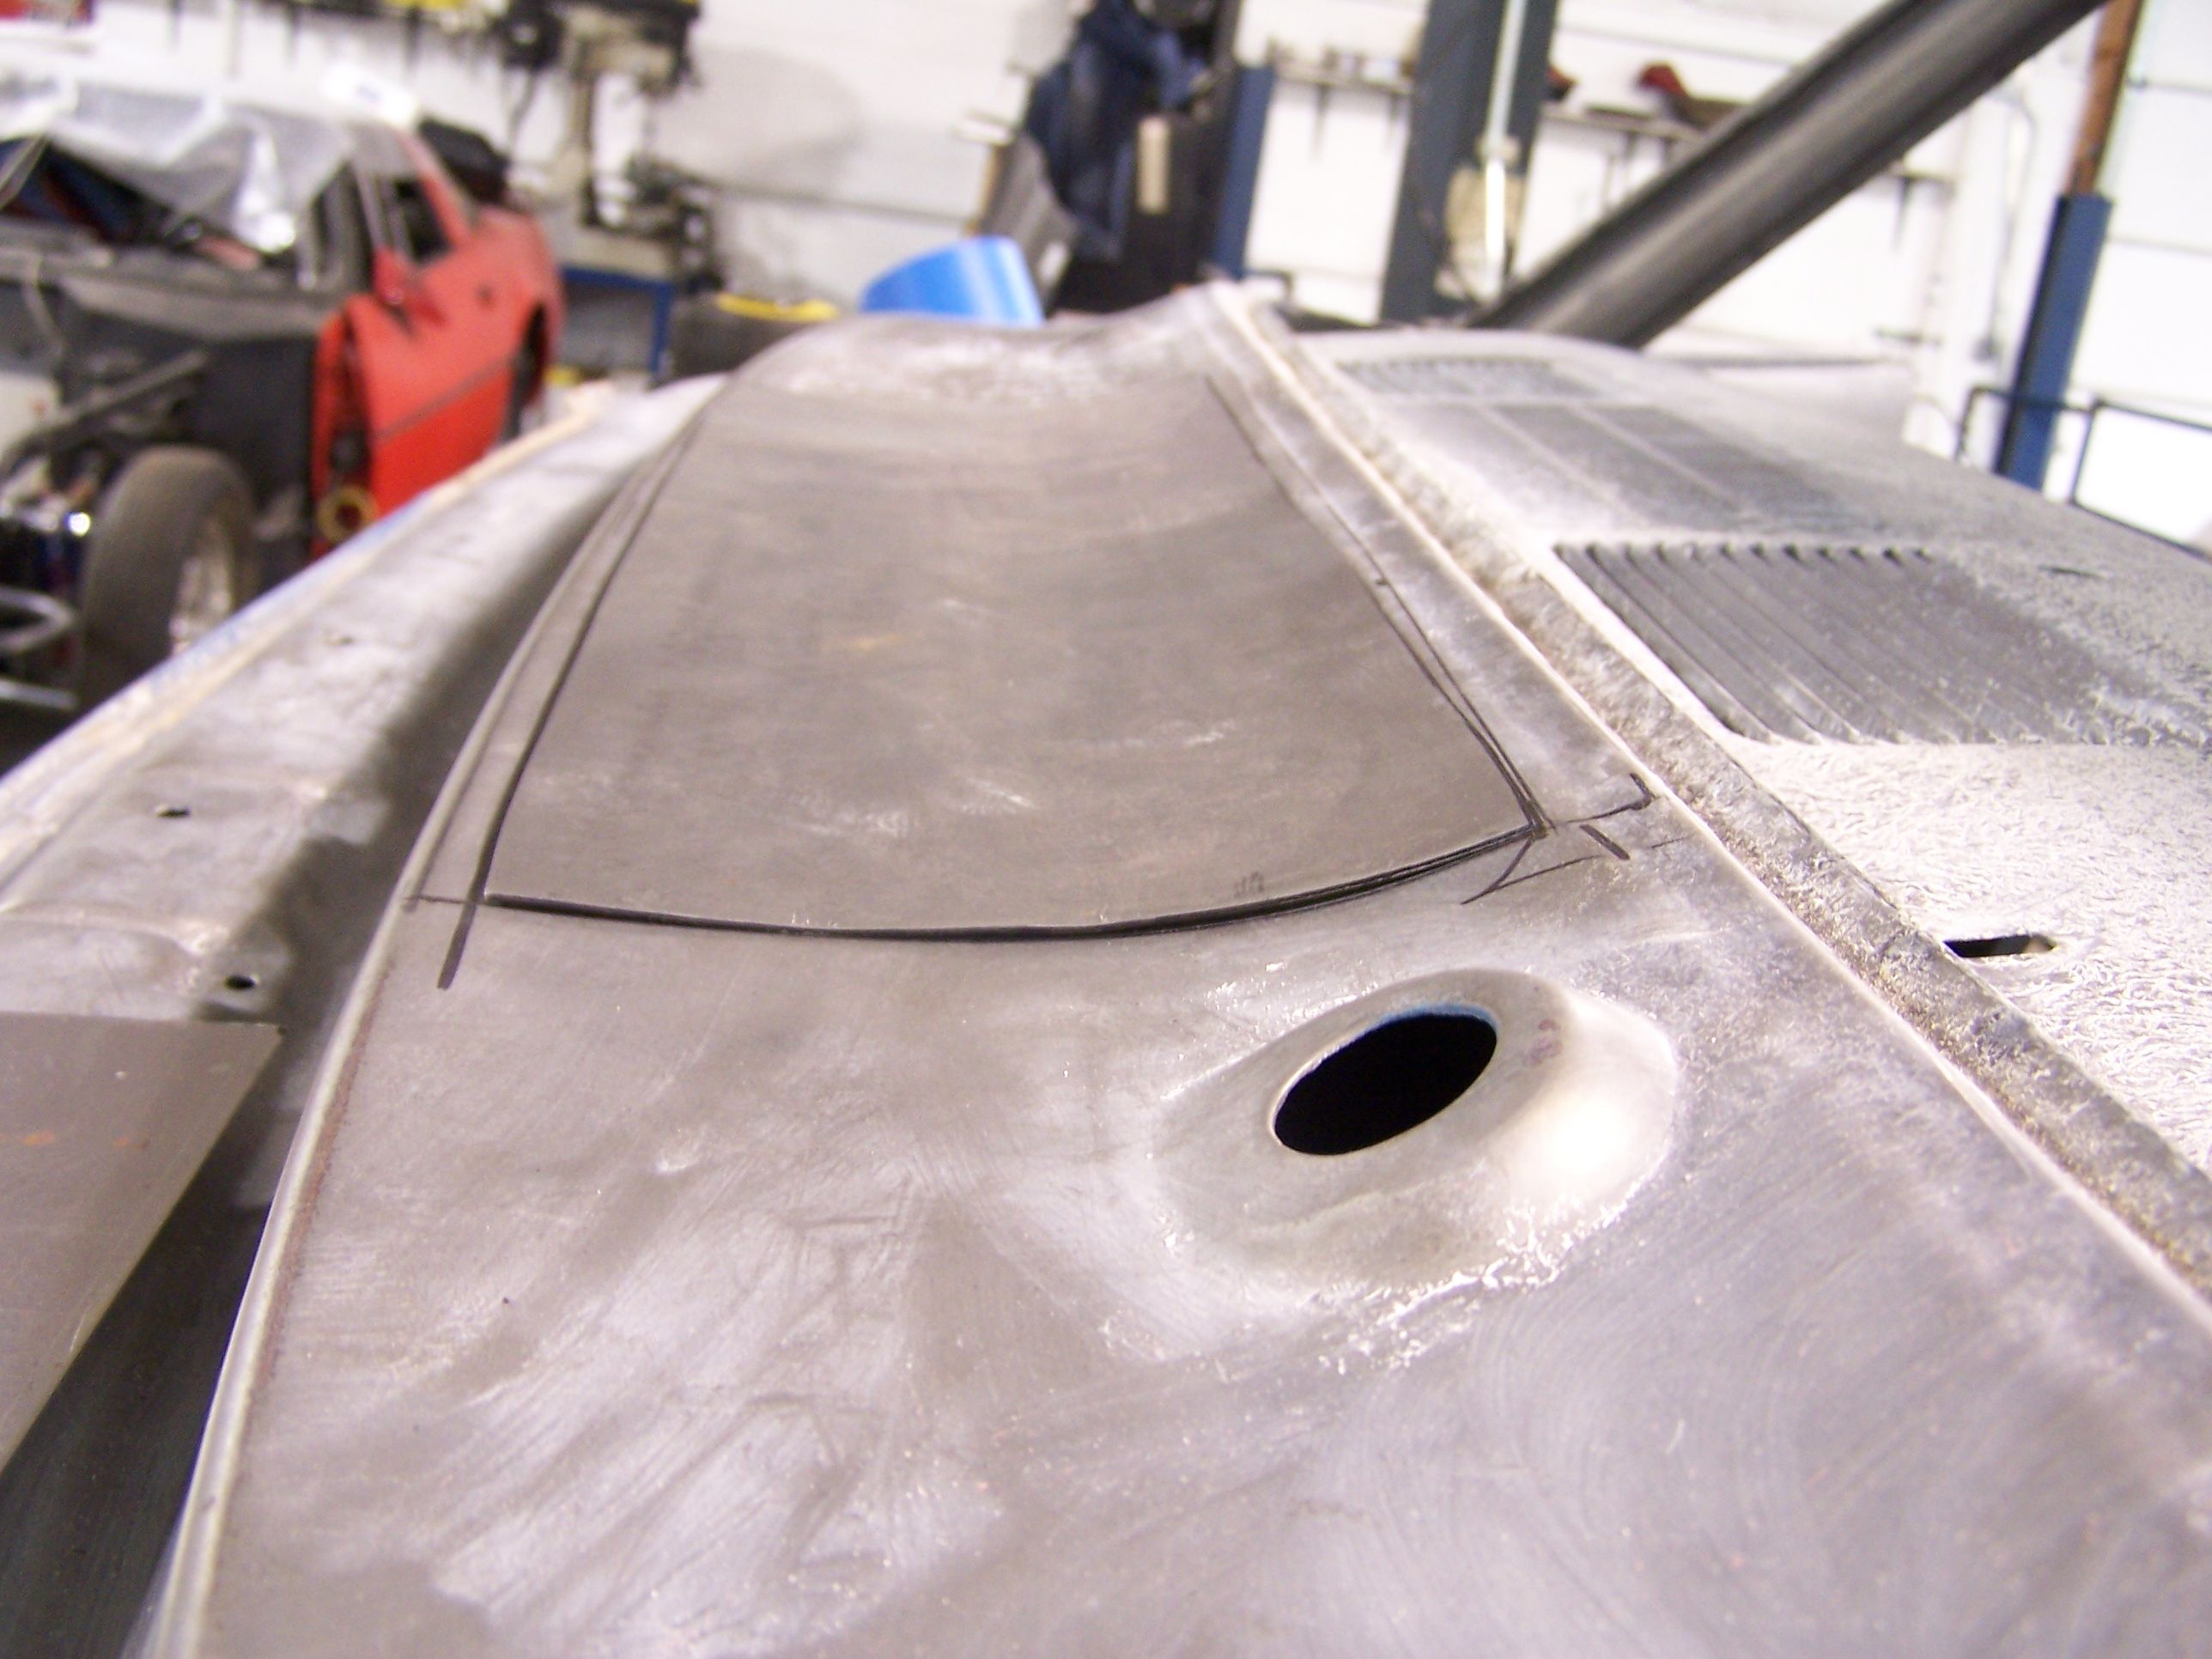
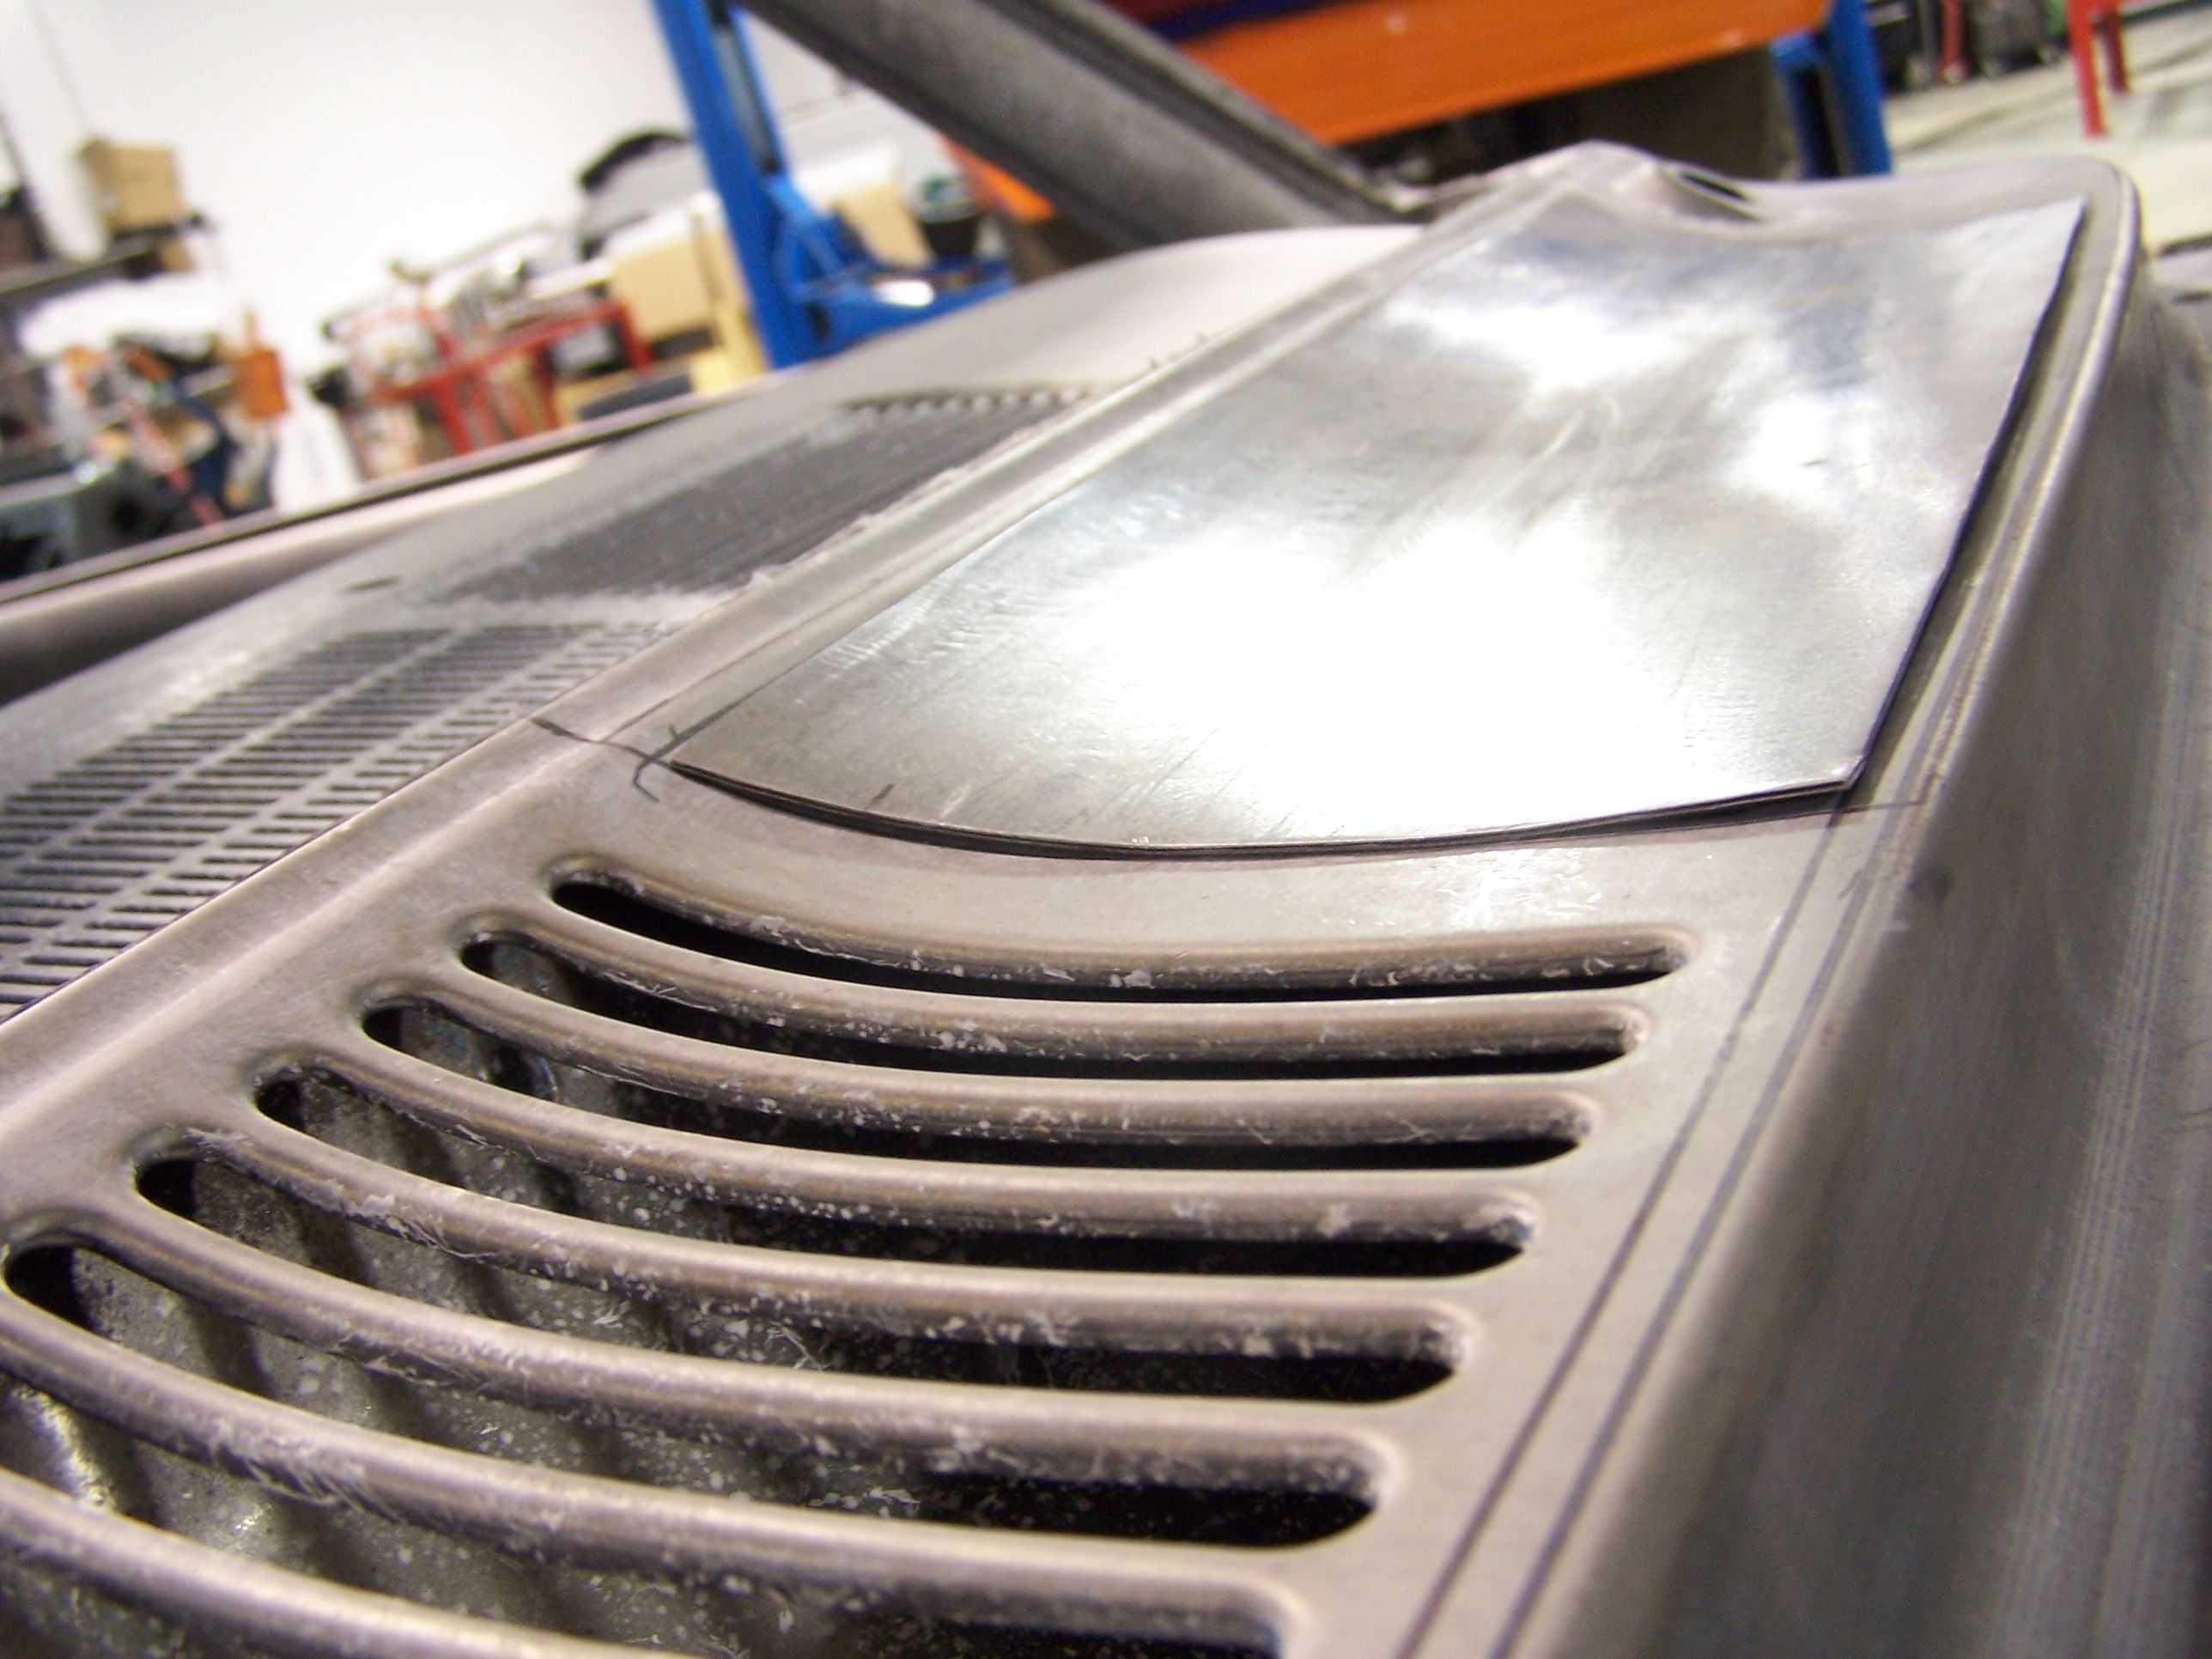
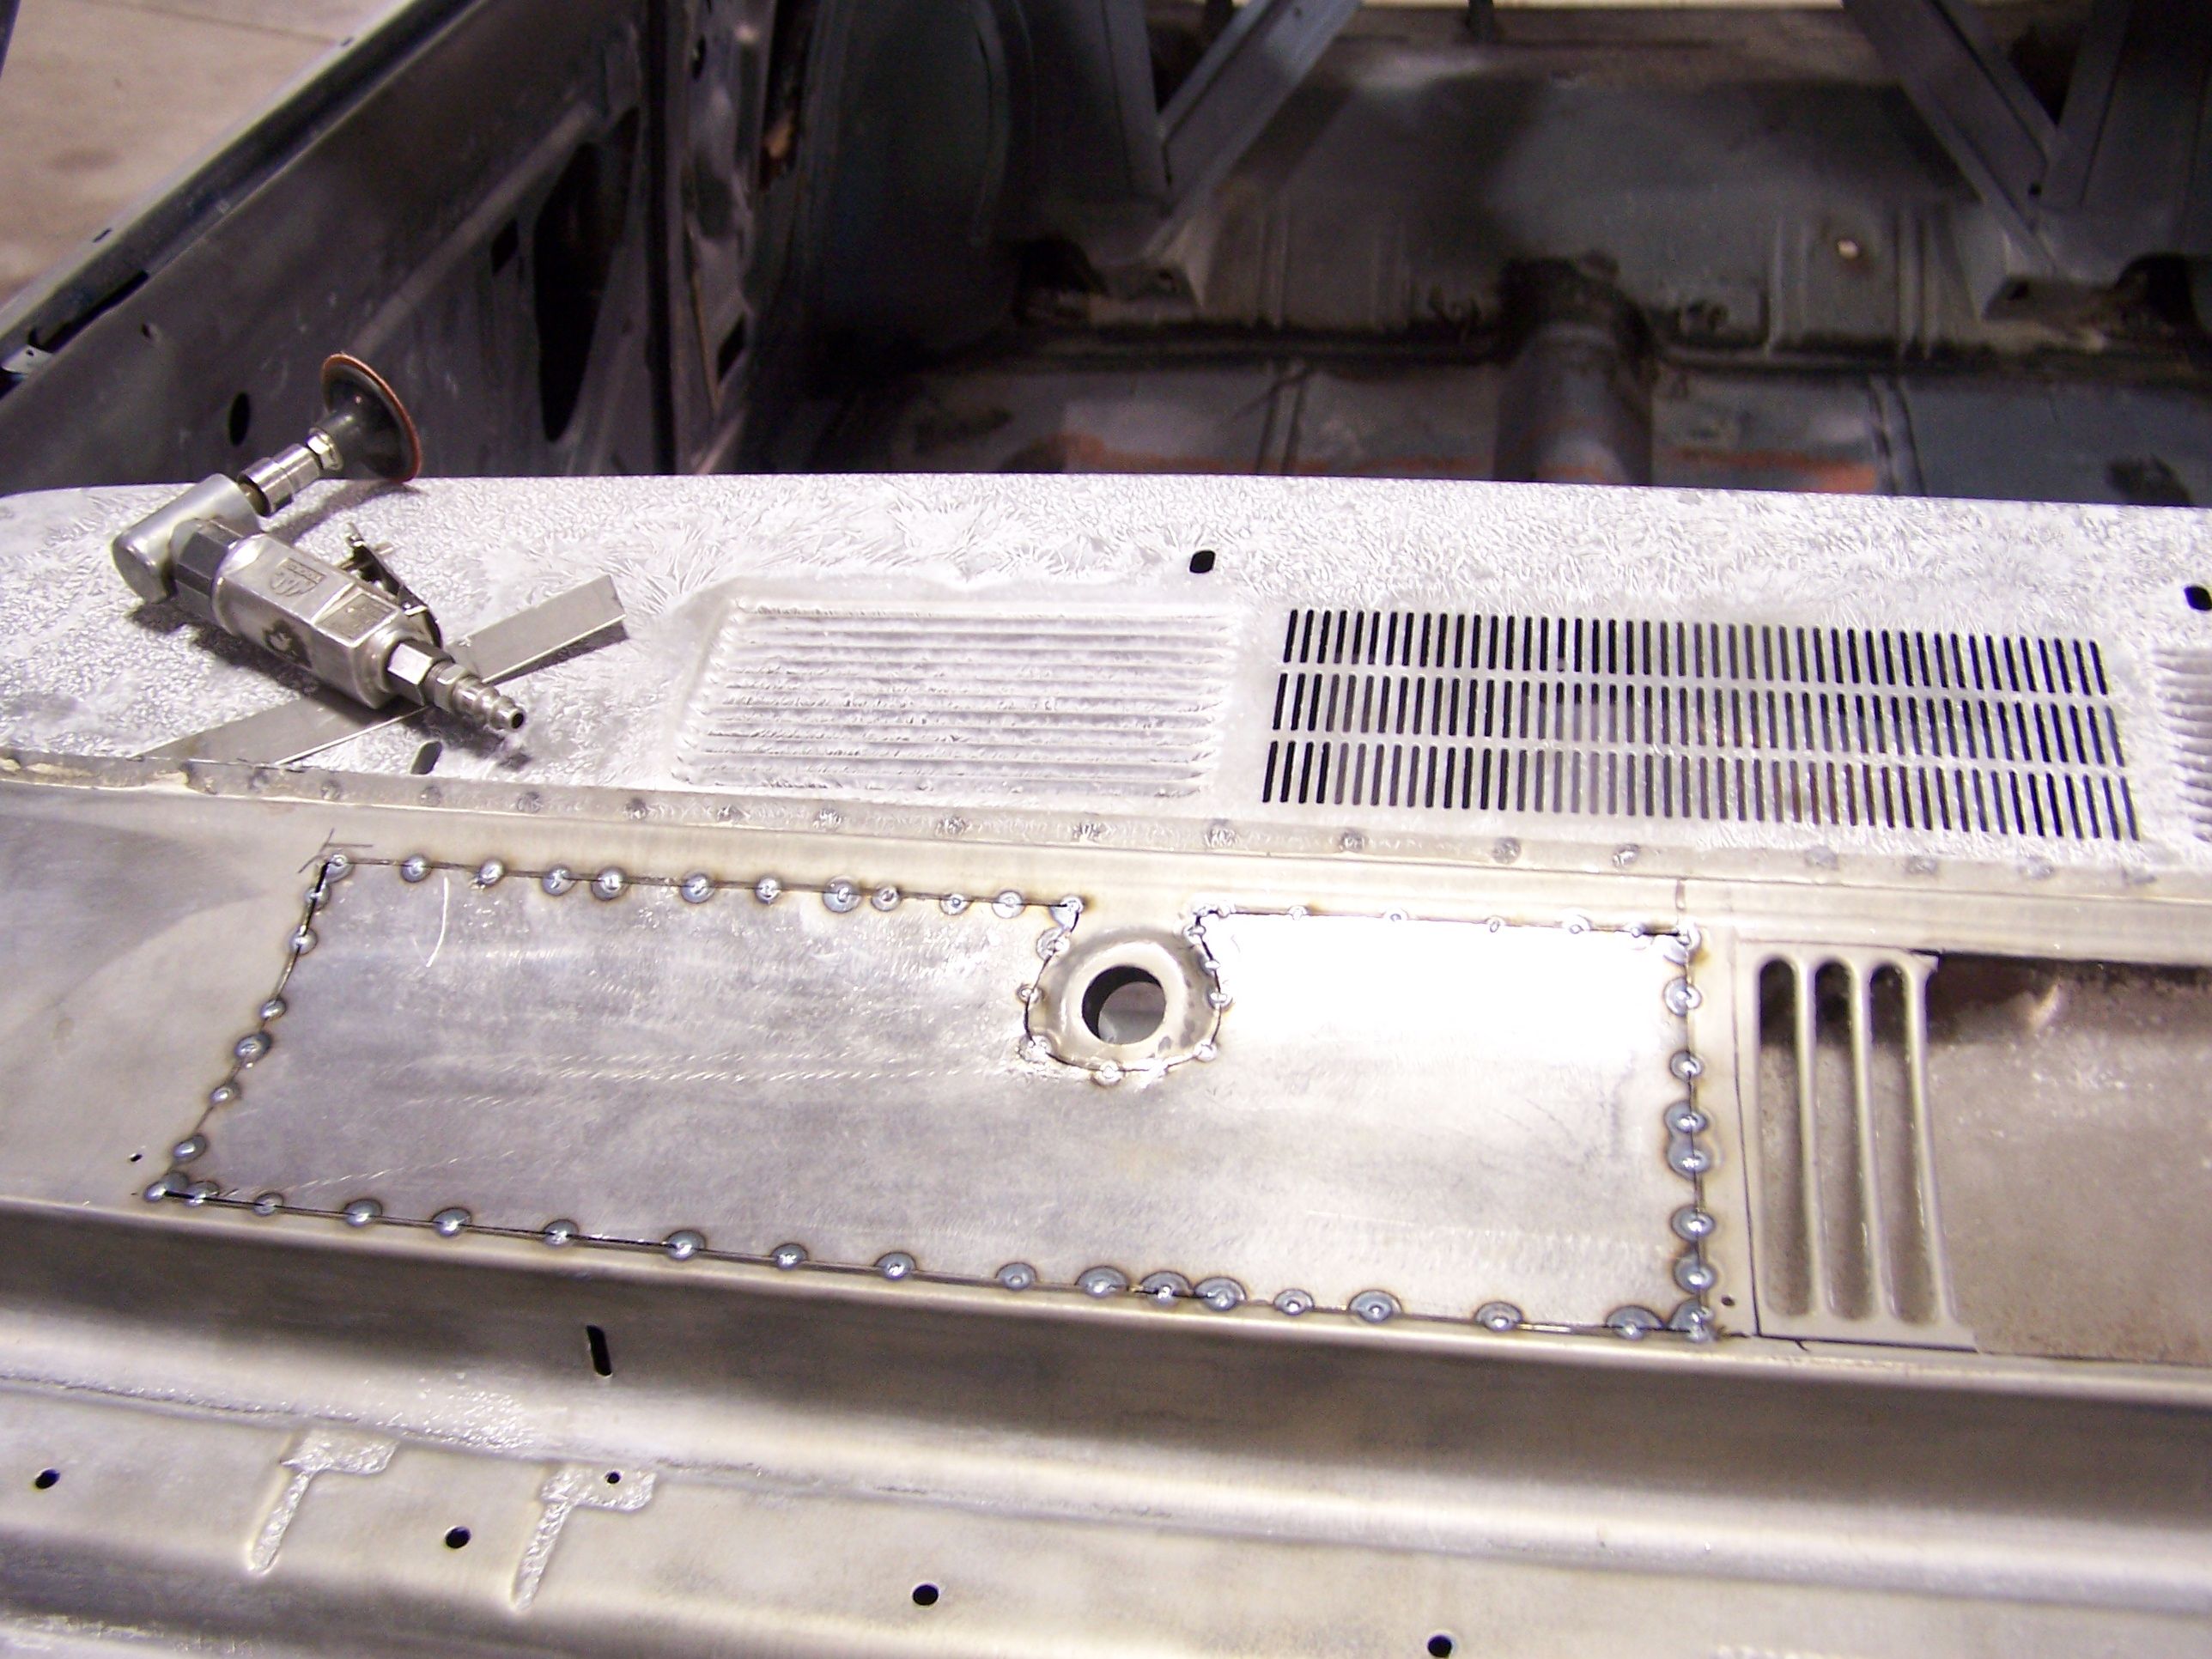
Once I got the shell into the shop the one thing that stuck out like a sore thumb were the cowl vents. So the only option to me was cover them up. Here is the process of the way we did it.


This was a little tough to make fit and follow the lines 100% but after a little bit of time on the english wheel this is what we got.


We did one side at a time to keep the metal from twisting and doing wacky things once we cut the area out and put the new part in.


Once we did that I think it just cleaned up the whole area and now it has a smooth look to it.
Reply With Quote
  #3  
Old 02-11-2011, 07:53 PM
eddiek eddiek is offline
Junior Member
 
Join Date: Oct 2007
Posts: 17
Thanks: 0
Thanked 0 Times in 0 Posts
Default

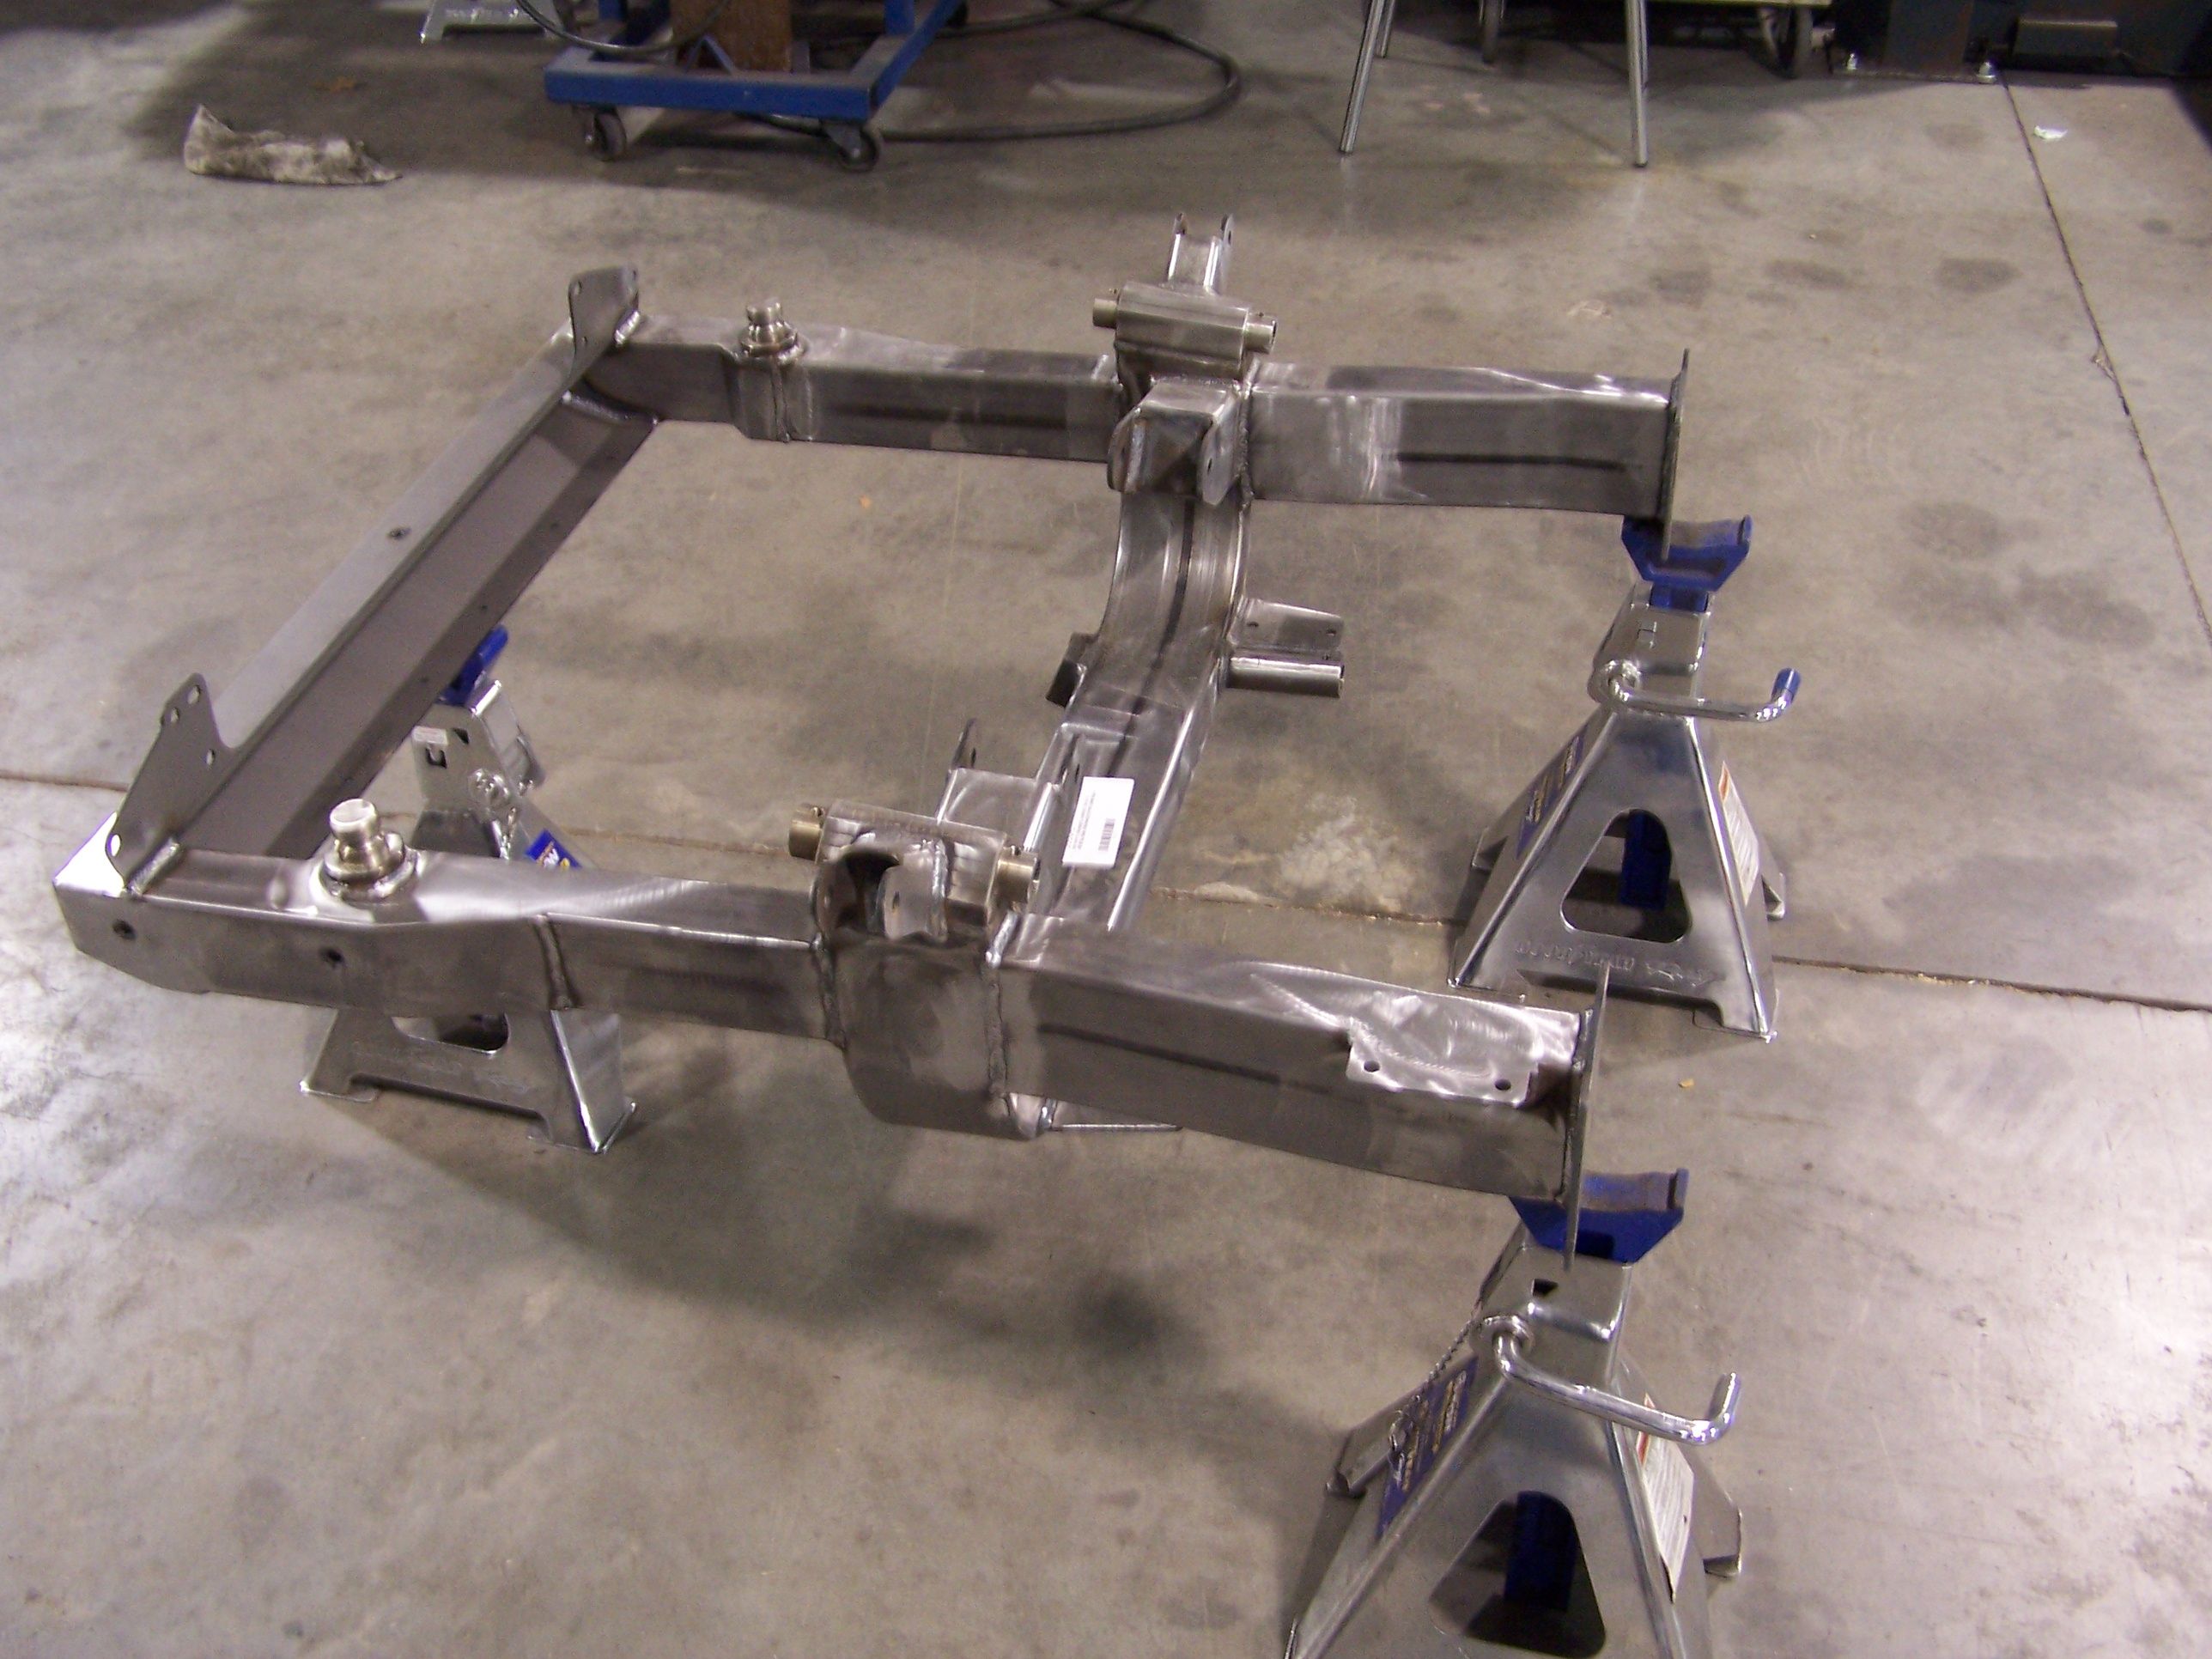
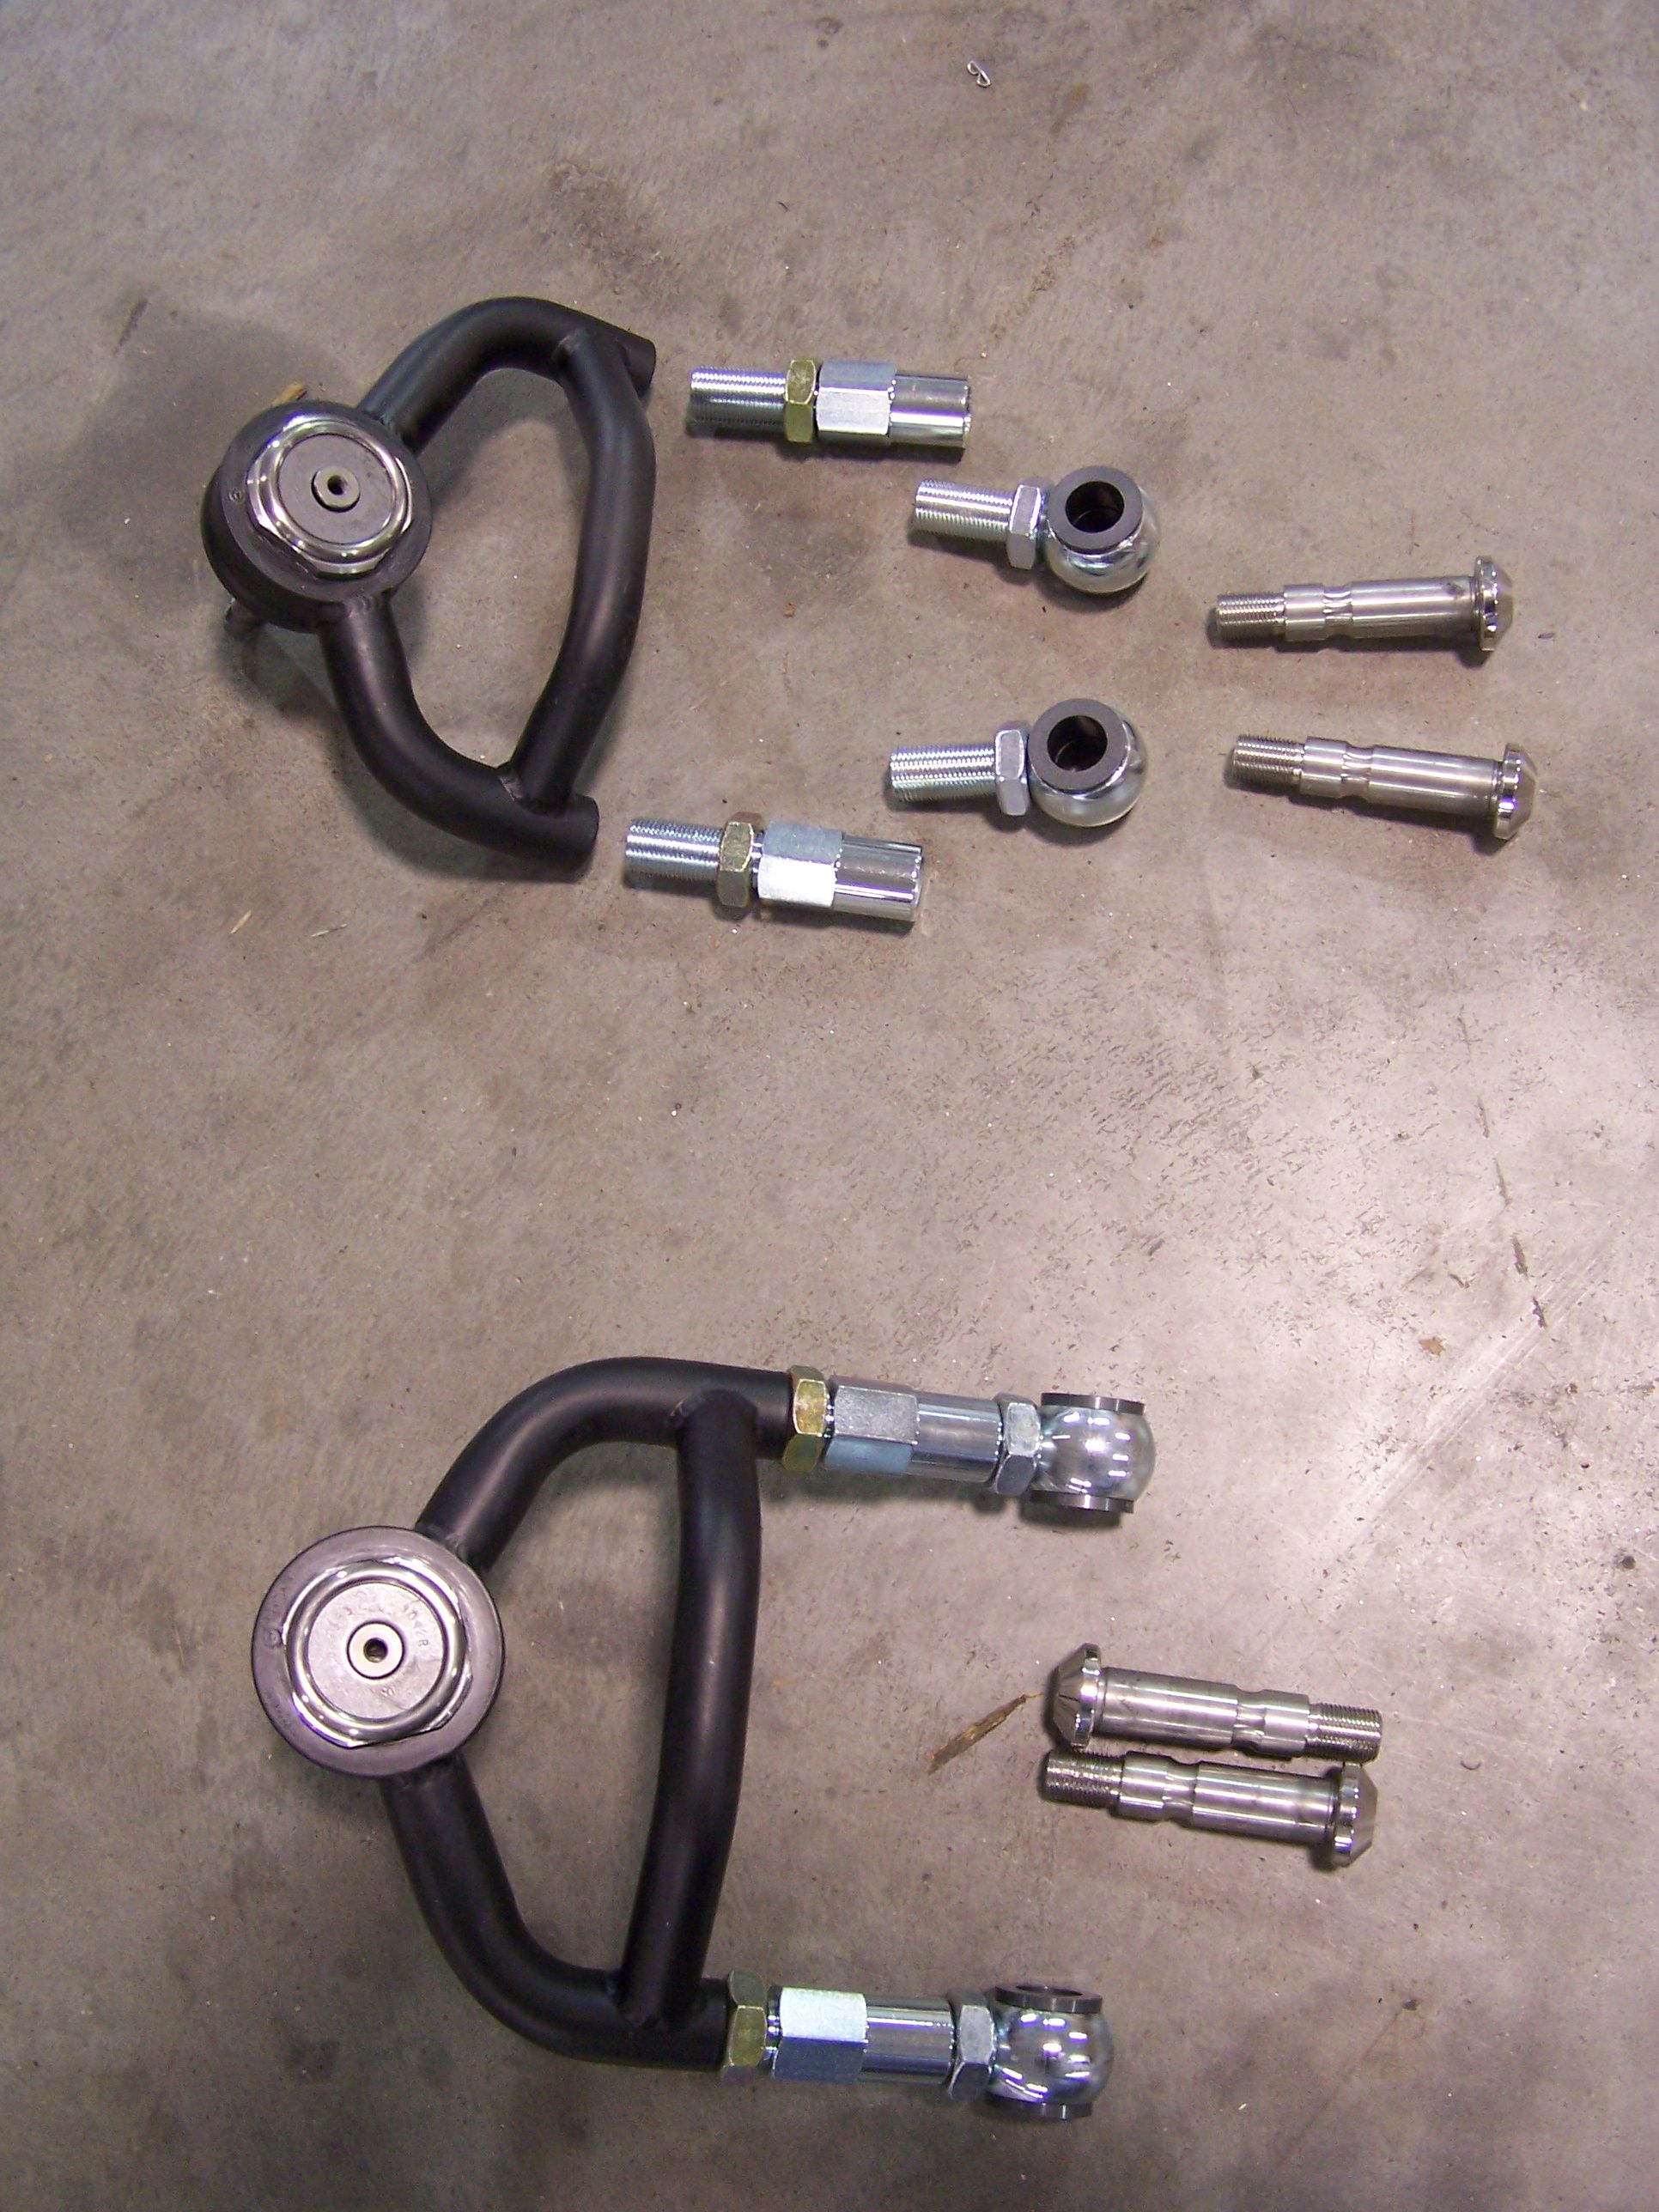
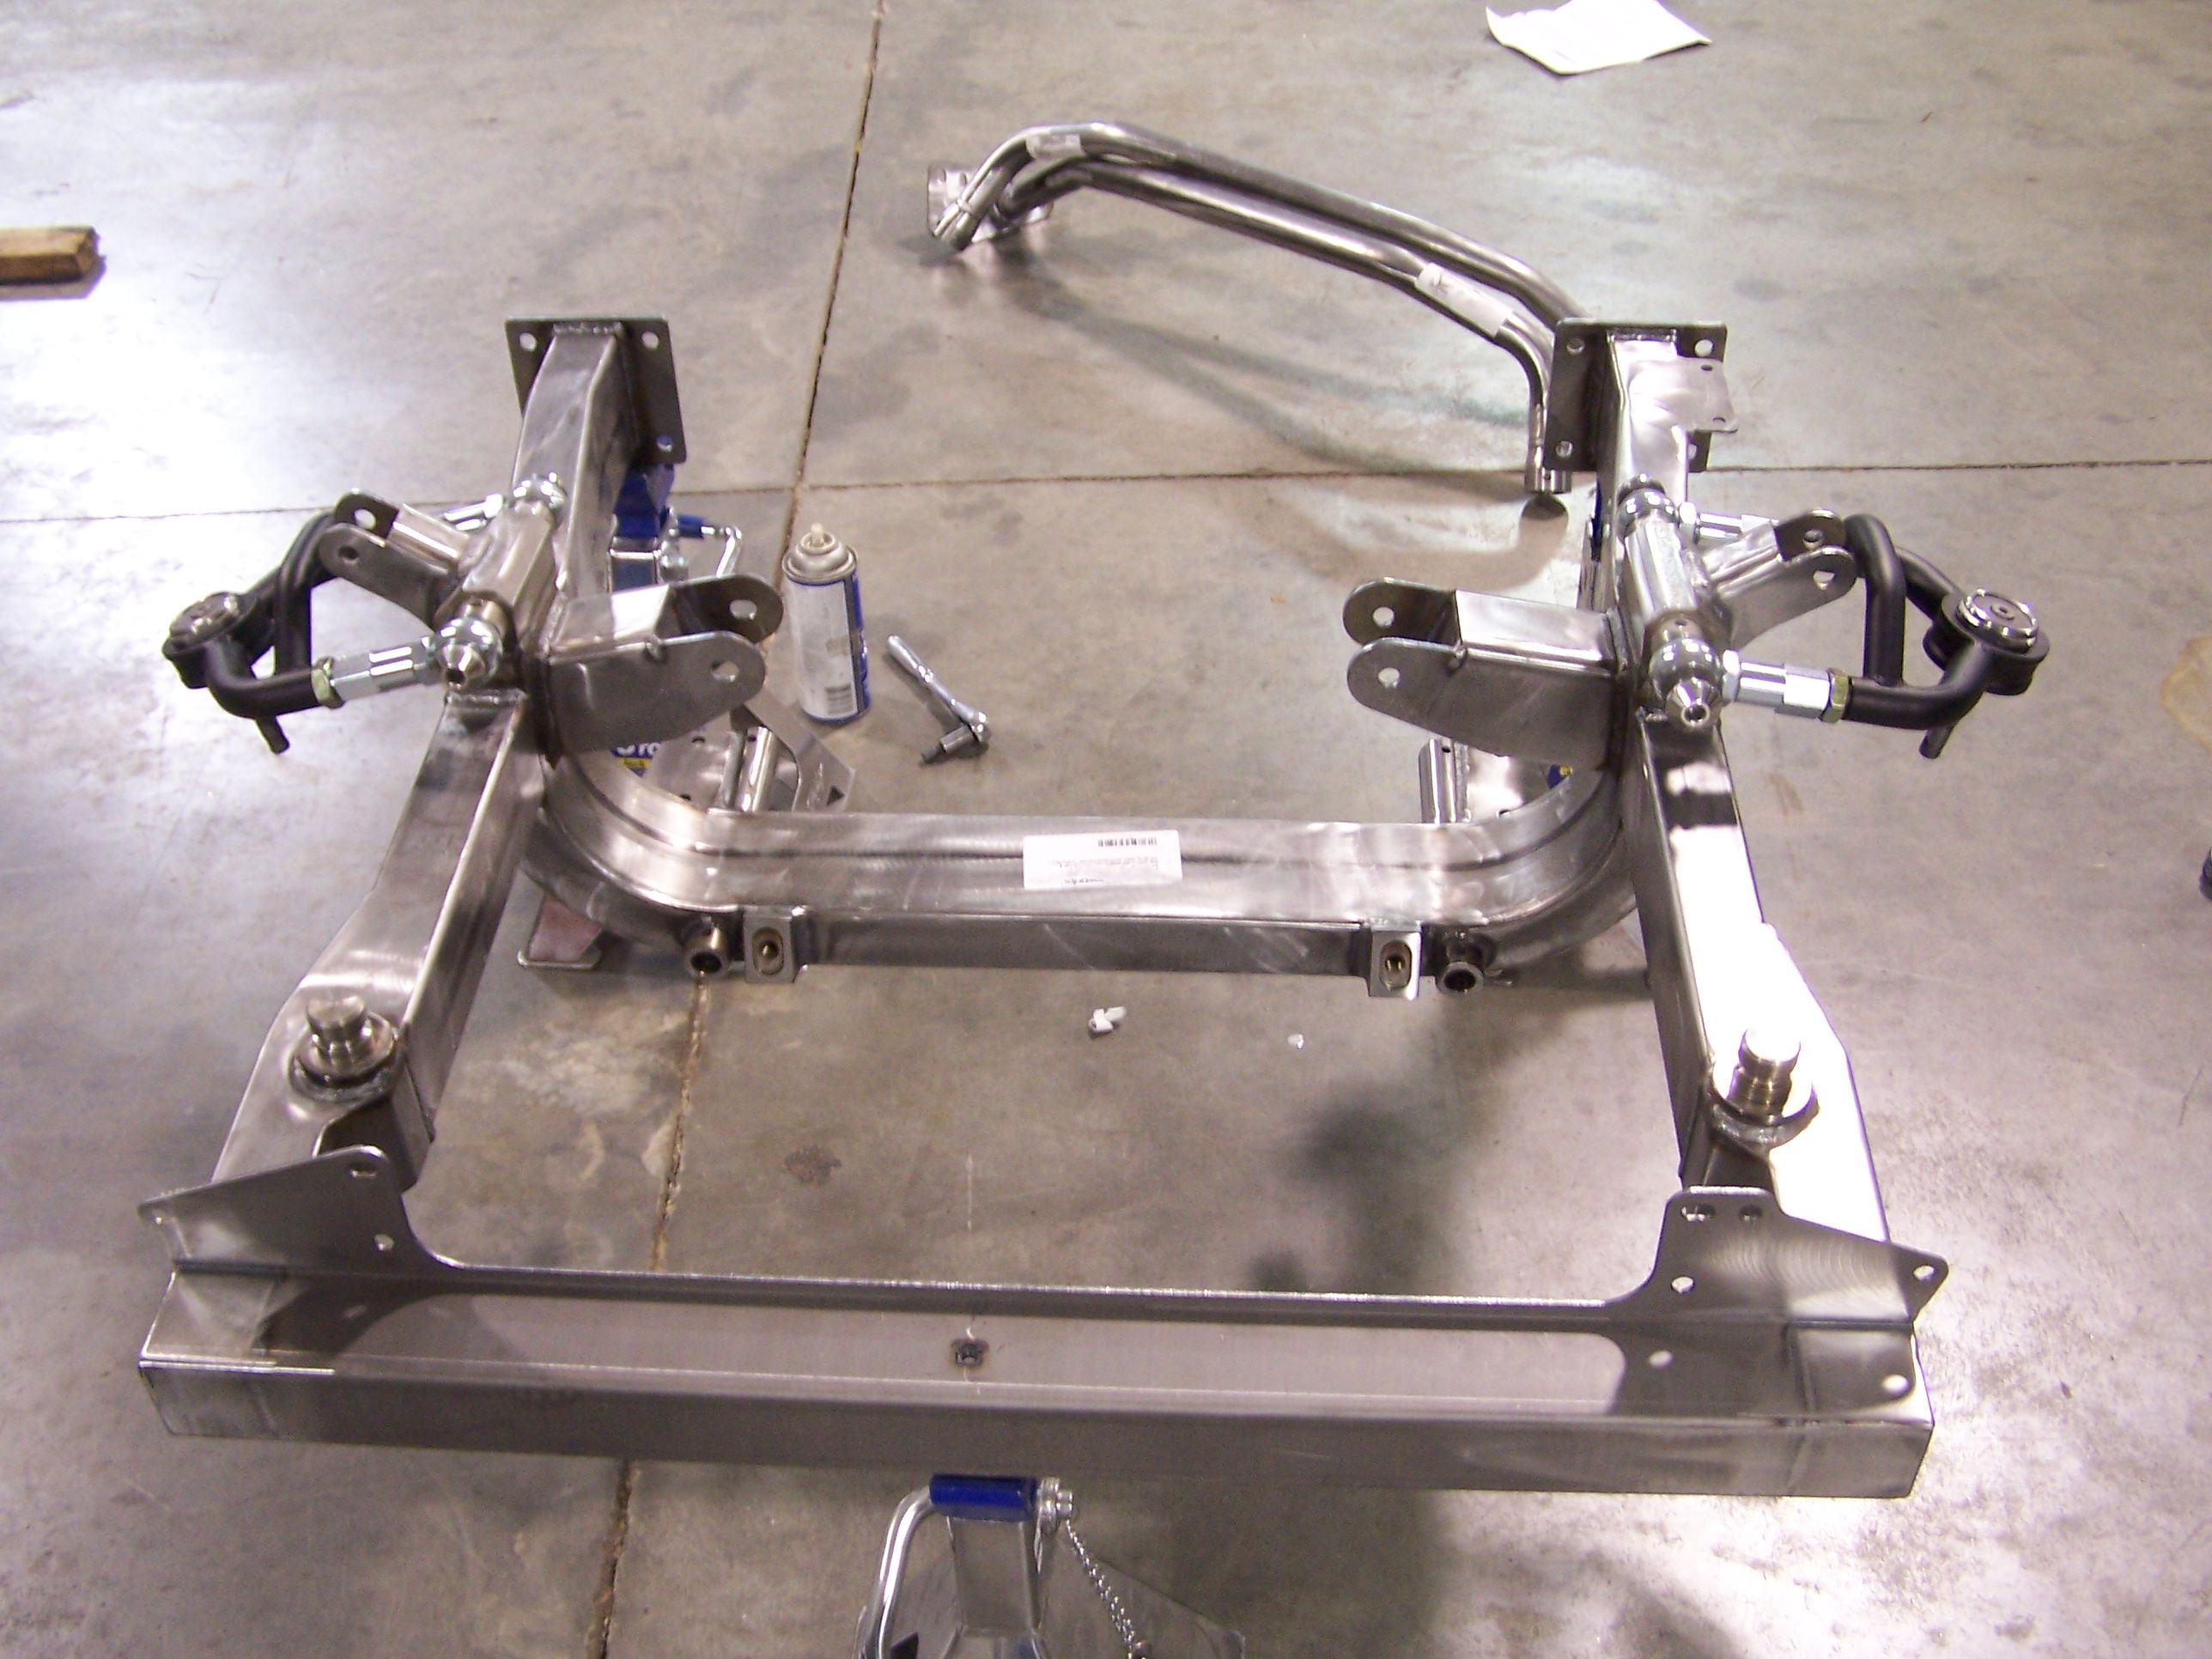
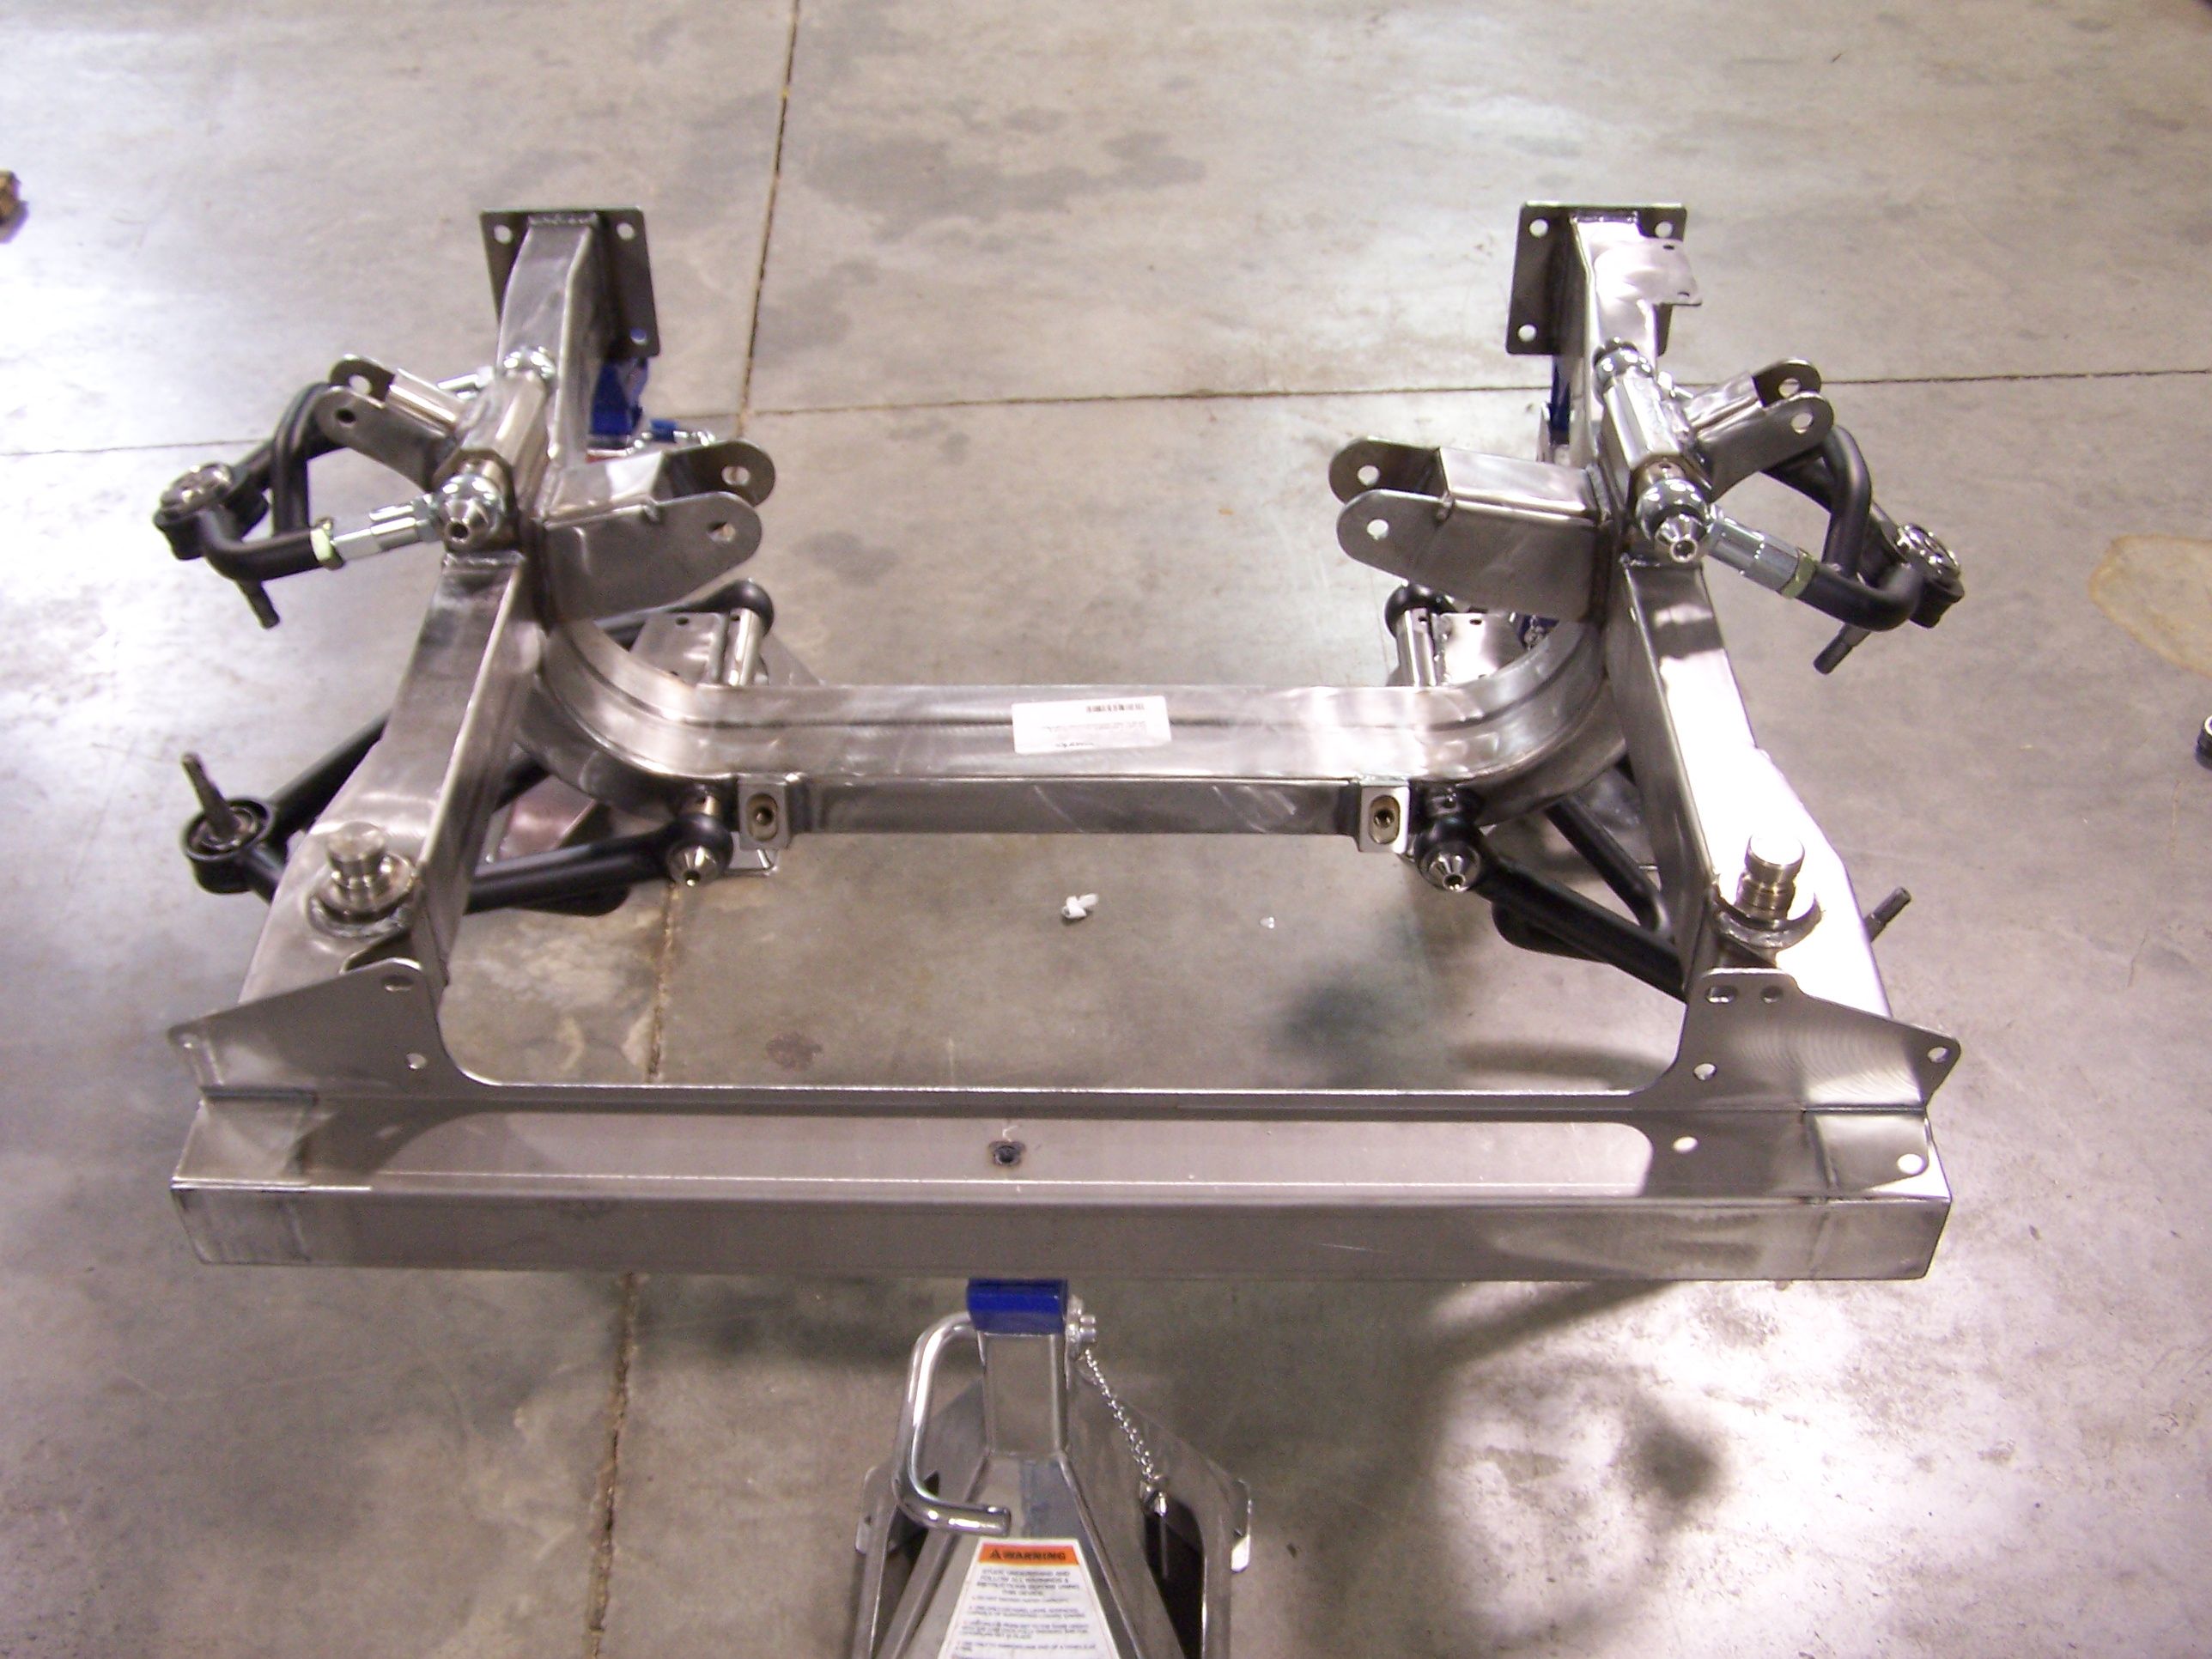
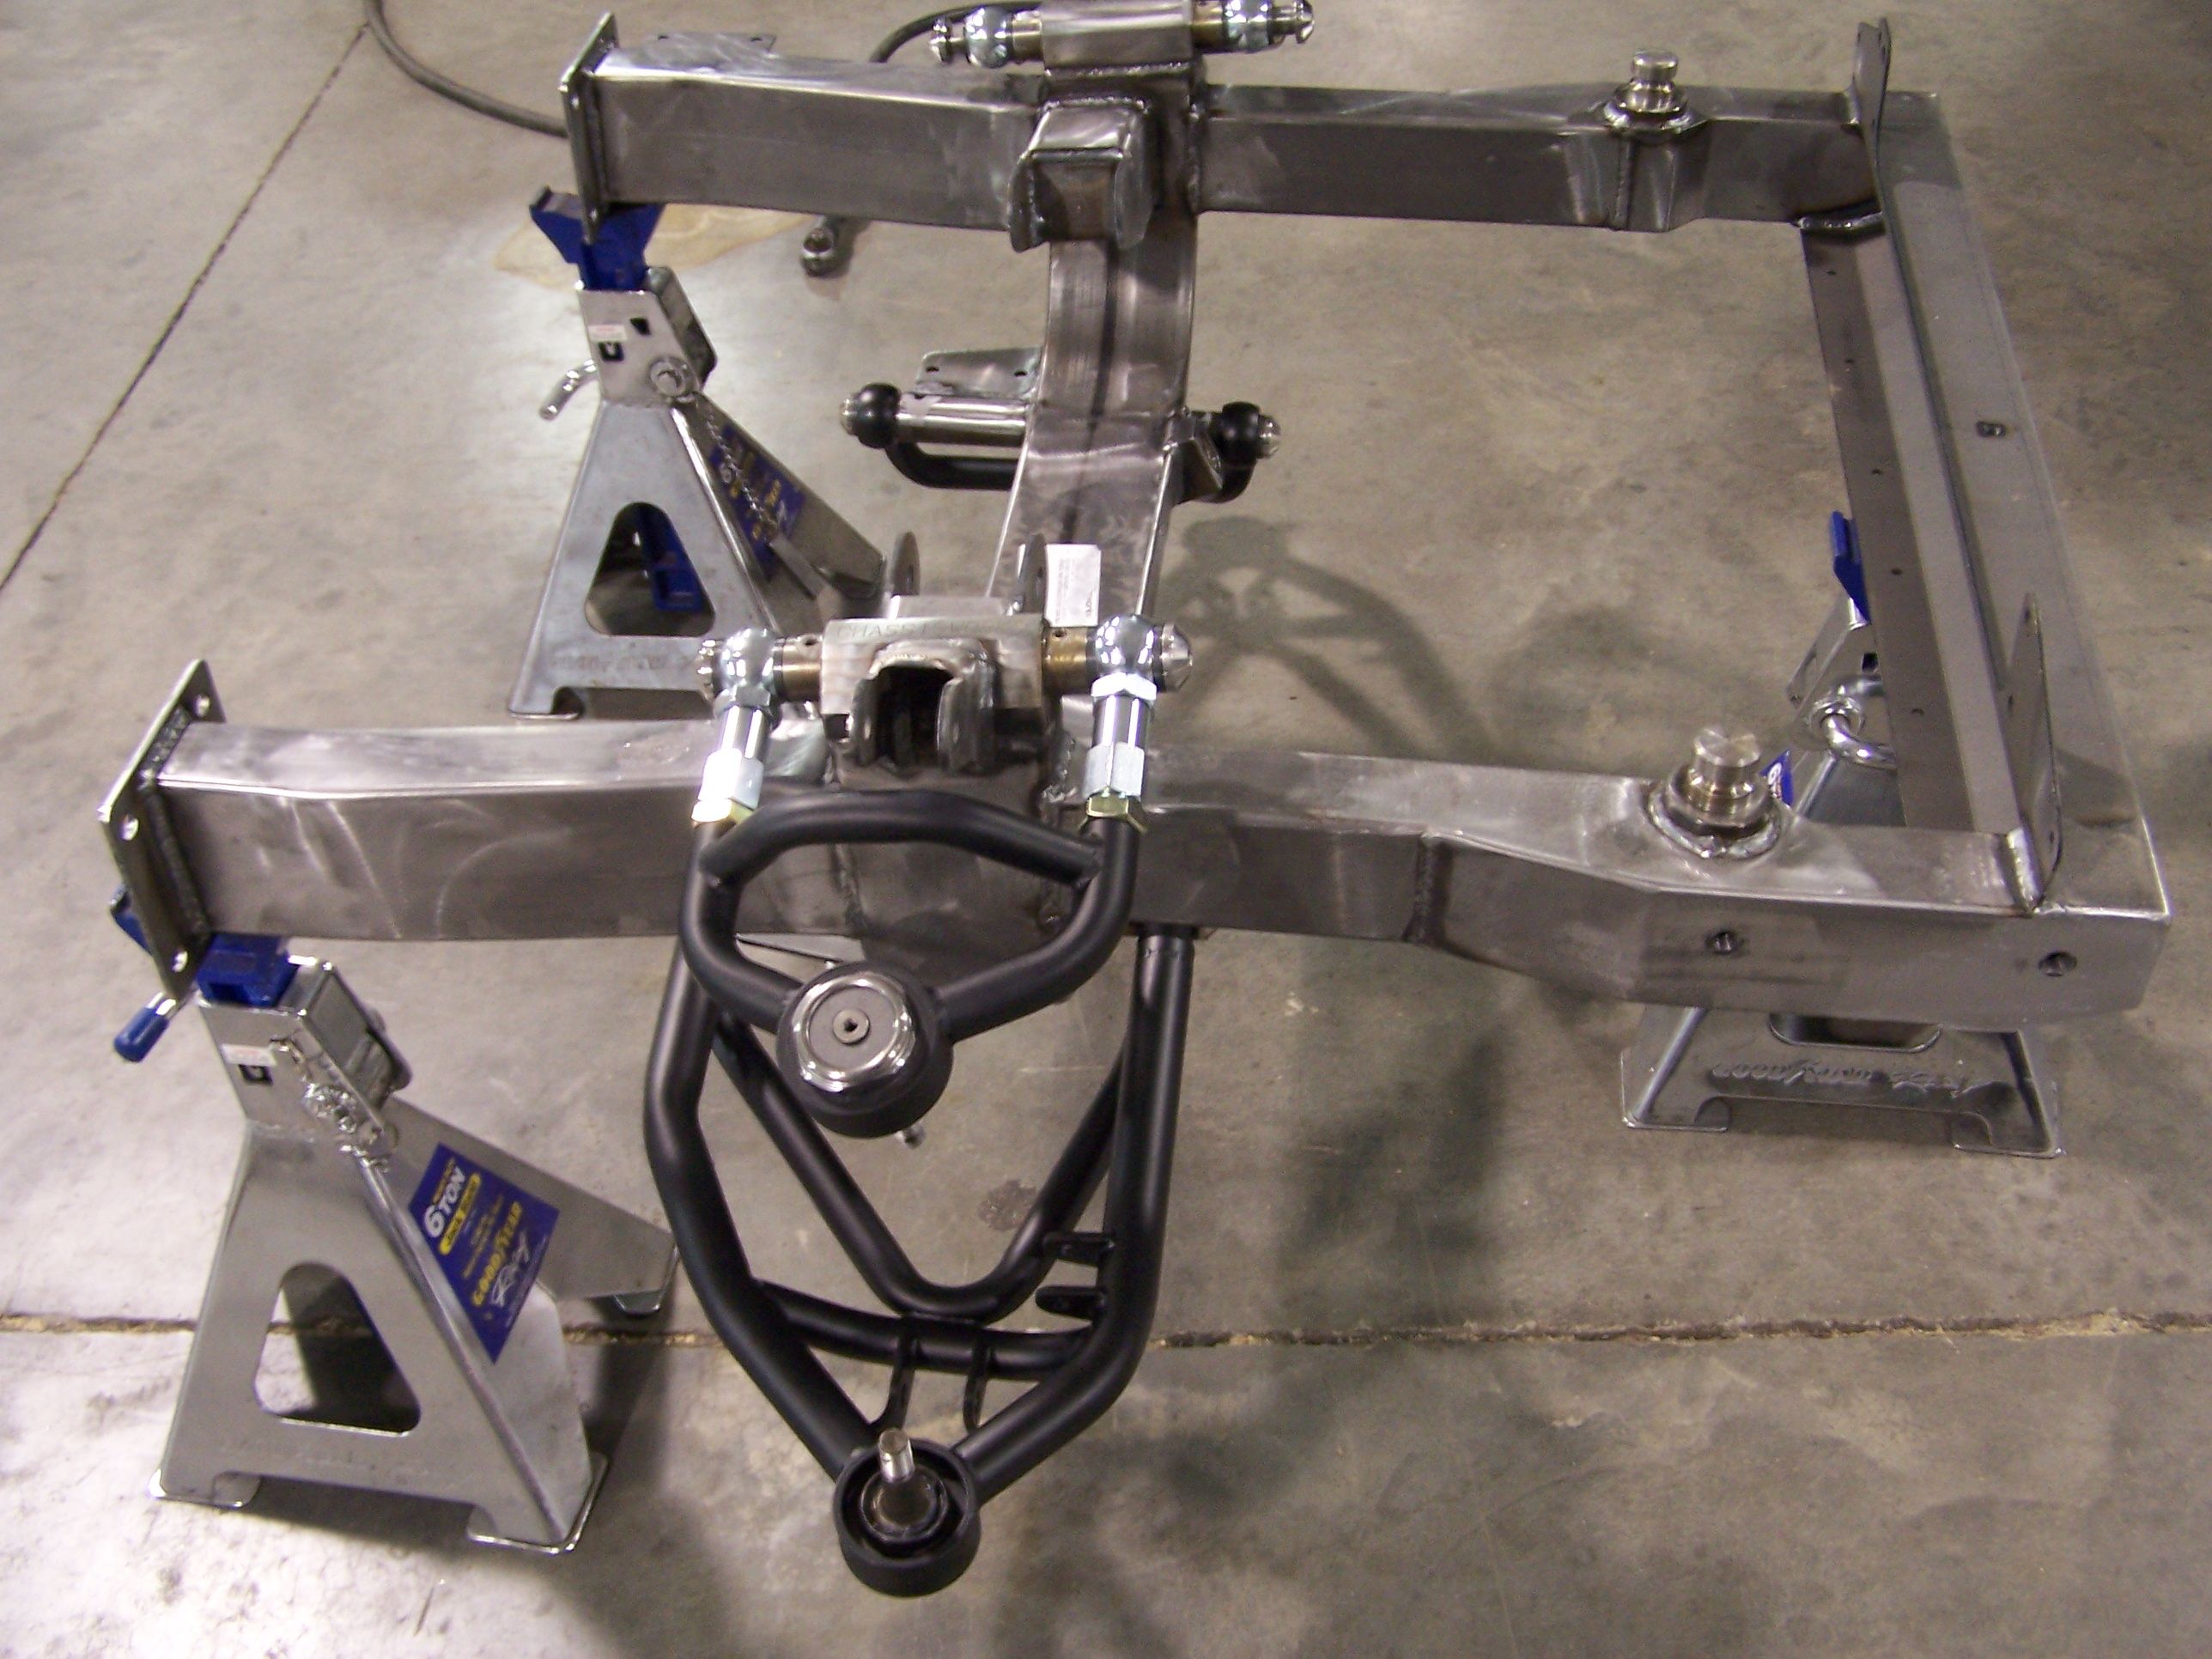
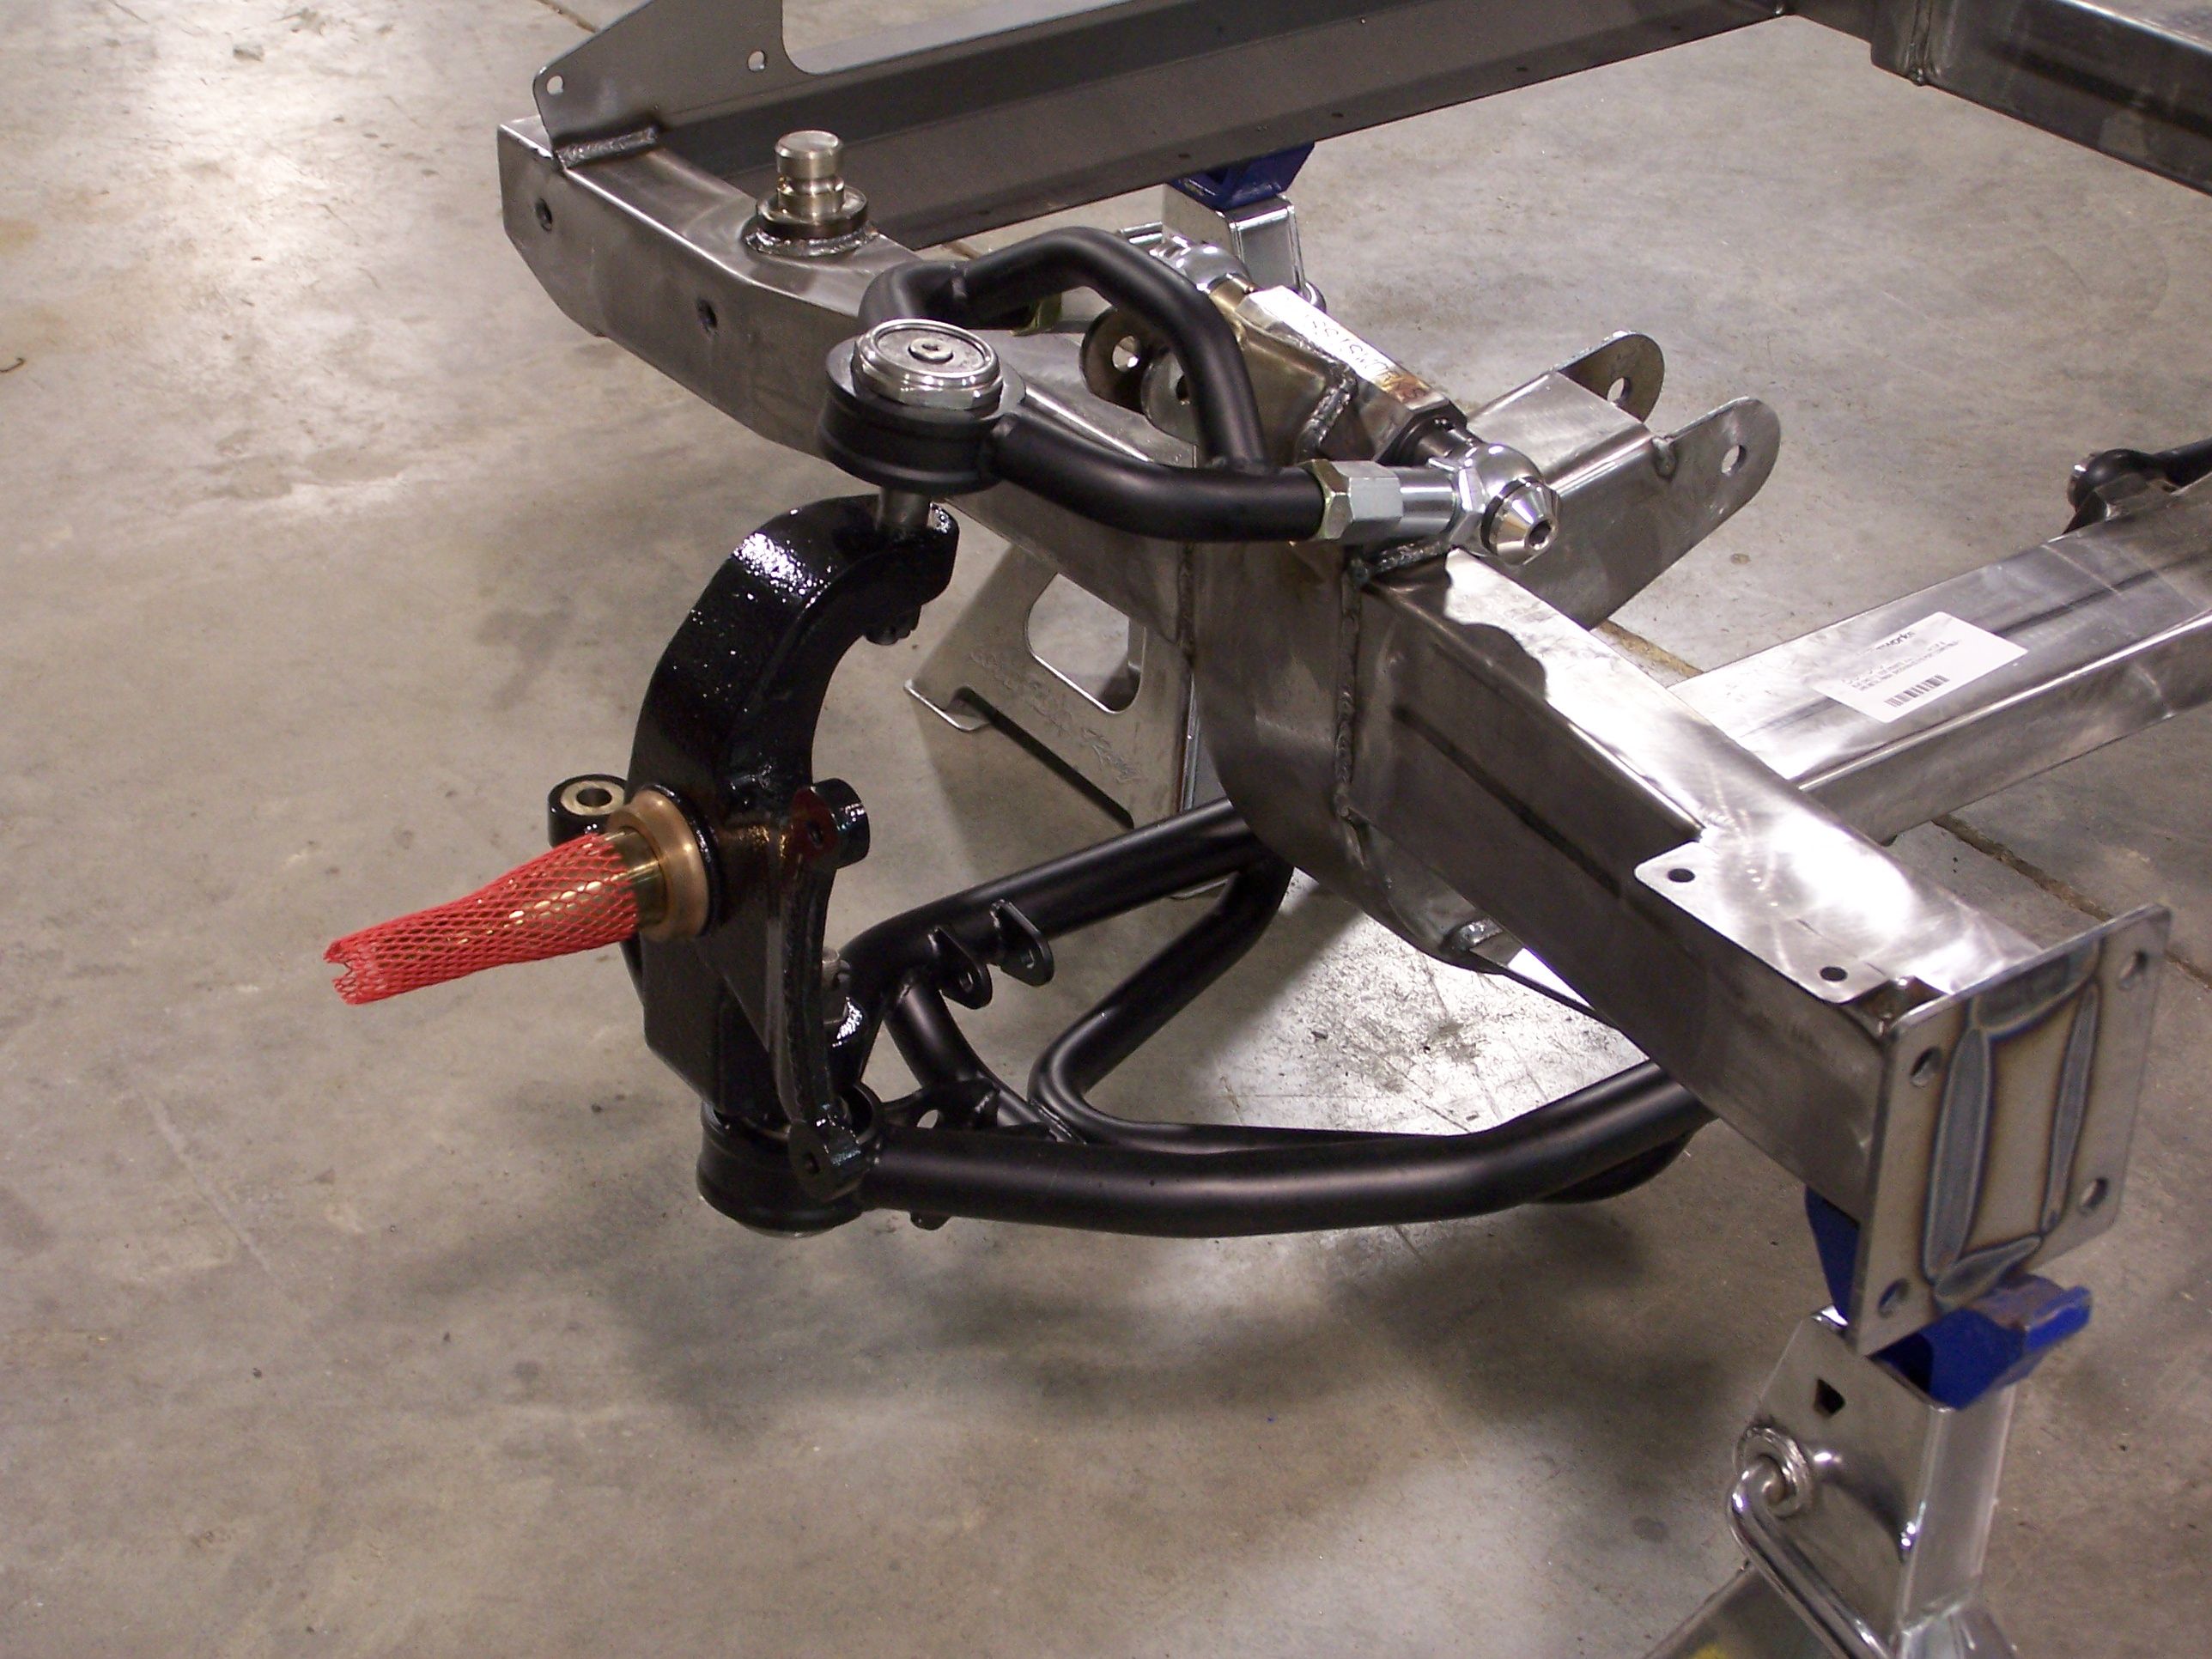
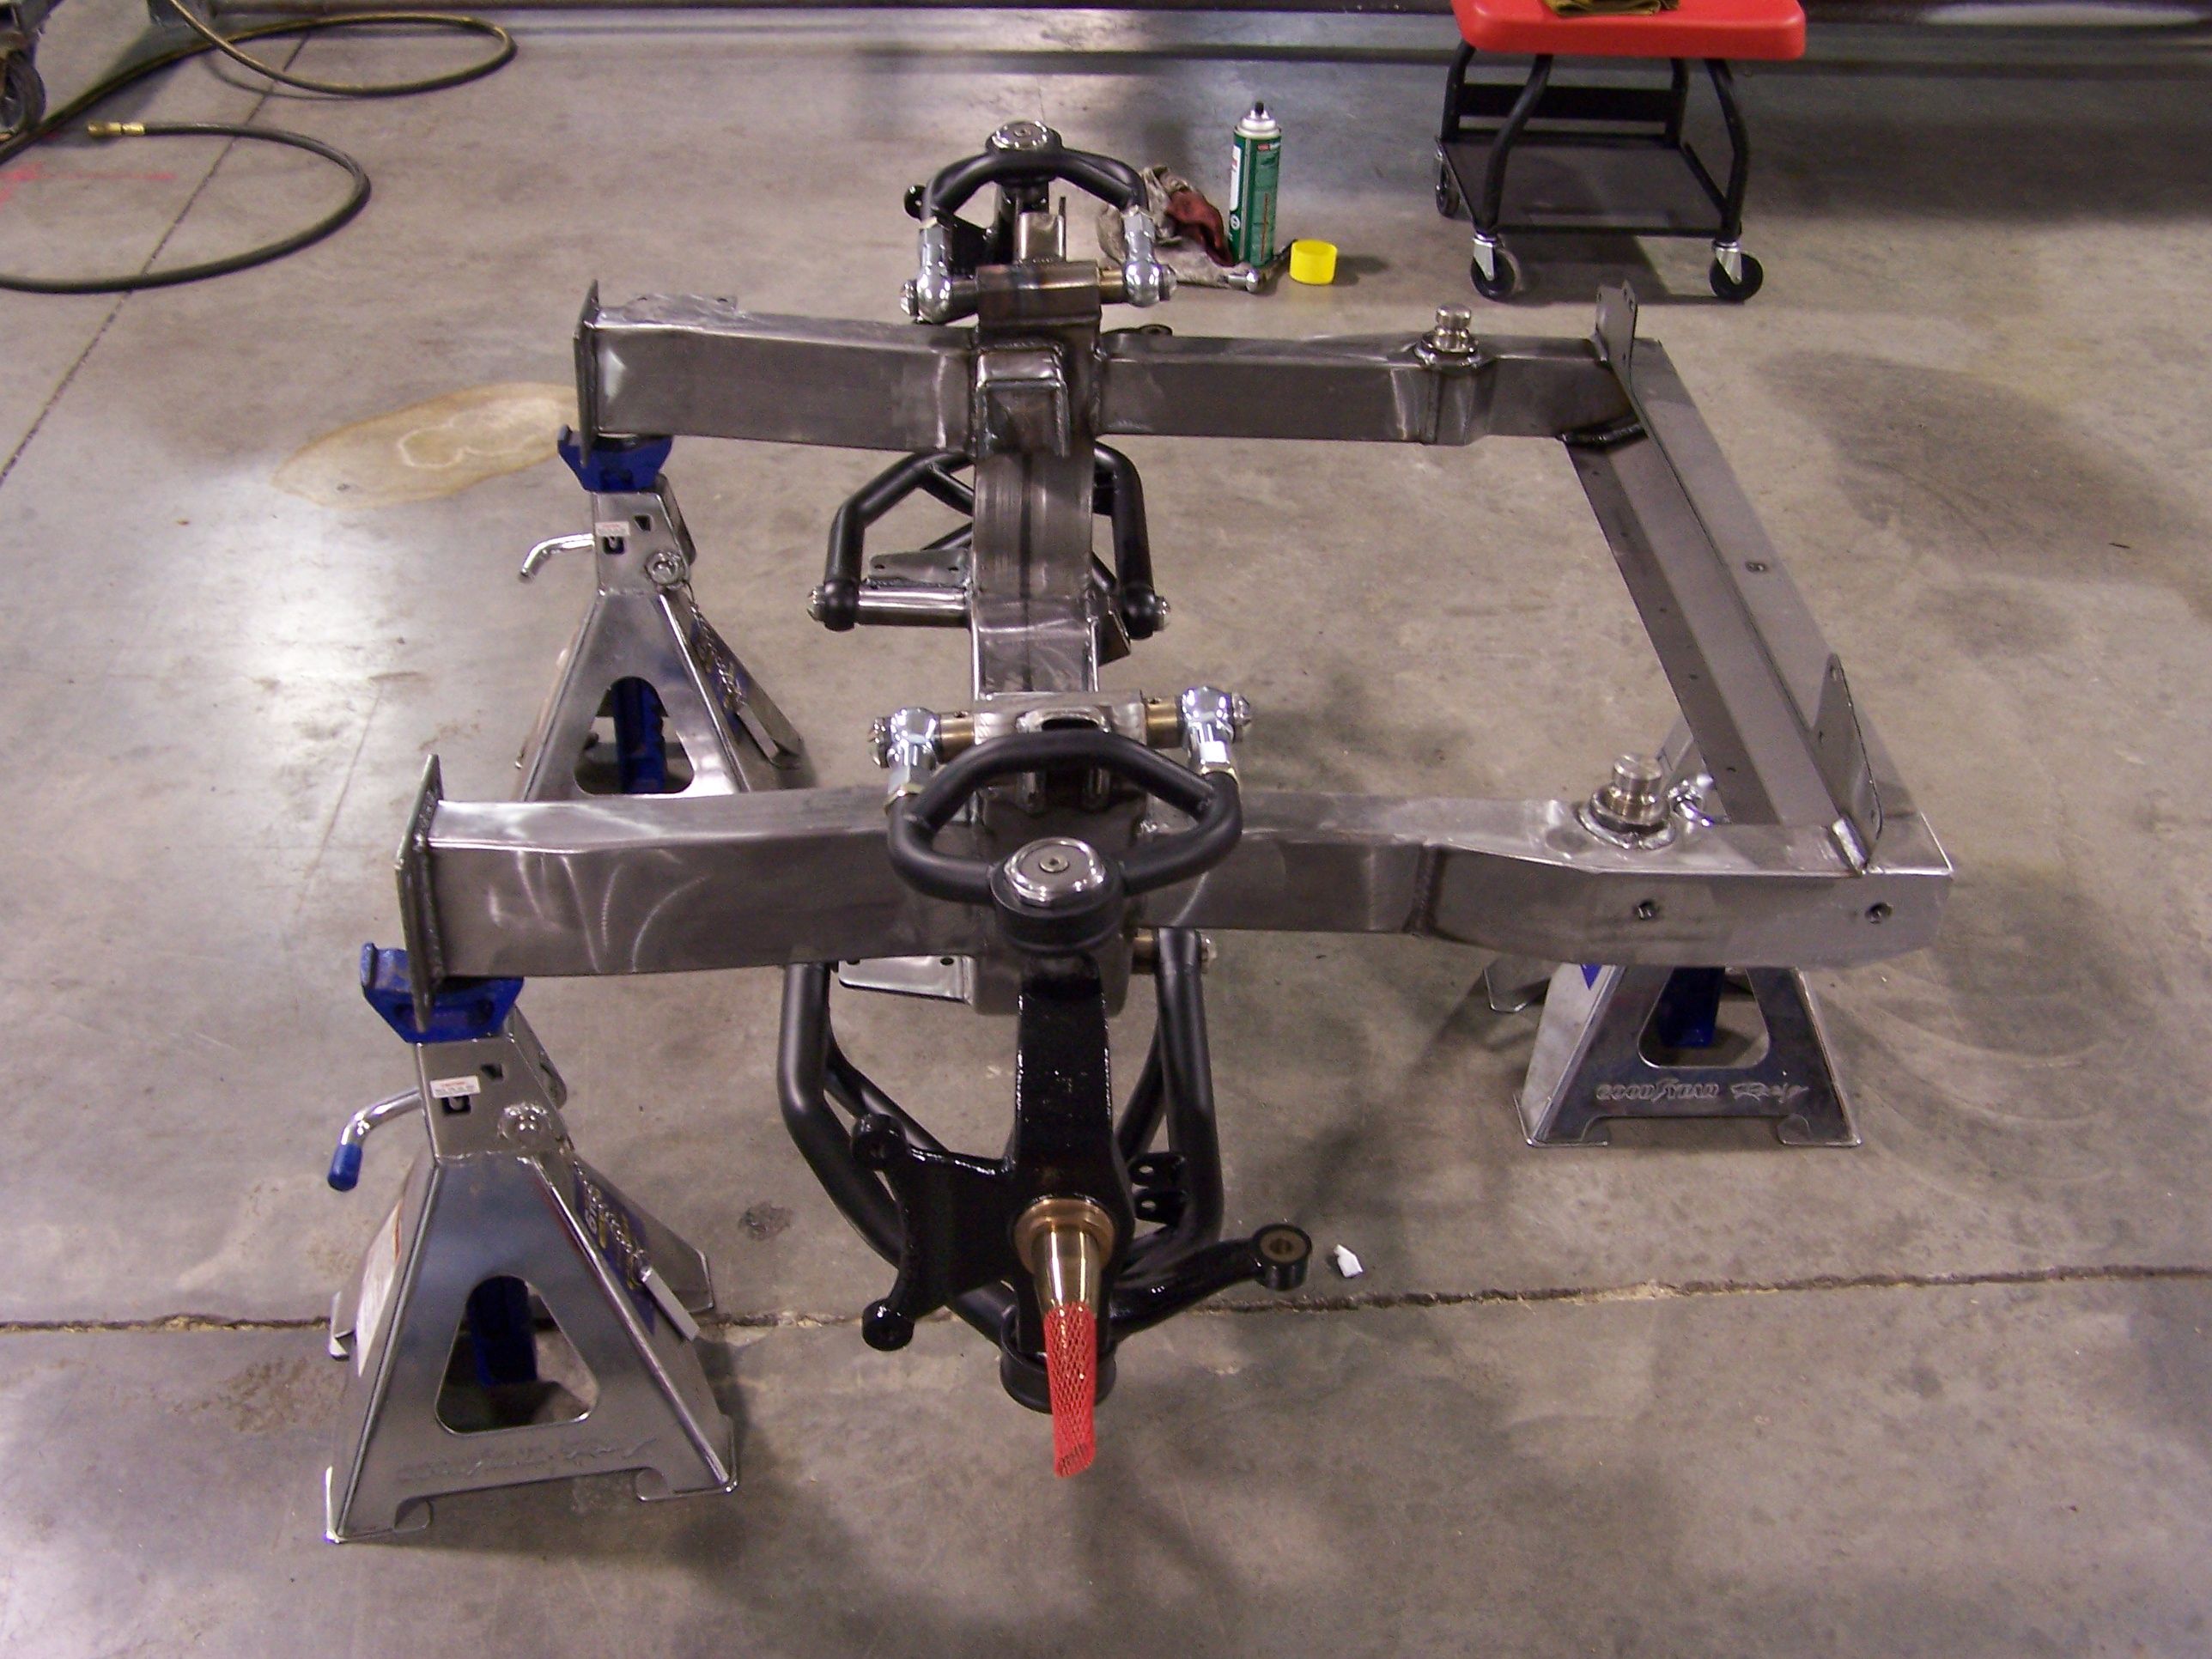
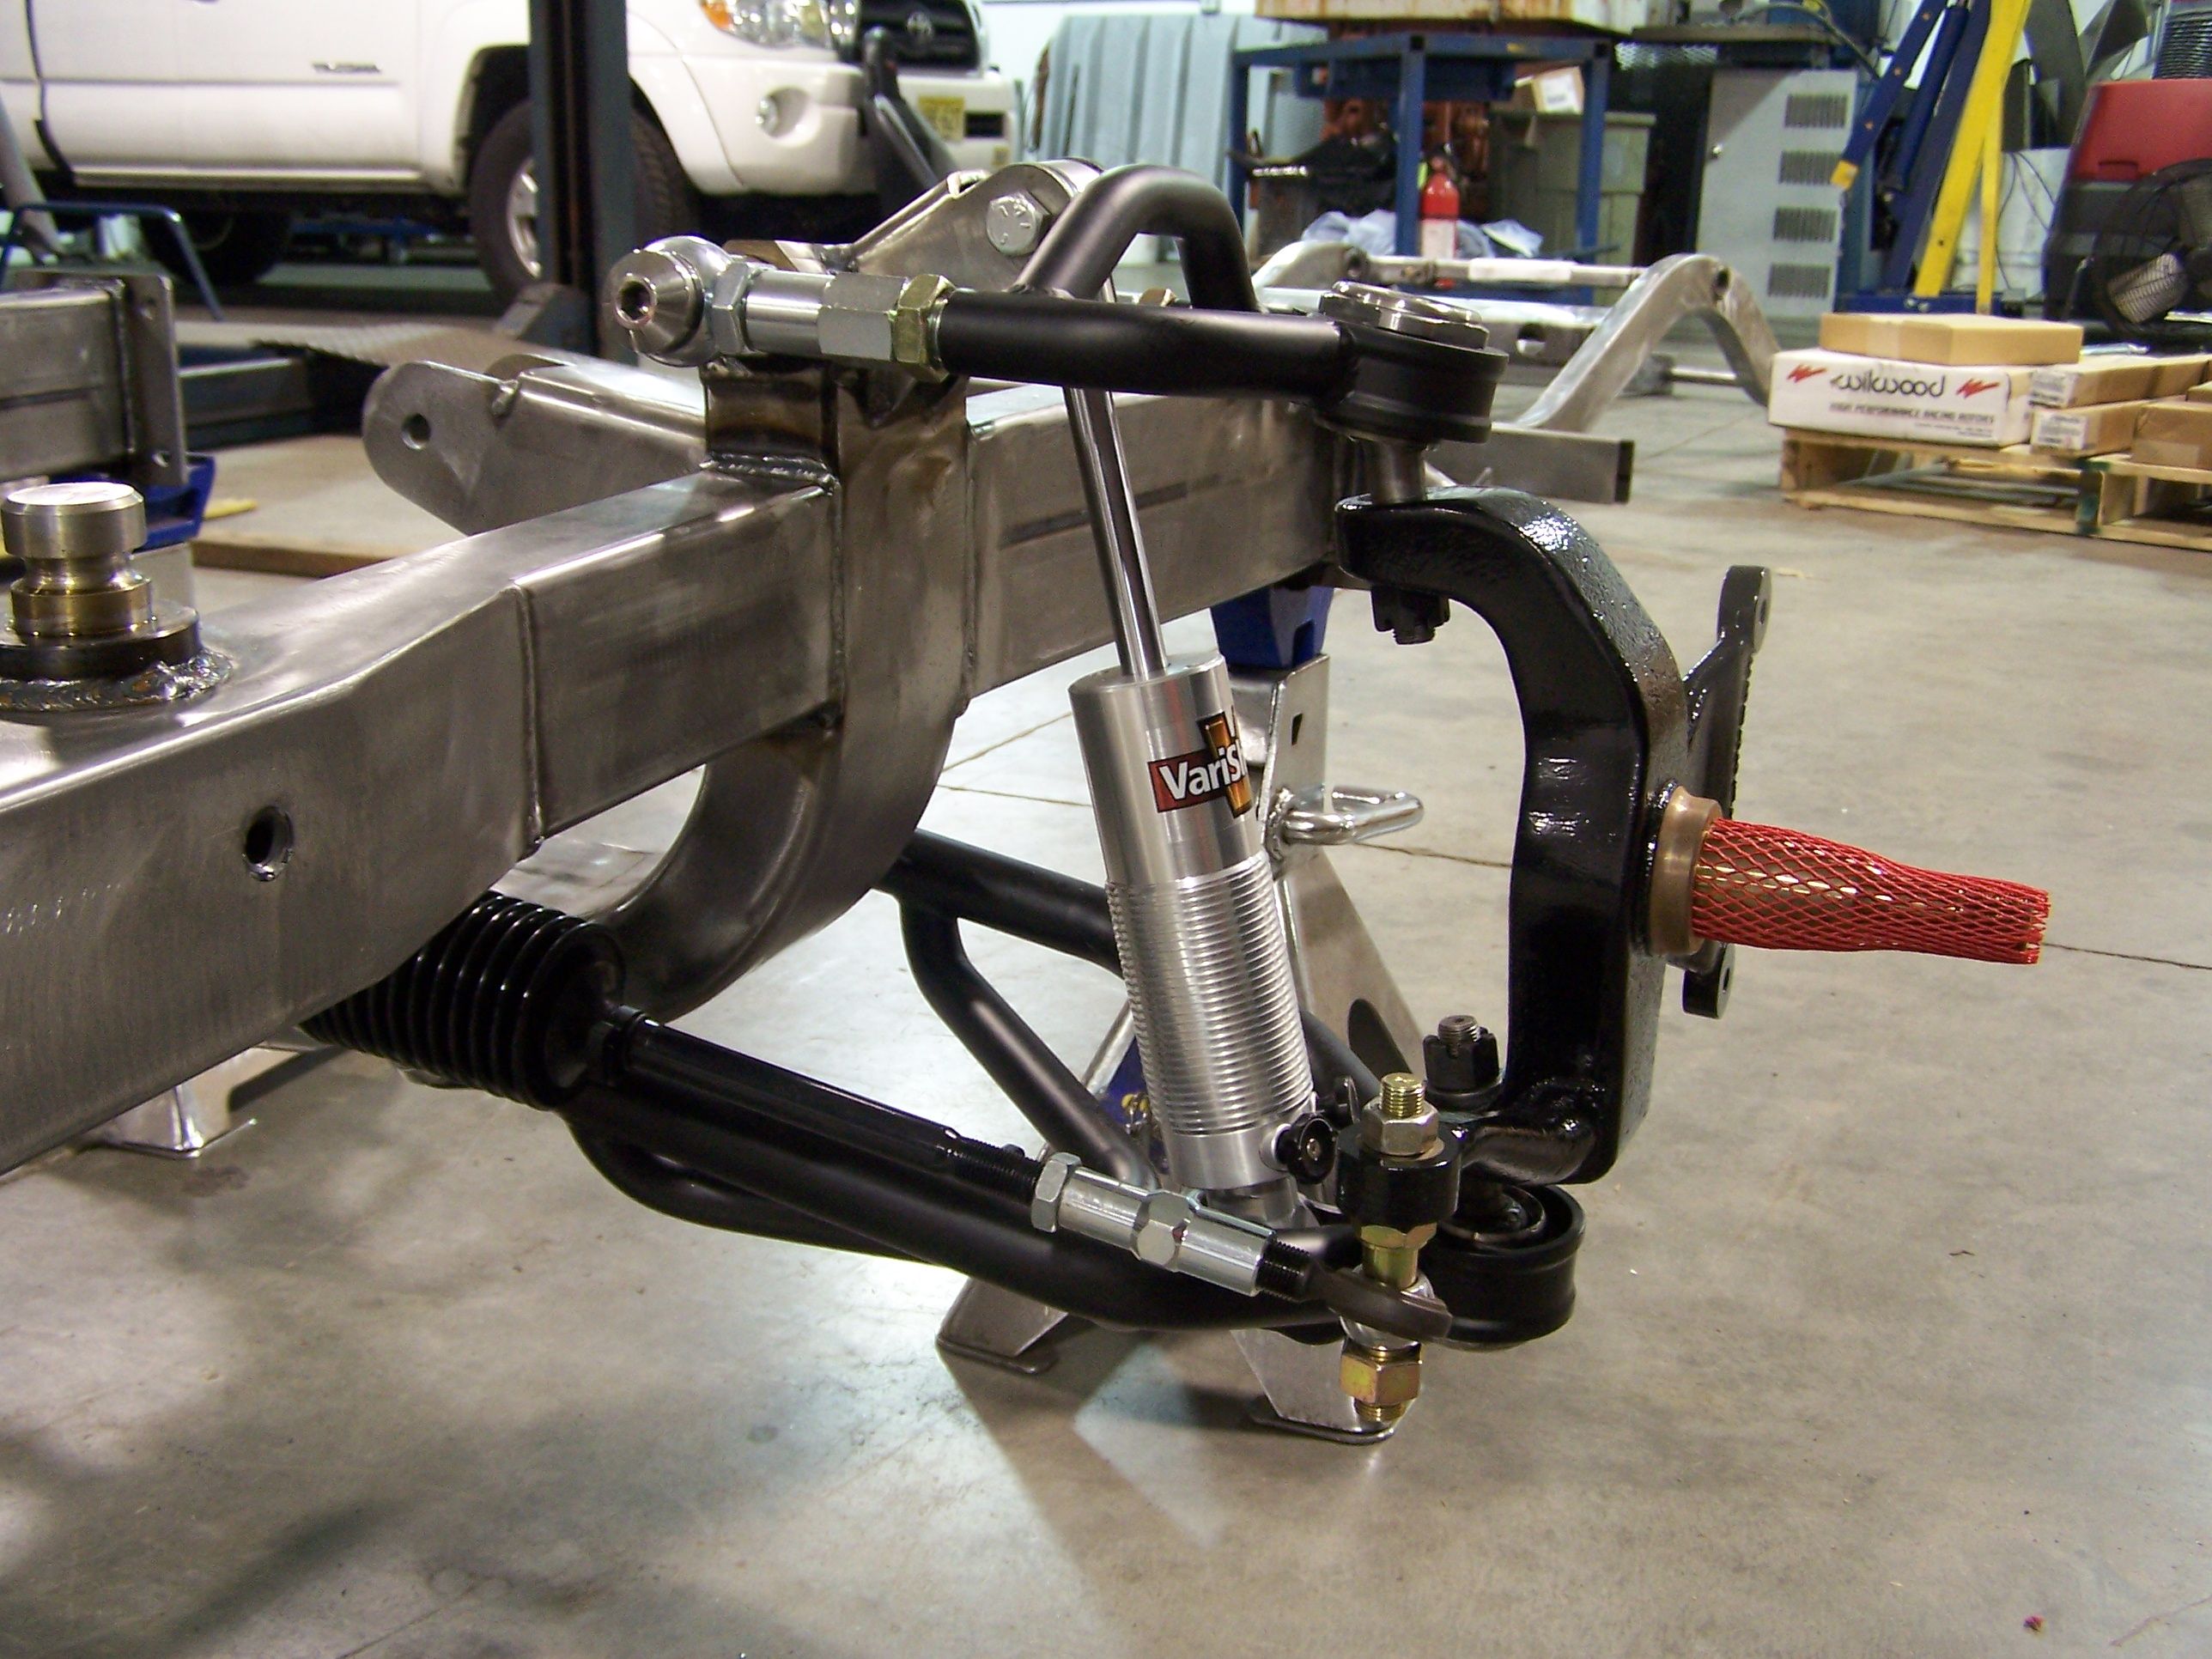
Once we got the metal work all done on the cowl area next was to put together the front clip. For that I choose the Chris Alston's Chassisworks G-Machine stuff. It is very high quality and was just what we needed. You can tell a lot of thought went into building the parts. Here are some pictures.
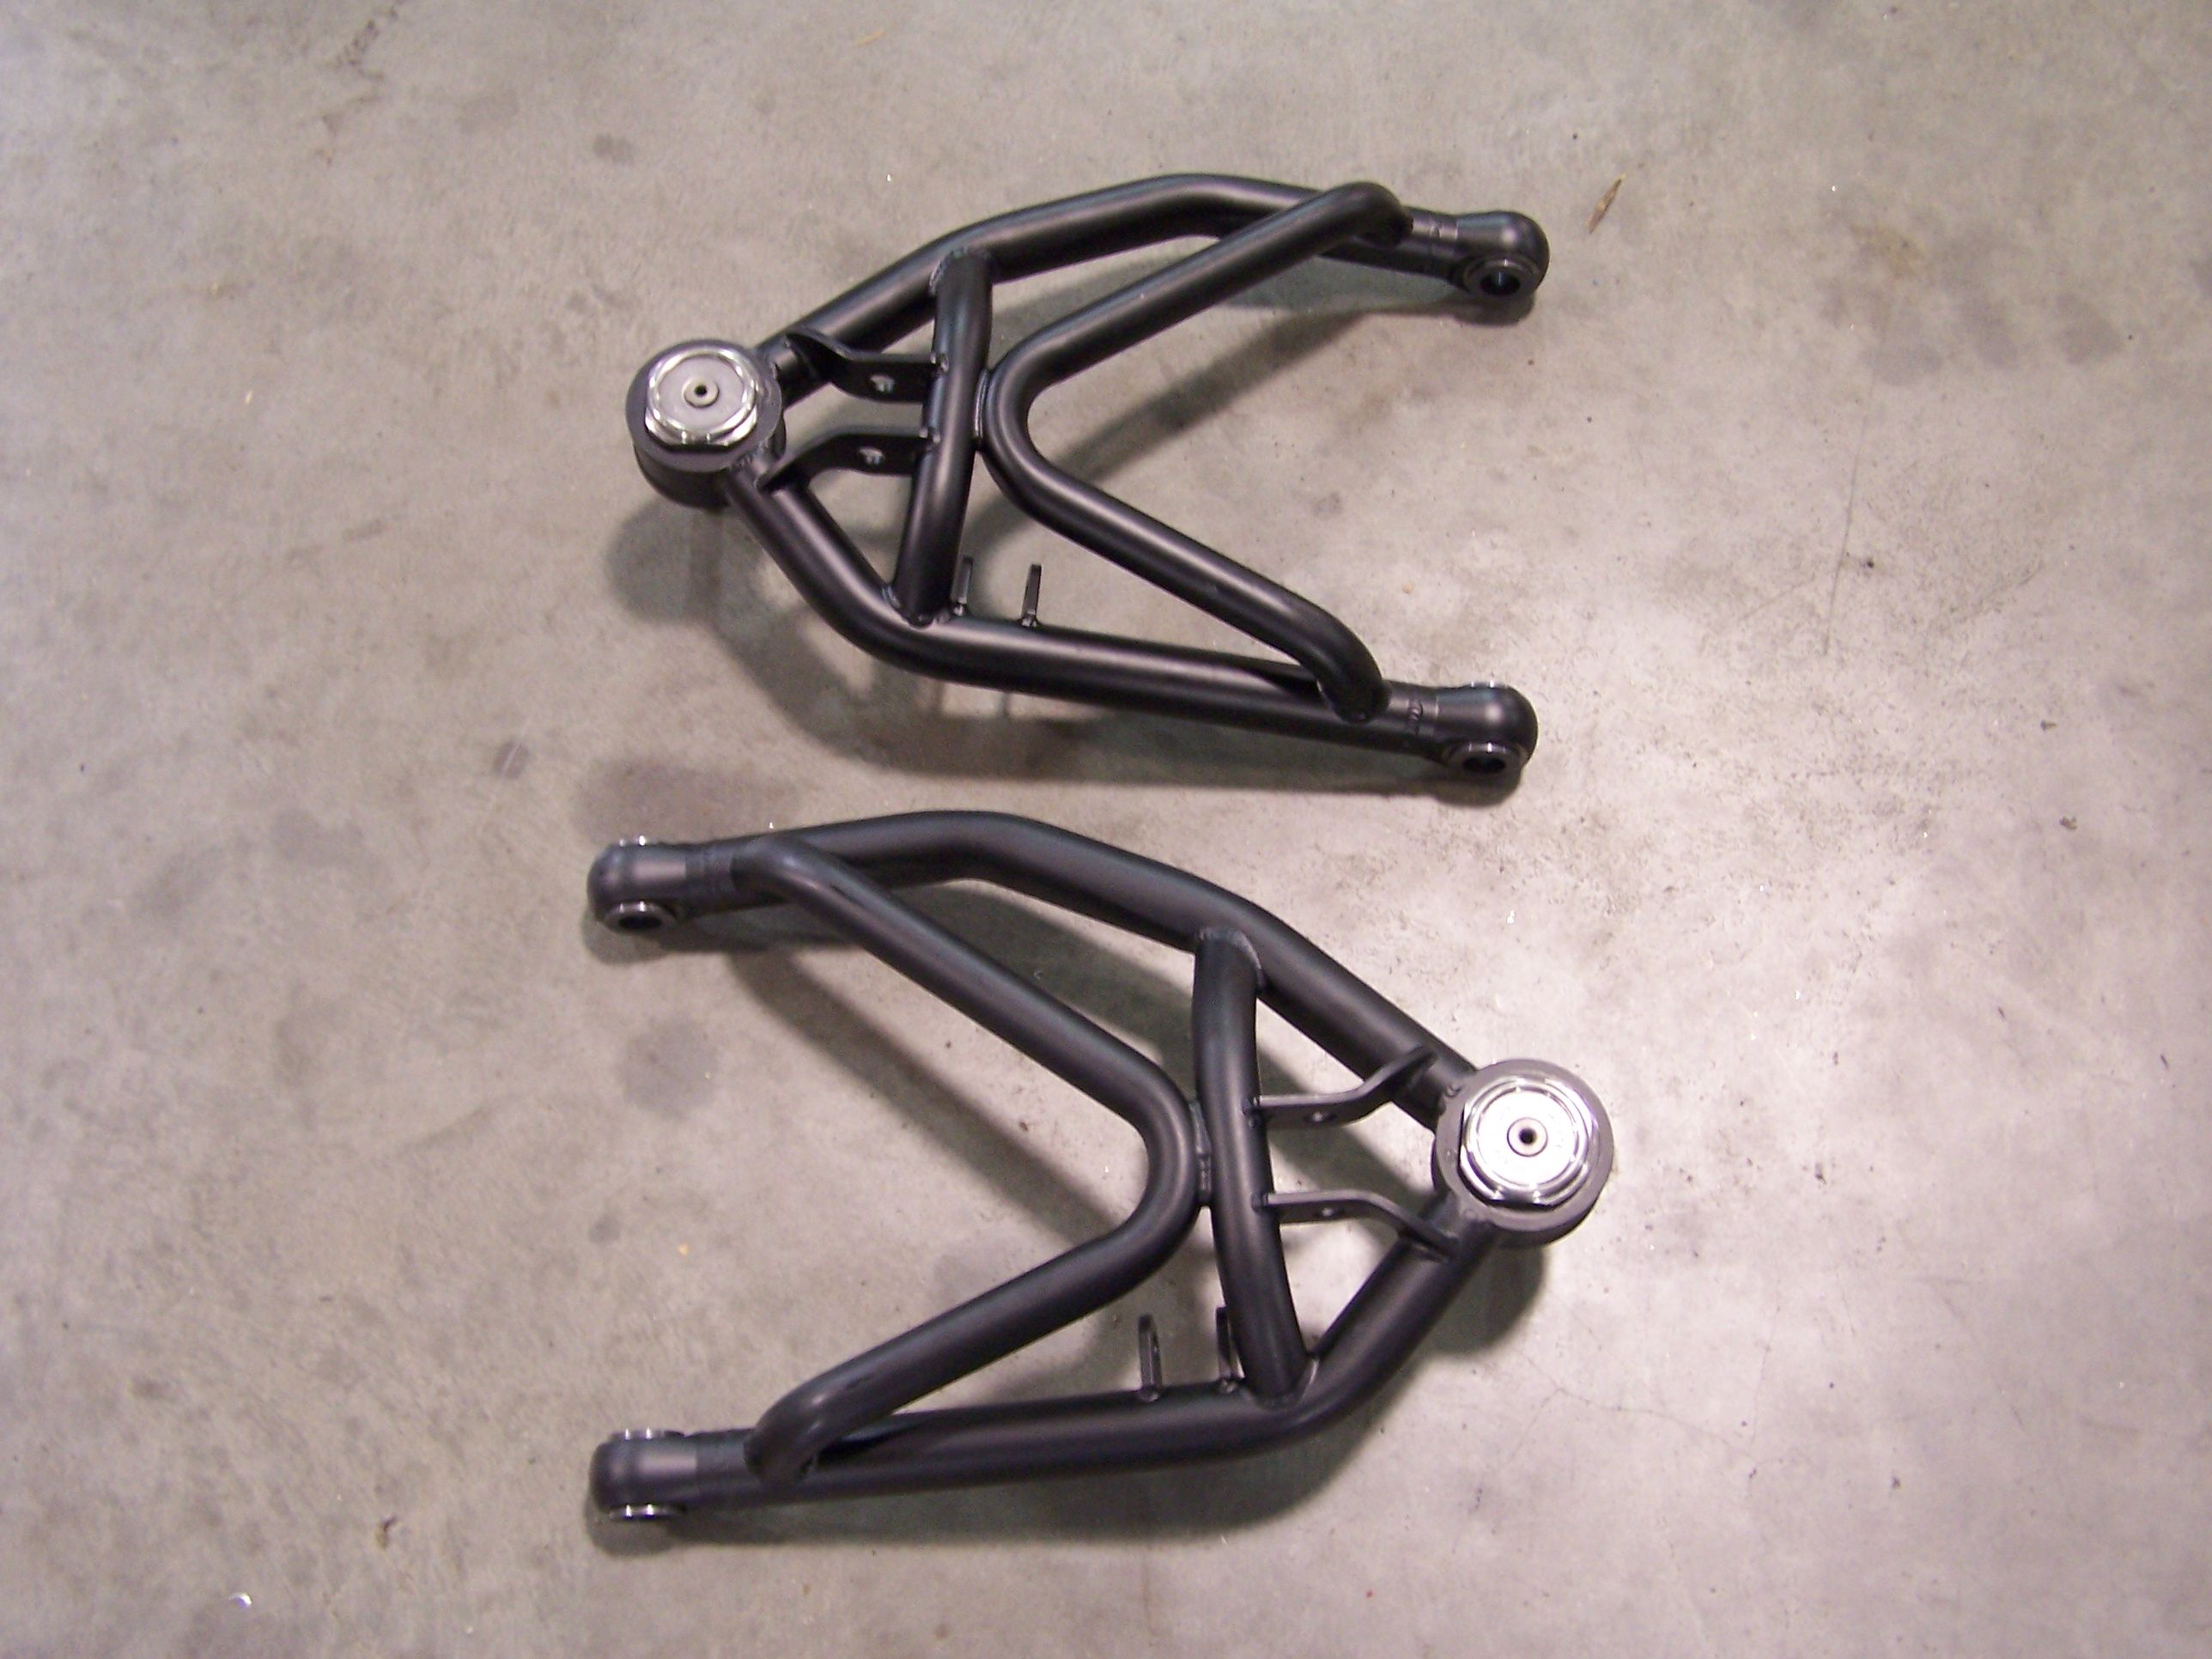


Upper A-Arms


Lower A-Arms


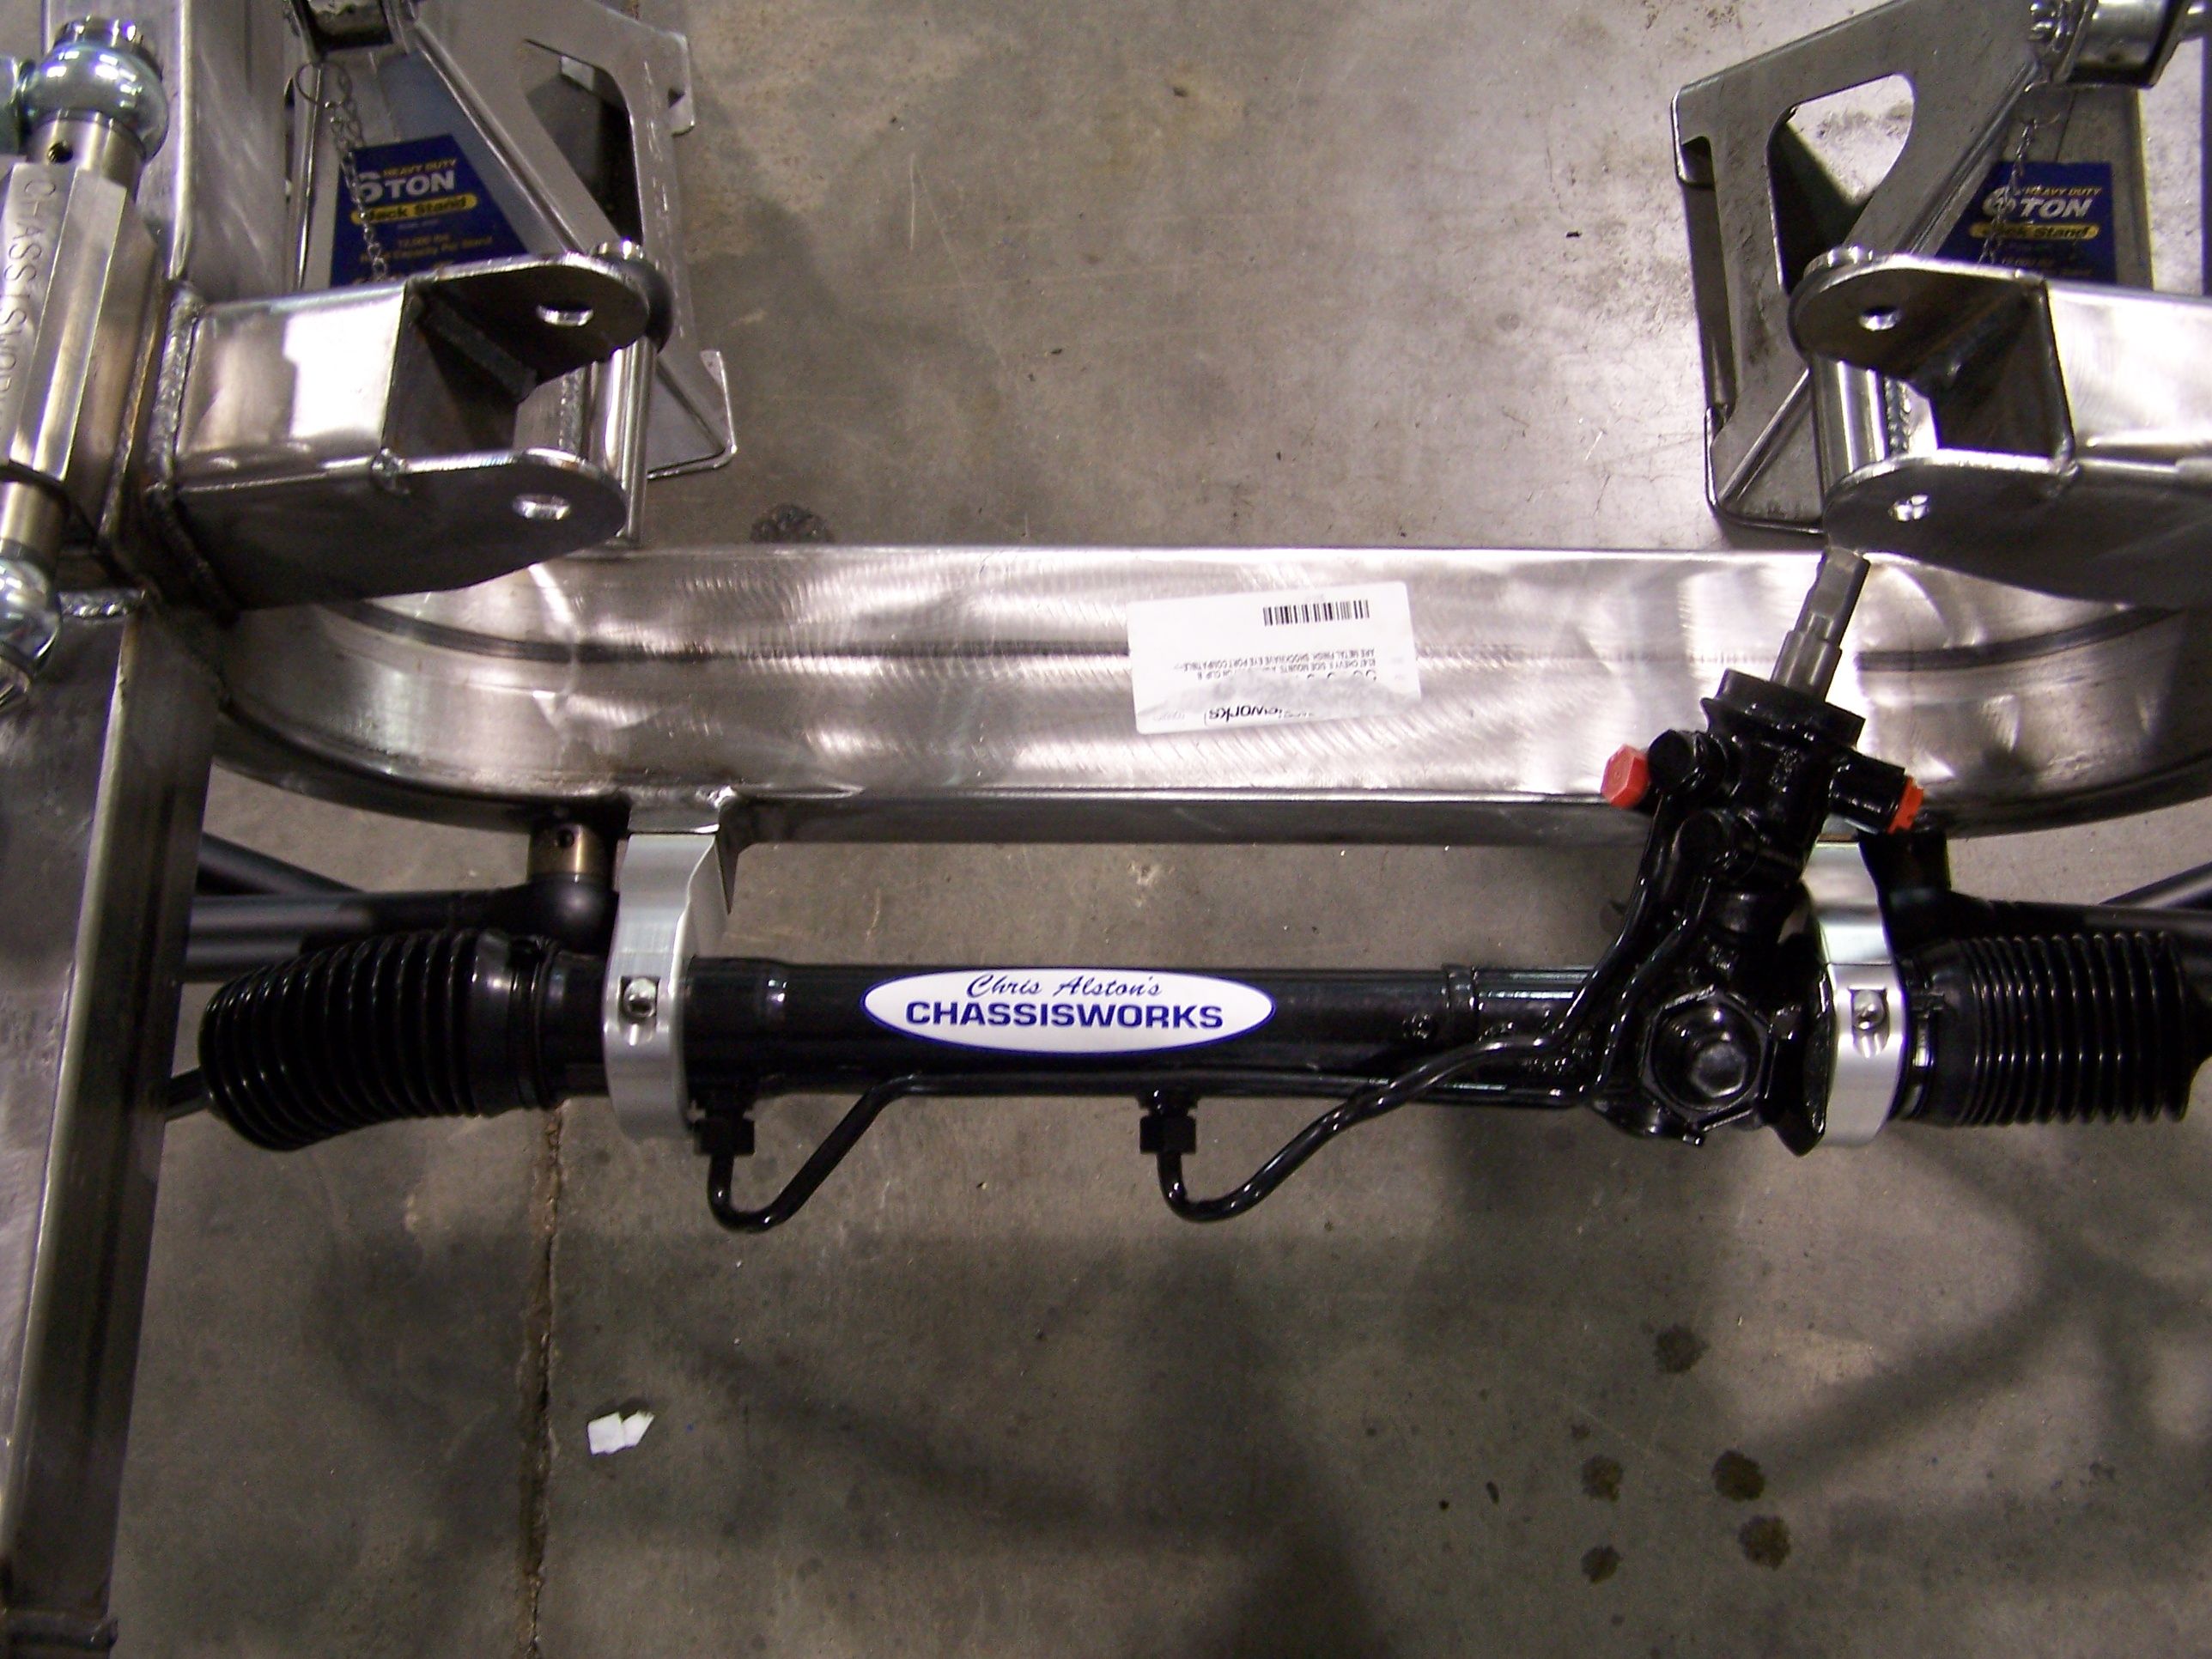
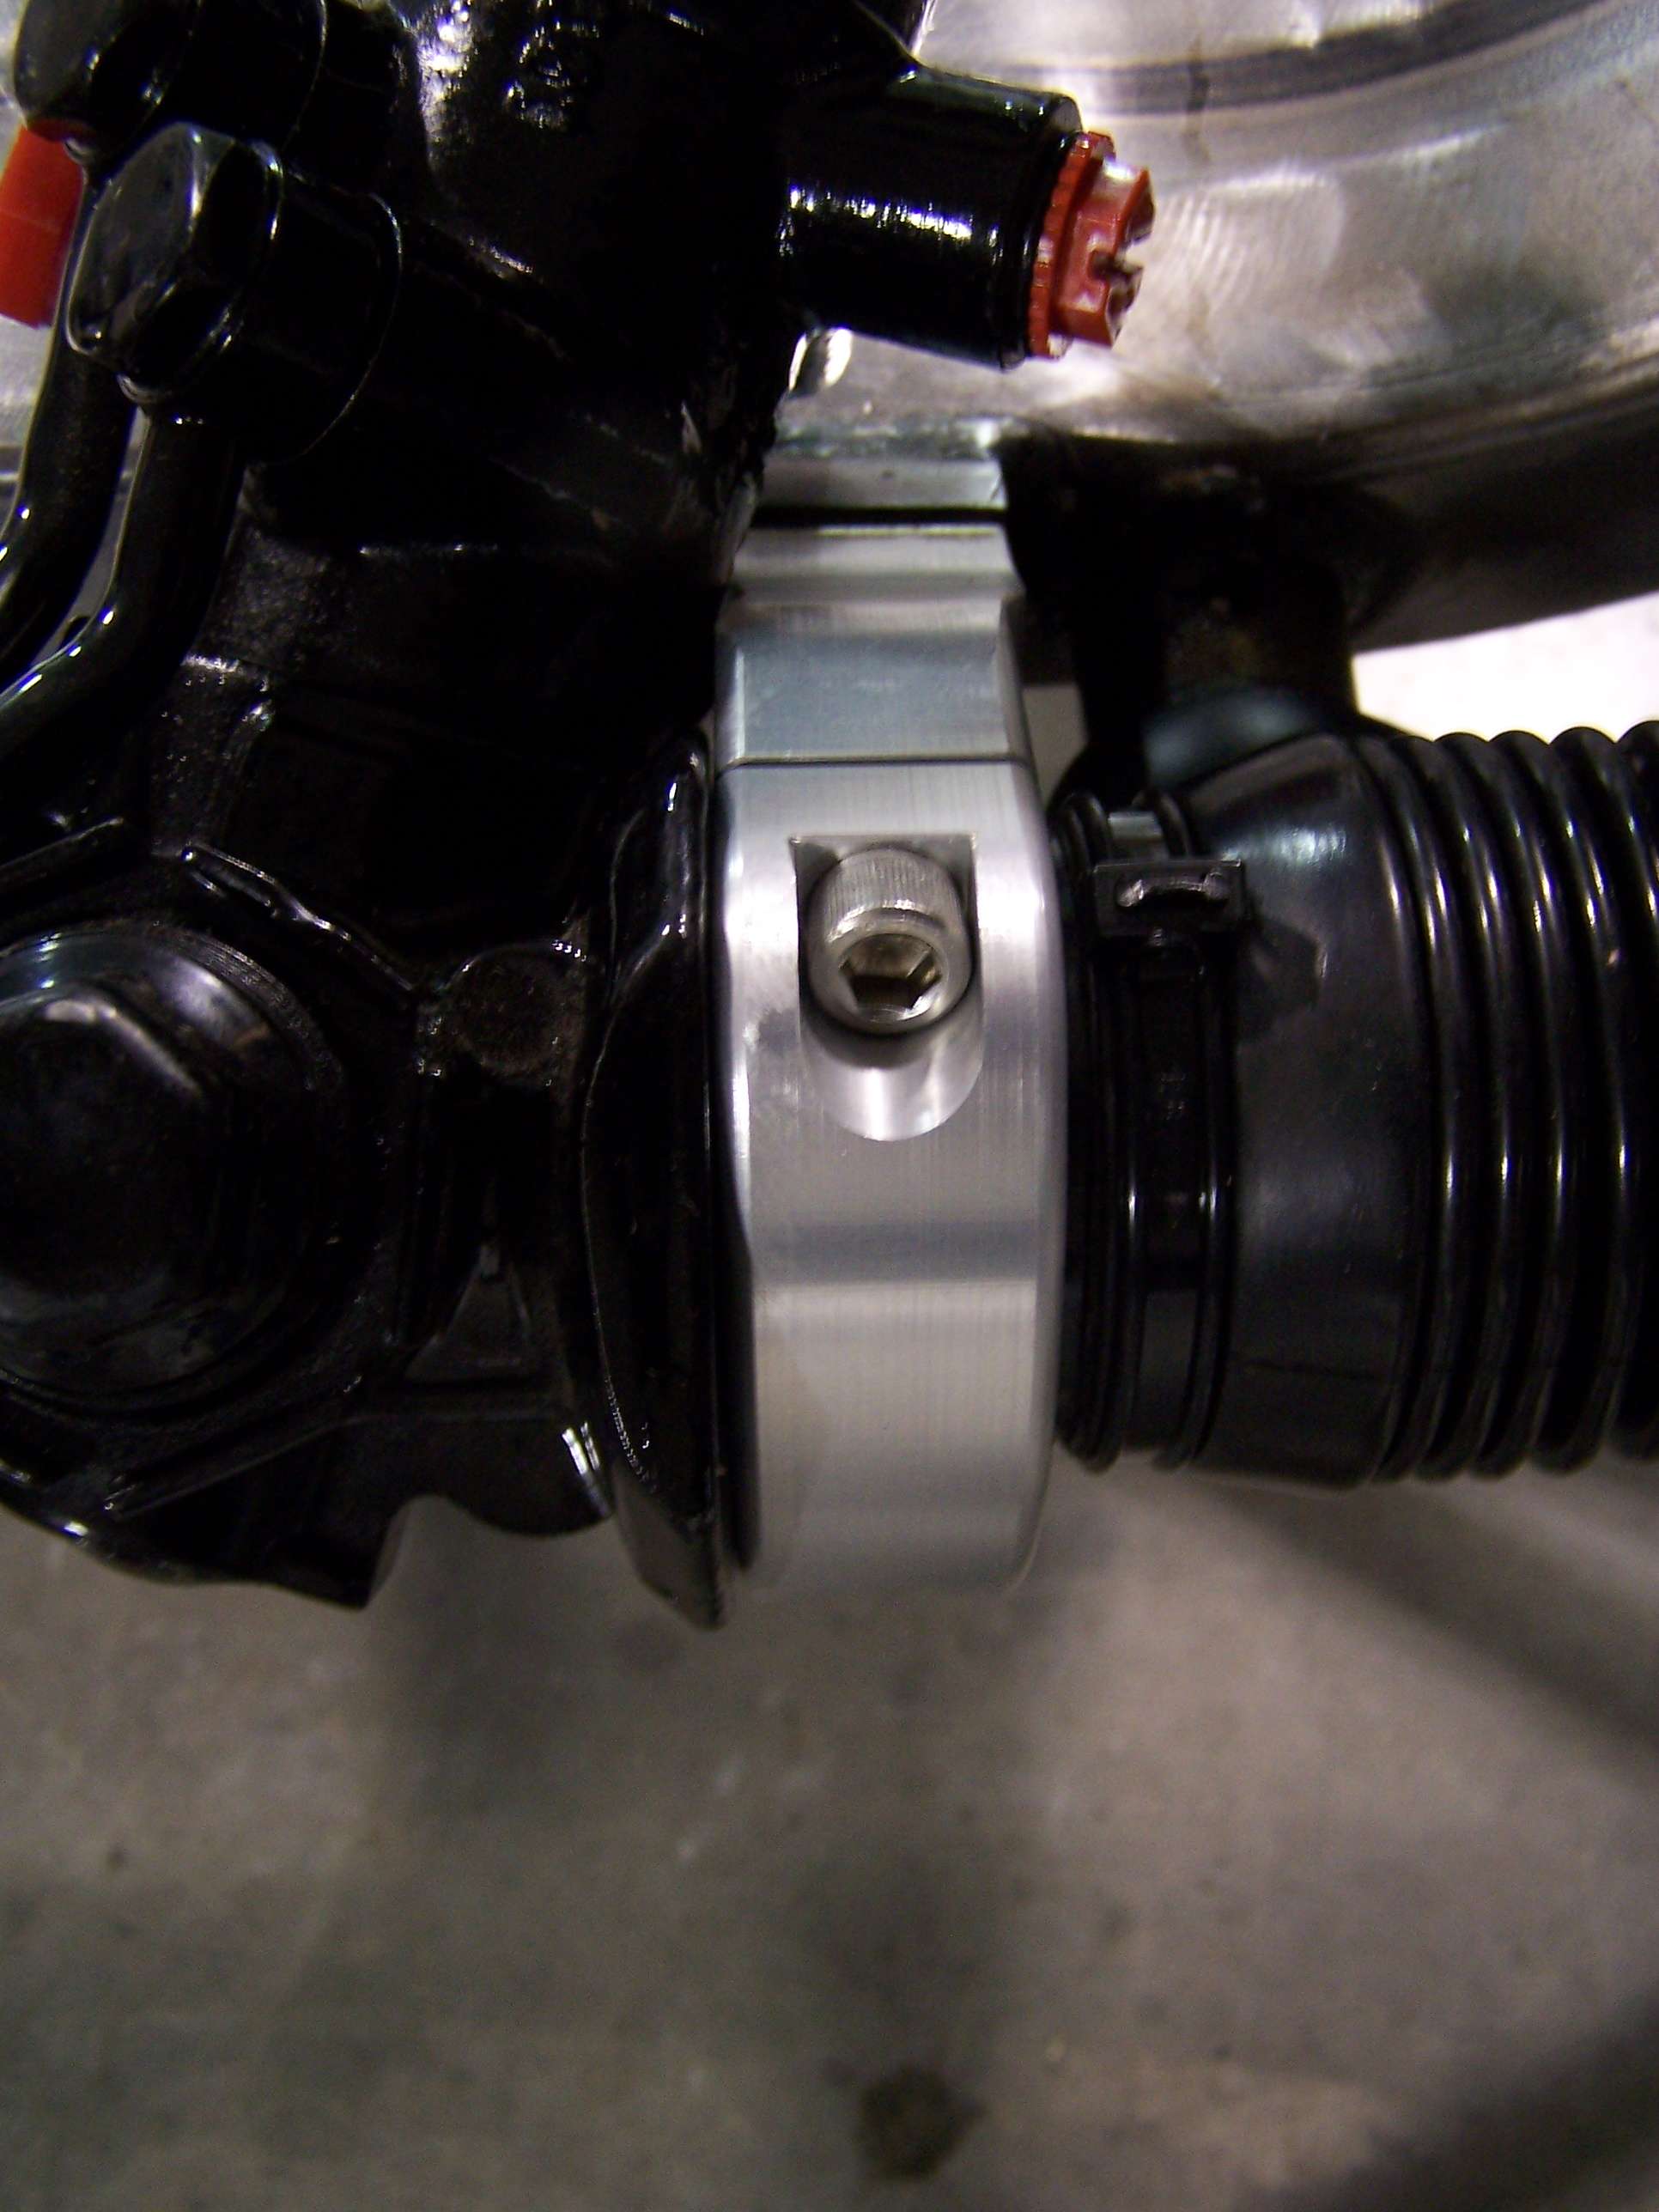
The Power Rack set up. This bolted in really nice and uses some really cool billet clamps to hold the rack on.


Close Up


I wanted to have a coil over in the car so I didn't have to worry about the air side of things. I got the double adjustable Vari-Shock.


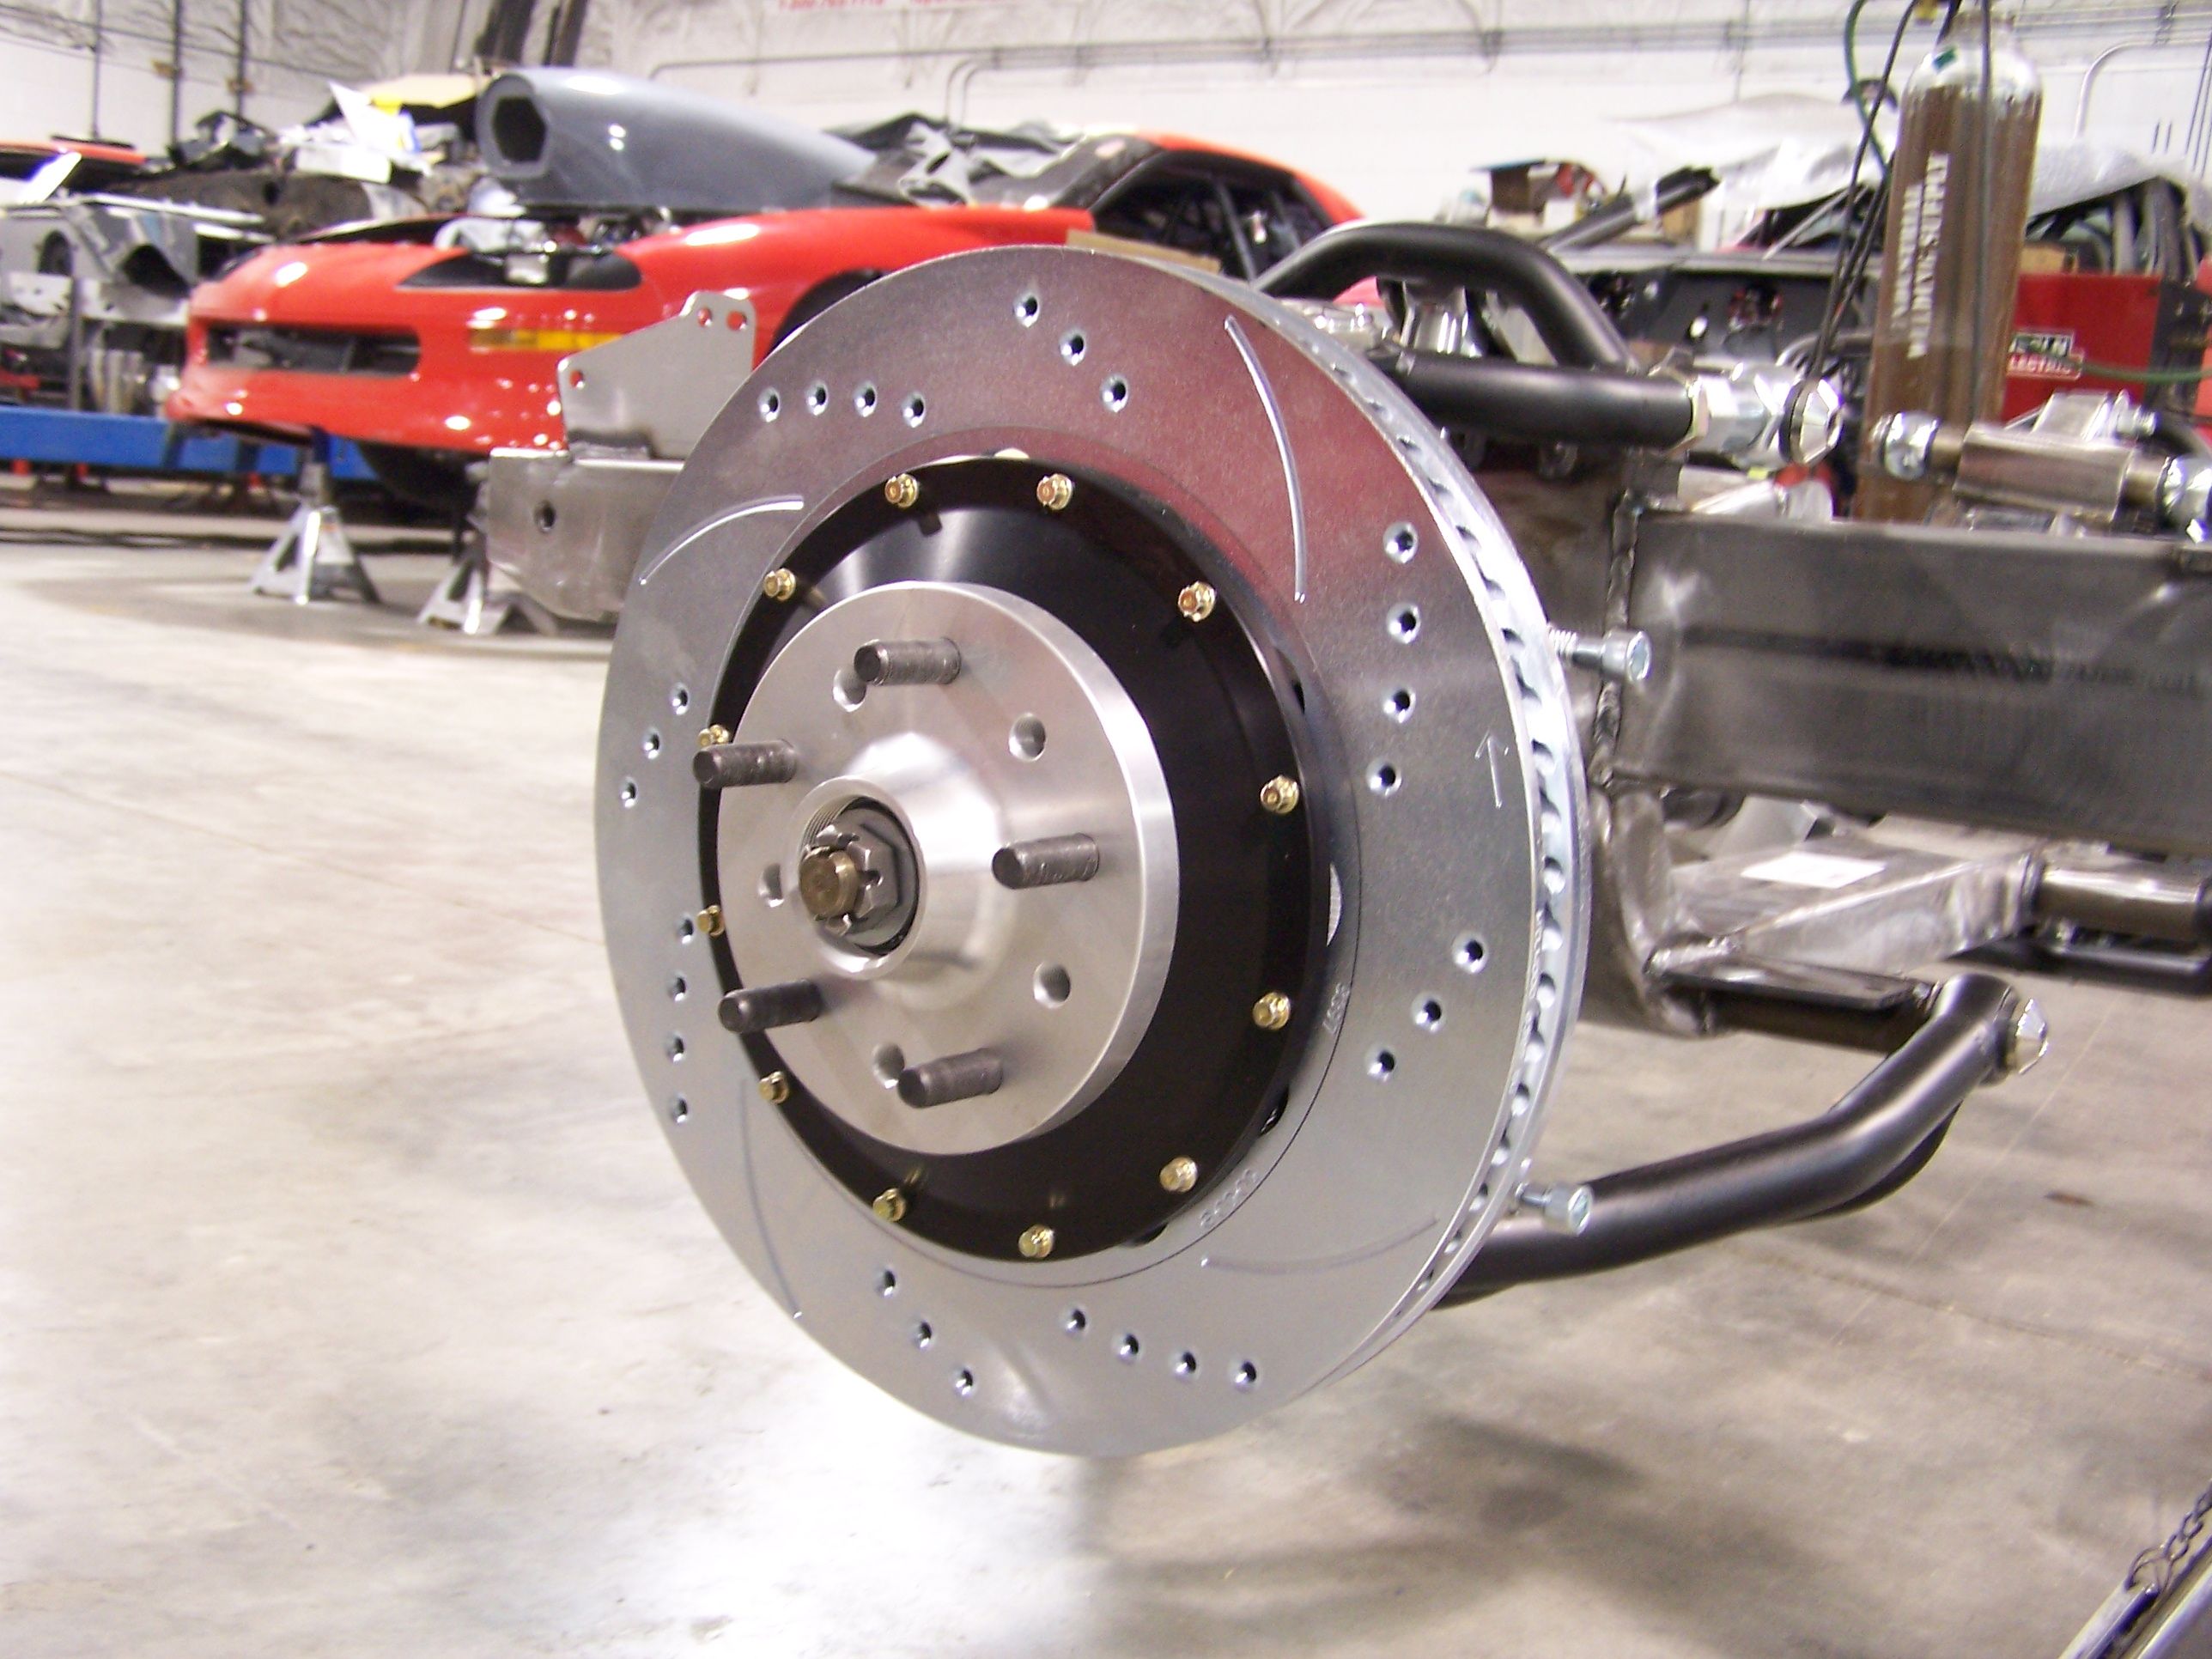
Also to make sure the car has no problems stopping I got the 14 inch Wilwood 6 piston brake set-up also made by Chassisworks.


Here is the whole clip built and ready to be bolted to the main body.
Reply With Quote
  #4  
Old 02-12-2011, 08:41 PM
69c4x11's Avatar
69c4x11 69c4x11 is offline
Senior Member
 
Join Date: Oct 2005
Posts: 252
Thanks: 0
Thanked 1 Time in 1 Post
Default Bad ASS

Eddie show Um the Latest pics,, How old are these?? They can see more on Super chevy Site !!!!!
Reply With Quote
  #5  
Old 02-13-2011, 07:39 AM
coolwelder62's Avatar
coolwelder62 coolwelder62 is offline
Senior Member
 
Join Date: Aug 2005
Location: Vinland Ks.
Posts: 4,315
Thanks: 0
Thanked 3 Times in 3 Posts
Default

WOW!!! Awesome.This going to be a top notch build.Can't wait to see more. Scott
Reply With Quote
  #6  
Old 02-13-2011, 03:33 PM
69c4x11's Avatar
69c4x11 69c4x11 is offline
Senior Member
 
Join Date: Oct 2005
Posts: 252
Thanks: 0
Thanked 1 Time in 1 Post
Default ?????'s

Eddie would love to talk to You !! Have ???'s about glass ?? Fuzzies, trim ?? Roger J
Reply With Quote
  #7  
Old 02-14-2011, 04:17 PM
eddiek eddiek is offline
Junior Member
 
Join Date: Oct 2007
Posts: 17
Thanks: 0
Thanked 0 Times in 0 Posts
Default

I'll PM you some info in a little bit. I just have been very busy.

I will also post some more pictures of some more stuff when I get a little bit of extra time.

Thanks
Reply With Quote
Reply

Thread Tools
Display Modes

Posting Rules
You may not post new threads
You may not post replies
You may not post attachments
You may not edit your posts

BB code is On
Smilies are On
[IMG] code is On
HTML code is Off

Forum Jump


All times are GMT -7. The time now is 02:37 PM.


Powered by vBulletin® Version 3.8.11
Copyright ©2000 - 2026, vBulletin Solutions Inc.
Copyright Lateral-g.net