...

Go Back   Lateral-g Forums > Lateral-G Open Discussions > Project Updates
User Name
Password


Reply
 
Thread Tools Display Modes
  #1  
Old 02-20-2020, 06:25 PM
WSSix WSSix is offline
Lateral-g Supporting Member
 
Join Date: Nov 2008
Location: Dunwoody, GA
Posts: 6,561
Thanks: 1,488
Thanked 837 Times in 632 Posts
Default

Looks great. The red wires on your black engine was a good choice.
__________________
Trey

Current rides: 2000 BMW 540i/6 and 86 C10.

Former ride: 1979 Trans Am WS6: LT1/T56, Kore 3 C5/6 brakes, BMW 18in rims
Reply With Quote
  #2  
Old 03-19-2020, 06:23 PM
garage_engineer's Avatar
garage_engineer garage_engineer is offline
Senior Member
 
Join Date: Jun 2015
Location: Mass
Posts: 145
Thanks: 10
Thanked 40 Times in 26 Posts
Default

Big update for tonight on all the work it took to get my wheels and tires to fit.

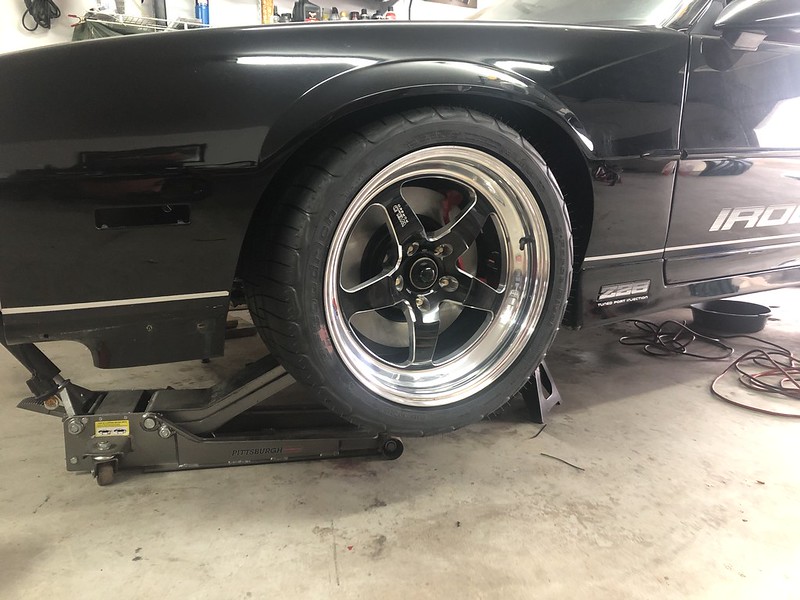
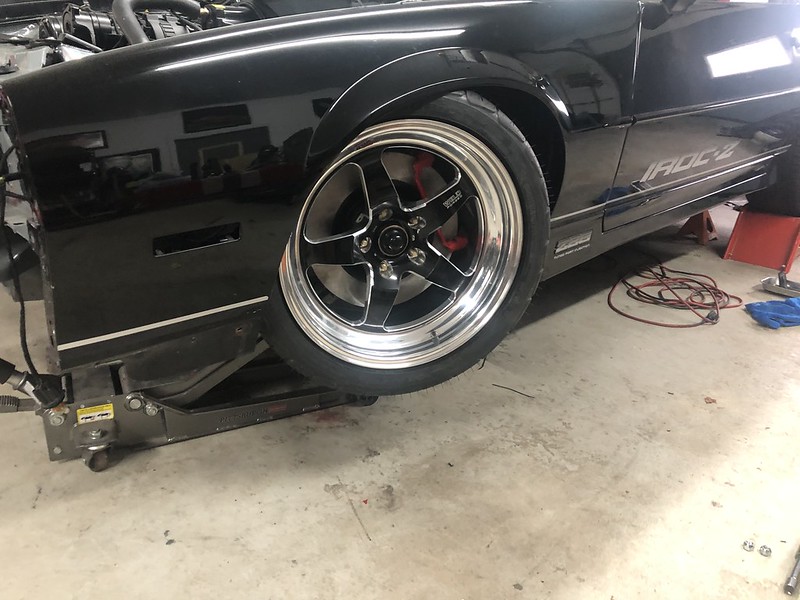
For reference, my wheels are 18x10.5" Weld S71s with a 6.6" backspace on all 4 corners. The tires are 315/30ZR18 BFG Rival S 1.5. I did my fitting with a small 1/4" thick spacer in the front.
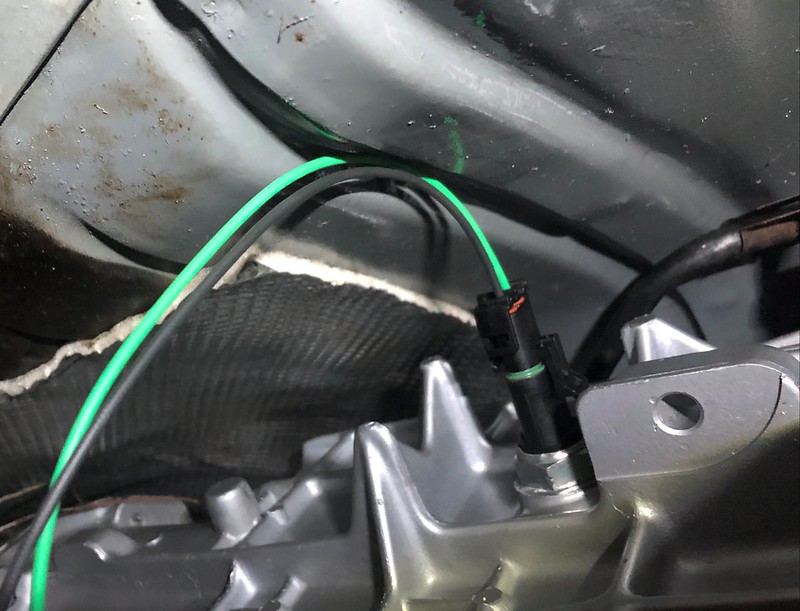
EDIT: I am also running a front brake upgrade that replaces the stock rotor / hub 1-piece assembly with a separate hub and rotor. This adds an additional width to the track the thickness of the rotor flange. Mine are Corvette C6 Z51 rotors, and I can get an exact thickness for someone if they need it.

My ultimate goal is to be able to drive this car without any compromises... so not having to go around speed bumps, avoid railroad crossings or have a huge turning circle. I want to be able to toss the keys to someone and not have to give a long list of things to worry about. A big part of this is doing your homework when installing new wheels to make sure nothing is going to rub or worse... cut a tire! With all of the autocrossing and road racing I am planning on doing with this car, I spent a lot of time here massaging everything to make sure I don't have to worry about tire rubbing.

I will start with the fronts. I removed the sway bar, front springs and the bump stops so I could cycle the suspension through it's full travel.

Here is where I would like my ride height to be:


This is where I expect the suspension to be at full compression (maybe a bit higher):


In just moving the wheel straight up, there were 2 areas that needed to be addressed.

The first was rolling the fenders. There was no way around this. I considered using the old school wooden baseball bat method, but ended up finding a fender roller on Amazon for about $40 so I just on it. The tool turned out to be pretty nice and worked like a charm. The tape was my guide for the area I needed to roll.


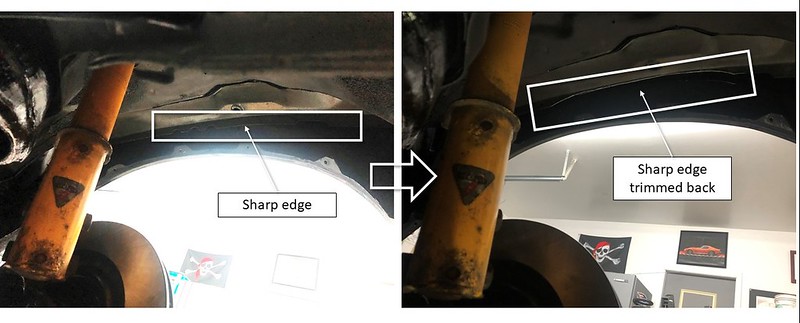
Next I trimmed a bit of material away from the pinch weld where the outer and inner fenders come together. If the tire were to get up into the fender well, this edge would definitely puncture a tire. I tried to get some good pictures but it was tough:


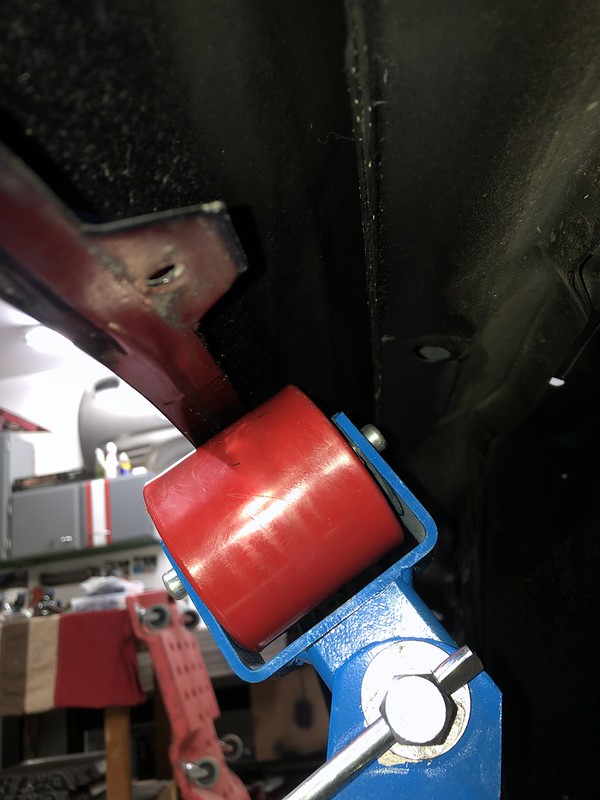
After the vertical clearance was taken care of, I started turning the wheels lock to lock at different areas of the suspension travel (from full compression to full droop) and adding clearance or removing material where needed. All of the pictures below are from the passenger side so just mirror things for the driver's side (except the battery box, obviously).


Here is another look at the battery box interference from lying under the car:


And with the final cut made:


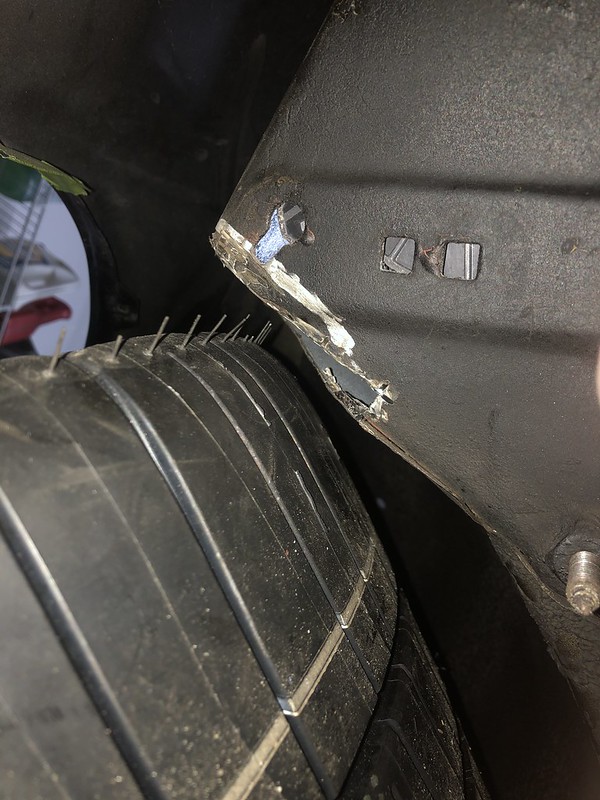
I don't currently have a welder, so once I get the car driving I'll have to find someone to weld up that corner with a little patch piece for me.

After, that things looked pretty good, so I painted to wheel wells and double checked everything:


The real test will come once I get out on the road but for now I'm pretty confident I've done my homework and will be OK. I'll post up the mods I did in the back next.

Last edited by garage_engineer; 03-20-2020 at 07:46 AM. Reason: Added brake rotor thickness info
Reply With Quote
  #3  
Old 03-19-2020, 07:23 PM
WSSix WSSix is offline
Lateral-g Supporting Member
 
Join Date: Nov 2008
Location: Dunwoody, GA
Posts: 6,561
Thanks: 1,488
Thanked 837 Times in 632 Posts
Default

Looks great! Did you give yourself enough clearance to account for tire flex?
__________________
Trey

Current rides: 2000 BMW 540i/6 and 86 C10.

Former ride: 1979 Trans Am WS6: LT1/T56, Kore 3 C5/6 brakes, BMW 18in rims
Reply With Quote
  #4  
Old 03-20-2020, 05:00 AM
garage_engineer's Avatar
garage_engineer garage_engineer is offline
Senior Member
 
Join Date: Jun 2015
Location: Mass
Posts: 145
Thanks: 10
Thanked 40 Times in 26 Posts
Default

Quote:
Originally Posted by WSSix View Post
Looks great! Did you give yourself enough clearance to account for tire flex?
I hope so! I gave it as much clearance as I could, and I figured there will be very few times when I will be at full steering lock with enough cornering force for a lot of tire deflection (maybe a 180 turnaround in an autocross?). If the clearance was still tight in a certain area at full lock, I at least ensured there were no sharp edges so the tire would not get get cut. I could then go back in and make some more adjustments in that area afterwards.

It's definitely going to be a work in progress to get the perfect fitment.
Reply With Quote
  #5  
Old 03-20-2020, 06:30 AM
ScotI ScotI is offline
Senior Member
 
Join Date: Feb 2005
Location: Dallas TX
Posts: 700
Thanks: 80
Thanked 237 Times in 162 Posts
Default

It's definitely looking good! The clearance you did will make a big impact on the 'get in it & drive w/no worry' philosophy.

I have a g-body I'm working on that buzzes the tops of the fender-wells because of the drop amount. It is annoying when you have to approach dips & asphalt patches @ a crawl to minimize the buzz.
Reply With Quote
  #6  
Old 03-20-2020, 08:42 AM
SSLance's Avatar
SSLance SSLance is offline
Senior Member
 
Join Date: Oct 2013
Location: Peoria, AZ
Posts: 2,683
Thanks: 72
Thanked 338 Times in 212 Posts
Default

Nice work! Pulling the springs and cycling everywhere is going above and beyond but also necessary to prevent troubles down the road. I've done quite a bit of that myself...
__________________
Lance
1985 Monte Carlo SS Street Car
Reply With Quote
  #7  
Old 03-21-2020, 07:16 AM
RT_66_Pro_Touring RT_66_Pro_Touring is offline
Member
 
Join Date: Oct 2016
Location: Oklahoma
Posts: 51
Thanks: 3
Thanked 7 Times in 7 Posts
Default

Quote:
Originally Posted by garage_engineer View Post
The real test will come once I get out on the road but for now I'm pretty confident I've done my homework and will be OK. I'll post up the mods I did in the back next.
Fantastic update! I told you that you were MUCH better at updates than me

What are you planning to do about the fender liners? Delete them entirely? Cut and modify?

I really appreciate the specifics of you brakes and wheel offset. I'm planning on exactly the same and it's nice to see the results in detail. The thing I have decided is whether I'm going 275 on 10.5" or 315 like you did. Cutting the battery box at this point isn't appealing.
Reply With Quote
  #8  
Old 03-23-2020, 07:25 AM
garage_engineer's Avatar
garage_engineer garage_engineer is offline
Senior Member
 
Join Date: Jun 2015
Location: Mass
Posts: 145
Thanks: 10
Thanked 40 Times in 26 Posts
Default

Quote:
Originally Posted by RT_66_Pro_Touring View Post
Fantastic update! I told you that you were MUCH better at updates than me

What are you planning to do about the fender liners? Delete them entirely? Cut and modify?

I really appreciate the specifics of you brakes and wheel offset. I'm planning on exactly the same and it's nice to see the results in detail. The thing I have decided is whether I'm going 275 on 10.5" or 315 like you did. Cutting the battery box at this point isn't appealing.
Great question on the fender liners, I forgot to mention that in my post. With rolling the fenders, you lose the mounting points for the liners. However, if you see in my pictures I marked where i needed to roll with green tape so I didn't go too far and only rolled what I needed to. This left the mounting tabs still in place in the front and back of the wheel wells. I will be trimming the liners into 2 pieces to cover those areas. On the passenger side, it's definitely critical to keep at least the back of the liner in place as the bulkhead for the engine wiring harness is right behind the tire.

I'll post up some pics once I get them mounted!

Regarding the 275 vs 315 question - not sure how much trimming you will save yourself but you will definitely save money! Depending on how long these 315s last and how many track days I get to, I may switch over to 275 myself. I doubt I am a good enough driver to even tell the difference.
Reply With Quote
  #9  
Old 04-25-2020, 07:06 PM
RT_66_Pro_Touring RT_66_Pro_Touring is offline
Member
 
Join Date: Oct 2016
Location: Oklahoma
Posts: 51
Thanks: 3
Thanked 7 Times in 7 Posts
Default

Any progress to share??
Reply With Quote
  #10  
Old 05-10-2020, 08:06 PM
garage_engineer's Avatar
garage_engineer garage_engineer is offline
Senior Member
 
Join Date: Jun 2015
Location: Mass
Posts: 145
Thanks: 10
Thanked 40 Times in 26 Posts
Default

Alright I'm back since my last post. Sorry for the delay but I have making a bunch of good progress on the car so I need to catch up on my posts. The good news I was able to get the car started! The bad news is I immediately had clutch issues:

Right after I got the car started, my clutch pedal was very stiff. It was so stiff actually that I snapped the rod going from the clutch master cylinder to the pedal. I was not happy when this happened! As with most cars the car is pretty much built around the master cylinder so I wasn't looking forward to taking everything apart that I had just put together. The show must go on though so I took off the brake master cylinder, the booster and everything else that needed to come off to get at the master cylinder. One positive though is I took the opportunity to upgrade a Tilton adjustable master cylinder. This helps a lot on these third gen cars retrofitted with LT1 T56s, as the stock 4th gen hydraulics bolt right up, but leads to clutch engagement really high in the pedal travel. I really didn't like this feeling and it made it hard to shift quickly, so this should be a nice upgrade.

Tilton adjustable master cylinder kit from Hawks Motorsports:


Bleeding the master cylinder before installing in the car:


One thing I did to make the installation 1000% easier was replace the bolts that come with the kit with studs. I struggled for a LONG time trying to line up the master cylinder in the engine bay and then thread the 2 bolts in from under the dash... talk about a frustrating experience! The studs made this so much easier because I could place the master cylinder in place with the studs through the firewall and then go underneath the dash and thread on the nuts. Worked liked a charm! I also needed to grind down the bolt holding the master cylinder to the bracket as it sat a bit proud on the mounting surface preventing the bracket from sitting flush on the firewall. You can see the grinding marks in the picture here:


Once I got the clutch master cylinder back installed, I devastated to still find a rock hard pedal. This meant something was wrong with the actual clutch. So, out came the transmission. What I found was my throw out bearing seized to my clutch disk and the throwout bearing was actually cracked:


It turns out I had my clutch disk in backwards, so instead of having clearance between the disk and the throwout bearing (which is what should happen), the disk was interfering with the bearing and eventually seized itself on there shortly after I started the engine..

The problem wasn't that I installed it incorrectly, but the sticker saying "FW SIDE" was on the wrong side of the disk! I found this out by comparing my old clutch disk to my now useless one:


So, I ended up getting a new disk and a new throwout bearing and, this time installing everything correctly, it should be working OK now. Just a pain in the rear to have to go so far backwards on the project! Now I can get back on my regular to-do list.

Last edited by garage_engineer; 05-10-2020 at 08:09 PM.
Reply With Quote
Reply

Thread Tools
Display Modes

Posting Rules
You may not post new threads
You may not post replies
You may not post attachments
You may not edit your posts

BB code is On
Smilies are On
[IMG] code is On
HTML code is Off

Forum Jump


All times are GMT -7. The time now is 07:39 AM.


Powered by vBulletin® Version 3.8.11
Copyright ©2000 - 2025, vBulletin Solutions Inc.
Copyright Lateral-g.net