...

Go Back   Lateral-g Forums > Lateral-G Open Discussions > Project Updates
User Name
Password


Reply
 
Thread Tools Display Modes
  #211  
Old 10-17-2014, 06:59 AM
bonecrrusher's Avatar
bonecrrusher bonecrrusher is offline
Senior Member
 
Join Date: Jun 2010
Location: Charlotte NC
Posts: 644
Thanks: 2
Thanked 3 Times in 3 Posts
Default

Long time no update - been working alot, getting my house ready to sell, and been replacing the suspension on my truck.

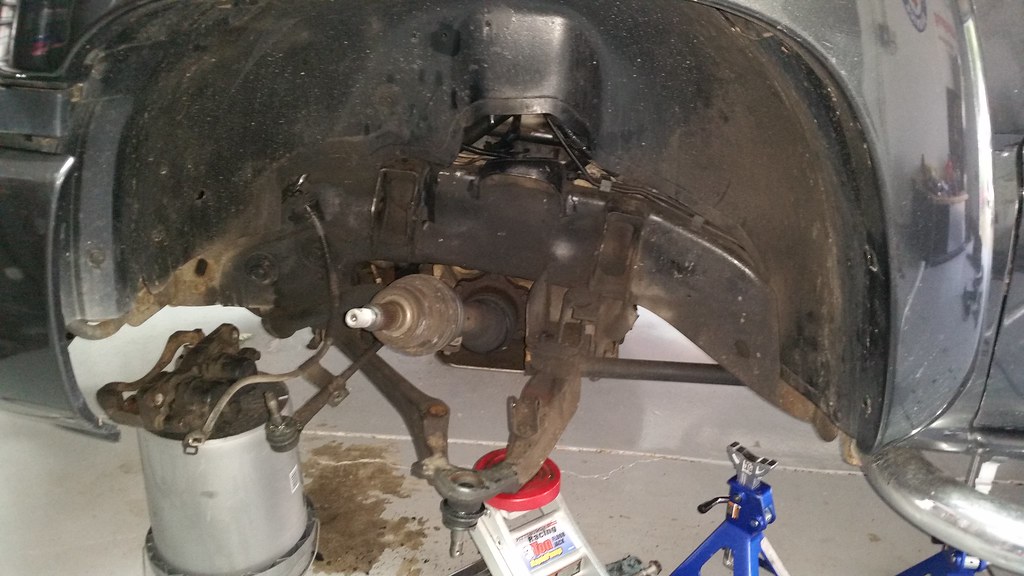
I got under the front end and found both upper balljoints have torn boots, one of the outer tie rod ends has a born boot, and both of the inner tie rods are missing the clamp around the dust boot that looks like a CV joint.

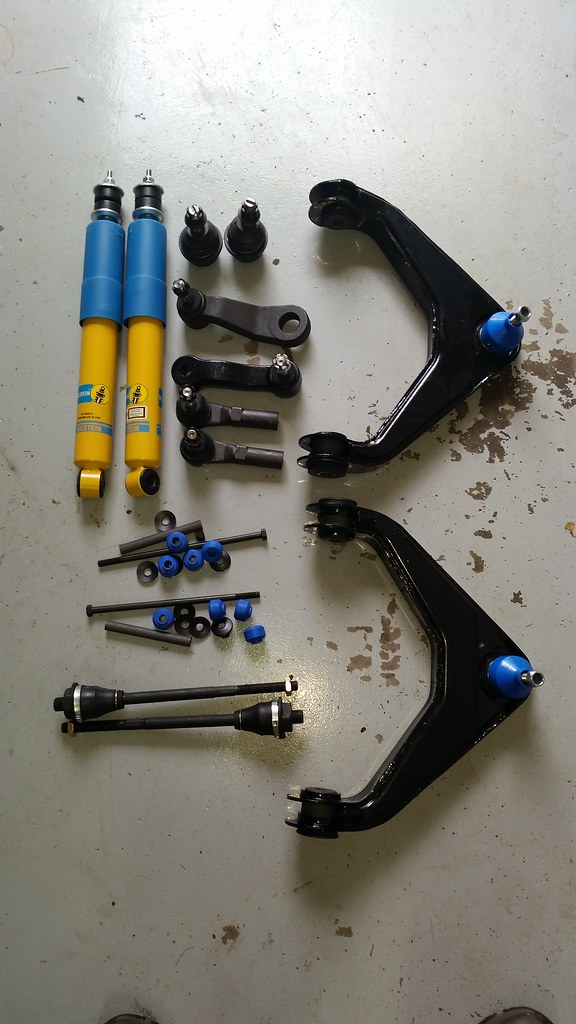
So I ordered all new Moog front end pieces, as well as Bilstein shocks all around.

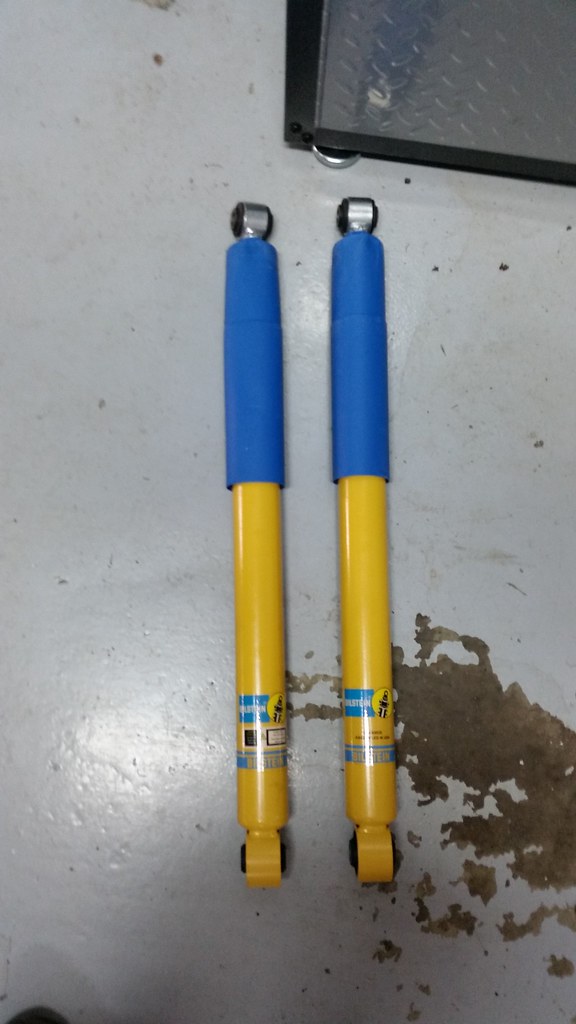
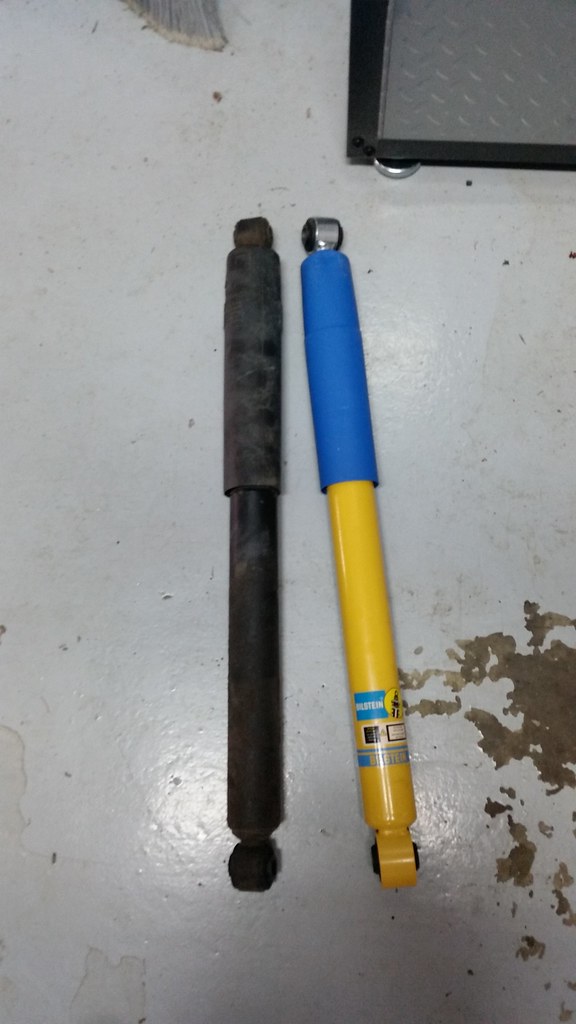
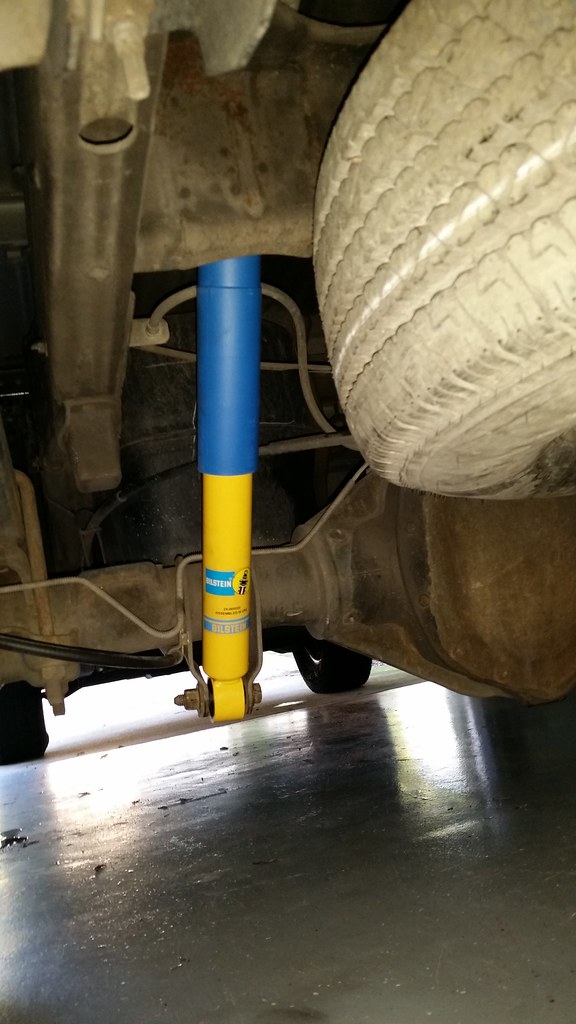
I did the easiest project first - I installed the rear shocks:


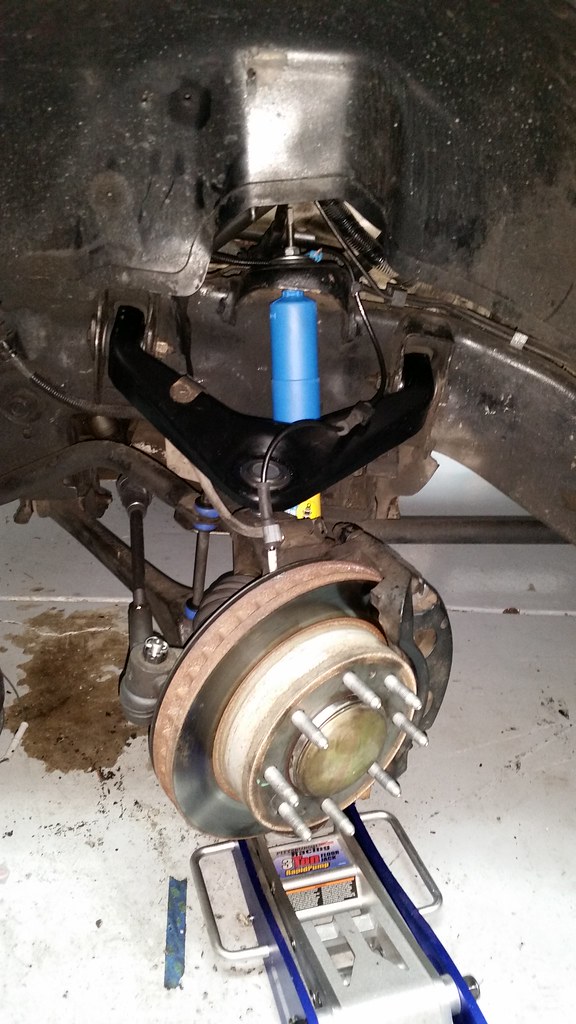
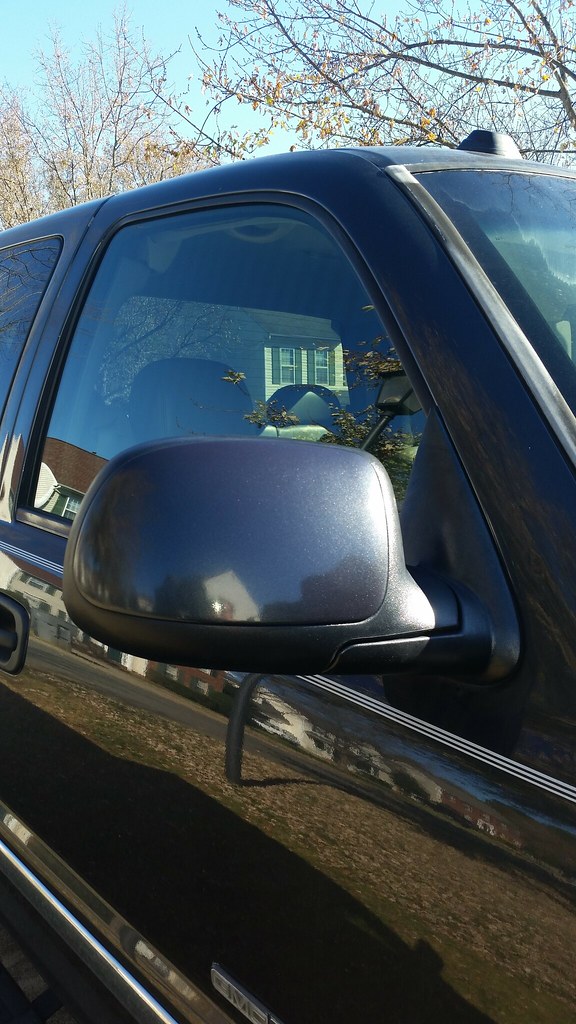
I decided just to replace the entire upper control arms as the prices weren't that much more then the pressed in balljoint - plus I installed a set of Bilsteins up front.

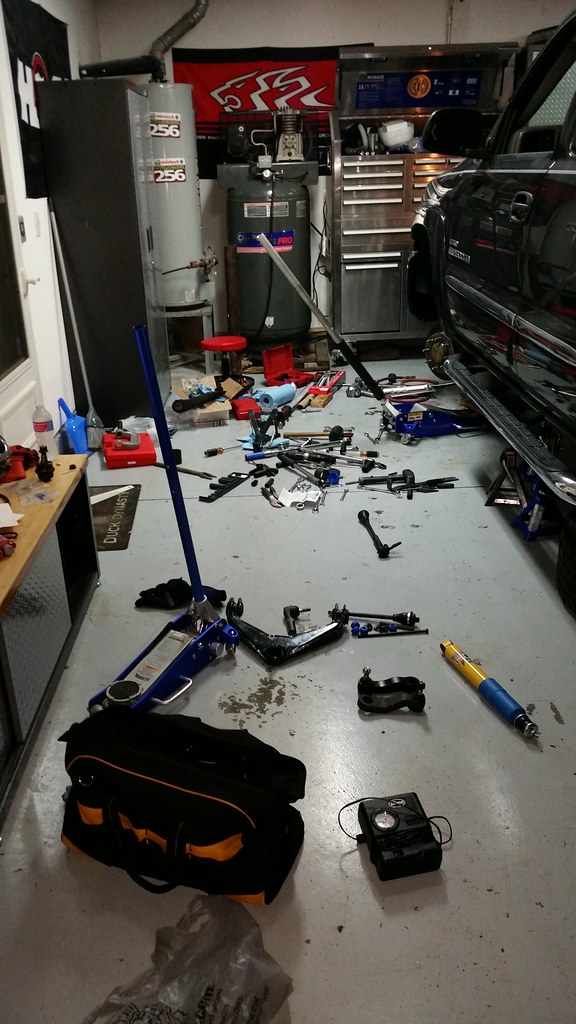
Overall the front end replacement was too terrible - it just took freaking forever.

Pressing out and pressing in the lower balljoints really is what took the longest as I've never had to press them out before. I usually just have to unbolt them/cut the rivets for them.

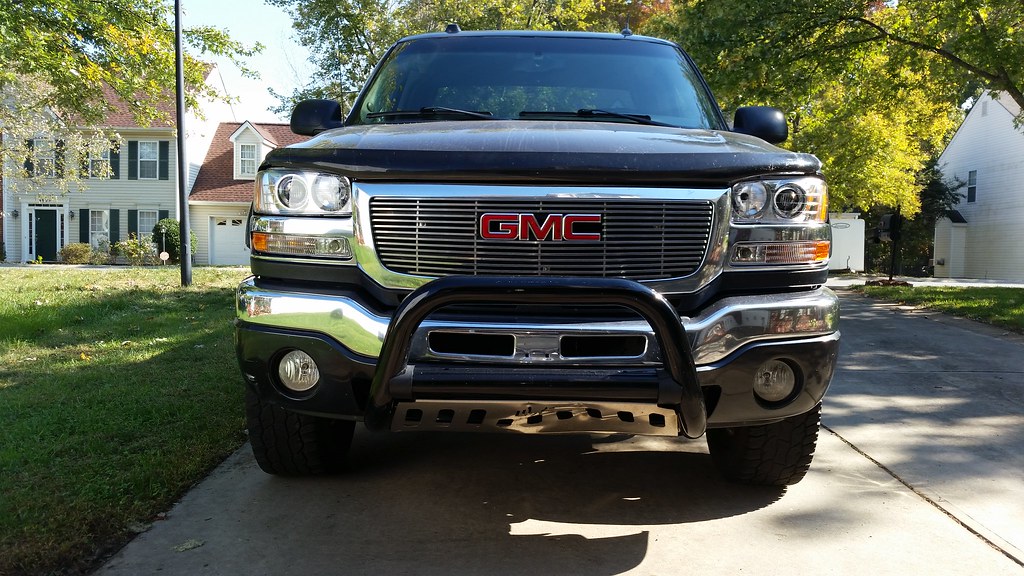
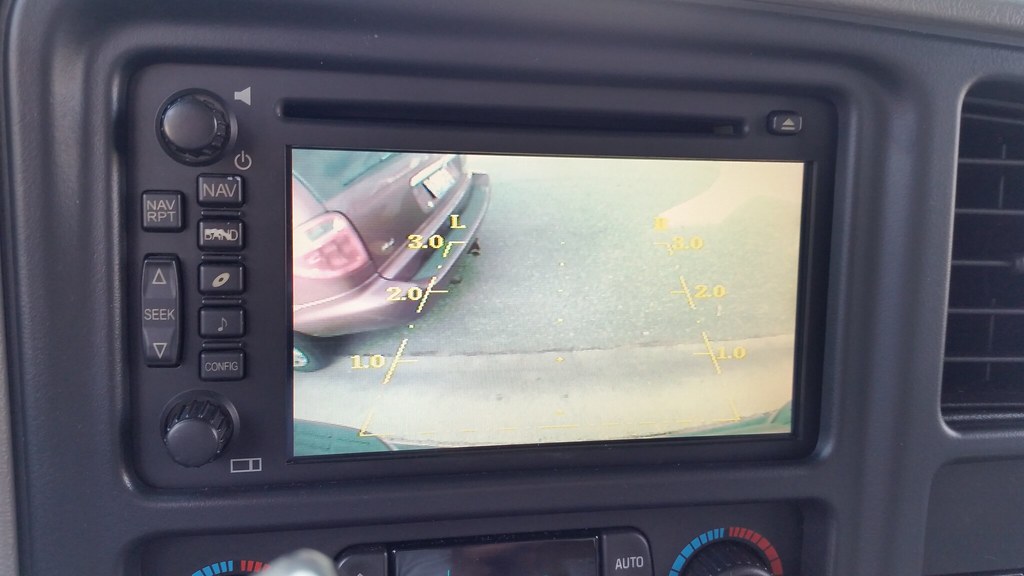
So I took it for a very quick test drive - everything seemed okay - going over bumps there is no more squishy sounds. As the stock shocks with 194k on them where completely shot!
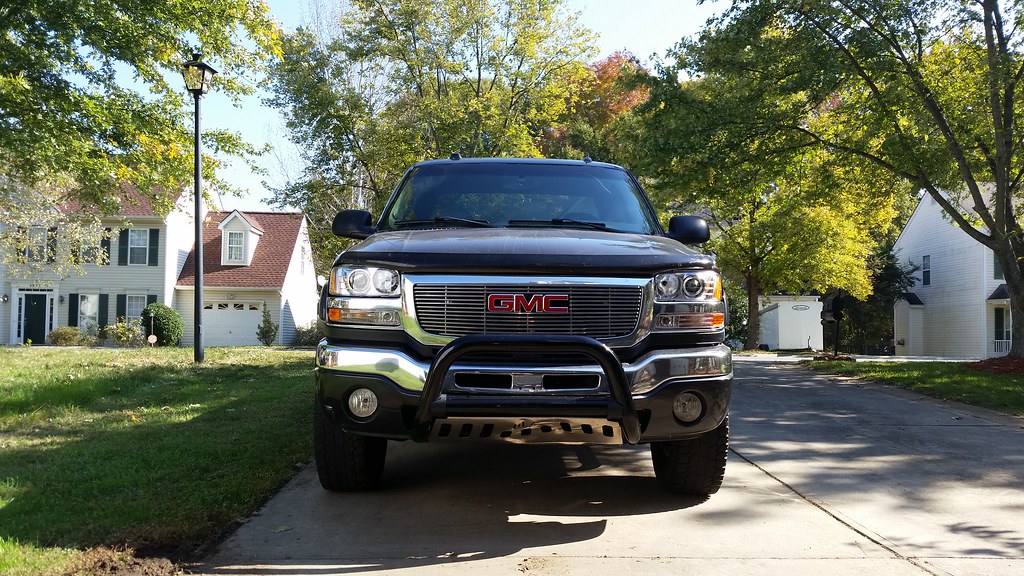
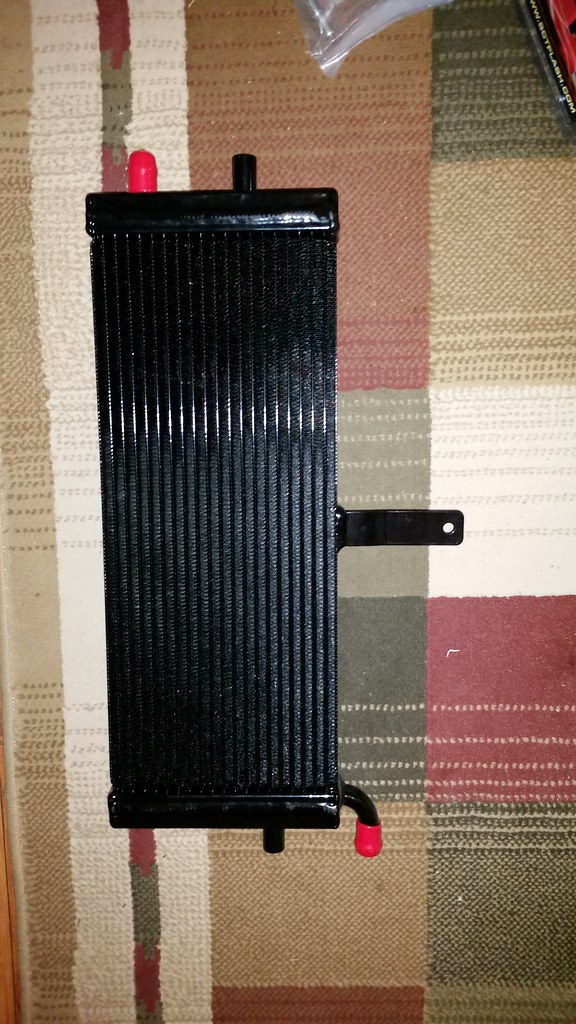
Now for some pics:


When I finished up installing the front end - I was really tired and lowered the truck down.

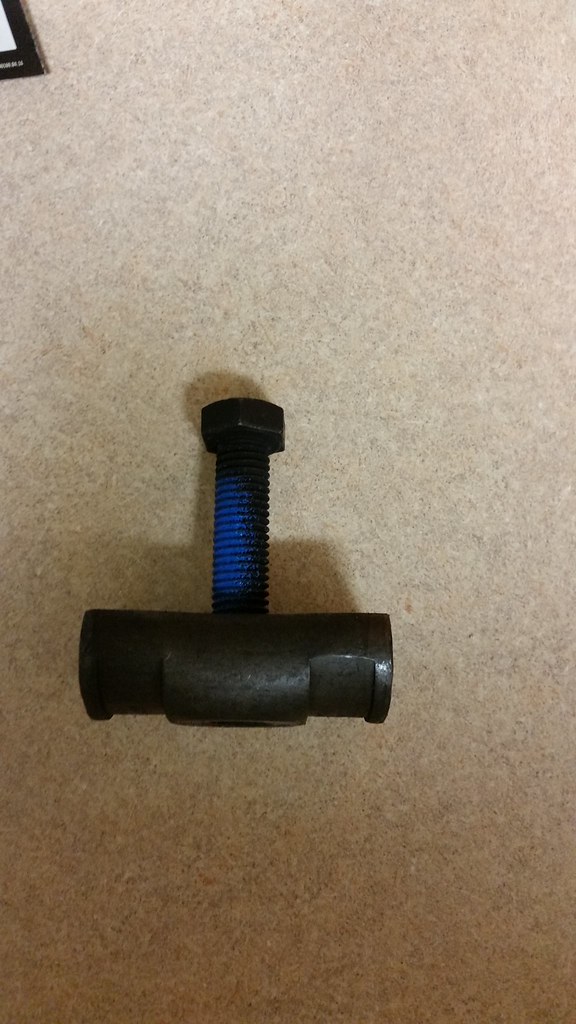
I ended up snapping one of the adjuster screws on the torsion keys clean off the thread.

So I ended up ordering a new screw and the retaining nut as well.

Since I don't have a welder - I ended up ordering the OEM tool brand Torsion arm loading/unloading tool - I got it for $62 off ebay - so I can't really complain about that.

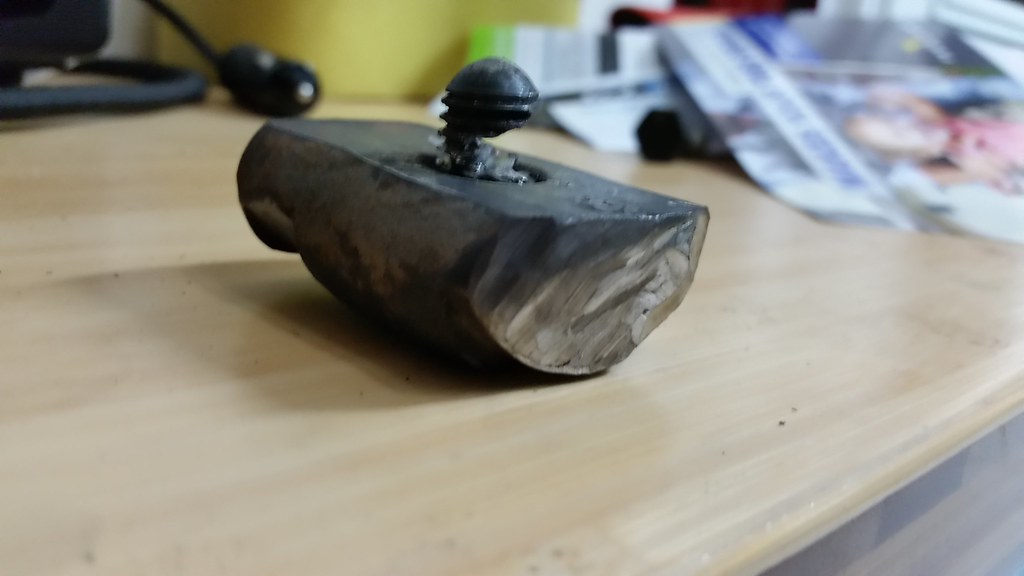
I spent last Friday under the truck. I used the tool to compress the Torsion arm key upward and got the snapped bolt assembly loosened up enough to use a dremel to try and cut through the bolt.

I got half way through it before I ran out of room for the dremel - I then used a jig saw with metal cutting blades and got another 1/3rd of the way though it - but then snapped both blades that I had.

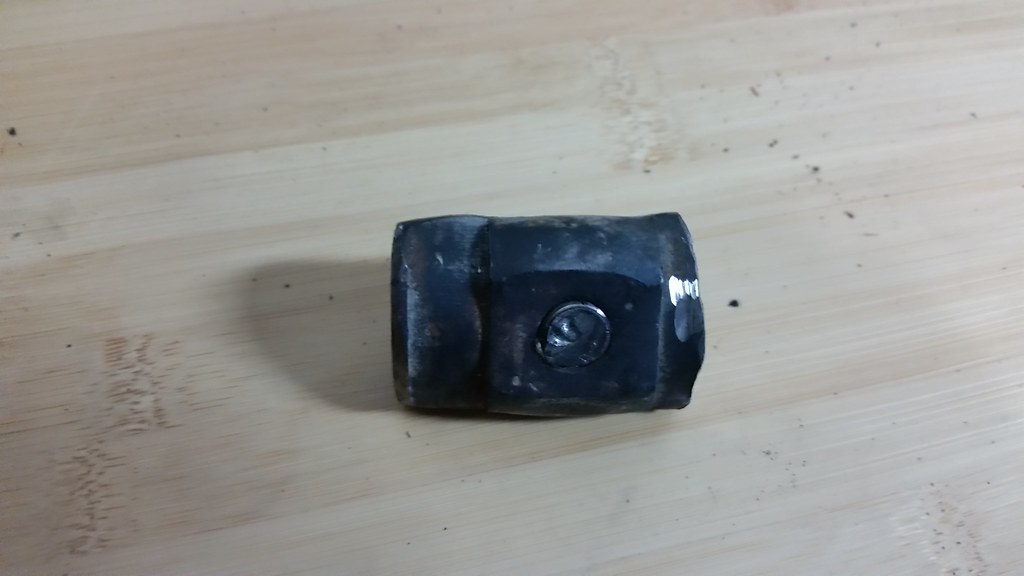
At that point I decided to get out the big gun - my angle grinder with a grinding wheel and decided to cut the end off of the retaining nut assembly and almost got it out - I ended up having to round off 2 of the edges of the retaining nut and finally it dropped out of the frame - I got the new nut/bolt installed.

Some pics of the carnage:


__________________
2005 LeMans Blue Corvette w/ T56 & Z51 & C6Z06 Brakes, Build Thread: https://lateral-g.net/forums/showthread.php4?t=27408
2005 GMC Sierra 2500HD - LLY - Allison
2014 Chevy SS - LS3 / 4 Doors
Reply With Quote
  #212  
Old 12-03-2014, 04:15 PM
bonecrrusher's Avatar
bonecrrusher bonecrrusher is offline
Senior Member
 
Join Date: Jun 2010
Location: Charlotte NC
Posts: 644
Thanks: 2
Thanked 3 Times in 3 Posts
Default

I am still around - just been a long time for an update.

A bit of an update on the truck - after finishing up the suspension project and getting everything fixed up - I wanted to replace the front headlights.

I had polished them up earlier this year - but they yellowed and started to look like crap again.

So I ordered a set of Denali headlights, as well as new turn signal housings. I also ordered a set of DDM Tuning HID's to throw in as well.

The lights all snapped right into place - the DDM kit required some wire removal from the kit - otherwise those where plug and play as well.

Install took about 2 hours - but not too bad. I still need to adjust the headlights - I plan on doing that tonight.

Now for teh pics:


Also - I took apart my drivers side mirror because it was flopping around on the highway - and was driving me nuts. Come to find out that someone had broken the original glass and replaced it with the wrong glass/element! My truck has the DL3 - heated/auto dimming/power fold in option - and the glass that was in it wasn't heated or auto dimming.

So after pricing out the correct replacement glass - it was going to be cheaper to get an entire replacement used mirror. So I found an Escalade mirror with the bottom light on it cheaper then a DL3 Sierra/Silverado mirror. I found another lighted DL3 mirror for the passenger side and ordered that as well.

The drivers side color didnt match my truck, and the passenger side was the black textured plastic - so I was going to have to do some painting.

So I picked up some Duplicolor perfect match rattle can primer, base coat, and clear coat and got to work.

The pre-painted mirror was easy to wet sand and prep - the black plastic cap I ended up sanding with 220, 320, 400, then 600 to get it smooth enough for primer.

I have finished painting both mirror caps - I am waiting for the clear coat to harden up. I am going to wet sand it and buff it before I install them.

I have already installed the mirrors themselves - and confirm everything is working correctly.

Here are my pics with the finished clear coat - I will get installed pics after I wet sand and buff everything next week.


__________________
2005 LeMans Blue Corvette w/ T56 & Z51 & C6Z06 Brakes, Build Thread: https://lateral-g.net/forums/showthread.php4?t=27408
2005 GMC Sierra 2500HD - LLY - Allison
2014 Chevy SS - LS3 / 4 Doors
Reply With Quote
  #213  
Old 12-03-2014, 04:16 PM
bonecrrusher's Avatar
bonecrrusher bonecrrusher is offline
Senior Member
 
Join Date: Jun 2010
Location: Charlotte NC
Posts: 644
Thanks: 2
Thanked 3 Times in 3 Posts
Default

I gave the Duplicolor clear a week to dry - today I sanded it with 1000, 1500, 2000, and 2500 grit.

I then used Meguiars Ultimate compound, Scatch X 2.0, Meguiars Cleaner Wax, Polish, and then some Carnuba wax.

I finally attached the caps to the mirrors with some 3M double sided tape - here are the results:


Overall - I am pretty happy with the results, I wish I could have buffed it with my DA Porter Cable - but I really couldn't put much pressure on the caps not being attached to the truck. I'll probably buff in a few months with the PC, and use my much better quality Adam's Polishes and Sealants next time. The color match is spot on with the rest of the truck and look way better then the crappy black plastic that was there before on the old mirrors.

I forgot to post about puddle mirror from the Escalade mirrors - plugged right in and gained an extra light at night:

__________________
2005 LeMans Blue Corvette w/ T56 & Z51 & C6Z06 Brakes, Build Thread: https://lateral-g.net/forums/showthread.php4?t=27408
2005 GMC Sierra 2500HD - LLY - Allison
2014 Chevy SS - LS3 / 4 Doors
Reply With Quote
  #214  
Old 12-03-2014, 04:49 PM
mach1stang's Avatar
mach1stang mach1stang is offline
Member
 
Join Date: Jul 2008
Location: Tampa FL
Posts: 80
Thanks: 0
Thanked 0 Times in 0 Posts
Default

Is that truck dark spiral grey?
__________________
Kody Willis

1969 mustang fastback - Lots of secret surprises to keep under wraps.

2012 boss 302 - BMR lower control arms, relocation brackets and pan hard bar, cortex racing coilovers, enkei 18x10.5's front and rear with 315/30/18's, offroad x pipe, lethal performance over axel pipes, SLP loudmouths.

"Your boss's exhaust when you floor it sounds like Jesus stepped on a lego in the middle of the night while going to the bathroom!"
Reply With Quote
  #215  
Old 12-04-2014, 05:44 AM
bonecrrusher's Avatar
bonecrrusher bonecrrusher is offline
Senior Member
 
Join Date: Jun 2010
Location: Charlotte NC
Posts: 644
Thanks: 2
Thanked 3 Times in 3 Posts
Default

Kody - it is.

wa805k is the paint code - Either Chevy or GMC called it a different name - but its all the same paint.
__________________
2005 LeMans Blue Corvette w/ T56 & Z51 & C6Z06 Brakes, Build Thread: https://lateral-g.net/forums/showthread.php4?t=27408
2005 GMC Sierra 2500HD - LLY - Allison
2014 Chevy SS - LS3 / 4 Doors
Reply With Quote
  #216  
Old 12-04-2014, 07:33 AM
Evil_s10's Avatar
Evil_s10 Evil_s10 is offline
Junior Member
 
Join Date: Dec 2007
Location: Cincinnati, OH
Posts: 18
Thanks: 2
Thanked 0 Times in 0 Posts
Default

Thanks for posting the tips and tricks on the truck. Been enjoying the little details that are setting it apart.
Reply With Quote
  #217  
Old 12-04-2014, 03:31 PM
mach1stang's Avatar
mach1stang mach1stang is offline
Member
 
Join Date: Jul 2008
Location: Tampa FL
Posts: 80
Thanks: 0
Thanked 0 Times in 0 Posts
Default

Quote:
Originally Posted by bonecrrusher View Post
Kody - it is.

wa805k is the paint code - Either Chevy or GMC called it a different name - but its all the same paint.
My 04 2500 was spiral grey and that is such a nice color!
__________________
Kody Willis

1969 mustang fastback - Lots of secret surprises to keep under wraps.

2012 boss 302 - BMR lower control arms, relocation brackets and pan hard bar, cortex racing coilovers, enkei 18x10.5's front and rear with 315/30/18's, offroad x pipe, lethal performance over axel pipes, SLP loudmouths.

"Your boss's exhaust when you floor it sounds like Jesus stepped on a lego in the middle of the night while going to the bathroom!"
Reply With Quote
  #218  
Old 12-27-2014, 02:06 PM
bonecrrusher's Avatar
bonecrrusher bonecrrusher is offline
Senior Member
 
Join Date: Jun 2010
Location: Charlotte NC
Posts: 644
Thanks: 2
Thanked 3 Times in 3 Posts
Default

Another truck update:

So I found a thread on here about a backup camera that tied into an edge tuner, well since I had already swapped to an Escalade Lux touch screen nav, I figured that I would tie into the nav screen that I had.

So I picked up a PAC-VCI-X adapter, a backup camera, and 25' of RCA cable.

I also picked up the 1500 style spoiler to put the backup camera in.

I split the nave unit open, installed the screen ribbon adapter, and ran the VGA cable out the bottom of the Nav unit.

I then tied into the light green harness wire in the trailer plugin box in the interior under the dash for the backup signal for the PAC unit.

I then removed the factory rear tail gate lid, put on the 1500 lid and drilled a hole for the camera. I ran the power supply for the camera to the reverse light harness under the bed.

I then ran the 25' of RCA cable and accessed the interior by the grommit holding the e-brake cable.

I plugged everything in, adjusted the camera, and boom - here is a pic of the camera working, the spoiler, and how I installed the camera.


__________________
2005 LeMans Blue Corvette w/ T56 & Z51 & C6Z06 Brakes, Build Thread: https://lateral-g.net/forums/showthread.php4?t=27408
2005 GMC Sierra 2500HD - LLY - Allison
2014 Chevy SS - LS3 / 4 Doors
Reply With Quote
  #219  
Old 02-18-2015, 03:16 PM
bonecrrusher's Avatar
bonecrrusher bonecrrusher is offline
Senior Member
 
Join Date: Jun 2010
Location: Charlotte NC
Posts: 644
Thanks: 2
Thanked 3 Times in 3 Posts
Default

Hey everyone, longtime no update..

Life has been crazy around here. I sold my house the week of Christmas, and closing was a couple weeks ago. So I had to pack all my stuff up - and get out of the house.

I moved all of my big furniture and garage/shop stuff into a storage unit.

Back during the week of Thanksgiving, we signed a contract on our new house - it will have 5 bedrooms and a 3+ car garage.

For more info and pics - head on over to Garage Journal for the latest and greatest:

http://www.garagejournal.com/forum/s...d.php?t=276996

As for the Corvette - it is up in storage until the house gets finished - we simply didn't have enough room to store the car at my gf's house.

I have a few parts to bolt onto the Vette - but will have to wait for the house to be built - and for me to install the lift.
__________________
2005 LeMans Blue Corvette w/ T56 & Z51 & C6Z06 Brakes, Build Thread: https://lateral-g.net/forums/showthread.php4?t=27408
2005 GMC Sierra 2500HD - LLY - Allison
2014 Chevy SS - LS3 / 4 Doors
Reply With Quote
  #220  
Old 02-20-2015, 04:03 PM
bonecrrusher's Avatar
bonecrrusher bonecrrusher is offline
Senior Member
 
Join Date: Jun 2010
Location: Charlotte NC
Posts: 644
Thanks: 2
Thanked 3 Times in 3 Posts
Default

Like I had mentioned earlier - I had some updates waiting to come in - well here is one of them:

Last year when I built my engine - I used an LS9 cam in my build - while it produced an extra 20 hp or so - it shifted the power band up and made 6th gear in my car an absolute dog - it made absolutely no power and I would have to drop 2 gears just to pass someone on the highway.

I chose that cam for a reason - I found a very good deal on a used Edelbrock E-Force Supercharger for an LS3 motor.

With my motor being an LS2 block with an LS3 top end - I ended up with the LS3 blower.

Since the Vette is in storage - and my new house/garage aren't built yet I will have to wait to install this.

Reading the install instructions - I'm going to be using my lift for this install - so for now here are some pics:


__________________
2005 LeMans Blue Corvette w/ T56 & Z51 & C6Z06 Brakes, Build Thread: https://lateral-g.net/forums/showthread.php4?t=27408
2005 GMC Sierra 2500HD - LLY - Allison
2014 Chevy SS - LS3 / 4 Doors
Reply With Quote
Reply

Thread Tools
Display Modes

Posting Rules
You may not post new threads
You may not post replies
You may not post attachments
You may not edit your posts

BB code is On
Smilies are On
[IMG] code is On
HTML code is Off

Forum Jump


All times are GMT -7. The time now is 05:03 PM.


Powered by vBulletin® Version 3.8.11
Copyright ©2000 - 2025, vBulletin Solutions Inc.
Copyright Lateral-g.net