...

Go Back   Lateral-g Forums > Lateral-G Open Discussions > Project Updates
User Name
Password


Reply
 
Thread Tools Display Modes
  #481  
Old 02-08-2013, 11:54 AM
scherp69's Avatar
scherp69 scherp69 is offline
Lateral-g Supporting Member
 
Join Date: Dec 2007
Location: British Columbia, Canada
Posts: 882
Thanks: 0
Thanked 4 Times in 2 Posts
Default

Quote:
Originally Posted by GregWeld View Post
Well.... didn't we just bust the bank!


Thanks Greg. It wasn't too bad. I'm sure with you're bank, you wouldn't have even noticed

Quote:
Originally Posted by waynieZ View Post
Wow what a haul!! Very Nice and helpful haul at that.
Yeah it was a nice haul. Too bad the tools are going to sit for a while until I get to use them. Oh well, they will be there waiting for me. How's the Camaro coming along? Have you had a chance to get out to the shop lately?

I made some decent progress on getting the rear seats mounted. It may not seem like much, but it's been time consuming and they are alot closer to being mounted. Well one side anyways. Yes it's been a major PITA, but for some reason I've found it quite enjoyable. I've actually been able to use some of my new tools.

On a side note before I post the pics, for those that are using the new Photobucket and don't like the fact that they took away the easy links, if you go into your settings there is a box you can check off to get the easy links back. I just found it this morning. Now it's like the old one where you can just click on the IMG link and not have to go into each photo to get it.

Onto the updates:

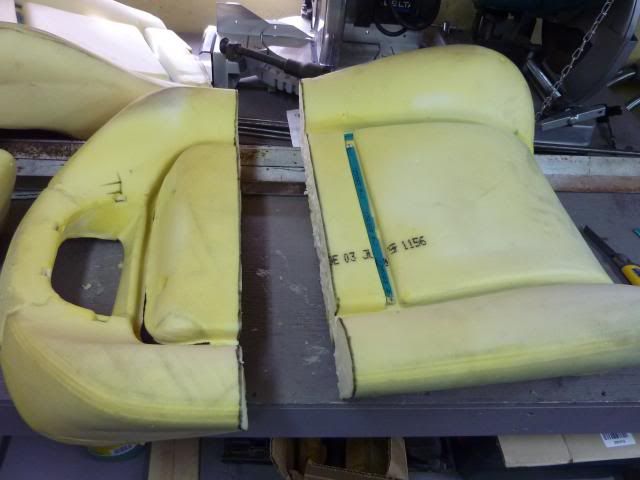
I found my leather was getting quite dirty, so I decided to take it off the seats. It came off very easily. As shown before, the bottom is held on with plastic clips that snap over the round bar. Once all the clips are off, the leather is held on with velcro


First thing I did was add some sheet metal to where the back of the seat will rest. This will give it some more support


Next I realized that when the seat was sitting on the floor, there was a large part of it that had no support underneath it at all. This is due to the way the floor is. You can see under the left side of the skeleton that most of it is sitting in the air


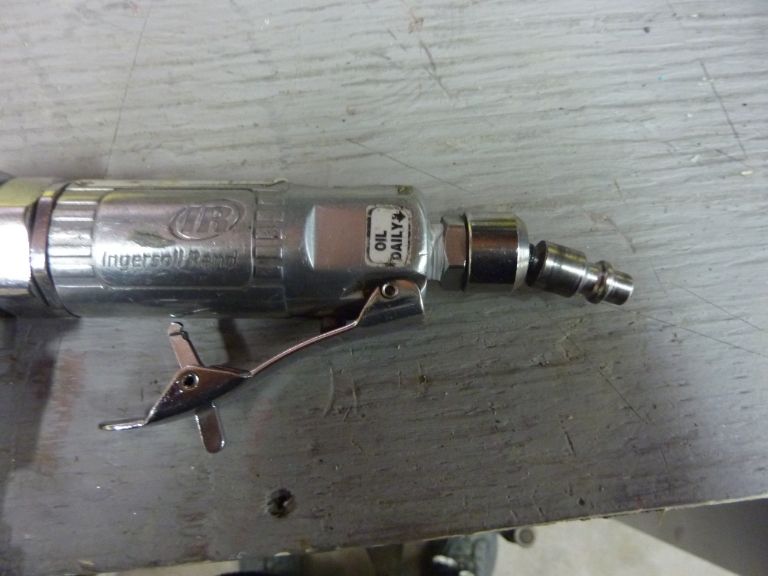
With this, I decided to make the floor more level. I built a new section to raise the floor out of 16 gauge sheet metal. I also found out that an Ingersol Rand air sheer is not designed to cut 16 gauge.....gotta buy a new one now

Here's the new section


This pic gives a good idea as to what I was talking about with the floor being unlevel


I also added a brace in the center of the new section


It sits on the floor a lot better now. I've also had to modify a few sections of the skeleton to make it sit better. I didn't take pics of all the modifications as it would be different from car to car.


I decided to use round bar to make front mounts instead of the sheetmetal ones that I had made. I will add some rear support bars to these later.

__________________
Mike

Pro Touring 68 Acadian(Nova)
Speedtech subframe with high clearance control arms
Prodigy Bar rear suspension
Ridetech single adjustable coilovers
Wilwood 12.2" brakes
New Gen Splitters
LS3 and TKO600

Link to my build: https://lateral-g.net/forums/showthread.php4?t=14349

Reply With Quote
  #482  
Old 02-08-2013, 11:55 AM
scherp69's Avatar
scherp69 scherp69 is offline
Lateral-g Supporting Member
 
Join Date: Dec 2007
Location: British Columbia, Canada
Posts: 882
Thanks: 0
Thanked 4 Times in 2 Posts
Default

At the rear of the seat, I'm going to weld some bolts onto the floor and they will slide into the two pieces on the outside. The middle piece slides into the upper part of the seat. With these pieces, you'll just have to hook the front of the seats into the mounts, slide the rear of the seat over the bolts and tighten it down.


Here's with the rear part of the seat in place. You can see how much I need to cut the rear section down to make it fit better. Sits way too high

__________________
Mike

Pro Touring 68 Acadian(Nova)
Speedtech subframe with high clearance control arms
Prodigy Bar rear suspension
Ridetech single adjustable coilovers
Wilwood 12.2" brakes
New Gen Splitters
LS3 and TKO600

Link to my build: https://lateral-g.net/forums/showthread.php4?t=14349

Reply With Quote
  #483  
Old 02-08-2013, 05:31 PM
aany001's Avatar
aany001 aany001 is offline
Senior Member
 
Join Date: Oct 2005
Location: Pickering Canada
Posts: 994
Thanks: 1
Thanked 46 Times in 25 Posts
Default

Wow Mike you have been busy. The car is coming along nicely and I love the rendering of the car it looks amazing!
Reply With Quote
  #484  
Old 03-18-2013, 06:51 PM
scherp69's Avatar
scherp69 scherp69 is offline
Lateral-g Supporting Member
 
Join Date: Dec 2007
Location: British Columbia, Canada
Posts: 882
Thanks: 0
Thanked 4 Times in 2 Posts
Default

Quote:
Originally Posted by aany001 View Post
Wow Mike you have been busy. The car is coming along nicely and I love the rendering of the car it looks amazing!
Thanks Steve. How's yours coming along. Noticed you haven't updated in a while.

Have some updates. I've still been working on the rear seats.

I finished up the floor on the driver's side. Once that was done, I put the two skeletons in place to see how they fit.


Once they were in place, I decided that I would need to cut them down. I decided to take 4" out of the back. I cut one frame down and here you can see the difference in height between the two


I started by putting the frame onto the work bench.


There were a few areas that needed to be cut out for it to sit flat


Once those sections were cut, I marked the frame where I was going to take the 4" section from. I decided to take it from the center as it was nice and straight


Before I cut the frame, I put it back into the foam and marked the foam where I would need to cut it


Then I cut the frame and I was left with two sections


I then welded the two sections back together and added some more round bar for strength


Then I started on the foam. I ran the lines around the foam as to where I needed to cut


Using a few exacto knife blades, I cut the section out. You will find that cutting foam with an exacto knife, the blades dull very quickly


__________________
Mike

Pro Touring 68 Acadian(Nova)
Speedtech subframe with high clearance control arms
Prodigy Bar rear suspension
Ridetech single adjustable coilovers
Wilwood 12.2" brakes
New Gen Splitters
LS3 and TKO600

Link to my build: https://lateral-g.net/forums/showthread.php4?t=14349

Reply With Quote
  #485  
Old 03-18-2013, 06:52 PM
scherp69's Avatar
scherp69 scherp69 is offline
Lateral-g Supporting Member
 
Join Date: Dec 2007
Location: British Columbia, Canada
Posts: 882
Thanks: 0
Thanked 4 Times in 2 Posts
Default

Using some upholstery glue, I glued the two pieces together


I then decided to move the velcro strip where the seat covers fit in the center. I started by marking the section 4" down from where it used to be


I then used an exacto knife to cut out the section. Once it was cut out, I glued the foam I just cut out into old spot and glued the velco into the new cut out strip. I was hoping that I wouldn't have to take the leather covers into an upholstery shop, but it looks like I will have to get them to make some modifications. I might move the velcro strip a bit up, but have decided yet.


Once I got both sides done, I put them in to see how they fit. I like!!!!


From behind


Now that I had them cut down to where they fit better, I started to make the mounts for them

I welded some modified bolts onto the floor to secure the bottom section


Then for the top section, I welded on some bolts that will go through the rear piece of sheet metal and I will put nuts onto the bolts from inside the trunk


__________________
Mike

Pro Touring 68 Acadian(Nova)
Speedtech subframe with high clearance control arms
Prodigy Bar rear suspension
Ridetech single adjustable coilovers
Wilwood 12.2" brakes
New Gen Splitters
LS3 and TKO600

Link to my build: https://lateral-g.net/forums/showthread.php4?t=14349

Reply With Quote
  #486  
Old 03-18-2013, 06:52 PM
scherp69's Avatar
scherp69 scherp69 is offline
Lateral-g Supporting Member
 
Join Date: Dec 2007
Location: British Columbia, Canada
Posts: 882
Thanks: 0
Thanked 4 Times in 2 Posts
Default

Here you can see where the bolts come through. I think I need to get some longer bolts as once I add sound deadner, they might not be quite long enough. I will also weld a piece of flat stock or large washers on the back to add some more strength to where the bolts come though


I just have a little more to do on the driver's side and both seats will be mounted. I am then going to start working on a console to go between the seats and arm rests on the sides to hide the deep tubs.

I've also spent a bit of time reorganizing the shop. I added a shelf and moved the stereo


Which allowed me more room to actually use my brake


I also found I was hating having to unwind and them rewind up extension cords and trouble lights. So I got some new retractable stuff. I also replaced the retractable air hose with a new Flexilla set up


This is so much better. Especially being right above my car.


Got this from www.toolrage.com It's a 54 light LED.


I also bought a new bracket to mount my Highway 22 wiring harness in the trunk. I originally bought one from Ironworks, but HPI Customs came out with one that has mounting brackets and more room for relays


I'm going to mount it on the driver's side, but just put it here to see how it would look


I also got a Highway 22 trunk mount kit from Tyler at HPI Customs


One other thing I did was swap out most of the male hose fitting on my air tools. The local tool shop had swivel fittings on for just under 5 bucks. They make a world of difference. I can actually lay my air tools down without them sounding like they have an air leak. It also probably helps that I bought a 2 foot lead hose to add to the end of my air line. It also has a swivel end on it.


I hope to get out to the shop again tomorrow and finish up the driver's rear seat and start on the console. Will post pics.
__________________
Mike

Pro Touring 68 Acadian(Nova)
Speedtech subframe with high clearance control arms
Prodigy Bar rear suspension
Ridetech single adjustable coilovers
Wilwood 12.2" brakes
New Gen Splitters
LS3 and TKO600

Link to my build: https://lateral-g.net/forums/showthread.php4?t=14349

Reply With Quote
  #487  
Old 03-18-2013, 07:14 PM
E.rodz's Avatar
E.rodz E.rodz is offline
Senior Member
 
Join Date: Sep 2008
Location: st. paul mn.
Posts: 649
Thanks: 0
Thanked 4 Times in 4 Posts
Default

good to see you are still working on this! hope things start coming together for you!
__________________
my name is Eric Hokenson I have a dream of building ten of the coolest hot rods out of my home shop wish me luck I am going to need it! - more pics on my web site www.erodzcustoms.com this is just for fun and i am NOT looking for any more work!
Thank you supporting sponsors! without you guys there is no way I could do this myself !
Modern automotive performance,Ring bros.,Yank convertors,extreme drive systems,Cj tunes,race coatings stainless works,Modern Automotive Performance.all of these shops have the experience to get your car to the top.
Reply With Quote
  #488  
Old 03-18-2013, 08:22 PM
GregWeld's Avatar
GregWeld GregWeld is offline
Lateral-g Supporting Member
 
Join Date: Jul 2005
Location: Scottsdale, AriDzona
Posts: 20,741
Thanks: 504
Thanked 1,080 Times in 388 Posts
Default

Give a man a welder and he can make almost anything!!


Looking good Mike!
Reply With Quote
  #489  
Old 03-18-2013, 08:42 PM
Todd in vancouver's Avatar
Todd in vancouver Todd in vancouver is offline
Member
 
Join Date: Jan 2013
Location: Vancouver, BC
Posts: 84
Thanks: 0
Thanked 0 Times in 0 Posts
Default

Hey Mike, thought of you the other day when I saw a used car rotisserie on CL here at the coast if you are still thinking of getting one. Car looks awesome and keep the pictures coming.
__________________
Todd in Vancouver, Canada

'67 Camaro SS

How hard can it be?

Project Obsession
https://lateral-g.net/forums/showthread.php4?t=40384
Reply With Quote
  #490  
Old 03-20-2013, 08:22 AM
waynieZ's Avatar
waynieZ waynieZ is offline
Lateral-g Supporting Member
 
Join Date: Oct 2006
Location: Ma
Posts: 8,491
Thanks: 939
Thanked 342 Times in 231 Posts
Default

Very Nice Mike, you've been a busy guy! I think taking the height out of the backs of the seat was a good idea. Nice job.
__________________
_Wayne________

___________________________________
https://lateral-g.net/forums/show...ghlight=FNQUIK
Reply With Quote
Reply

Thread Tools
Display Modes

Posting Rules
You may not post new threads
You may not post replies
You may not post attachments
You may not edit your posts

BB code is On
Smilies are On
[IMG] code is On
HTML code is Off

Forum Jump


All times are GMT -7. The time now is 03:55 PM.


Powered by vBulletin® Version 3.8.11
Copyright ©2000 - 2025, vBulletin Solutions Inc.
Copyright Lateral-g.net