Quote:
Originally Posted by SSLance

**raising hand** Me too...
|
Do you know what cracks me up about this....I have gotten more comments from people on the placement of the cupholders than anything else on this truck build.
My dad even made it a point to send me a text message about the placement of the cupholders and his concern about where they are going to go.....he is a car guy and almost 70.
More on that soon...Probably not a lot of people on here who care about seat brackets for the bumpside truck but Ill update this as well as my other thread to keep them all current.
Well, today was interesting. Hands down the longest I have ever worked on a set of seat mounts in my life.
Not too sure everyone knows that they once made factory bucket seat mounts for these trucks but they were very, very rare and even more rare some 50 years later. I stumbled across someone that had taken the time to draw up the seat mounts in CAD and share them on one of the ford forums. I downloaded them at work and had one of our CAD guys print them out in actual size so I could use them as a template. (Thanks Eddie) Its one of the benefits of working in the HVAC Field =)
And here we go.
Started out with some 3/16" hot rolled plate. I sincerely believe these could be made with 1/8" and be plenty sturdy.
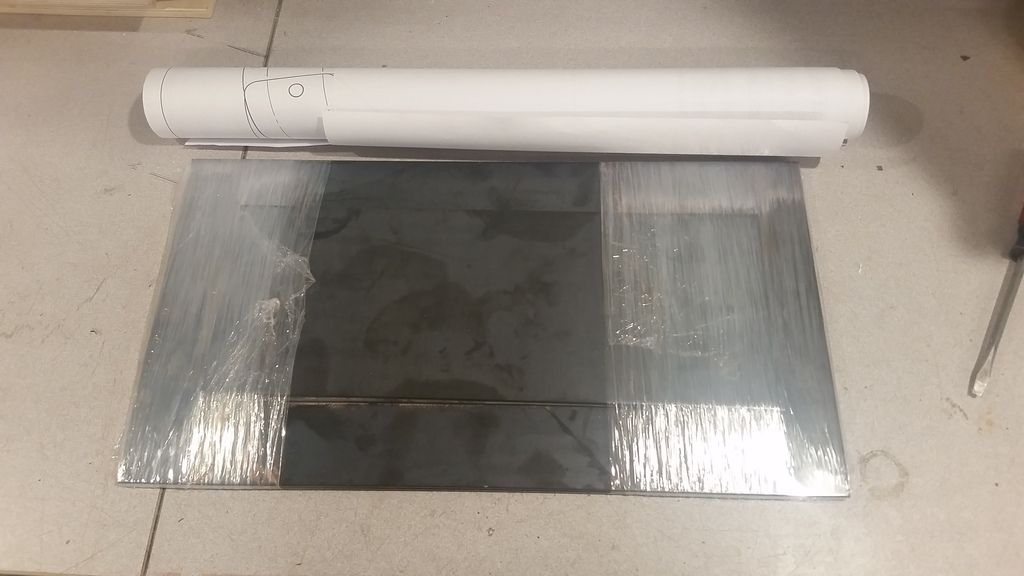
Laid out the template on the plate....I should mention here that I made a couple adjustments. As I am not running a fuel tank and am not necessarily a small person, in height and diameter I extended the brackets to the rear of the truck by about 3" and marked another set of holes in the brackets.
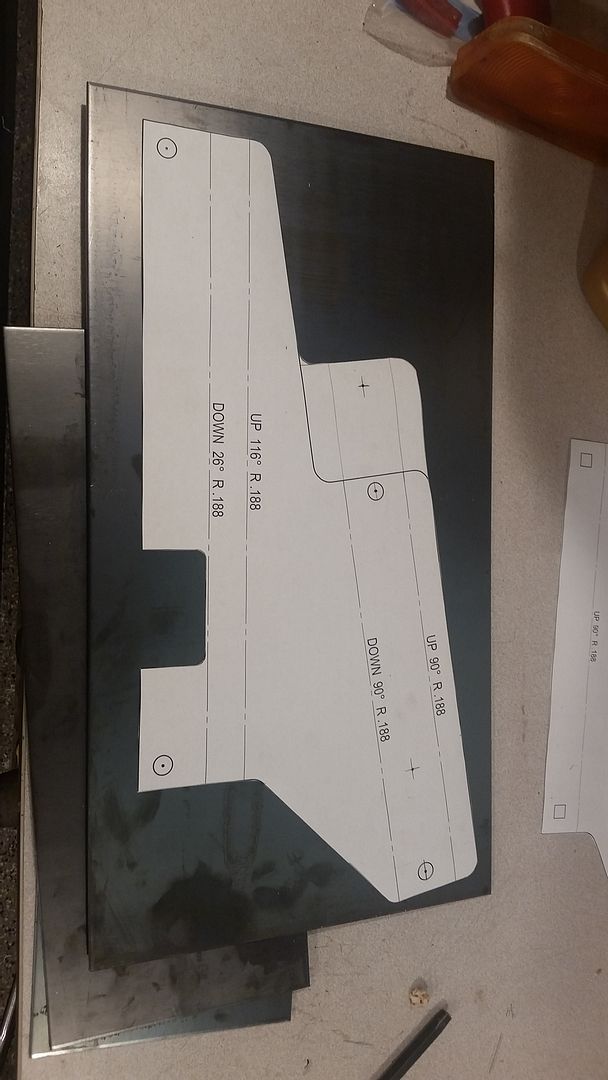
Got to work with the plasma, grinder and a flap disc and the drill press. I did a pilot hole, around 3/8 then the final 1/2" hole x 24 holes 8)
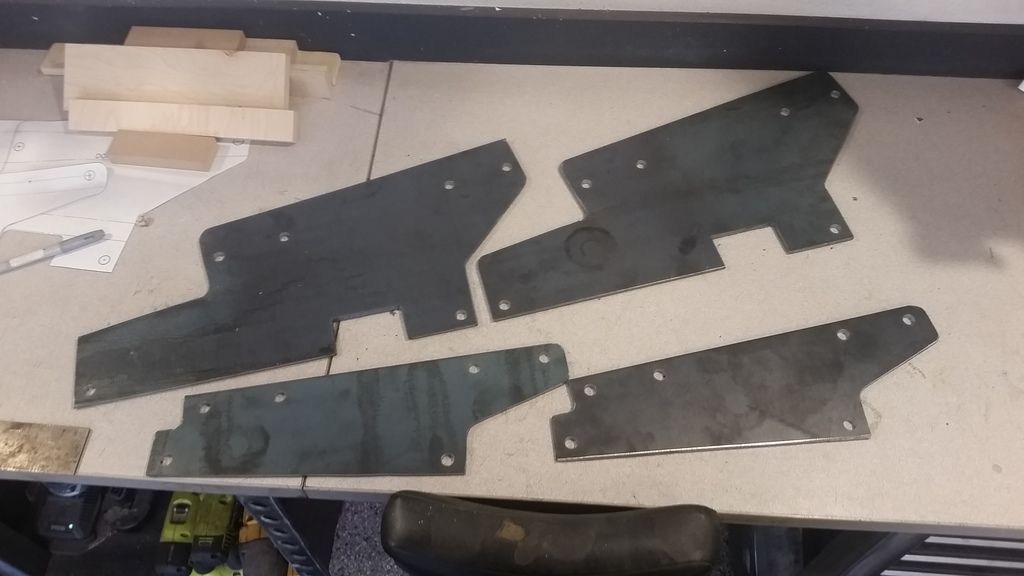
Cut out and marked for holes. I also use a punch to mark the center of the holes before drilling.

All drilled up and ready to mark them up and bend them the poor mans way :roll:
So.....I have no brake so I have to get a little more creative and its a lot more work this way but I get to the end and its a very strong good looking part. OEM, not exactly.
I marked out the lines to bend on.
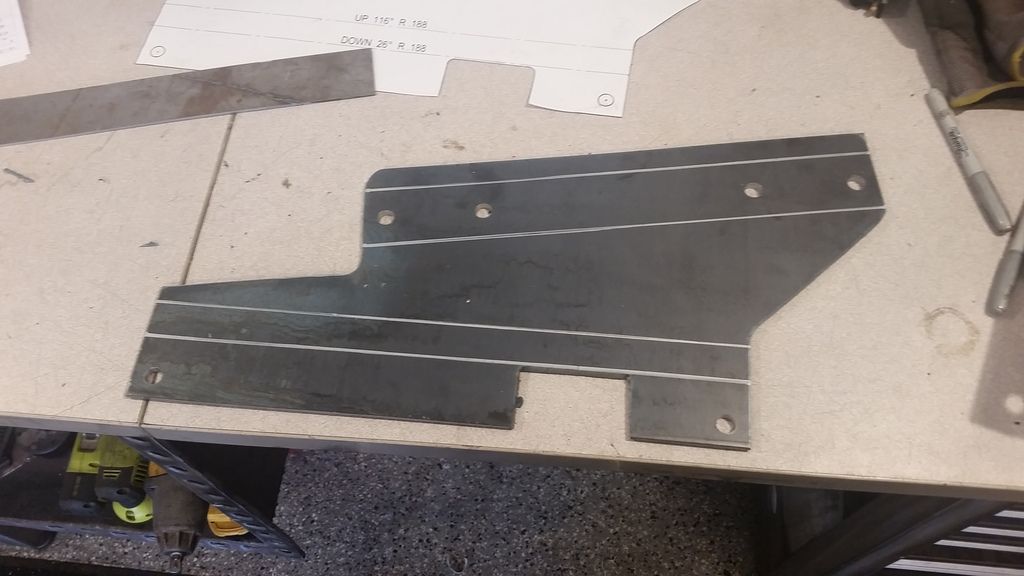
Then I use the plasma to cut the lines. I leave about 3/8" of uncut material at the end and about every three or four inches I skip a 1/4" section to keep the piece together allowing me to bend it but keep the part in one piece.

This is how I do my bends. This is a digital angle guage from Harbor Freight. It allows me to get dead on angles on my bends. I think this one was 26 degrees. I bent it to 26.2 degrees and can duplicate that over and over this way.
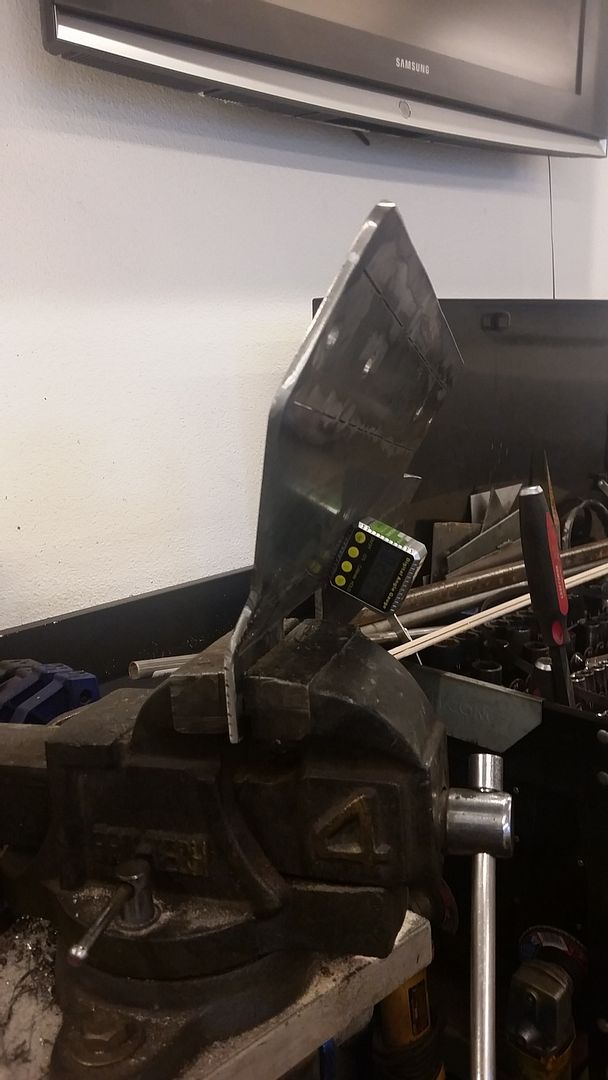
I wont bore you with the other bends.....and I did not take any photos of them either.
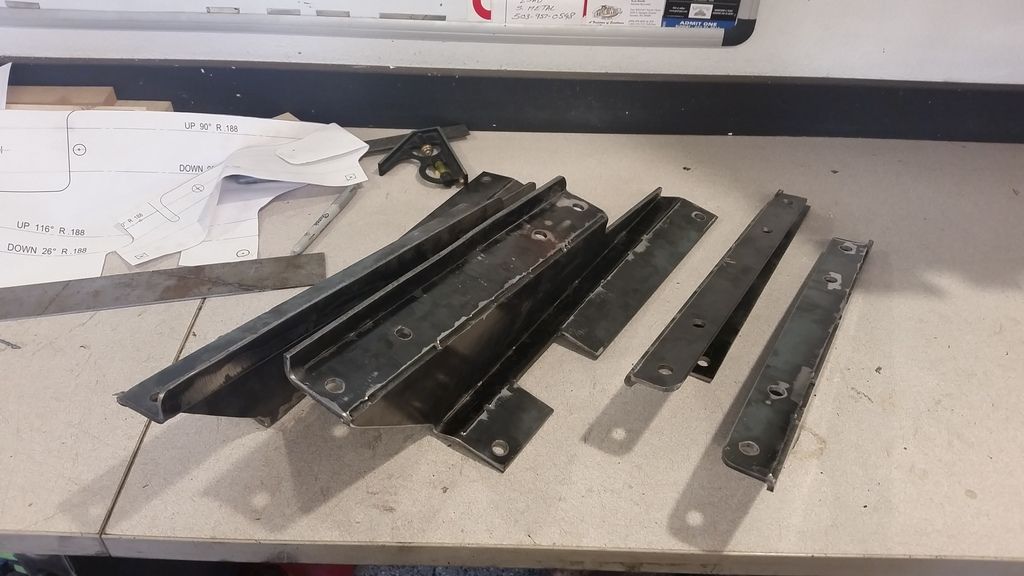
Here are the 4 brackets bent up and ready to weld. I know bending is the preferred way but this is doable at home and should be no issue with strength for seat brackets.
I went to work with the welder, turned the heat up a little bit and had 2 good setbacks. I forgot I had put Stainless wire, so I had to swap back to normal wire, then grabbed the hood and found it with dead batteries. So a quick trip for a rockstar, and some batteries for the hood. New lenses and batteries are good for the vision.
Now onto the weld.
You can see that there is some compound angles going on here.


And there we have it, bucket seat brackets for your bumpside in about a half a day's work.

I am super happy with how they came out, they were a lot of work and I am very, very glad to have found the drawings.
My neighbor also found a weak link in my brake heim joint (These were not final tight yet) but I was not happy with this setup so I rebuilt it with WAAAAY more better stuff.
3/8-24 stud cut down and lick tighted into a female heim joint then into the coupler with a jam nut on both sides and burried together. There is no chance of a failure now.
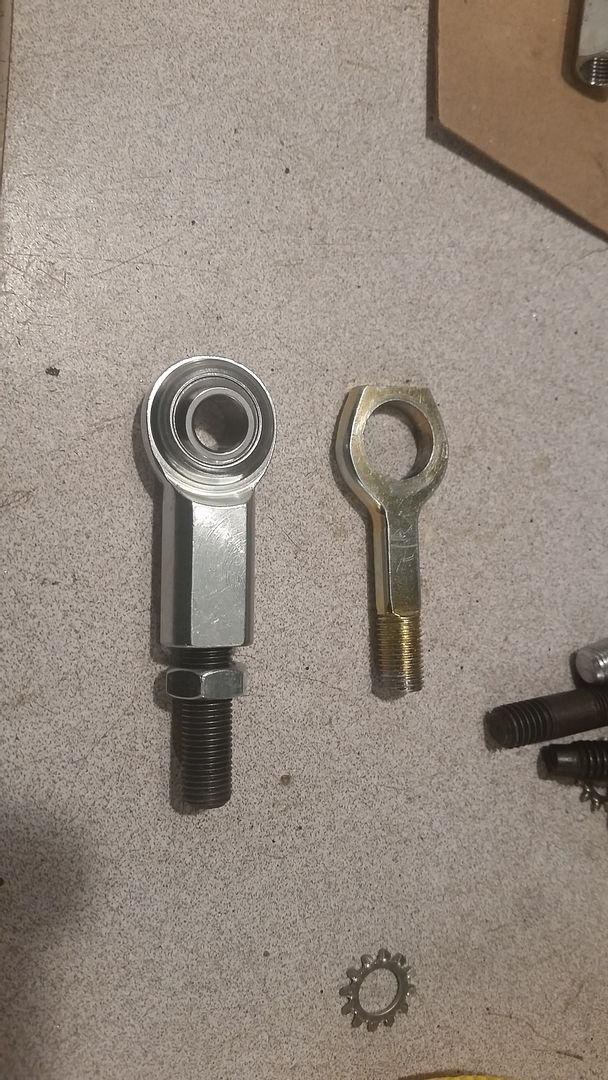
Much better now.
Also got my cupholders.


 Brian Hobaugh SCCA National Tour June 2014
 First Hemi 'Cuda Convertible Ever Built
 Short clips: Goodguys Pleasanton autocross and pit videos


 Linear Mode

