...

Go Back   Lateral-g Forums > Lateral-G Open Discussions > Project Updates
User Name
Password


Reply
 
Thread Tools Display Modes
  #1  
Old 05-21-2020, 07:07 PM
syborg tt's Avatar
syborg tt syborg tt is offline
Lateral-g Supporting Member
 
Join Date: Jun 2005
Posts: 8,449
Thanks: 5,661
Thanked 2,043 Times in 1,100 Posts
Default

More parts for Pro-Tek Powder Coating. ( 04-22-20 )

In order to make it easy for the guys at Pro-Tek I drilled a hole so the parts could hang.


Might as well give him the one off upper and lower radiator hoses.


So i have been asked a couple times what is the part number of the grommet that I used for the Holley EFI Harness.

McMaster Carr -- 9600K231 SBR Rubber Push-In Grommet

__________________
marty-mj
Is a car ever really done???? It's like a ball of yarn unwinding, that has no end... Author DKz Garage

Projects - Syborg TT 4.3l v6 Mini-Truck, 2nd Chance Camaro & SLP575 Bumble Bee - 4Sale
Reply With Quote
  #2  
Old 08-06-2020, 10:42 PM
bkswede bkswede is offline
Senior Member
 
Join Date: Oct 2013
Posts: 165
Thanks: 6
Thanked 140 Times in 83 Posts
Default

Great build thread - too many posts to get through at once (and haven’t been able to make my way through all of them), but love the detailed posts!


Sent from my iPhone using Tapatalk
__________________
63 Chevy II - Build in Progress
2017 Camaro ZL1
2010 Mercedes C63 AMG
Reply With Quote
The Following User Says Thank You to bkswede For This Useful Post:
syborg tt (09-06-2020)
  #3  
Old 08-07-2020, 07:17 PM
waynieZ's Avatar
waynieZ waynieZ is offline
Lateral-g Supporting Member
 
Join Date: Oct 2006
Location: Ma
Posts: 8,491
Thanks: 939
Thanked 342 Times in 231 Posts
Default

I just saw the first picture on this page and that was my first thought! Thank you for that laugh I just finished.
I just went back a page to see what I missed. Nice looking parts they look good on the car.
__________________
_Wayne________

___________________________________
https://lateral-g.net/forums/show...ghlight=FNQUIK

Last edited by waynieZ; 08-07-2020 at 07:36 PM.
Reply With Quote
The Following User Says Thank You to waynieZ For This Useful Post:
syborg tt (09-06-2020)
  #4  
Old 09-28-2020, 09:45 AM
Ricochet's Avatar
Ricochet Ricochet is offline
Moderator
 
Join Date: Jul 2004
Location: Sacramento, Ca
Posts: 2,403
Thanks: 323
Thanked 381 Times in 121 Posts
Default

Looks great Marty!!! Always thinking outside the box!

Sent from my SM-G960U using Tapatalk
__________________
Brent
Reply With Quote
The Following User Says Thank You to Ricochet For This Useful Post:
syborg tt (09-29-2020)
  #5  
Old 09-28-2020, 05:34 PM
WSSix WSSix is offline
Lateral-g Supporting Member
 
Join Date: Nov 2008
Location: Dunwoody, GA
Posts: 6,618
Thanks: 1,759
Thanked 920 Times in 685 Posts
Default

I'd go under the battery, Marty. It's not often that you have to deal with the heater hose so I don't think you need to worry about accessing them.
__________________
Trey

Current ride: 2001 BMW 540iT soon to be manual swapped.

Former rides: 1979 Trans Am WS6: LT1/T56, Kore 3 C5/6 brakes, BMW 18in rims

00 BMW 540i/6: Suspension, wheels, and ACS bits.
Reply With Quote
The Following User Says Thank You to WSSix For This Useful Post:
syborg tt (09-29-2020)
  #6  
Old 09-29-2020, 10:35 AM
syborg tt's Avatar
syborg tt syborg tt is offline
Lateral-g Supporting Member
 
Join Date: Jun 2005
Posts: 8,449
Thanks: 5,661
Thanked 2,043 Times in 1,100 Posts
Default

Quote:
Originally Posted by WSSix View Post
I'd go under the battery, Marty. It's not often that you have to deal with the heater hose so I don't think you need to worry about accessing them.
That is kinda what I am thinking. However, I just need to make sure there isn't a rubbing issue.
__________________
marty-mj
Is a car ever really done???? It's like a ball of yarn unwinding, that has no end... Author DKz Garage

Projects - Syborg TT 4.3l v6 Mini-Truck, 2nd Chance Camaro & SLP575 Bumble Bee - 4Sale
Reply With Quote
  #7  
Old 10-03-2020, 07:57 AM
syborg tt's Avatar
syborg tt syborg tt is offline
Lateral-g Supporting Member
 
Join Date: Jun 2005
Posts: 8,449
Thanks: 5,661
Thanked 2,043 Times in 1,100 Posts
Default Battery Tray Support Concept ( 06-14-20 )

Moving back to the battery tray I need to figure out a good way to support the tray without over engineering it. The goal is
to come up with something simple that you wouldn't notice when you look under the car. It also has to be smooth to prevent
chaffing on the heater hoses.

Back from Ace Hardware with some supplies for my concept.


Support Sleeve.


I need to thread a 3/8" stainless steel threaded rod into the bottom of the battery tray and anchor it to the core support bracket. You need
to drill the proper size hole for the 3/8" tap. If you don't have this Tap Cheat sheet it is worth saving this as I borrowed it from someone on one
of the BB forums years ago and have referenced it many times.


Drilling a hole in your Carbon Inner Fender is kinda nerve racking.


Concept # 1 -- Create a bracket the bolts to the existing core support bracket.


Concept # 2 -- However if I bend rod just a little bit to get it to reach
the core support bracket I can bolt it directly to it.

__________________
marty-mj
Is a car ever really done???? It's like a ball of yarn unwinding, that has no end... Author DKz Garage

Projects - Syborg TT 4.3l v6 Mini-Truck, 2nd Chance Camaro & SLP575 Bumble Bee - 4Sale
Reply With Quote
  #8  
Old 10-07-2020, 07:40 PM
syborg tt's Avatar
syborg tt syborg tt is offline
Lateral-g Supporting Member
 
Join Date: Jun 2005
Posts: 8,449
Thanks: 5,661
Thanked 2,043 Times in 1,100 Posts
Default Vintage Air Fittings ( 06-20-20 )

Once again I am working on the Vintage Air lines and I need some new fittings. I headed over to Midwest Hots to pick up the new
fittings. I am very happy they made improvements as these are much better.


Prior to painting the firewall I added one new hole for the power wires for the Holley Terminator system. They made it clear in their instructions
that these wires need to be separated from all other wires in the car. So I moved them over to the passenger side of the Kick Panel.

ps Remember where these wire come out.


When I went to install the new Vintage Air fittings into the existing holes the new fittings hit the Anvil Inner fender. I starred at it for at
least 20 minutes and decided to put the old fittings back as the new ones didn't work. Hours later after lunch I took a second look and I
move the Vintage Air fittings over one hole. I as was shocked it actually fit like I had planned it. Talk about dumb luck.


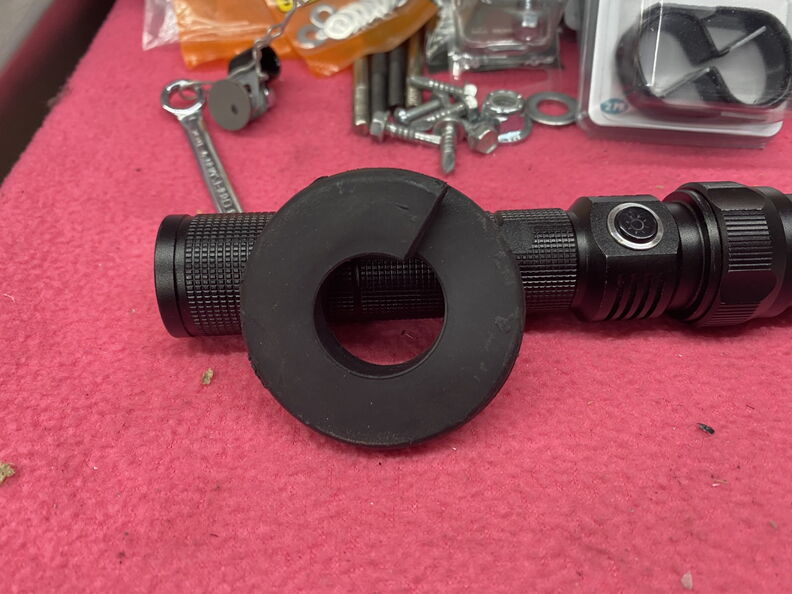
I sourced "machined washer" from Grainger and installed them on the back side to act as washers.


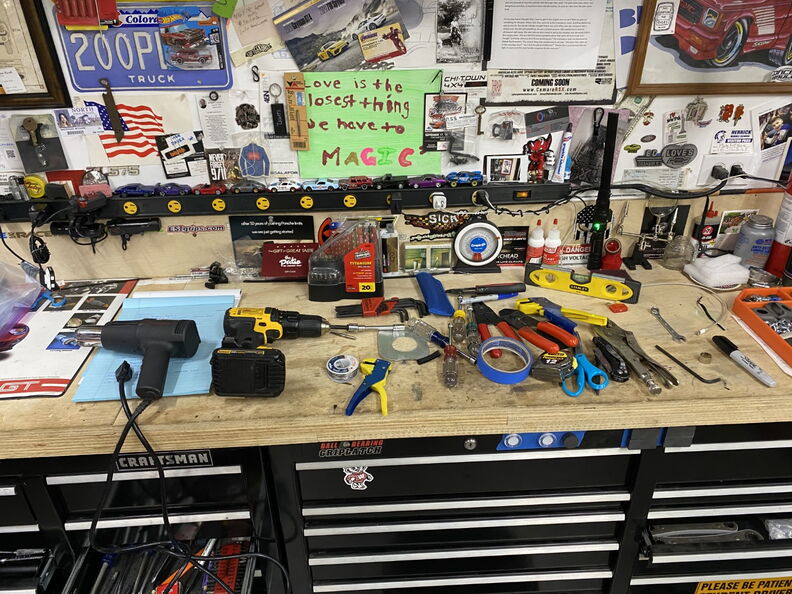
I decided to clean out all of the metal shavings that where inside the kick panel. So I got out my trusty magnet and started fishing for
metal shavings and I actually enjoyed this task.


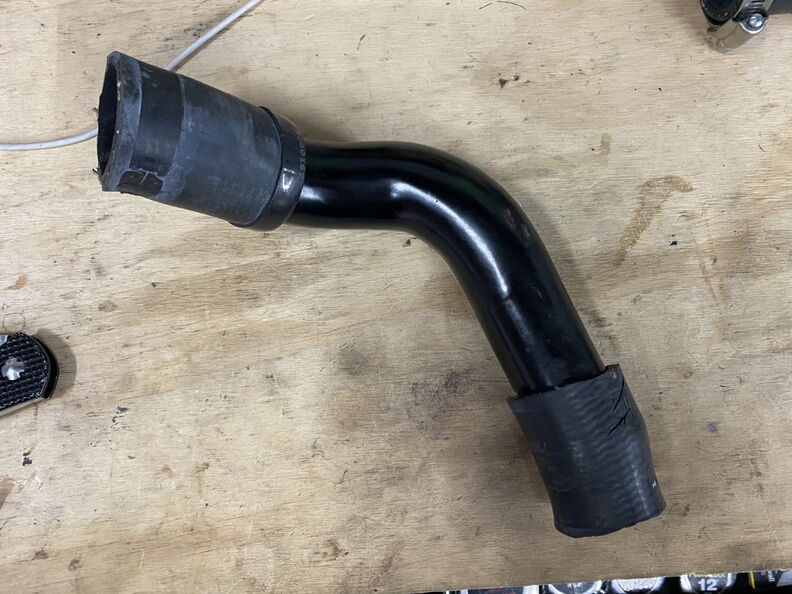
Test fitting the new lines and I am very happy how they look coming off the firewall.


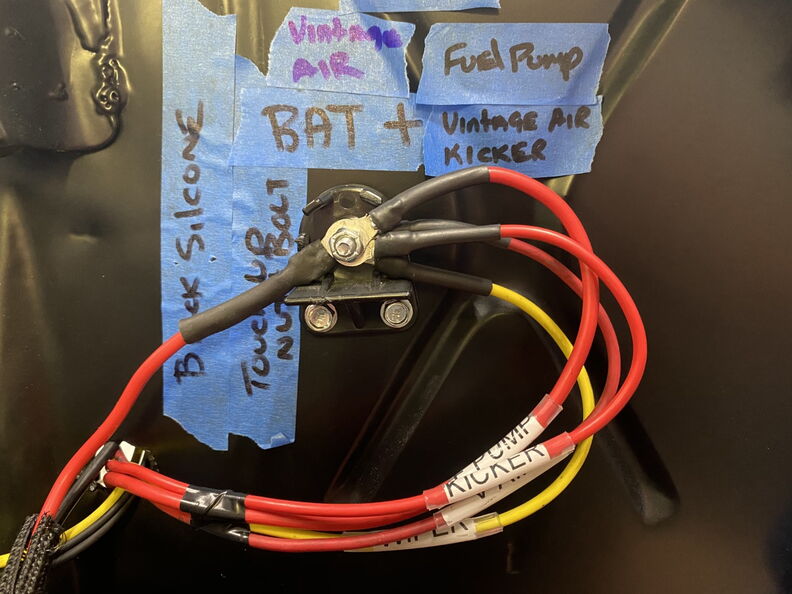
I am going to be moving this switch to location where I can service it if needed.


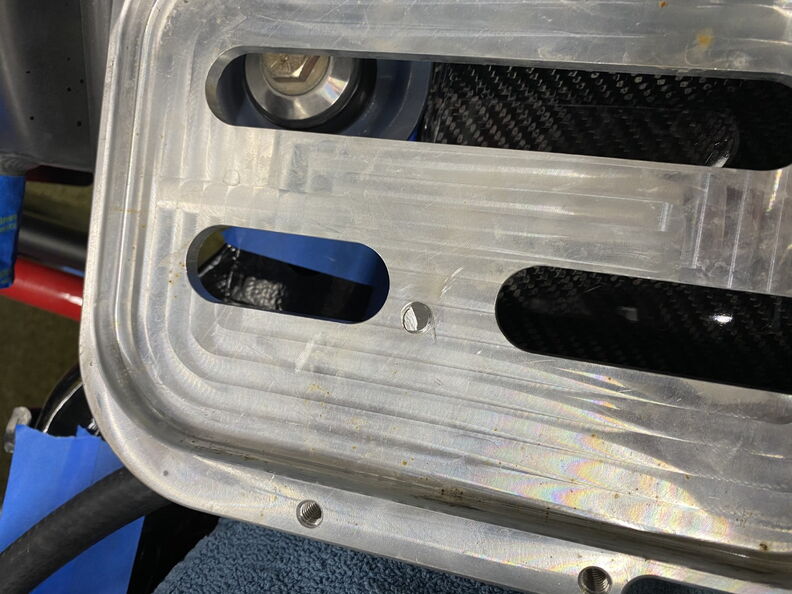
I am not liking how the AC lines look under the battery tray so I am going to try to figure out a new routing.


I don't like this either so I will be adding a line clamp to keep this line safe from harm as there is a bolt poking through the core support
directly into this line.


Flipping the line put the "Switch" in a much better locations.


Shadow is back.

__________________
marty-mj
Is a car ever really done???? It's like a ball of yarn unwinding, that has no end... Author DKz Garage

Projects - Syborg TT 4.3l v6 Mini-Truck, 2nd Chance Camaro & SLP575 Bumble Bee - 4Sale
Reply With Quote
The Following 7 Users Say Thank You to syborg tt For This Useful Post:
camcojb (10-08-2020), EVIL SS (10-13-2020), fleet (10-08-2020), glassman (10-09-2020), OLDFLM (10-08-2020), streetbird (10-08-2020), WILWAXU (10-08-2020)
  #9  
Old 12-12-2020, 08:27 AM
bkswede bkswede is offline
Senior Member
 
Join Date: Oct 2013
Posts: 165
Thanks: 6
Thanked 140 Times in 83 Posts
Default

Hey Marty,

Thanks for the detailed update and the progress looks great! Look forward to future updates,

Brian


Sent from my iPad using Tapatalk
__________________
63 Chevy II - Build in Progress
2017 Camaro ZL1
2010 Mercedes C63 AMG
Reply With Quote
The Following User Says Thank You to bkswede For This Useful Post:
syborg tt (12-12-2020)
  #10  
Old 12-14-2020, 06:26 PM
syborg tt's Avatar
syborg tt syborg tt is offline
Lateral-g Supporting Member
 
Join Date: Jun 2005
Posts: 8,449
Thanks: 5,661
Thanked 2,043 Times in 1,100 Posts
Default Wiring, Wiring & more Wiring - The Clean Up ((09-07-20 )) Part 2

So how is it possible that I used all of these tools.


Moving to my next project.

I don't have many wires that I want to label so as much as I want the really nice label maker I am going to do it the poor
man way. So off to Office Depot to Dymo Label maker for $40.00 and some clear heat shrink tubing.


So here is my first try and I think it worked good enough for my little project.


Sometime I wish I had a 3rd arm to help hold wires while I am soldering.


__________________
marty-mj
Is a car ever really done???? It's like a ball of yarn unwinding, that has no end... Author DKz Garage

Projects - Syborg TT 4.3l v6 Mini-Truck, 2nd Chance Camaro & SLP575 Bumble Bee - 4Sale
Reply With Quote
The Following 6 Users Say Thank You to syborg tt For This Useful Post:
camcojb (12-15-2020), Damerjo (12-16-2020), fleet (12-14-2020), jarhead (12-15-2020), Ricochet (12-15-2020), WILWAXU (12-14-2020)
Reply


Posting Rules
You may not post new threads
You may not post replies
You may not post attachments
You may not edit your posts

BB code is On
Smilies are On
[IMG] code is On
HTML code is Off

Forum Jump


All times are GMT -7. The time now is 07:19 AM.


Powered by vBulletin® Version 3.8.11
Copyright ©2000 - 2026, vBulletin Solutions Inc.
Copyright Lateral-g.net