Quote:
Originally Posted by syborg tt

Brian Brian Brian,
WOW this car keeps getting better and better and better.
So now that we see all the work you have done so far. I feel we need to know more of what your plans are with the interior.
|
Hey Marty,
Thanks for the kind words... my plans for the interior arent too crazy. Im aiming for an interior that is a nice balance between function and good looks, but also some cool subtle details.
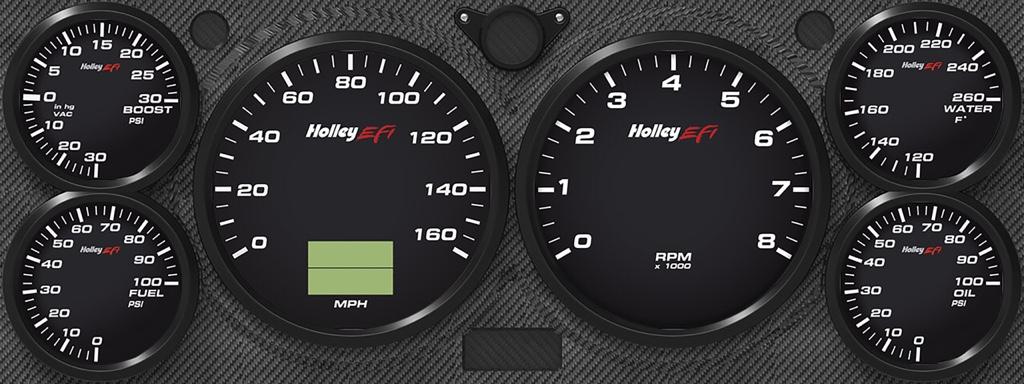
My first objective was to get rid of the stock gauge pod and replace it with something more fitting of a pro-touring car. I considered fabricating a new gauge pod that could hold an assortment of proper analog gauges; however, there isnt a lot of space in a first generation Nova dash. I decided to incorporate Holleys new 12.3 digital dash, which offered the ability for various dash layouts, all with the swipe of a finger - you can swipe between dash layouts by swiping the touchscreen, just like a smart phone. I was able to customize my dash layout by adding digital gauges and read outs to reflect whatever info I wanted to display that was captured by my Dominator ECU, or that I fed into the digital dash. Below is the base layout that was embedded in the dash. I had a graphics designer modify the template by changing the boost gauge in the Holley template to an oil temp gauge (cost $50 on Etsy)...
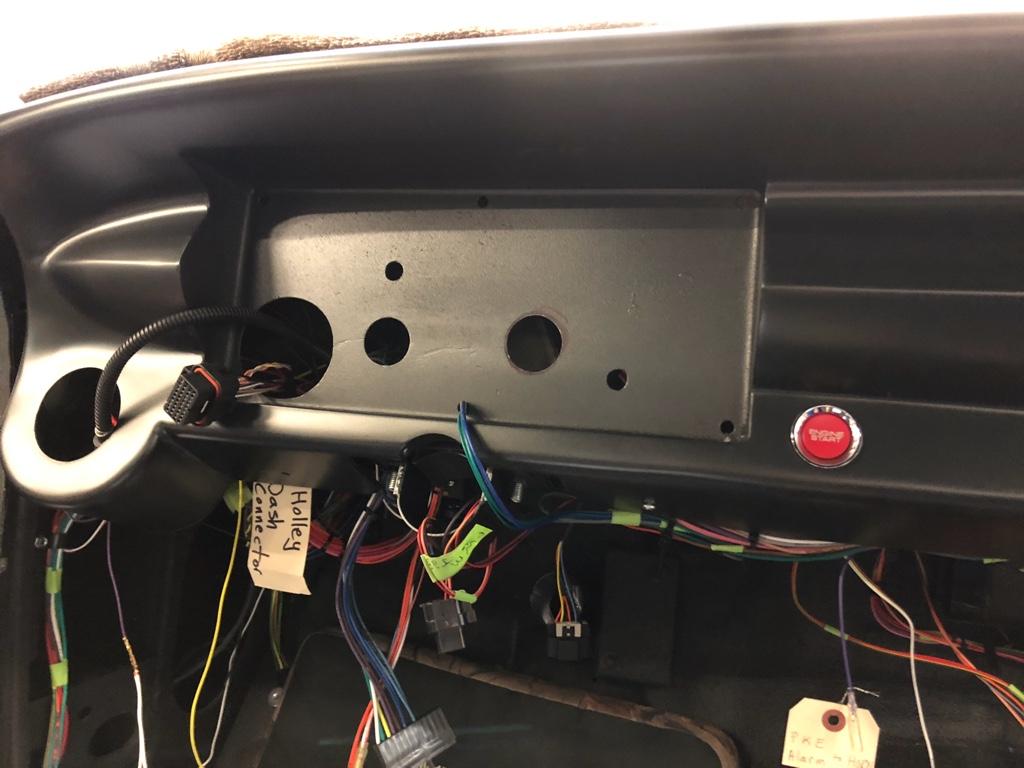
We fabricated the dash to mount the Holley digital dash in place of the stock gauge pod...


Replaced keyed ignition with push button start and keyless locks, similar to newer cars (digital guard dawg)...
Front seats are Recaro LS-C seats from some model of early 80s Volkswagen, which were rebuilt and recovered in black leather with diamond pattern.

For backseat, Im using an early 2000s rear seat from a BMW 3 series, which fits very nicely. Almost perfect width (the photo below doesnt show the panels that cover the wheel wells and will need to be trimmed a bit)... purchased on eBay for $175... Interior shop will recover the rear seat to match the front seats (I purchased an extra hyde of leather from the guy who did my front seats in order to match the rear seats)

Were building a center console to house A/C vents, vintage air controller, power window and door switches as well as cup holders. The console will look somewhat similar to the one in this very nice 63 Chevy II.

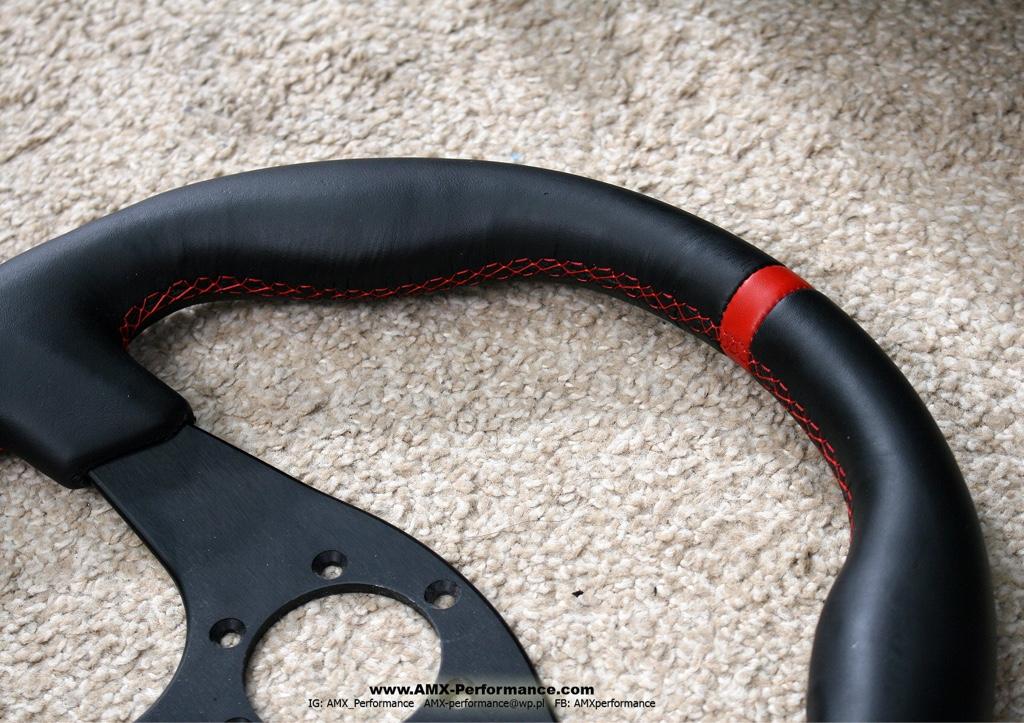
Momo steering wheel that I had recovered in same leather as my front seats, and added red stripe at 12 oclock, as well as red stitching...

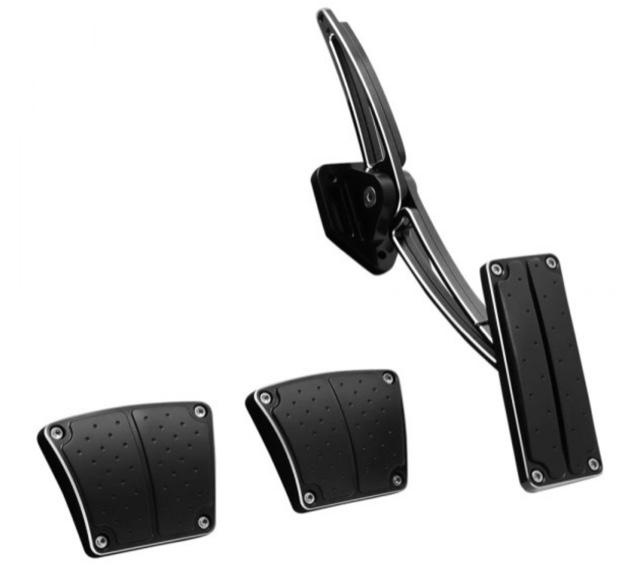
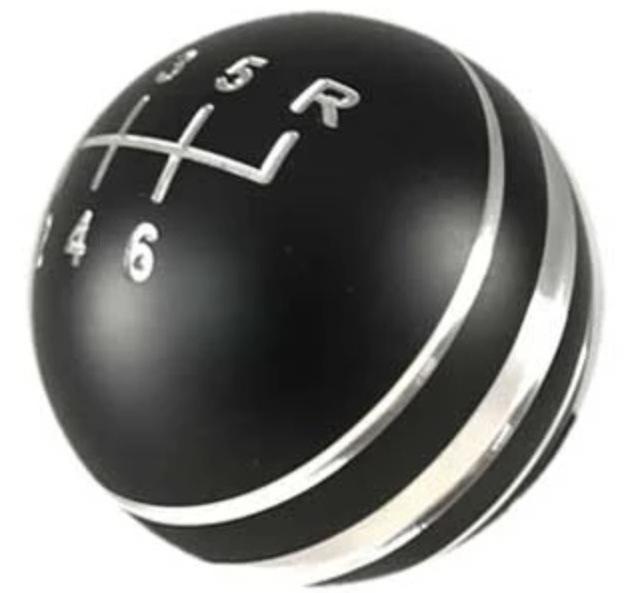
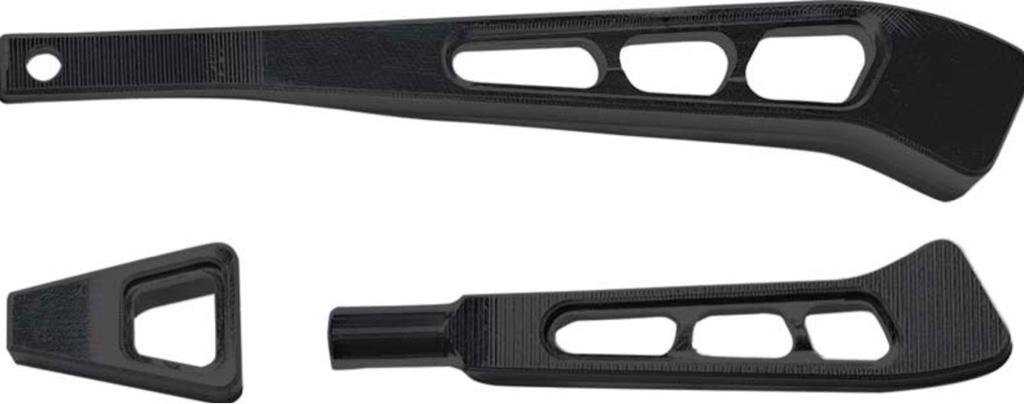
Im having custom door panels made by the interior shop Im working with... again, nothing too crazy, but will incorporate arm rests into the door panels. The headliner is black suede and the center console and door panels will be some combination of leather and suede to match the seats and headliner. Im also using Clayton Machine Works door and window handles, and pedal covers; as well as matching shifter and steering column levers.

Will add custom black carpet and some black anodized sill plates. The stereo and amp will be mounted in the trunk behind the rear seat, completely hidden and controlled via RF remote. Speakers are mounted in the front doors and rear package shelf, as well as an 8 subwoofer mounted in the trunk. Thanks!
Brian
Sent from my iPad using Tapatalk


 Brian Hobaugh SCCA National Tour June 2014
 First Hemi 'Cuda Convertible Ever Built
 Short clips: Goodguys Pleasanton autocross and pit videos


 It's like a ball of yarn unwinding, that has no end... Author DKz Garage

 Hybrid Mode
