...

Go Back   Lateral-g Forums > Lateral-G Open Discussions > Project Updates
User Name
Password


Reply
 
Thread Tools Display Modes
  #151  
Old 12-11-2020, 10:26 AM
1965_SS's Avatar
1965_SS 1965_SS is offline
Senior Member
 
Join Date: Oct 2010
Location: Central Valley, CA
Posts: 258
Thanks: 30
Thanked 15 Times in 13 Posts
Default

Great build! Thanks for all the detailed pics and info.
__________________
_________
Todd
1965 Chevelle SS
Project Build
Reply With Quote
  #152  
Old 12-11-2020, 06:59 PM
64G-lark's Avatar
64G-lark 64G-lark is offline
Senior Member
 
Join Date: Jun 2005
Location: Mapleton, IL.
Posts: 106
Thanks: 9
Thanked 74 Times in 41 Posts
Default

Nice update Brian. I had been anxiously waiting. Ready for Christmas? Where did you source the interior light?
Reply With Quote
  #153  
Old 12-12-2020, 06:28 AM
RdHuggr68 RdHuggr68 is offline
Senior Member
 
Join Date: Jan 2009
Location: Elizabeth CO
Posts: 669
Thanks: 163
Thanked 23 Times in 15 Posts
Default

Quote:
Originally Posted by bkswede View Post
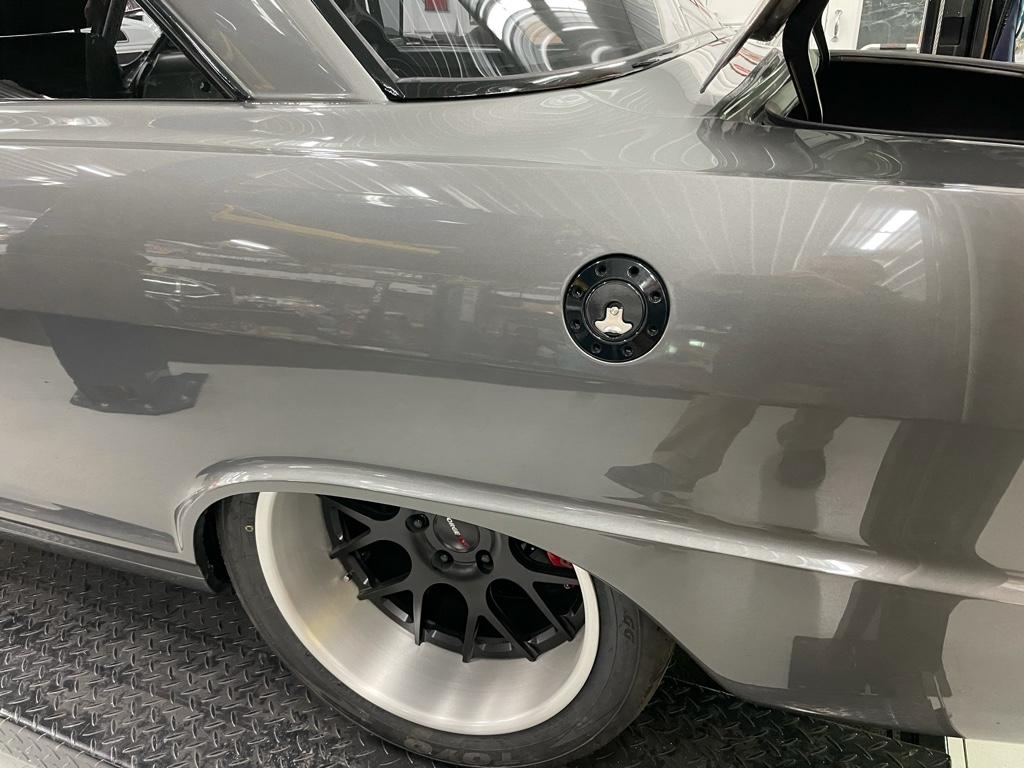
Made a trip to Eau Claire recently to meet with Kurt and check out some nice progress on the Nova. Wiring is basically finished up, but for a few items that will require mock up of center console (e.g., power window and lock switches). Kurt got the Vaporworx PWM fuel pump module mounted in the trunk (wiring is nice and tidy), along with the battery and the II Much fuel vent.

Attachment 73195
Attachment 73196
Attachment 73197

The headlights are also mounted and wired up. These headlights are LED units with halos. The halos shine white most of the time, so they serve as daytime running lights when headlights are off. When the headlights are on, I can either leave the halos on or switch them off - I have them wired to a virtual switch on the Holley pro dash. When turn signals are activated, however, the halos shine amber and blink with the turn signals. Pretty cool, and excited to see them in action.

Attachment 73198
Attachment 73199
Attachment 73200

We also got the radiator back from powder coating and it turned out great! We powder coated the tanks, top, bottom and sides. The fins weren’t powder coated in traditional way, but coated in a very thin coat of similar color to ensure no degradation of thermal transmission of the fins. We still need to deal with the radiator cap. We didn’t want to coat the cap as it has a rubber gasket that we were concerned about putting in the oven as part of the curing process. Instead, we’re going to have the cap coated with Cerakote, a product similar to a powder coat, but thinner and can be air cured rather than oven cured.

Attachment 73201
Attachment 73202

We also got the catch can mounted. Went with a Mighty Mouse catch can. Will connect via a -8AN adaptor on the valve cover oil filler. We had to modify the fuel rail cover - drilled a hole and will connect a 90 degree elbow fitting with push lock hose that will connect to the catch can. Other line out of the catch can will plug into nipple on the intake manifold.

Attachment 73203

Kurt had moved the Nova on to a four post lift as we’ll be working on the exhaust next. Was cool to get under the car and see some of the work close up. QA1 carbon fiber driveshaft installed, and good look at the aluminum center section 9 inch rear end.

Attachment 73204


Was able to get a few pics of the inner wheels.. calipers clear, but not by much!


Got a nice view of some of the wiring that was done under the car. I mentioned previously that the C6 Corvette PWM fan unit is wired with a nice splitter harness from Vintage Air that splits the output signal from the fan control unit in two into pigtails that plug directly into the Spal fan pigtail harnesses. Works awesome... we will need to secure the harnesses so that they don’t block the air flaps in the shroud, but is super clean.


I also installed multiple temperature sensors to monitor oil temps and power steering fluid temps. My C&R radiator has oil and power steering coolers. We wired in temperature sensors in the input and output lines so that we can monitor oil and power steering fluid temps as they enter the cooling unit and after they exit the cooling unit. Because these all feed the digital dash (rather than a physical gauge), it is easy and inexpensive to monitor this data in a digital environment where you don’t need physical gauges.


A couple of under car shots where you can see where we will run the exhaust from the headers...


For exhaust, I’m using Spintech oval tubing from the headers to an X-pipe to their 3000 series mufflers. The oval tubing is 3 1/2” wide and 2 1/4” tall, and the equivalent to 3” round tubing. The oval tubing will give us a little more ground clearance to tuck the exhaust up tighter to the floors. The mufflers are oval inlets and 3” round outlets. The round tubing will exit the mufflers and go over the rear end, angle toward the back corner of the rear of the car (the fuel tank has clipped corners) and will exit near the rear bumper. System will be Tig welded together but for a handful of V band clamps to take it off in sections. Once completed, we’ll coat the exhaust black. You can see one of the mufflers, the X-pipe and other oval tubing in the photo below. The exhaust components are sitting on lift in front of the rear tire.


A handful of shots of the Nova on the lift. First time it’s had front fenders on it in a long, long time. Kurt adjusted the front shocks and the rake is pretty close... looks great! We’ll tweak it again after all fluids are in and weight is settled in.


Great to see the continued progress! PFTE fuel line should be in this week and will be installed. Also, as mentioned above, exhaust will be a priority this week as well. Stay safe,

Brian


Sent from my iPad using Tapatalk
I like the idea of the air flaps installed in the shroud. Is there anymore info in your thread on this idea? Great build info BTW, great information.
Reply With Quote
  #154  
Old 12-12-2020, 06:33 AM
bkswede bkswede is offline
Senior Member
 
Join Date: Oct 2013
Posts: 165
Thanks: 6
Thanked 140 Times in 83 Posts
Default ‘63 Chevy II Pro-Touring Build

Quote:
Originally Posted by Marcellus View Post
Man that thing is sweet. I tried to find a link to where you got the dash knobs as I think they would go well in my Chevy II. How did you order those I cant find them anywhere. Thanks.

Thanks! I looked all over trying to find knobs that I liked. Ridetech used to make knobs that I really liked that looked similar to these from Dutchboys, but they discontinued them a few years ago and I’ve never been able to locate any. I stumbled upon these from Dutchboys a few weeks ago on one of the forums where someone recommended them for someone else’s build. Glad I saw the post, as I really like these and think they’ll compliment the rest of my interior. Here is the link to where to purchase. I just ordered mine a few weeks ago, but their webpage now shows them as being sold out - hopefully just temporary... I’d give them a call and find out when they’ll have more in stock. Best,

Brian

http://www.dutchboyshotrods.com/onli...Kit-p175736154


Sent from my iPad using Tapatalk
__________________
63 Chevy II - Build in Progress
2017 Camaro ZL1
2010 Mercedes C63 AMG
Reply With Quote
  #155  
Old 12-12-2020, 06:44 AM
bkswede bkswede is offline
Senior Member
 
Join Date: Oct 2013
Posts: 165
Thanks: 6
Thanked 140 Times in 83 Posts
Default

Quote:
Originally Posted by 1965_SS View Post
Great build! Thanks for all the detailed pics and info.

Thanks - appreciate the kind words!


Sent from my iPad using Tapatalk
__________________
63 Chevy II - Build in Progress
2017 Camaro ZL1
2010 Mercedes C63 AMG
Reply With Quote
  #156  
Old 12-12-2020, 07:03 AM
bkswede bkswede is offline
Senior Member
 
Join Date: Oct 2013
Posts: 165
Thanks: 6
Thanked 140 Times in 83 Posts
Default ‘63 Chevy II Pro-Touring Build

Quote:
Originally Posted by 64G-lark View Post
Nice update Brian. I had been anxiously waiting. Ready for Christmas? Where did you source the interior light?

I wish it would be ready for Christmas! I’ll be happy if Kurt is done with his work by the end of January, and we can get it to the interior shop so they can complete their work, and then get it dyno tuned and ready for the road by the time spring rolls around here in MN (say May 1). We still need to get it running and trouble shoot any issues (there is a lot of wiring in this thing!), but definitely getting closer... when we mocked up the console on Wednesday, we put the front seats in it to test positioning of the console and hand brake - made me really anxious sitting in the driver’s seat!

I picked up the led interior light on eBay... was a little unsure when I ordered it, but Kurt raved about it when it showed up at the shop, and we ordered two more to mount one on each side of the center console as courtesy lights. It has a nice little billet aluminum housing. Here’s the link:

https://www.ebay.com/itm/LED-Billet-...-/253772095609

Sent from my iPad using Tapatalk
__________________
63 Chevy II - Build in Progress
2017 Camaro ZL1
2010 Mercedes C63 AMG

Last edited by bkswede; 12-12-2020 at 07:41 AM.
Reply With Quote
  #157  
Old 12-12-2020, 07:09 AM
bkswede bkswede is offline
Senior Member
 
Join Date: Oct 2013
Posts: 165
Thanks: 6
Thanked 140 Times in 83 Posts
Default

Quote:
Originally Posted by RdHuggr68 View Post
I like the idea of the air flaps installed in the shroud. Is there anymore info in your thread on this idea? Great build info BTW, great information.

Thanks! The air flaps in the shrouds are just part of the standard Spal shroud system. The fans are part of a dual 11” unit, with each unit having three air flaps above and three air flaps below, the fan itself. Makes all the sense in the world to have those flaps so air can move freely through the shroud when you’re at speed and the fans aren’t running.


Sent from my iPad using Tapatalk
__________________
63 Chevy II - Build in Progress
2017 Camaro ZL1
2010 Mercedes C63 AMG
Reply With Quote
The Following User Says Thank You to bkswede For This Useful Post:
RdHuggr68 (12-12-2020)
  #158  
Old 12-14-2020, 07:25 PM
syborg tt's Avatar
syborg tt syborg tt is offline
Lateral-g Supporting Member
 
Join Date: Jun 2005
Posts: 8,403
Thanks: 5,518
Thanked 1,954 Times in 1,057 Posts
Default

Brian Brian Brian,

WOW this car keeps getting better and better and better.

So now that we see all the work you have done so far. I feel we need to know more of what your plans are with the interior.
__________________
marty-mj
Is a car ever really done???? It's like a ball of yarn unwinding, that has no end... Author DKz Garage

Projects - Syborg TT 4.3l v6 Mini-Truck, 2nd Chance Camaro & SLP575 Bumble Bee - 4Sale
Reply With Quote
  #159  
Old 12-16-2020, 08:28 AM
badbu68 badbu68 is offline
Member
 
Join Date: Sep 2007
Location: Normal, IL
Posts: 60
Thanks: 6
Thanked 0 Times in 0 Posts
Default

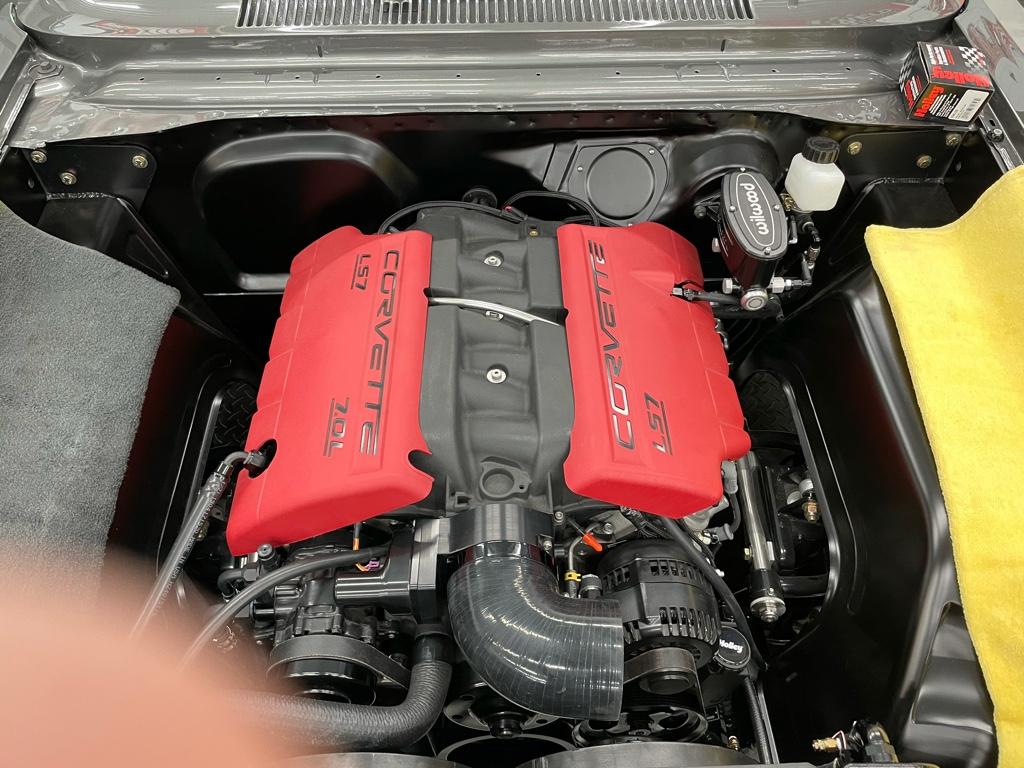
Nice and clean, love how modern factory it looks with everything tucked in and not hanging out.
Reply With Quote
  #160  
Old 12-16-2020, 08:39 PM
bkswede bkswede is offline
Senior Member
 
Join Date: Oct 2013
Posts: 165
Thanks: 6
Thanked 140 Times in 83 Posts
Default

Quote:
Originally Posted by syborg tt View Post
Brian Brian Brian,

WOW this car keeps getting better and better and better.

So now that we see all the work you have done so far. I feel we need to know more of what your plans are with the interior.

Hey Marty,

Thanks for the kind words... my plans for the interior aren’t too crazy. I’m aiming for an interior that is a nice balance between function and good looks, but also some cool subtle details.

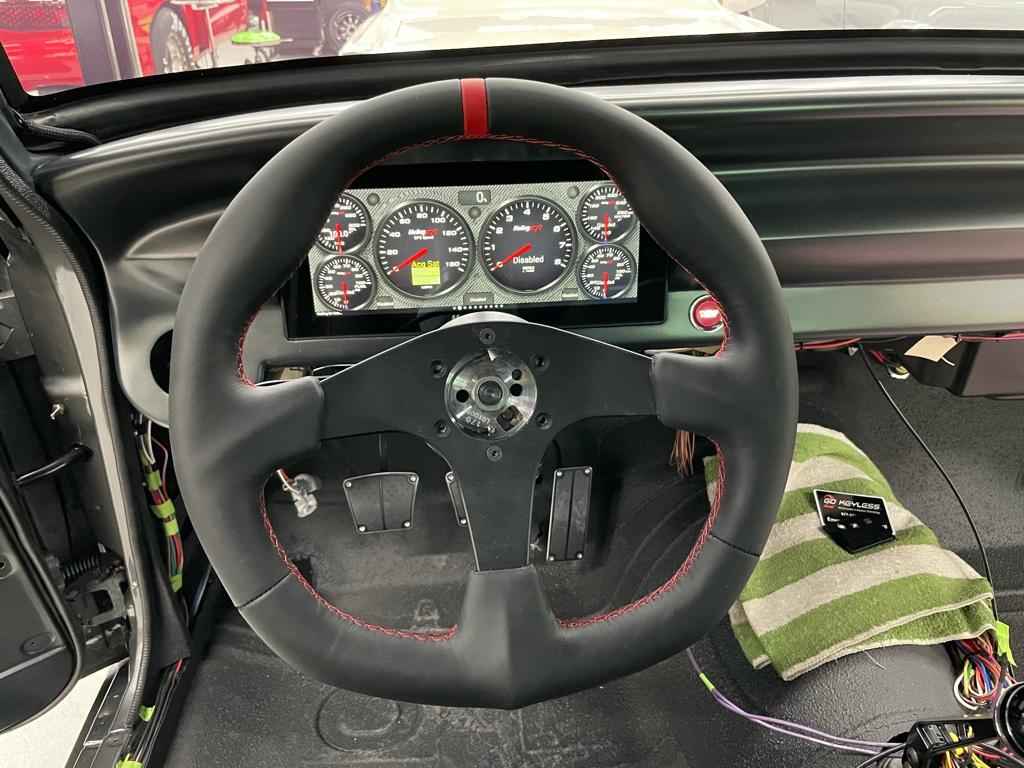
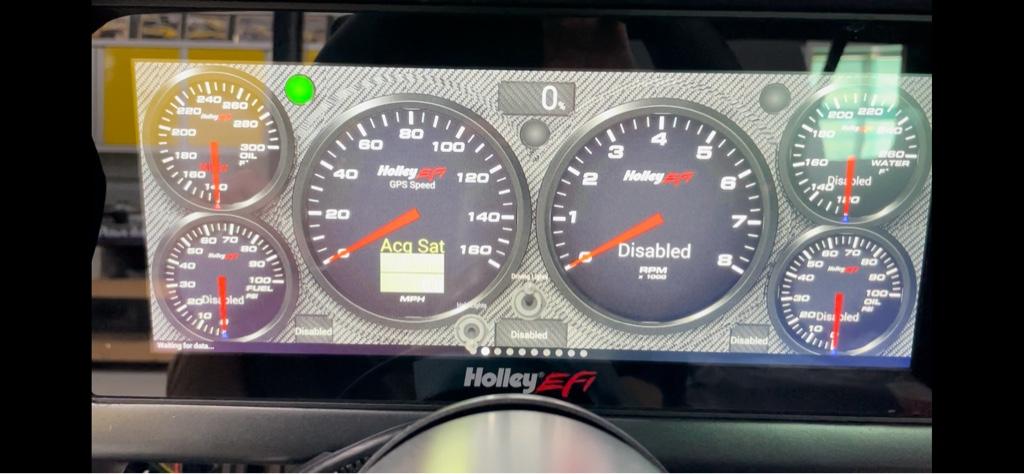
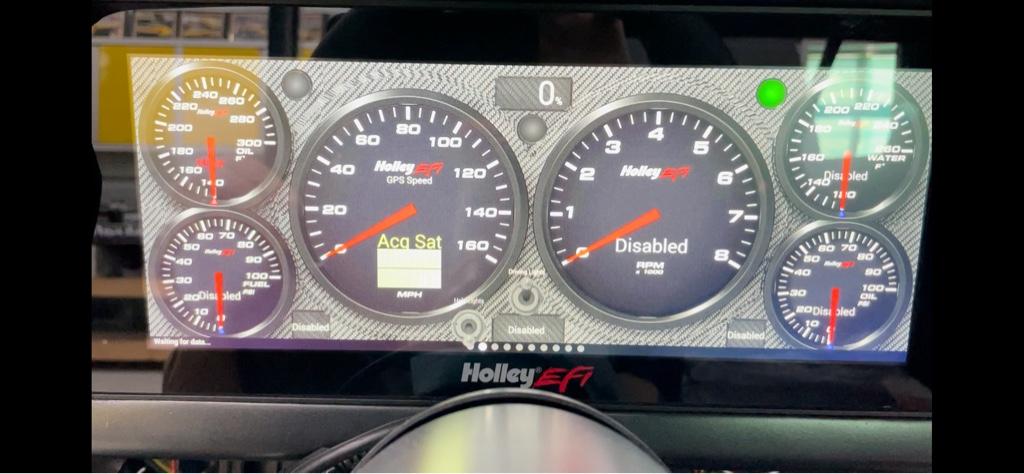
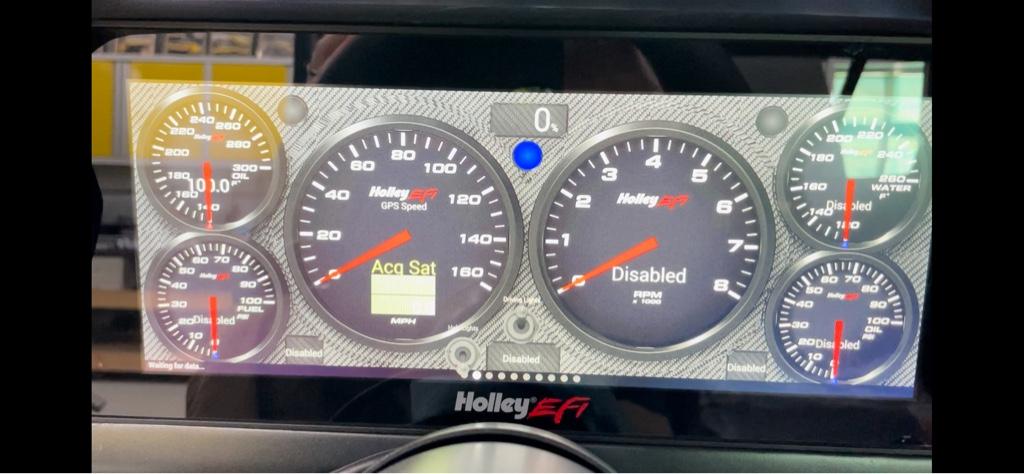
My first objective was to get rid of the stock gauge pod and replace it with something more fitting of a pro-touring car. I considered fabricating a new gauge pod that could hold an assortment of proper analog gauges; however, there isn’t a lot of space in a first generation Nova dash. I decided to incorporate Holley’s new 12.3” digital dash, which offered the ability for various dash layouts, all with the swipe of a finger - you can swipe between dash layouts by swiping the touchscreen, just like a smart phone. I was able to customize my dash layout by adding digital gauges and read outs to reflect whatever info I wanted to display that was captured by my Dominator ECU, or that I fed into the digital dash. Below is the base layout that was embedded in the dash. I had a graphics designer modify the template by changing the boost gauge in the Holley template to an oil temp gauge (cost $50 on Etsy)...


We fabricated the dash to mount the Holley digital dash in place of the stock gauge pod...


Replaced keyed ignition with push button start and keyless locks, similar to newer cars (digital guard dawg)...


Front seats are Recaro LS-C seats from some model of early 80’s Volkswagen, which were rebuilt and recovered in black leather with diamond pattern.


For backseat, I’m using an early 2000’s rear seat from a BMW 3 series, which fits very nicely. Almost perfect width (the photo below doesn’t show the panels that cover the wheel wells and will need to be trimmed a bit)... purchased on eBay for $175... Interior shop will recover the rear seat to match the front seats (I purchased an extra hyde of leather from the guy who did my front seats in order to match the rear seats)


We’re building a center console to house A/C vents, vintage air controller, power window and door switches as well as cup holders. The console will look somewhat similar to the one in this very nice ‘63 Chevy II.


Momo steering wheel that I had recovered in same leather as my front seats, and added red stripe at 12 o’clock, as well as red stitching...


I’m having custom door panels made by the interior shop I’m working with... again, nothing too crazy, but will incorporate arm rests into the door panels. The headliner is black suede and the center console and door panels will be some combination of leather and suede to match the seats and headliner. I’m also using Clayton Machine Works door and window handles, and pedal covers; as well as matching shifter and steering column levers.


Will add custom black carpet and some black anodized sill plates. The stereo and amp will be mounted in the trunk behind the rear seat, completely hidden and controlled via RF remote. Speakers are mounted in the front doors and rear package shelf, as well as an 8” subwoofer mounted in the trunk. Thanks!

Brian


Sent from my iPad using Tapatalk
__________________
63 Chevy II - Build in Progress
2017 Camaro ZL1
2010 Mercedes C63 AMG
Reply With Quote
The Following 2 Users Say Thank You to bkswede For This Useful Post:
dhutton (12-20-2020), EVIL SS (12-22-2020)
Reply


Posting Rules
You may not post new threads
You may not post replies
You may not post attachments
You may not edit your posts

BB code is On
Smilies are On
[IMG] code is On
HTML code is Off

Forum Jump


All times are GMT -7. The time now is 11:27 AM.


Powered by vBulletin® Version 3.8.11
Copyright ©2000 - 2025, vBulletin Solutions Inc.
Copyright Lateral-g.net