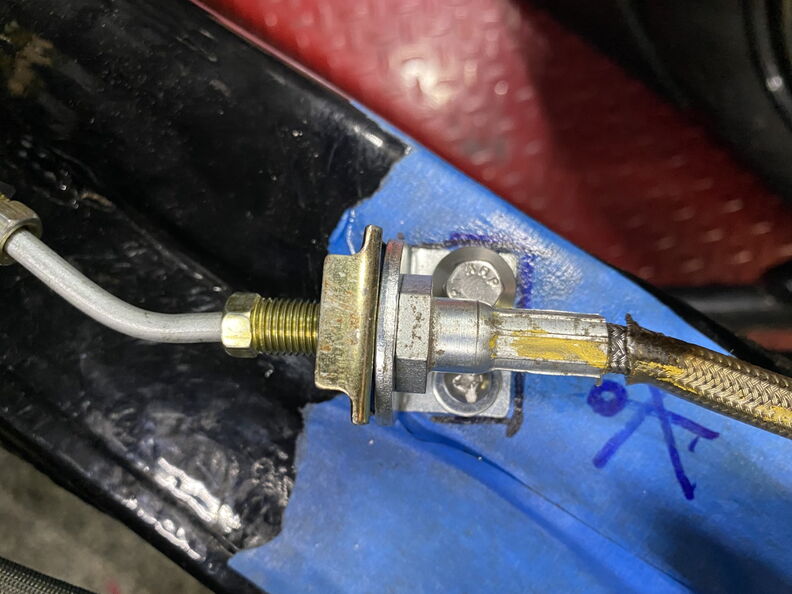
...

Go Back   Lateral-g Forums > Lateral-G Open Discussions > Project Updates
User Name
Password


Reply
 
Thread Tools Display Modes
  #1631  
Old 10-04-2021, 10:25 PM
syborg tt's Avatar
syborg tt syborg tt is offline
Lateral-g Supporting Member
 
Join Date: Jun 2005
Posts: 8,313
Thanks: 5,055
Thanked 1,816 Times in 977 Posts
Default Fan Relay 05-15-21

I removed the old wiring for the fan and installed a painless relay set up. Eventually this will come out and I will install the PWM setup.


I need to figure out the location for the relay.


This looks like the perfect location.


The black screw is the ground stud.


Wiring is all hidden nicely behind the battery


Remy Picture


Routing the wires over to the fan where I will install a weather pack connector.
__________________
marty-mj
Is a car ever really done???? It's like a ball of yarn unwinding, that has no end... Author DKz Garage

Projects - Syborg TT 4.3l v6 Mini-Truck, 2nd Chance Camaro & SLP575 Bumble Bee - 4Sale
Reply With Quote
The Following 2 Users Say Thank You to syborg tt For This Useful Post:
Roscoe03 (10-05-2021), zz430droptop67rs (10-05-2021)
  #1632  
Old 10-04-2021, 10:36 PM
syborg tt's Avatar
syborg tt syborg tt is offline
Lateral-g Supporting Member
 
Join Date: Jun 2005
Posts: 8,313
Thanks: 5,055
Thanked 1,816 Times in 977 Posts
Default Making things looks pretty (05-16-21)

Time to wrap the wires


Breakfast & Relay


While I here I sketched out my wiring plan/diagram.


Of Course I will be using an Optima battery since the billet battery tray Ron & I designed for the 2nd Gen Camaro's.


more stuff !!!

__________________
marty-mj
Is a car ever really done???? It's like a ball of yarn unwinding, that has no end... Author DKz Garage

Projects - Syborg TT 4.3l v6 Mini-Truck, 2nd Chance Camaro & SLP575 Bumble Bee - 4Sale
Reply With Quote
The Following 4 Users Say Thank You to syborg tt For This Useful Post:
camcojb (10-04-2021), fleetus macmullitz (10-07-2021), Ricochet (10-06-2021), Roscoe03 (10-05-2021)
  #1633  
Old 10-07-2021, 06:44 PM
syborg tt's Avatar
syborg tt syborg tt is offline
Lateral-g Supporting Member
 
Join Date: Jun 2005
Posts: 8,313
Thanks: 5,055
Thanked 1,816 Times in 977 Posts
Default I really really thought the car would make it out this year (05-17-21)

So my plan was to have the car completed for the Hot Rod Power Tour.
However, that didn't happen but the good news is I did buy the tires and plan to have them mounted soon.


Jumping back on the brakes or should I say "Circling Back".
I needed to stop this bracket from twisting when I turn the wheel


Step One - Dill second hole in the bracket.


Step Two - Tap said hole.


Step Three - Drill second hole in frame.


Step Four - Mount bracket using the ARP bolt and then thread in the smaller bolt so it acts like a stud in the bracket. That way if the small bolt
breaks all I have to do is replace it. I also don't have to worry about breaking a small tap in the frame as I have done that some many times in
the past that I no longer trust myself.


Step Five - Rinse and Repeat on the Drivers Side


Yahoo I get to use my Right Hand Drill


__________________
marty-mj
Is a car ever really done???? It's like a ball of yarn unwinding, that has no end... Author DKz Garage

Projects - Syborg TT 4.3l v6 Mini-Truck, 2nd Chance Camaro & SLP575 Bumble Bee - 4Sale
Reply With Quote
  #1634  
Old 10-07-2021, 06:58 PM
syborg tt's Avatar
syborg tt syborg tt is offline
Lateral-g Supporting Member
 
Join Date: Jun 2005
Posts: 8,313
Thanks: 5,055
Thanked 1,816 Times in 977 Posts
Default Adding a Weather-Pack to the Fan (05-23-21)

Upgrading the wire connectors to a weather-pack connector.


I started using a X-Acto hot knife to cut the Tech-Flex wire sleeve. It works good and if you accidently cut yourself it also singes
your skin so you don't have to worry about bleeding or needing a band-aid.


__________________
marty-mj
Is a car ever really done???? It's like a ball of yarn unwinding, that has no end... Author DKz Garage

Projects - Syborg TT 4.3l v6 Mini-Truck, 2nd Chance Camaro & SLP575 Bumble Bee - 4Sale
Reply With Quote
  #1635  
Old 10-07-2021, 08:31 PM
camcojb's Avatar
camcojb camcojb is online now
Administrator
 
Join Date: Jul 2004
Location: Wilton, CA.
Posts: 12,904
Thanks: 5,577
Thanked 1,595 Times in 716 Posts
Default

Quote:
Originally Posted by syborg tt View Post

Step One - Dill second hole in the bracket.


Step Two - Tap said hole.


Step Three - Drill second hole in frame.


Step Four - Mount bracket using the ARP bolt and then thread in the smaller bolt so it acts like a stud in the bracket. That way if the small bolt
breaks all I have to do is replace it. I also don't have to worry about breaking a small tap in the frame as I have done that some many times in
the past that I no longer trust myself.


Step Five - Rinse and Repeat on the Drivers Side
That will definitely work. I've fallen in love with nutserts (rivet nuts) in cases like that, easy to install and work great for mounting brackets/etc. to frames, firewalls, fenderwells, sheet metal...
Attached Images
  
__________________
Jody

PAST CAR PROJECTS

Like Lateral-G on Facebook!

Follow Lateral-G on Instagram!

SPECIAL THANKS TO:
Jacob Ehlers and Amsoil for the lubricants and degreasers for my 70 Chevelle project
Shannon at Modo Innovations for the cool billet DBW bracket
Roadster Shop for their Chevelle SPEC Chassis
Dakota Digital for their Chevelle HDX Gauge Package
Painless Performance for their wiring harness

Ron Davis Radiators for their radiator and fan assembly.
Baer Brakes for their front and rear brakes

Texas Speed and Performance for their 427 LS Stroker
American Powertrain for their ProFit Magnum T56 kit
Currie Enterprises for their 9" Third Member
Forgeline for their GF3 Wheels
McLeod Racing for their RXT street twin clutch
Ididit for their steering column
Holley for their EFI and engine parts
Lokar and Clayton Machine for their pedals and door and window handles
Morris Classic Concepts for their 3 point belts and side mirrors
Thermotec for their heat sleeve and sound deadening products
Restomod Air for their Tru Mod A/C kit
Mightymouse Solutions for their catch can
Magnaflow for their 3" exhaust system
Aeromotive for their dual Phantom fuel system
Vintage Air for their new Mid Mount LS front drive
Hydratech Braking for their hydroboost system
Borgeson for their stainless steering shaft and u joints
Eddie Motorsports for their hood and trunk hinges and misc parts
TMI Products for their seats, door panels, and dash pad
Rock Valley Antique Auto Parts for their stainless fuel tank
Reply With Quote
The Following 5 Users Say Thank You to camcojb For This Useful Post:
EVIL SS (10-08-2021), Roscoe03 (10-09-2021), srode1 (10-08-2021), WILWAXU (10-08-2021), zz430droptop67rs (10-07-2021)
  #1636  
Old 10-08-2021, 11:43 AM
syborg tt's Avatar
syborg tt syborg tt is offline
Lateral-g Supporting Member
 
Join Date: Jun 2005
Posts: 8,313
Thanks: 5,055
Thanked 1,816 Times in 977 Posts
Default

That's a great idea and what really sucks is I have the tool.

Da !!!!

Quote:
Originally Posted by camcojb View Post
That will definitely work. I've fallen in love with nutserts (rivet nuts) in cases like that, easy to install and work great for mounting brackets/etc. to frames, firewalls, fenderwells, sheet metal...
__________________
marty-mj
Is a car ever really done???? It's like a ball of yarn unwinding, that has no end... Author DKz Garage

Projects - Syborg TT 4.3l v6 Mini-Truck, 2nd Chance Camaro & SLP575 Bumble Bee - 4Sale
Reply With Quote
The Following User Says Thank You to syborg tt For This Useful Post:
redfire69 (10-08-2021)
  #1637  
Old 10-08-2021, 12:00 PM
F'in mine's Avatar
F'in mine F'in mine is offline
Senior Member
 
Join Date: Mar 2015
Location: Toronto, Canada
Posts: 130
Thanks: 18
Thanked 36 Times in 25 Posts
Default

I've followed along at times and used some of your wiring techniques which has helped me, thanks for that. For my fan relays I decided to put them into a enclosure to protect from the elements just in case. One like this that fits both.
https://secure.sayal.com/STORE2/View_SHOP.php?SKU=14898

Then decided to grab this one of which I'll alter to fit down the road.
https://www.amazon.ca/gp/product/B07...0?ie=UTF8&th=1

Also fabbed up a panel into the front fender area so that I wouldn't clutter up the battery area with a bunch of wires. Also used 2 battery terminal blocks as extended power points. Rivnut tool came in handy here!
Attached Images
  
__________________
1969 Camaro SSRS
Simon
Reply With Quote
The Following User Says Thank You to F'in mine For This Useful Post:
syborg tt (10-09-2021)
  #1638  
Old 10-09-2021, 08:27 AM
syborg tt's Avatar
syborg tt syborg tt is offline
Lateral-g Supporting Member
 
Join Date: Jun 2005
Posts: 8,313
Thanks: 5,055
Thanked 1,816 Times in 977 Posts
Default

Hi Simon,

Thank you Thank you

Looking back I should have used the waterproof relay, which means I will most likely order the waterproof relay kit and redo this next week unless Amazon can get it to me tomorrow.

https://www.summitracing.com/parts/prf-30130


Quote:
Originally Posted by F'in mine View Post
I've followed along at times and used some of your wiring techniques which has helped me, thanks for that. For my fan relays I decided to put them into a enclosure to protect from the elements just in case. One like this that fits both.
https://secure.sayal.com/STORE2/View_SHOP.php?SKU=14898

Then decided to grab this one of which I'll alter to fit down the road.
https://www.amazon.ca/gp/product/B07...0?ie=UTF8&th=1

Also fabbed up a panel into the front fender area so that I wouldn't clutter up the battery area with a bunch of wires. Also used 2 battery terminal blocks as extended power points. Rivnut tool came in handy here!
Attached Images
 
__________________
marty-mj
Is a car ever really done???? It's like a ball of yarn unwinding, that has no end... Author DKz Garage

Projects - Syborg TT 4.3l v6 Mini-Truck, 2nd Chance Camaro & SLP575 Bumble Bee - 4Sale

Last edited by syborg tt; 10-09-2021 at 08:30 AM. Reason: Typo because of lack of knowledge
Reply With Quote
  #1639  
Old 10-09-2021, 09:37 AM
syborg tt's Avatar
syborg tt syborg tt is offline
Lateral-g Supporting Member
 
Join Date: Jun 2005
Posts: 8,313
Thanks: 5,055
Thanked 1,816 Times in 977 Posts
Default Holley EFI Wiring, does it ever end (05-30-21)

Yep, more wiring

So way back on the 13th of May I wrote myself a note to look for this harness


found it


more notes


Holley Injector Harness ( 05-30-21)


Okay so I was hungry and I went inside and made myself some oatmeal and well I never realized how nice it looked.


In order to plug in the harness I will once again need to remove the Vintage Air unit.


Found it


He's getting bigger.

__________________
marty-mj
Is a car ever really done???? It's like a ball of yarn unwinding, that has no end... Author DKz Garage

Projects - Syborg TT 4.3l v6 Mini-Truck, 2nd Chance Camaro & SLP575 Bumble Bee - 4Sale
Reply With Quote
The Following User Says Thank You to syborg tt For This Useful Post:
zz430droptop67rs (10-09-2021)
  #1640  
Old 10-09-2021, 09:57 AM
syborg tt's Avatar
syborg tt syborg tt is offline
Lateral-g Supporting Member
 
Join Date: Jun 2005
Posts: 8,313
Thanks: 5,055
Thanked 1,816 Times in 977 Posts
Default Holley Dash Wiring, Yes there is more (05-30-21)

Moving on to the Holley Digital Dash


Connected and routed the wires so the Vintage Air unit it once again will go back in.

__________________
marty-mj
Is a car ever really done???? It's like a ball of yarn unwinding, that has no end... Author DKz Garage

Projects - Syborg TT 4.3l v6 Mini-Truck, 2nd Chance Camaro & SLP575 Bumble Bee - 4Sale
Reply With Quote
The Following 2 Users Say Thank You to syborg tt For This Useful Post:
68454RS (10-09-2021), fleetus macmullitz (10-09-2021)
Reply


Posting Rules
You may not post new threads
You may not post replies
You may not post attachments
You may not edit your posts

BB code is On
Smilies are On
[IMG] code is On
HTML code is Off

Forum Jump


All times are GMT -5. The time now is 06:57 PM.


Powered by vBulletin® Version 3.8.11
Copyright ©2000 - 2024, vBulletin Solutions Inc.
Copyright Lateral-g.net