...

Go Back   Lateral-g Forums > Lateral-G Open Discussions > Project Updates
User Name
Password


Reply
 
Thread Tools Display Modes
  #1871  
Old 09-26-2022, 09:51 AM
syborg tt's Avatar
syborg tt syborg tt is offline
Lateral-g Supporting Member
 
Join Date: Jun 2005
Posts: 8,302
Thanks: 5,002
Thanked 1,766 Times in 954 Posts
Default Final Wiring routed under Drivers Side fender (( 06-25-22 ))

I started final routing of the wires on the drivers side of the car.


More Mag Daddy Magnetic Mounts


__________________
marty-mj
Is a car ever really done???? It's like a ball of yarn unwinding, that has no end... Author DKz Garage

Projects - Syborg TT 4.3l v6 Mini-Truck, 2nd Chance Camaro & SLP575 Bumble Bee - 4Sale
Reply With Quote
  #1872  
Old 09-26-2022, 10:17 AM
syborg tt's Avatar
syborg tt syborg tt is offline
Lateral-g Supporting Member
 
Join Date: Jun 2005
Posts: 8,302
Thanks: 5,002
Thanked 1,766 Times in 954 Posts
Default Upper & Lower Radiator Hoses (( 06-26-22 ))

Kenny did an unbelievable job on the upper and lower radiator hose's

I am going to order an longer hose for the connection at the water pump.


I also finished up the routing for the Vintage Air lines.


__________________
marty-mj
Is a car ever really done???? It's like a ball of yarn unwinding, that has no end... Author DKz Garage

Projects - Syborg TT 4.3l v6 Mini-Truck, 2nd Chance Camaro & SLP575 Bumble Bee - 4Sale
Reply With Quote
  #1873  
Old 09-26-2022, 10:43 AM
syborg tt's Avatar
syborg tt syborg tt is offline
Lateral-g Supporting Member
 
Join Date: Jun 2005
Posts: 8,302
Thanks: 5,002
Thanked 1,766 Times in 954 Posts
Default Opps I made a mistake with the Ground Wires - Thank you Kenny & Ron (( 07-01-22 ))

So when I was doing the wiring I just had a brain fart and forgot that if I flip the switch on the battery shut off and then
went and tried to start the car it would still go through all of the small grounds on the top of the battery.

Thank you Kenny and Ron for explaining this to me and hopefully I got it right this time.

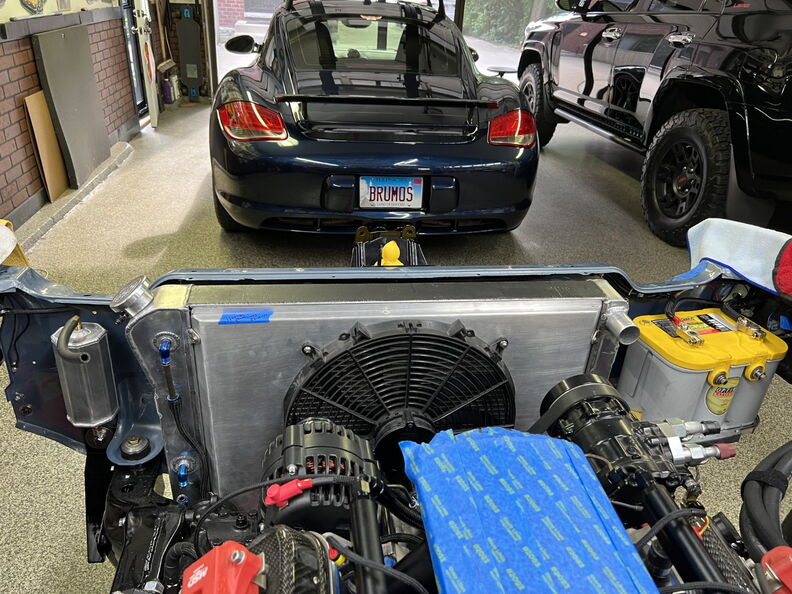
I hope this is the last time that I will be taking this headlight bucket out. FYI in order to put the upper and lower valance
on the headlight bucket has to be removed so it will not be going back on till I am ready to install the upper and lower valance.


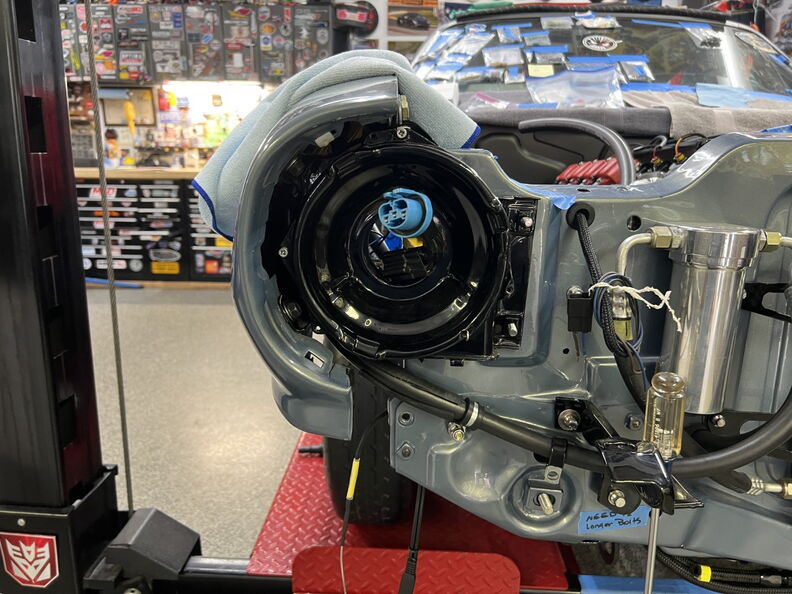
All the wires have been exposed and I can now visually see my mistake.


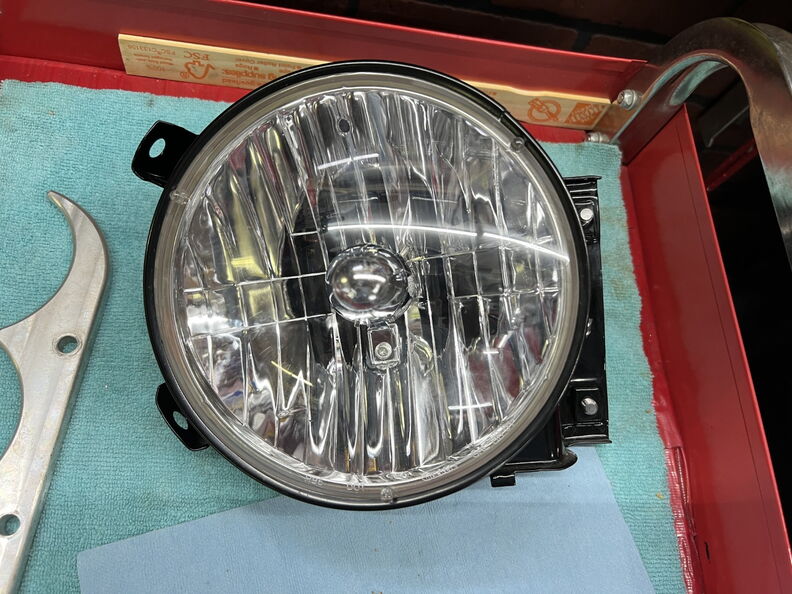
I really love the DSE lights however how much better can the new Holley Lights actually be.


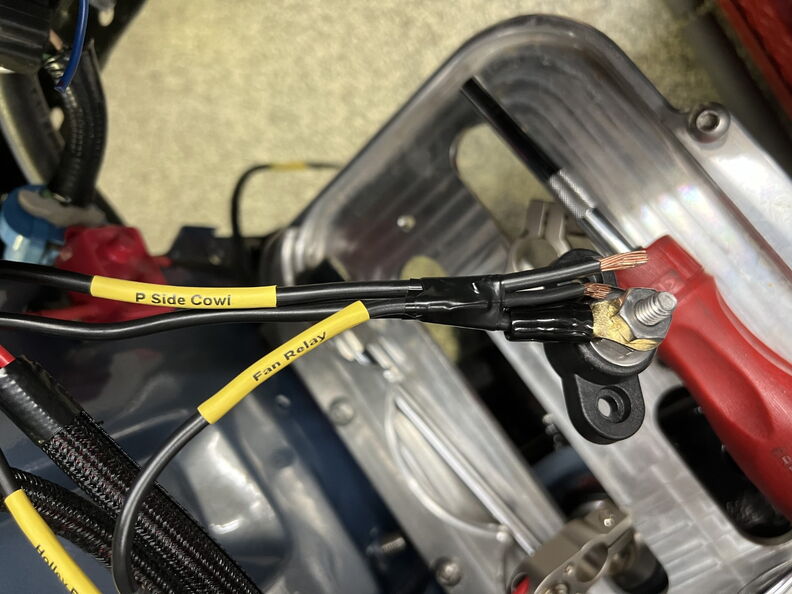
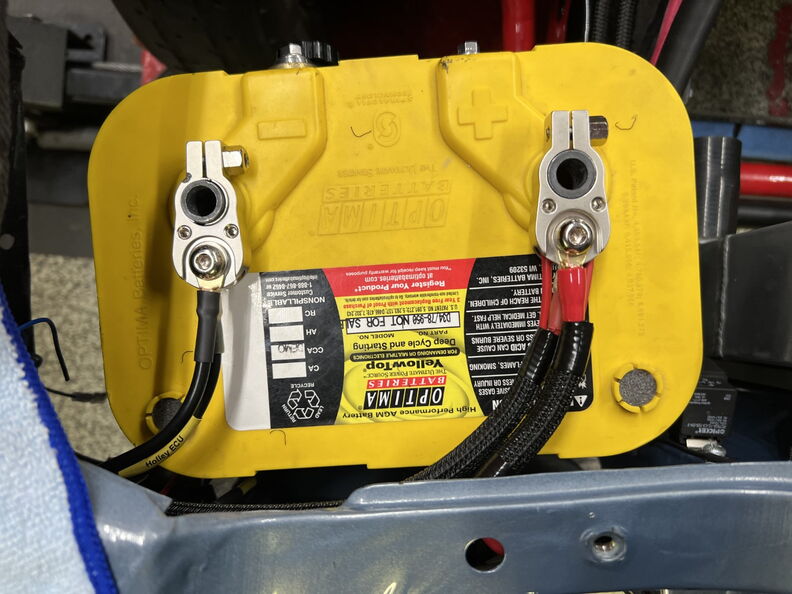
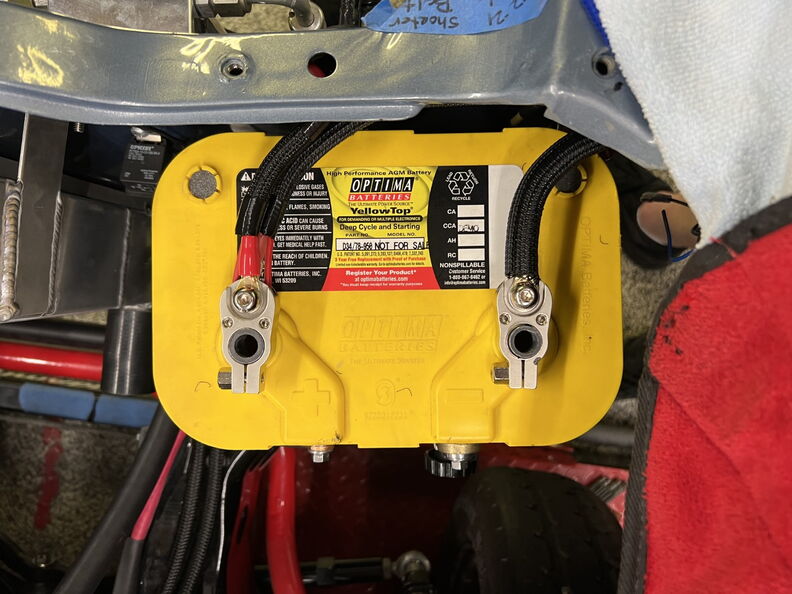
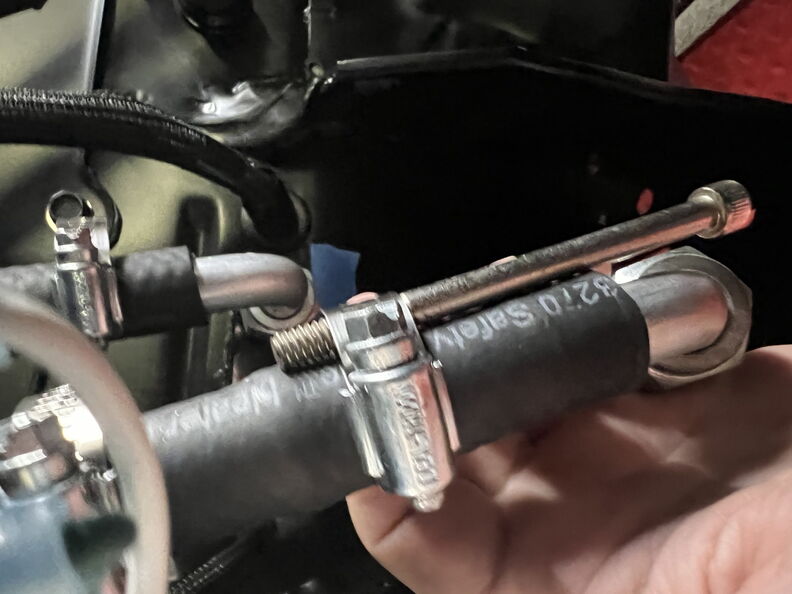
Everything that was on the top post terminal will now be moved to this remote ground stud.


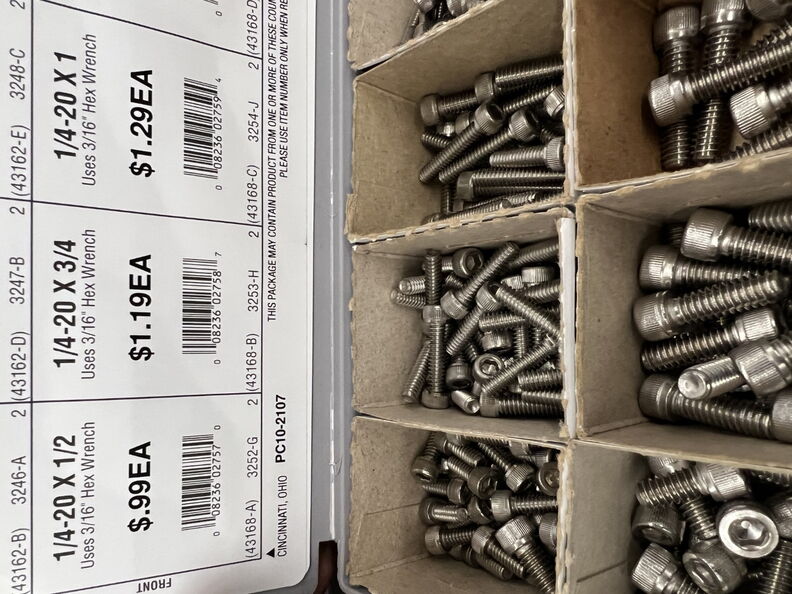
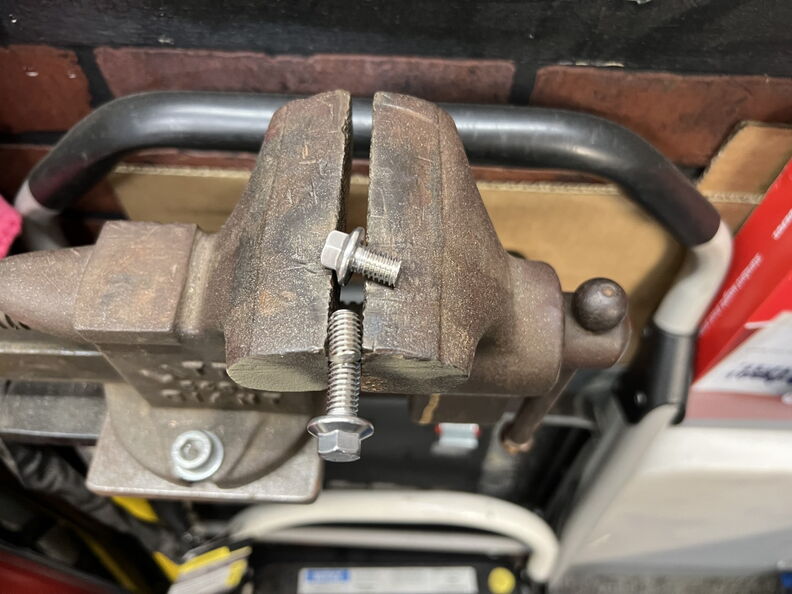
Off to Ace Hardware for more nuts, washers and bolts.


I also used nylock nut so I don't have to worry about the bolts coming loose.


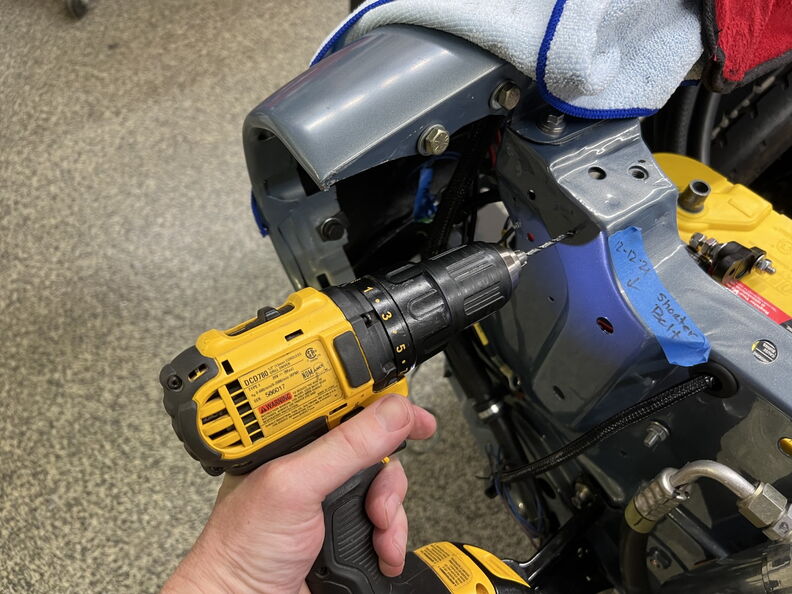
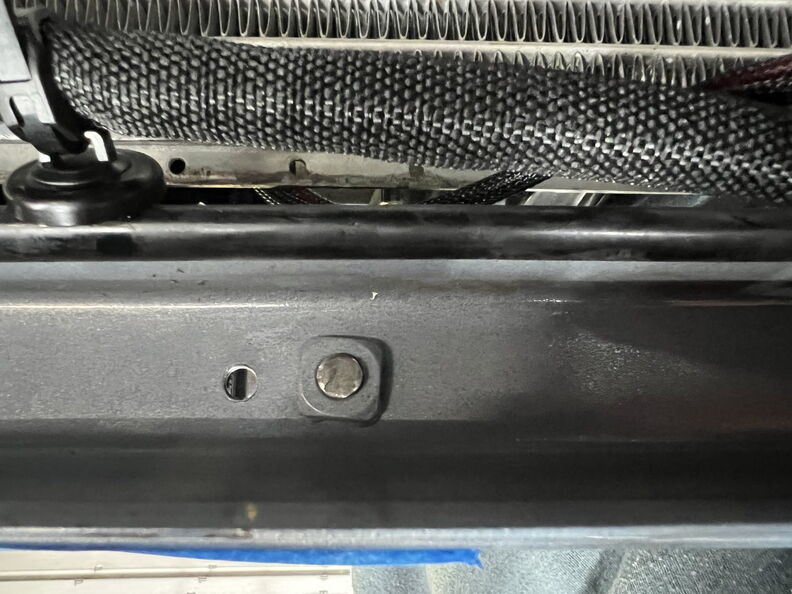
Have I mentioned how much I love drilling into pretty paint.


You can see that I hid the ground lug behind the battery so it could be easily serviced if necessary.


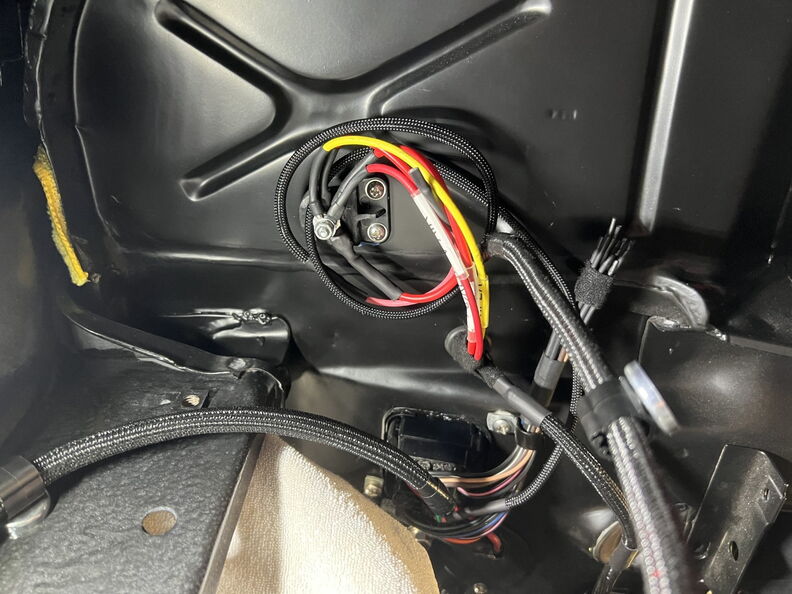
I made a temporary ground wire that runs back to the lug where all of the wires moved to.


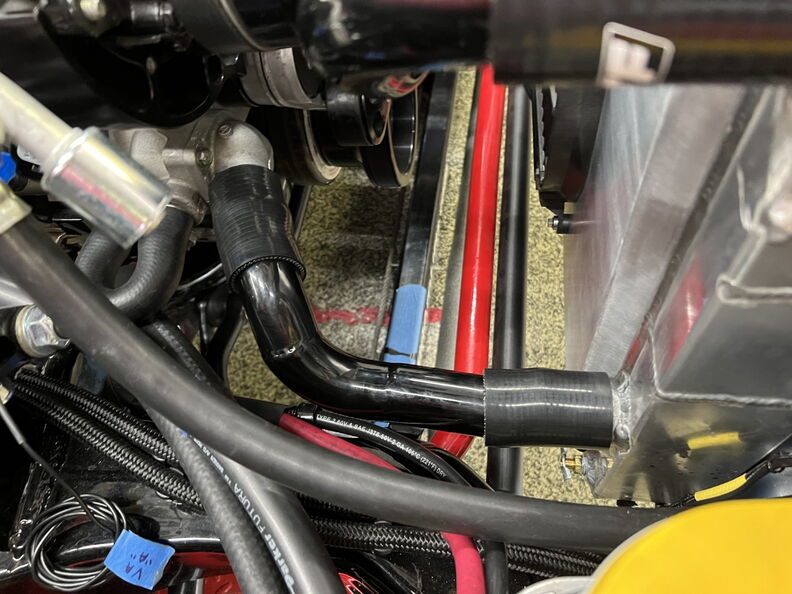
I put some TechFlex wrap over the wires and called it a night.

__________________
marty-mj
Is a car ever really done???? It's like a ball of yarn unwinding, that has no end... Author DKz Garage

Projects - Syborg TT 4.3l v6 Mini-Truck, 2nd Chance Camaro & SLP575 Bumble Bee - 4Sale

Last edited by syborg tt; 09-26-2022 at 10:46 AM.
Reply With Quote
The Following User Says Thank You to syborg tt For This Useful Post:
camcojb (09-26-2022)
  #1874  
Old 09-26-2022, 10:50 AM
camcojb's Avatar
camcojb camcojb is offline
Administrator
 
Join Date: Jul 2004
Location: Wilton, CA.
Posts: 12,876
Thanks: 5,310
Thanked 1,571 Times in 700 Posts
Default

Just a thought on the injector wires. You could run the wires under the fuel rails and behind the runners. If you split the harness into two sides then each side could tuck in between the runner and the valley cover of the engine. There's usually a nice little pocket formed there that holds the wires nicely and completely hidden. Keep the harness separate like in this pic, adding the black covering.
Attached Images
 
__________________
Jody

PAST CAR PROJECTS

Like Lateral-G on Facebook!

Follow Lateral-G on Instagram!

SPECIAL THANKS TO:
Jacob Ehlers and Amsoil for the lubricants and degreasers for my 70 Chevelle project
Shannon at Modo Innovations for the cool billet DBW bracket
Roadster Shop for their Chevelle SPEC Chassis
Dakota Digital for their Chevelle HDX Gauge Package
Painless Performance for their wiring harness

Ron Davis Radiators for their radiator and fan assembly.
Baer Brakes for their front and rear brakes

Texas Speed and Performance for their 427 LS Stroker
American Powertrain for their ProFit Magnum T56 kit
Currie Enterprises for their 9" Third Member
Forgeline for their GF3 Wheels
McLeod Racing for their RXT street twin clutch
Ididit for their steering column
Holley for their EFI and engine parts
Lokar and Clayton Machine for their pedals and door and window handles
Morris Classic Concepts for their 3 point belts and side mirrors
Thermotec for their heat sleeve and sound deadening products
Restomod Air for their Tru Mod A/C kit
Mightymouse Solutions for their catch can
Magnaflow for their 3" exhaust system
Aeromotive for their dual Phantom fuel system
Vintage Air for their new Mid Mount LS front drive
Hydratech Braking for their hydroboost system
Borgeson for their stainless steering shaft and u joints
Eddie Motorsports for their hood and trunk hinges and misc parts
TMI Products for their seats, door panels, and dash pad
Rock Valley Antique Auto Parts for their stainless fuel tank
Reply With Quote
The Following 2 Users Say Thank You to camcojb For This Useful Post:
OLDFLM (09-27-2022), syborg tt (09-26-2022)
  #1875  
Old 09-26-2022, 10:52 AM
syborg tt's Avatar
syborg tt syborg tt is offline
Lateral-g Supporting Member
 
Join Date: Jun 2005
Posts: 8,302
Thanks: 5,002
Thanked 1,766 Times in 954 Posts
Default Vintage Air valve final connections (( 07-02-22 ))

So the line are finally on for the last time.

You can see the line clamps are hanging out and could cut me or possible cut a wire.


The trick I learned years ago was to stick a small bolt under the metal strap that is hanging off and just push it down. It's just that simple.


__________________
marty-mj
Is a car ever really done???? It's like a ball of yarn unwinding, that has no end... Author DKz Garage

Projects - Syborg TT 4.3l v6 Mini-Truck, 2nd Chance Camaro & SLP575 Bumble Bee - 4Sale
Reply With Quote
The Following User Says Thank You to syborg tt For This Useful Post:
camcojb (09-26-2022)
  #1876  
Old 09-26-2022, 10:56 AM
syborg tt's Avatar
syborg tt syborg tt is offline
Lateral-g Supporting Member
 
Join Date: Jun 2005
Posts: 8,302
Thanks: 5,002
Thanked 1,766 Times in 954 Posts
Default

Quote:
Originally Posted by camcojb View Post
Just a thought on the injector wires. You could run the wires under the fuel rails and behind the runners. If you split the harness into two sides then each side could tuck in between the runner and the valley cover of the engine. There's usually a nice little pocket formed there that holds the wires nicely and completely hidden. Keep the harness separate like in this pic, adding the black covering.
Thank you Thank you and yes that is my plan.
__________________
marty-mj
Is a car ever really done???? It's like a ball of yarn unwinding, that has no end... Author DKz Garage

Projects - Syborg TT 4.3l v6 Mini-Truck, 2nd Chance Camaro & SLP575 Bumble Bee - 4Sale
Reply With Quote
  #1877  
Old 09-26-2022, 11:28 AM
syborg tt's Avatar
syborg tt syborg tt is offline
Lateral-g Supporting Member
 
Join Date: Jun 2005
Posts: 8,302
Thanks: 5,002
Thanked 1,766 Times in 954 Posts
Default More small projects (( 07-02-22 ))

I figured I might as well tackle this project the old school was and just cut the darn bolts instead of buying new ones.


Note to self don't pick it up it's hot !!


When it's hot let it lie


Looks good to me


I even layered a little bit of sound deadening over it just in case.


Installed the foam to reduce the air traveling around the radiator instead of through it like it needs to be.


Maybe one day soon I will ask Mario if he can paint my Radiator and fan shroud.


__________________
marty-mj
Is a car ever really done???? It's like a ball of yarn unwinding, that has no end... Author DKz Garage

Projects - Syborg TT 4.3l v6 Mini-Truck, 2nd Chance Camaro & SLP575 Bumble Bee - 4Sale
Reply With Quote
The Following User Says Thank You to syborg tt For This Useful Post:
camcojb (09-26-2022)
  #1878  
Old 09-26-2022, 01:47 PM
syborg tt's Avatar
syborg tt syborg tt is offline
Lateral-g Supporting Member
 
Join Date: Jun 2005
Posts: 8,302
Thanks: 5,002
Thanked 1,766 Times in 954 Posts
Default A Gamble that actually paid off (( 07-09-22 ))

So I took a gamble on a fitting from Amazon and it actually worked perfectly.


I used this fitting on the overflow vent and it had to be able to spin and not hit the radiator and end up in the correct orientation
facing the overflow tank.


Shocking it worked perfectly.

__________________
marty-mj
Is a car ever really done???? It's like a ball of yarn unwinding, that has no end... Author DKz Garage

Projects - Syborg TT 4.3l v6 Mini-Truck, 2nd Chance Camaro & SLP575 Bumble Bee - 4Sale
Reply With Quote
The Following User Says Thank You to syborg tt For This Useful Post:
camcojb (09-26-2022)
  #1879  
Old 09-26-2022, 03:20 PM
syborg tt's Avatar
syborg tt syborg tt is offline
Lateral-g Supporting Member
 
Join Date: Jun 2005
Posts: 8,302
Thanks: 5,002
Thanked 1,766 Times in 954 Posts
Default Back to the Radiator Hoses (( 07-09-22 ))

Originally I was going to use the Gates Heat Shrink hose clamps but that goes against the thought of being able to fix
the car on the side of the road. So I picked up these very nice stainless steel hose clamps.


So this is one of things that you just can't believe was the fix. Way back when I replace the door hinge pins the drivers door
just didn't close nearly as nice as the passenger. I'm still not sure why I thought about putting just a little bit of oil in the latch
assembly. Well SOB it actually worked and worked incredibly well. So much so it has fixed the problem.

__________________
marty-mj
Is a car ever really done???? It's like a ball of yarn unwinding, that has no end... Author DKz Garage

Projects - Syborg TT 4.3l v6 Mini-Truck, 2nd Chance Camaro & SLP575 Bumble Bee - 4Sale
Reply With Quote
The Following User Says Thank You to syborg tt For This Useful Post:
camcojb (09-26-2022)
  #1880  
Old 09-26-2022, 03:28 PM
syborg tt's Avatar
syborg tt syborg tt is offline
Lateral-g Supporting Member
 
Join Date: Jun 2005
Posts: 8,302
Thanks: 5,002
Thanked 1,766 Times in 954 Posts
Default Back to the Intake Manifold (( 07-09-22 ))

Back to the intake Holley Sniper Intake Manifold.


The only way to get these lines off is with a knife. You can also see I added DEI Heat Sleeve around one of the hoses.


I hope this is the final plumbing and wiring.


I decided to vacuum bleed the brakes and all seemed good.


I went out to get tacos and on my way home I decided to pick up the oil for the motor.


Opps apparently the passenger side brake line had to go to the bathroom. Ugh !!!!

__________________
marty-mj
Is a car ever really done???? It's like a ball of yarn unwinding, that has no end... Author DKz Garage

Projects - Syborg TT 4.3l v6 Mini-Truck, 2nd Chance Camaro & SLP575 Bumble Bee - 4Sale

Last edited by syborg tt; 09-26-2022 at 03:41 PM.
Reply With Quote
The Following User Says Thank You to syborg tt For This Useful Post:
camcojb (09-26-2022)
Reply


Posting Rules
You may not post new threads
You may not post replies
You may not post attachments
You may not edit your posts

BB code is On
Smilies are On
[IMG] code is On
HTML code is Off

Forum Jump


All times are GMT -5. The time now is 02:31 AM.


Powered by vBulletin® Version 3.8.11
Copyright ©2000 - 2024, vBulletin Solutions Inc.
Copyright Lateral-g.net