...

Go Back   Lateral-g Forums > Lateral-G Open Discussions > Project Updates
User Name
Password


Reply
 
Thread Tools Display Modes
  #1981  
Old 01-04-2023, 03:08 PM
syborg tt's Avatar
syborg tt syborg tt is offline
Lateral-g Supporting Member
 
Join Date: Jun 2005
Posts: 8,300
Thanks: 4,996
Thanked 1,762 Times in 952 Posts
Default Time to Organize some stuff (( 12-12-22 ))

Since I started building this car I have acquired and or rented a bunch of cool tools. Because I ran out of room in the garage I ended
up putting them in the garage attic. Well today was the day that I finally decided to add a couple more shelves in the garage.


Quick trip to home depot to pic up a new shelf.


I actually started from the bottom up as I know one of the cases will actually be sitting the on the floor under the lowest shelf.


All done and calling it a night.


__________________
marty-mj
Is a car ever really done???? It's like a ball of yarn unwinding, that has no end... Author DKz Garage

Projects - Syborg TT 4.3l v6 Mini-Truck, 2nd Chance Camaro & SLP575 Bumble Bee - 4Sale
Reply With Quote
  #1982  
Old 01-04-2023, 03:20 PM
syborg tt's Avatar
syborg tt syborg tt is offline
Lateral-g Supporting Member
 
Join Date: Jun 2005
Posts: 8,300
Thanks: 4,996
Thanked 1,762 Times in 952 Posts
Default Intake Tube Concept 1.0 / 2.0 (( 12-16-22 ) Not Liking it.

A couple things I don't like the intake tube mainly because one is polished and on tube isn't.
The other reason is the angle/bend radius so I ordered matching tubes.

v1.0 ( 90 Degree Bend )


v2.0 ( 60 Degree Bend )


I also took a few pictures of what is left in my office attic.


My 3D Printed Honey Comb Standard Grille.

__________________
marty-mj
Is a car ever really done???? It's like a ball of yarn unwinding, that has no end... Author DKz Garage

Projects - Syborg TT 4.3l v6 Mini-Truck, 2nd Chance Camaro & SLP575 Bumble Bee - 4Sale
Reply With Quote
The Following 3 Users Say Thank You to syborg tt For This Useful Post:
camcojb (01-04-2023), Cramer4918 (01-04-2023), waynieZ (01-21-2023)
  #1983  
Old 01-04-2023, 04:12 PM
syborg tt's Avatar
syborg tt syborg tt is offline
Lateral-g Supporting Member
 
Join Date: Jun 2005
Posts: 8,300
Thanks: 4,996
Thanked 1,762 Times in 952 Posts
Default Intake Tube "Final Sensor is finally here."

It's getting closer and I am hoping to have the car ready to start on Saturday with Andrew AKA Dr EFI.


Temporarily I am going to just dill a 3/4 hole in the tube and self tape it with a NPT fitting.


Eventually I will have my buddy Ben weld on the bung so it looks like it was done correctly.

__________________
marty-mj
Is a car ever really done???? It's like a ball of yarn unwinding, that has no end... Author DKz Garage

Projects - Syborg TT 4.3l v6 Mini-Truck, 2nd Chance Camaro & SLP575 Bumble Bee - 4Sale
Reply With Quote
  #1984  
Old 01-04-2023, 04:48 PM
syborg tt's Avatar
syborg tt syborg tt is offline
Lateral-g Supporting Member
 
Join Date: Jun 2005
Posts: 8,300
Thanks: 4,996
Thanked 1,762 Times in 952 Posts
Default Starter Dust Shield (( 12-26-22 ))

I am finally installing the last Dust Shield.


As you can see the only bolt I could find was an old rusty water bottle cage bolt off of one of my bikes.


Quick run to Ace Hardware for the new necessary hardware.


__________________
marty-mj
Is a car ever really done???? It's like a ball of yarn unwinding, that has no end... Author DKz Garage

Projects - Syborg TT 4.3l v6 Mini-Truck, 2nd Chance Camaro & SLP575 Bumble Bee - 4Sale
Reply With Quote
The Following User Says Thank You to syborg tt For This Useful Post:
camcojb (01-04-2023)
  #1985  
Old 01-04-2023, 05:06 PM
syborg tt's Avatar
syborg tt syborg tt is offline
Lateral-g Supporting Member
 
Join Date: Jun 2005
Posts: 8,300
Thanks: 4,996
Thanked 1,762 Times in 952 Posts
Default Yep, I am an idiot (( 12-27-22 ))

So I have this box in my warehouse since I originally started the car way back in 2011. I decided put it in the car as it would be so
much more comfortable to kneel on or even lay on while I am working in the car.


I also found my LS1 Intake Manifold and a few other things which you can see in this picture.


As nice as the DEI Boom Mat / XMat is I am certain the Carpet is going to feel great. With that being said the
shifter and the wiring for the Kicker Stereo will have to be temporarily removed.


When I removed the shifter I forgot that I needed to touch up the bare steel.


All better


I also needed to remove the ShiftWorks shifter cable.


Carpet is going in.


I had to remove the Tiger Cage Hoop so I could trim around the base.


__________________
marty-mj
Is a car ever really done???? It's like a ball of yarn unwinding, that has no end... Author DKz Garage

Projects - Syborg TT 4.3l v6 Mini-Truck, 2nd Chance Camaro & SLP575 Bumble Bee - 4Sale
Reply With Quote
The Following 2 Users Say Thank You to syborg tt For This Useful Post:
camcojb (01-04-2023), waynieZ (01-21-2023)
  #1986  
Old 01-04-2023, 05:13 PM
Cramer4918's Avatar
Cramer4918 Cramer4918 is offline
Senior Member
 
Join Date: Nov 2021
Posts: 162
Thanks: 109
Thanked 182 Times in 103 Posts
Default

Looking good, Marty!

What a difference the carpet makes!

The dust shields are on my "need to buy" list. Looking forward to the startup.
__________________
-Matt-

'61 Biscayne ~ AKA BISKWIK
Reply With Quote
The Following User Says Thank You to Cramer4918 For This Useful Post:
syborg tt (01-31-2023)
  #1987  
Old 01-04-2023, 07:33 PM
syborg tt's Avatar
syborg tt syborg tt is offline
Lateral-g Supporting Member
 
Join Date: Jun 2005
Posts: 8,300
Thanks: 4,996
Thanked 1,762 Times in 952 Posts
Default

Quote:
Originally Posted by Cramer4918 View Post
Looking good, Marty!

What a difference the carpet makes!

The dust shields are on my "need to buy" list. Looking forward to the startup.

Thank you and definitely order the dust shields now as they were hard to find locally.

It amazing how comfortable it is to work inside the car now. I plan to bring the backseat home this weekend so I can sit on the seat and stir up the dash and make sure I got everything right.


Sent from my iPhone using Tapatalk
__________________
marty-mj
Is a car ever really done???? It's like a ball of yarn unwinding, that has no end... Author DKz Garage

Projects - Syborg TT 4.3l v6 Mini-Truck, 2nd Chance Camaro & SLP575 Bumble Bee - 4Sale
Reply With Quote
The Following User Says Thank You to syborg tt For This Useful Post:
Cramer4918 (01-04-2023)
  #1988  
Old 01-05-2023, 10:35 AM
syborg tt's Avatar
syborg tt syborg tt is offline
Lateral-g Supporting Member
 
Join Date: Jun 2005
Posts: 8,300
Thanks: 4,996
Thanked 1,762 Times in 952 Posts
Default More Cool Tools (( 12-30-22 )

Instead of borrowing my buddy's Vacuum coolant fill tool I decided to buy one for myself.

Now it looks like that new shelf is going to be overfull once again. Ugh


__________________
marty-mj
Is a car ever really done???? It's like a ball of yarn unwinding, that has no end... Author DKz Garage

Projects - Syborg TT 4.3l v6 Mini-Truck, 2nd Chance Camaro & SLP575 Bumble Bee - 4Sale

Last edited by syborg tt; 01-05-2023 at 10:42 AM.
Reply With Quote
The Following 2 Users Say Thank You to syborg tt For This Useful Post:
andrewb70 (01-05-2023), fleetus macmullitz (01-05-2023)
  #1989  
Old 01-05-2023, 11:32 AM
syborg tt's Avatar
syborg tt syborg tt is offline
Lateral-g Supporting Member
 
Join Date: Jun 2005
Posts: 8,300
Thanks: 4,996
Thanked 1,762 Times in 952 Posts
Default Shifter and Center Console Install (( 01-01-23 ))

Step One is to find an older carpet Soldering Iron. Everyone needs one of these.


Let that sucker get nice and hot.


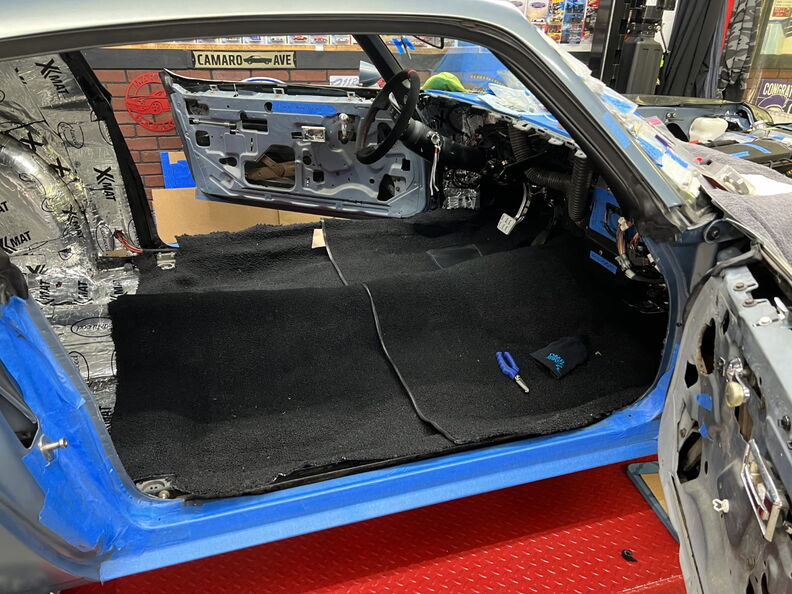
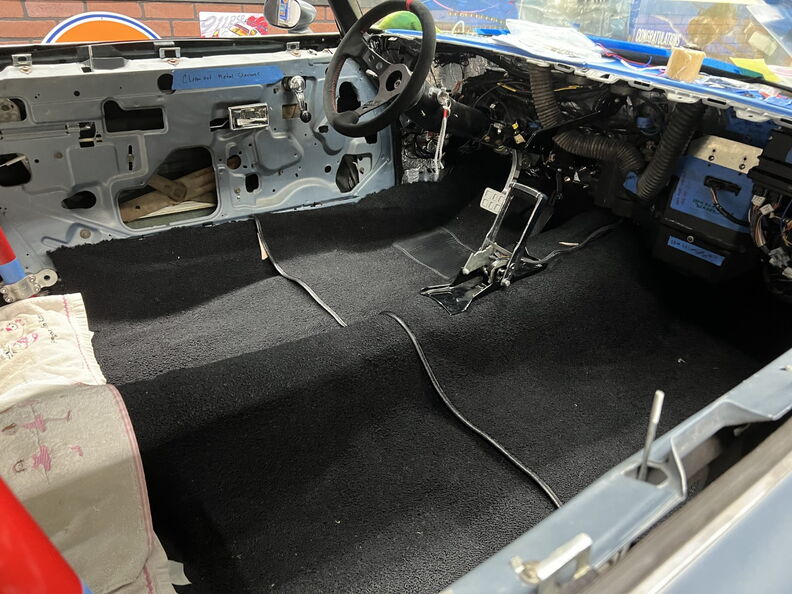
Install the four bolts that hold the shifter assembly in. Then lay the carpet back in and make sure you have it exactly where
it needs to be as you only get one shot. I like installing the carpet this way as the shifter assembly keeps the carpet from moving.
Once you are certain then this is where it gets fun. You need to push down on the carpet to find the first bolt. I choose to do the
right bottom bolt since I am right handed. Now all you have to do is gently push the soldering iron into the carpet and it will
make a perfect hole and the carpet won't fray since the iron melts it perfecty.


Install the bolt and move on to the next bolt. This time I choose the left bottom as this hopefully will allow me to find the top to easily.


I used the shifter as template and it worked perfectly.


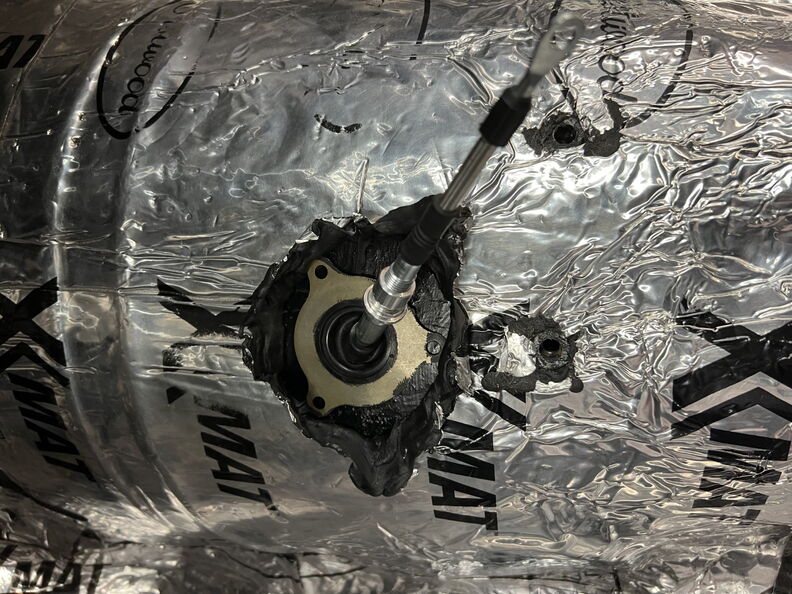
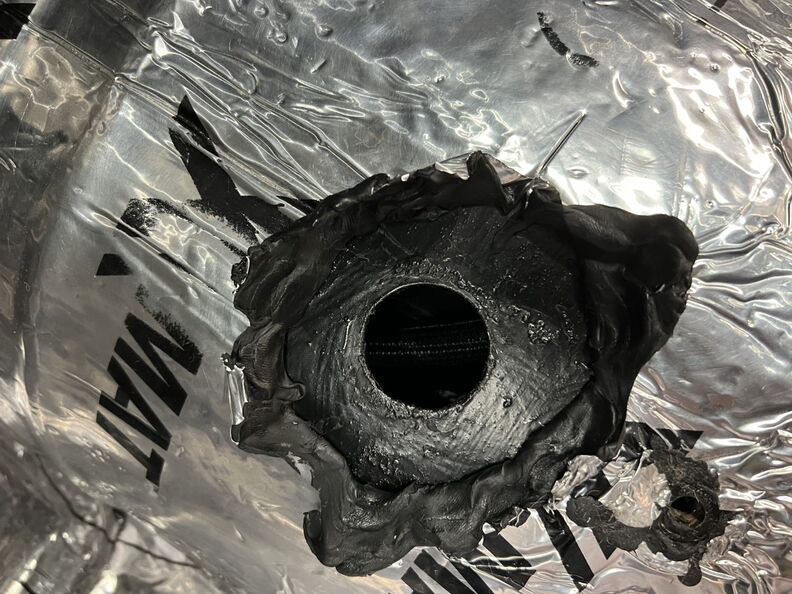
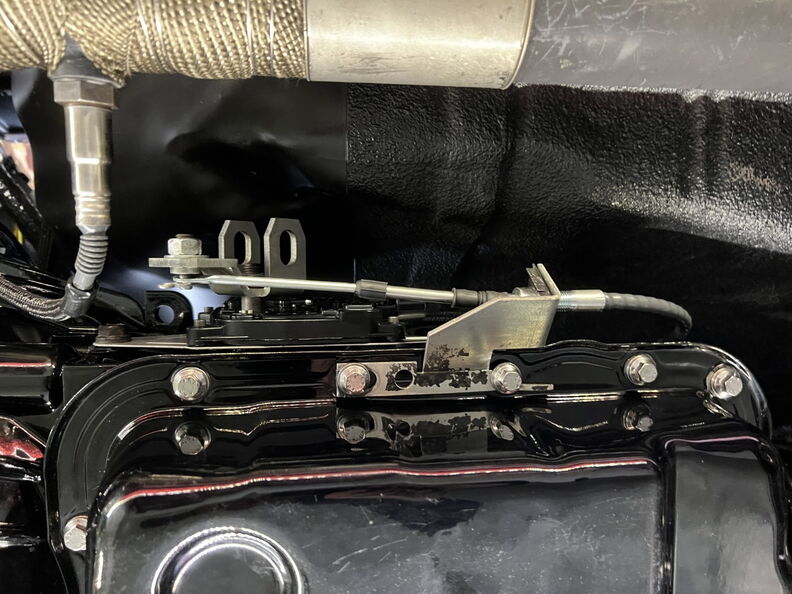
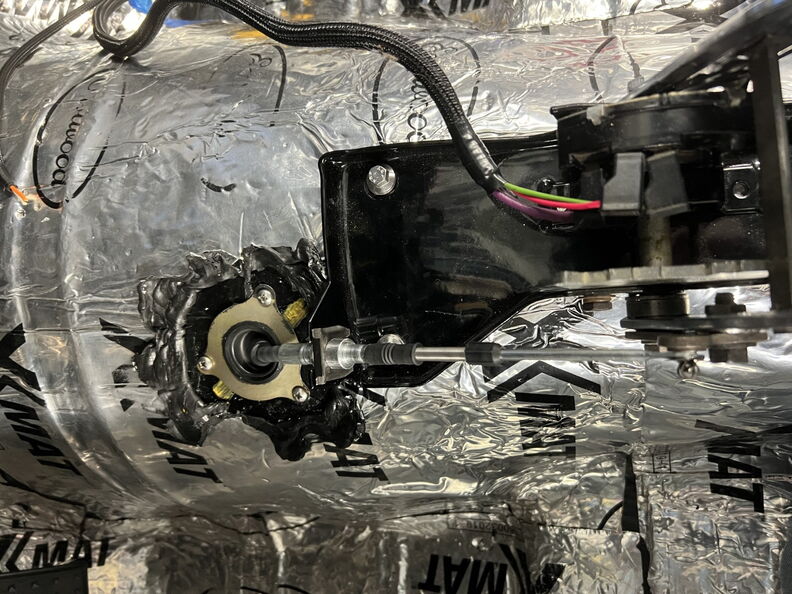
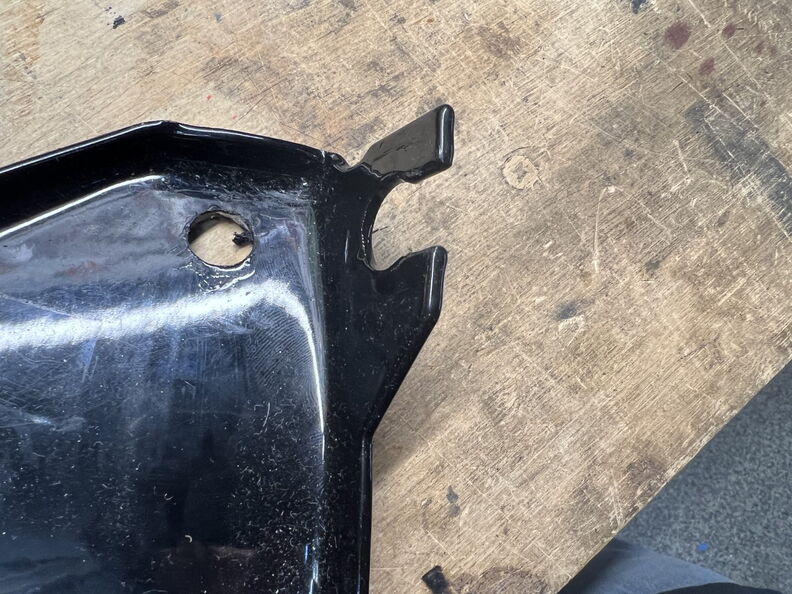
Next I need to locate the hole for the ShiftWorks shifter cable.

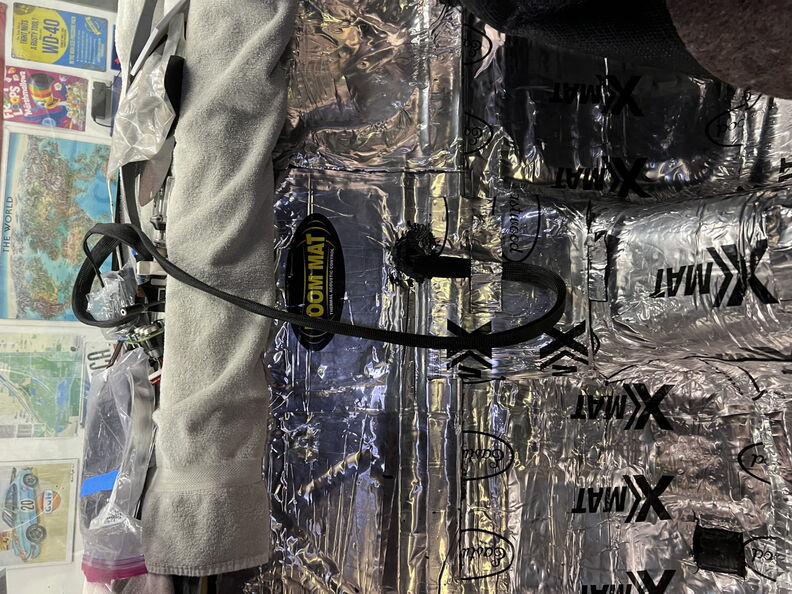
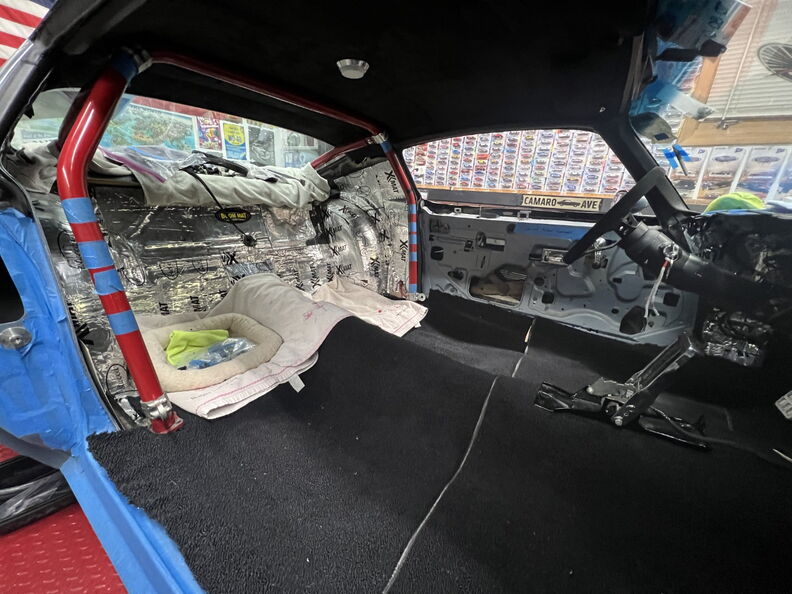
Since I am here I gently ( ha !! ) peeled back the DEI sound deadening.


I installed the cable on spun the cable grommet to a safe orientation as there are a couple wires running over the top of the transmission.


I needed to peel back more sound deadening and of course some of it will never come out from under my finger nails.


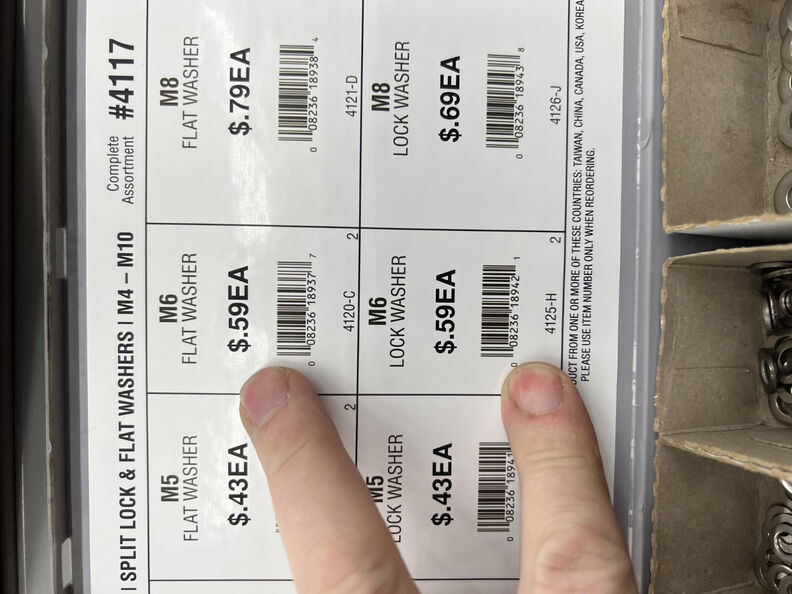
Quick run to Home Depot for the correct length stainless crews.


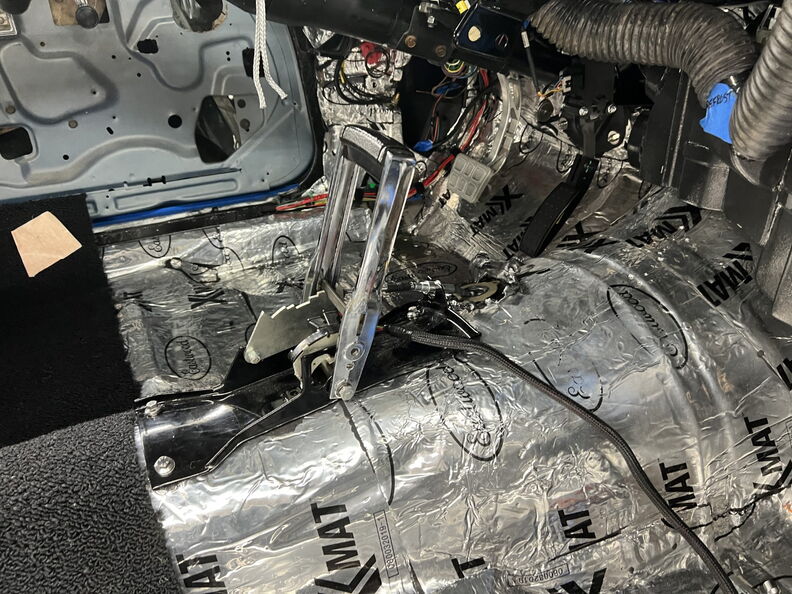
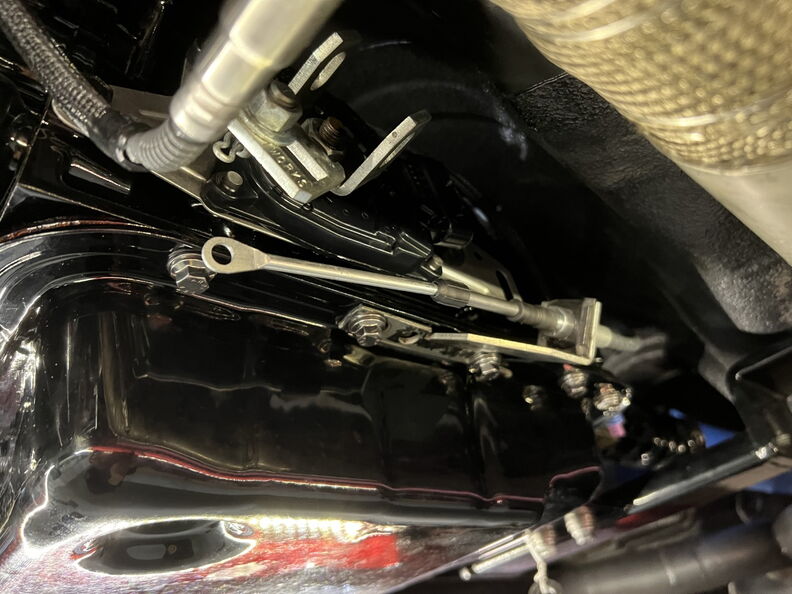
Installed the shifter to make sure everything looks good.


Everyone needs one of the Harbor Freight Dead Blow Hammers. They are so cheap.


I installed the cable and ran it through the gears.


Quick picture of the wires under the shifter for location reference.


I used a paint marker to mark where the wires run. As you can see I reposition the grommet.


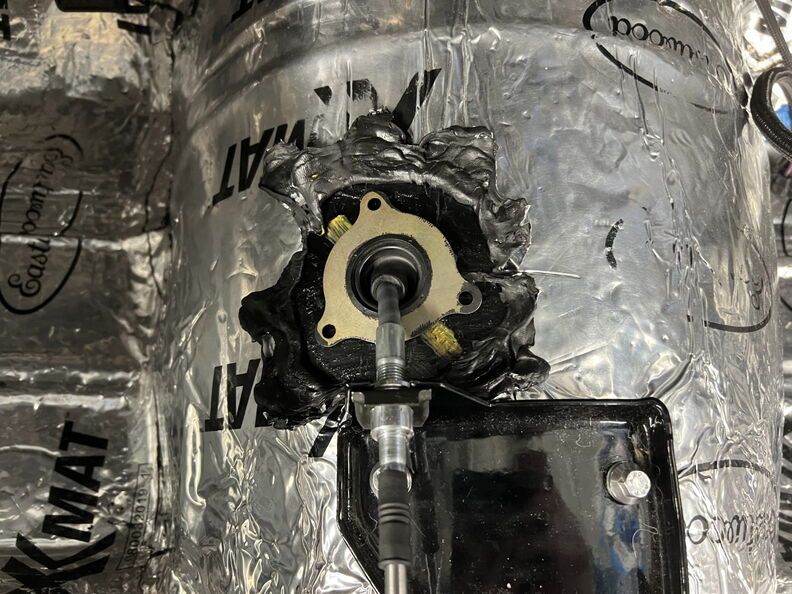
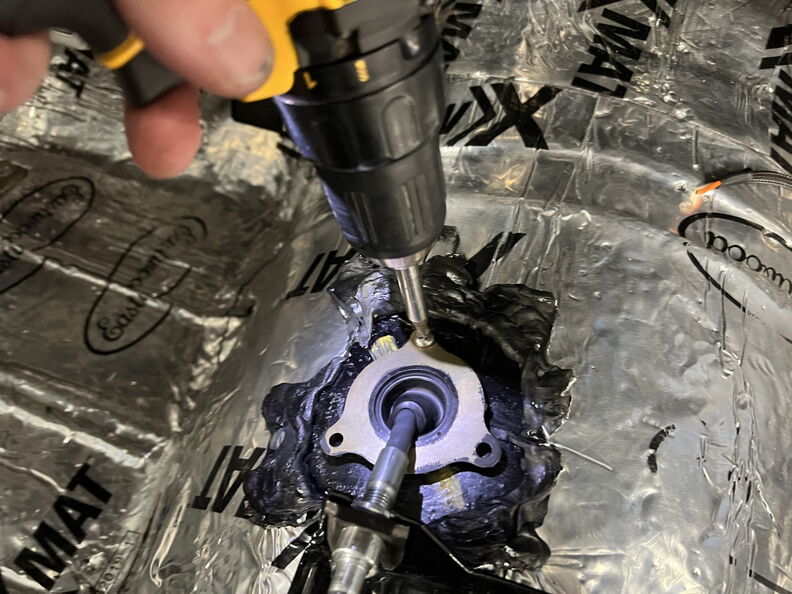
Since these screws are not self-tapping I drilled a 7/64 hole.


__________________
marty-mj
Is a car ever really done???? It's like a ball of yarn unwinding, that has no end... Author DKz Garage

Projects - Syborg TT 4.3l v6 Mini-Truck, 2nd Chance Camaro & SLP575 Bumble Bee - 4Sale
Reply With Quote
The Following 3 Users Say Thank You to syborg tt For This Useful Post:
andrewb70 (01-05-2023), camcojb (01-05-2023), waynieZ (01-21-2023)
  #1990  
Old 01-05-2023, 11:35 AM
camcojb's Avatar
camcojb camcojb is online now
Administrator
 
Join Date: Jul 2004
Location: Wilton, CA.
Posts: 12,876
Thanks: 5,301
Thanked 1,570 Times in 699 Posts
Default

Appreciate you sharing your cool tricks.
__________________
Jody

PAST CAR PROJECTS

Like Lateral-G on Facebook!

Follow Lateral-G on Instagram!

SPECIAL THANKS TO:
Jacob Ehlers and Amsoil for the lubricants and degreasers for my 70 Chevelle project
Shannon at Modo Innovations for the cool billet DBW bracket
Roadster Shop for their Chevelle SPEC Chassis
Dakota Digital for their Chevelle HDX Gauge Package
Painless Performance for their wiring harness

Ron Davis Radiators for their radiator and fan assembly.
Baer Brakes for their front and rear brakes

Texas Speed and Performance for their 427 LS Stroker
American Powertrain for their ProFit Magnum T56 kit
Currie Enterprises for their 9" Third Member
Forgeline for their GF3 Wheels
McLeod Racing for their RXT street twin clutch
Ididit for their steering column
Holley for their EFI and engine parts
Lokar and Clayton Machine for their pedals and door and window handles
Morris Classic Concepts for their 3 point belts and side mirrors
Thermotec for their heat sleeve and sound deadening products
Restomod Air for their Tru Mod A/C kit
Mightymouse Solutions for their catch can
Magnaflow for their 3" exhaust system
Aeromotive for their dual Phantom fuel system
Vintage Air for their new Mid Mount LS front drive
Hydratech Braking for their hydroboost system
Borgeson for their stainless steering shaft and u joints
Eddie Motorsports for their hood and trunk hinges and misc parts
TMI Products for their seats, door panels, and dash pad
Rock Valley Antique Auto Parts for their stainless fuel tank
Reply With Quote
The Following 2 Users Say Thank You to camcojb For This Useful Post:
syborg tt (01-05-2023), waynieZ (01-21-2023)
Reply


Posting Rules
You may not post new threads
You may not post replies
You may not post attachments
You may not edit your posts

BB code is On
Smilies are On
[IMG] code is On
HTML code is Off

Forum Jump


All times are GMT -5. The time now is 12:17 AM.


Powered by vBulletin® Version 3.8.11
Copyright ©2000 - 2024, vBulletin Solutions Inc.
Copyright Lateral-g.net