...

Go Back   Lateral-g Forums > Lateral-G Open Discussions > Open Discussion
User Name
Password


Reply
 
Thread Tools Display Modes
  #11  
Old 10-14-2016, 08:30 AM
Fair Fair is offline
Senior Member
 
Join Date: Mar 2014
Location: Plano, TX
Posts: 160
Thanks: 6
Thanked 67 Times in 33 Posts
Default

continued from above


One side was the normal loop-style steel threaded anchor for clip-in harnesses, which we provided (above left). Joe wanted to use this crazy Schroth "loop plate" for all of the lower anchors, which I was none too crazy about. Apparently these are popular in the UK but I had never seen them. We did some research and sure enough, they can be used like this. So I machined some spacers and installed this loop plate at the factory reinforced floor mount for the stock 3-point belt. This is the same spot in the floor where the Sparco harness bar "foot" went, but with the proper style hardened bolt and the custom spacers, it all worked and the stock belt could still swivel properly with no slop.


We quoted the install a year earlier at our "3-4 hours per side" estimate we usually use for most cars. This is how long it takes to properly engineer, measure, fabricate, and fit a seat to a car for a given customer. Seat mounting is hugely important, and often overlooked by most folks - especially if there is an easy, bolt-in, off-the-shelf "bracket solution" for a given car. We have yet to see one of these solutions that didn't have major drawbacks.

Well both seats were installed using the customer provided brackets. We installed a pair of Scroth Profii-II 6-point harnesses into the 4 anchors for the laps and anti-subs and the shoulder harnesses wrapped around the Sparco harness bar. The initial seat mounting wasn't acceptable at all. Tons of slop and too much "wasted space" made the seats sit up SUPER high, even on the lowest mounting holes that would fit.


Joe was out of the country for an extended period so I made the first video above to show him how poorly these brackets functioned in the Camaro. There was no intent to sabotage this install - we wanted the brackets to work because the factory front floor mounts were FUNKY SLOTS that later proved to be difficult to work around. But these brackets just had a too much slop that was simply unacceptable, which you can see in the video.


I made the second video above to show how properly mounted Cobra Suzuka seats should fit. The first car had this same seat with a custom set of brackets we built along with a Cobra dual locking slider. The second car (#DangerZone) was bolted directly to the reinforced floor via the side brackets. Both installs show how rigid a seat mount should be.

We would normally have had the customer come by and see for themselves how poorly this worked on one side before tackling the other, but with Joe out of country it was difficult to explain - hence the videos. We had a test autocross event scheduled so I ran it this way, with no lower cushions to save height. It was a hot mess.

TEXAS REGION SCCA EVENT + SEAT MOUNTING VER 2.0

I will be brief but this first autocross event in the 2013 1LE was an initial test of the new springs, camber plates, and seat setup. The new wheels (see below) had been ordered but were not here yet, so we ran on the factory 1LE 20x10/20x11 wheels and the well worn and old 285mm Michelin Pilot Super Sport (MPSS) tires for this event. The tires looked pretty ragged but I had hoped they would scrub-off some of the old crusty rubber and give some usable grip (they didn't). I entered the car in CAM-C in preparation for the Texas CAM Challenge event later that month.


The video above summarizes my thoughts on the tires and seat bracket pretty well. The MPSS tires were totally shot (3+ years and likely a dozen track days on them) and we learned the limits of the ABS in low-grip situations at this event. After 4 runs of losing the ABS system completely only almost every braking zone, I had to dial back my normally aggressive left foot braking technique to get a clean-ish and fast-ish run in. It felt like I was driving a wet course with no brakes.

As you will hear the announcer say in the autocross video above, after this "dialed way back" 5th and final run I had jumped from 3rd to 1st in class, briefly. 20 minutes later when the cone sheets were audited they found that I hit a cone on this run also (like every other run that day, ugh) and I fell to 2nd place with the 2 second penalty. Still, while I knew these tires were shot (they durometerd very poorly), the car still had lots of potential. The shocks and rest of the suspension setup felt good, the tires just sucked.


But those seat brackets?? HA! You can hear the constant clunk-clunk-clunk sounds in that run, which were the damned seats flopping around in the sloppy mounting joints. Re-making those brackets into something usable was a top priority the day after this autocross event. It didn't help my driving since I was 3 inches too close to the steering wheel and that my head was jammed up into the roof sideways. GRR! I hate janky seat brackets! That makes a good racing seat worse than the OEM Barcalounger seats.


The forward factory floor mounts for the front seats have two pairs of slots on each side (see above). The factory seats have some "hooks" that go into there and then the rear mounts are bolted down. This aftermarket set of brackets tried to copy the stock hooks but the shapes were off and this is where all of the slop was.


After checking the interwebs and not seeing a proper "fix" for this (other than race cars with modified floors), Ryan came up with the solution shown above. After cutting the hooks off, these "nut plates" were fished between the slots and a hole was drilled to secure them to the floor. You can see more details if you click for higher rez images on the two pics above, but basically he made a proper threaded hole under the floor so that the factory seats could go back in one day. There is only a pair of small holes (for the M6 bolt that secures the nut plate to the floor) and a pair of bigger holes (for the main M10 bolts) added. Otherwise this can be completely un-done in minutes, since this isn't a dedicated race car build.


With the hooks and slots removed the slop was completely gone. Ryan also took over 2" of stack-up height out of the arrangement when he removed the giant hooks, plus some mods to the rear as well. Last but not least the range of motion of the slider was improved several inches by drilling all new holes, which let the seat move more rearward.

continued below
Reply With Quote
  #12  
Old 10-14-2016, 08:34 AM
Fair Fair is offline
Senior Member
 
Join Date: Mar 2014
Location: Plano, TX
Posts: 160
Thanks: 6
Thanked 67 Times in 33 Posts
Default

continued from above

TRACK TEST - MSR-CRESSON, SEPTEMBER 16, 2016

If you have been waiting through this MASSIVE write-up for some road course testing, its finally time! I have driven the MSR-Cresson 1.7 mile CCW course dozens of times over the past decade but starting in July, I have been there almost every week testing several cars in various states of tune.


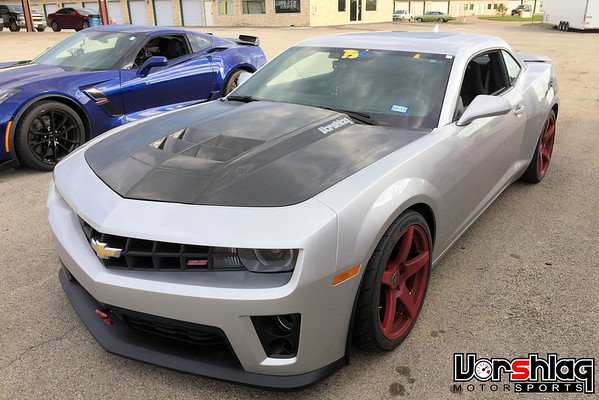
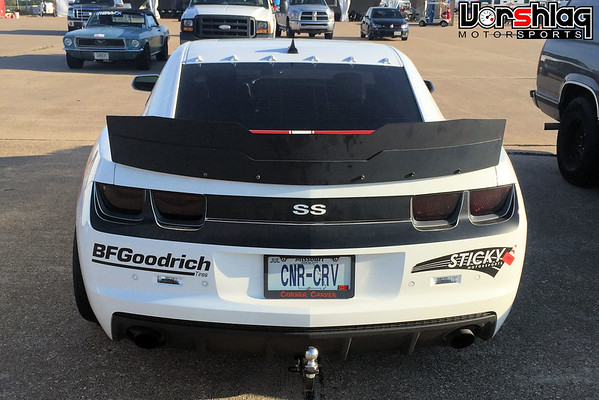
On this beautiful Friday morning in September we had both Joe's 2013 1LE and his newly acquired 2017 Corvette Grand Sport 7-speed manual on hand for some test laps. Joe asked me to trailer out the Camaro while he drove out in the GS, and I was slated to take some "baseline" laps in both cars. I also ended up driving a customer's stock C6 Z06 the same day. Good references to compare the Camaro to, but I was worried the 1LE would be far out matched by these two generations of Corvettes. I was pleasantly surprised at the results.


This was only the 2nd time Joe drove the Camaro on track after the gaggle of changes we made in 2016, but it was my first time to ever put any miles on a road course in any 5th gen Camaro. Or any C6 or C7 for that matter. What should I be worried about? They are just cars, right? If it has a V8 under hood and drives the rear wheels, I'm down for whatever!


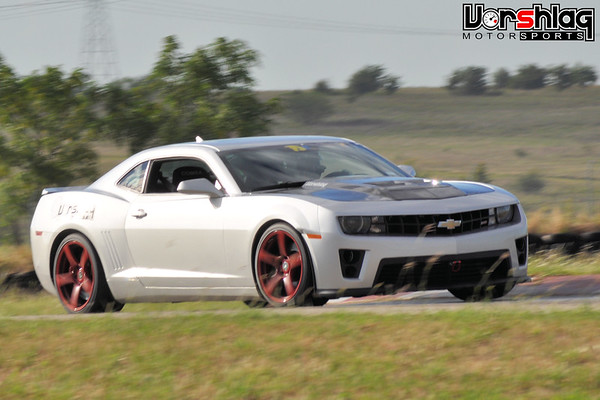
We got there early on a member day and the weather was good. I managed to get out on course in the Camaro when the course was devoid of traffic - Joe was in his GS and I was in the Camaro, without another soul on track. This made for some easy laps where I clocked off some quick ones.


Car handled beautifully on track. The setup that had a touch of understeer in autocross was perfect for road course use. I was able to put the car to about 90-95% of the limit and get a good lap time in it safely. The racing seats and harnesses made driving effortless and I wasn't having to "hang on" like I did in the C6 Z06 (which frankly had terrible stock seats).

More Data Logged Track Videos at MSR-C 1.7 I have driven:
https://youtu.be/athEpfLRH3o - 1:22.56 in the modded 2013 1LE Camaro
https://youtu.be/6Rpepzil8FI - 1:21.89 in the stock 2017 Grand Sport
https://youtu.be/1_B2u_fOnww - 1:22.63 in the stock 2012 C6 Z06
https://youtu.be/fpWyzzf-pHk - 1:27.40 in a stock 2016 Focus RS
https://youtu.be/Cs6AF436ykE - 1:31.90 in a stock 2013 Scion FR-S

For reference those links are to some of my other videos showing lap times in street cars on street tires that I have run on this same course layout in 2016. All of these laps are using 200-300 treadwear street tires and the same AiM SOLO lap timer / data logger. This AiM unit is within 0.1 sec of the AMB timing loop whenever I run NASA Time Trial events here, but the on-board "PDR" data logger from both of the two Corvettes was about 1-3 seconds optimistic. Always be wary of using phone apps or onboard automotive timer systems.


Of course a better driver could wring out more from these cars than me, but I just wanted to show my other relative lap times to this 3800 pound Camaro, with the same driver on the same course.


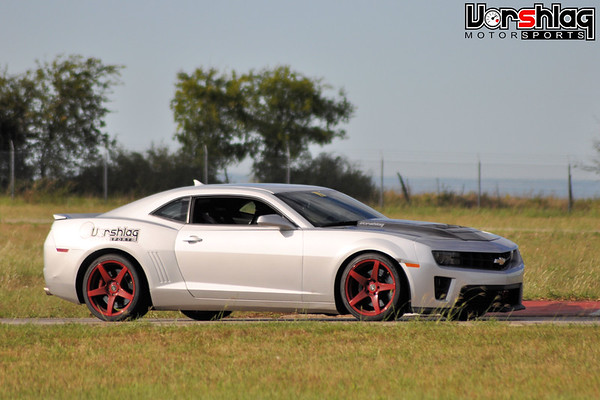
The Camaro's stock brakes (with cooling, good pads, and proper fluid) were absolutely infallible - watch the g-traces and you can see how I abused them (1.1-1.2g stops on every corner, every lap) and yet never had a hint of fade. The Hankook tires worked great, generating 1.3g lateral in some places, mostly 1.1-1.2g. Joe drove the GS twice and the Camaro once at MSR that day - and was quicker in the 1LE! We both felt it was easier to drive fast. Of course the $76K Grand Sport was GLORIOUS in its own right.


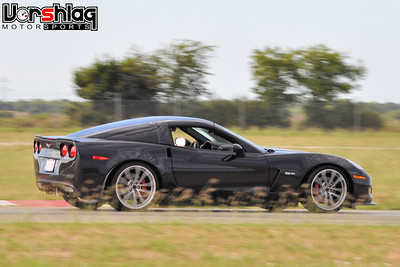
The C6 Z06 was the slowest of the 3 cars I drove that day, which was the biggest surprise. It was rolling around like a wet noodle and the seats were terrible. Both the C7 Grand Sport and C6 Z06 were on very fresh 285F/335R MPSS tires. Nobody running with us there that day could believe the Camaro's times until they saw it and timed the laps themselves. Amazing lap time for a 3800 pound with some tweaks and bolt-ons. This is a beautiful car to drive on the street, other than a little brake pad noise.

WHAT'S NEXT?

So that was a big post covering 2 years of work on this one Camaro alone. Thanks for sticking with it - we have touched a lot of systems on this car, and it has been fun to see all of that hard work produce lap times faster than a stock C6 Z06 and within spitting distance of a C7 GS! To beat a GT350R on Sport Cup 2 tires by 3 seconds on the same track was just icing on the cake.


We have been working with more 5th gen Camaro owners ever since we rolled out our production camber plate, and out plates are popping up on Optima racers and autocrossers cars left and right.


Joe recently bought the 2017 Grand Sport, and after driving it he hadn't planned on keeping the Camaro. It might go for sale soon. But the lap times the 1LE produced, and as easy as it was to drive, it is giving him pause... He also has a Mark7 VW GTI we have used for testing (our new Mk7 camber plates) that he normally drives around town in. What probably makes the most sense is selling the Camaro and keeping the GS for weekend fun and the GTI for daily driving - why have two track toys with such similar capabilities?


Left: I ran a 1:28.1 lap Joe's 2015 VW GTI with our camber plates. Right: Stock GT350R ran a 1:25.6 on the Sport Cup 2 tires

I just hate to see this Camaro go - all of our 5th gen development work is tied up in this car, it looks great and is performing far above our expectations. If I had the cash I'd get this car for myself - it is still a GREAT street car with full interior, AC, touch screen ICE, back up video camera, and a cushy ride. But it also makes great power, has excellent brakes, and handles beautifully. It does everything right, and can trounce supercars on track. Why would you sell such a beast??


Who knows, maybe sanity will prevail and he will keep this one. I can hope! I will update this thread again if we go further with this Camaro and/or when we get our hands on another. We have some more ideas we would like to test out, just need a good tester willing to let us make it better...

Cheers,
__________________
Terry Fair @ Vorshlag Motorsports
Reply With Quote
  #13  
Old 10-14-2016, 08:42 AM
dhutton dhutton is offline
Senior Member
 
Join Date: Nov 2006
Location: Mountain Springs, Texas
Posts: 1,891
Thanks: 1,067
Thanked 479 Times in 264 Posts
Default

[

Superchargers and other forced induction options can make huge power bumps on modern V8 cars - they work well for dyno queens, drag cars and hard parkers, but boost SUCKS on a road course. These systems always heat soak within "ones of laps", even with giant intercoolers, and there is no getting around that fundamental problem with blown V8s.

Even OEM supercharged V8s, the Mustang GT500, Camaro ZL1, Corvette ZR1 and C7 Corvette Z06, overheat quickly on track. I've seen C7 Z06 Corvettes overheat and go into limp mode in LESS THAN ONE LAP at tracks like COTA in the Texas summer heat. If your supercharged V8 isn't overheating on a road course, you are either: driving very slowly, you are blind, or your car doesn't have accurate gauges.

continued below[/QUOTE]

Apparently you haven't come across Mark Stielow and his LS9 powered 69 Camaros in your travels. Those words are almost blasphemy around here...

Don
Reply With Quote
  #14  
Old 10-14-2016, 03:19 PM
SBDave SBDave is offline
Senior Member
 
Join Date: May 2009
Posts: 240
Thanks: 0
Thanked 1 Time in 1 Post
Default

Thanks for documenting and posting all this! Very relevant as I'm mounting Sparco fixed back seats in my Cuda and it is taking me way longer than I anticipated to figure out how to mount it properly.

Dave
Reply With Quote
Reply


Posting Rules
You may not post new threads
You may not post replies
You may not post attachments
You may not edit your posts

BB code is On
Smilies are On
[IMG] code is On
HTML code is Off

Forum Jump


All times are GMT -5. The time now is 01:45 PM.


Powered by vBulletin® Version 3.8.11
Copyright ©2000 - 2024, vBulletin Solutions Inc.
Copyright Lateral-g.net