|
|

05-15-2010, 09:32 PM
|
 |
Senior Member
|
|
Join Date: Jan 2008
Location: Huntington Beach, Ca
Posts: 773
Thanks: 0
Thanked 0 Times in 0 Posts
|
|
Then the work started on the body. Again because of the dropped height, raised motor, and proper drive shaft angles, I had to make multiple changes. I thought that I was going to be able to get away with cutting a little out of the tranny tunnel for the tremec, but it turned out to be a whole lot more than that. I started by cutting out the entire tranny tunnel, and fabbing up a new piece that fit over the tranny once the proper angles were established. I then welded it in, and continued by cutting out the entire driveshaft tunnel. The driveshaft was about 1 away from the stock tunnel at ride height, so it was raised a good amount. I was originally going to leave it all spot welded, but I ended up solid welding it with all the welds ground down and finished. I was amazed at how much more rigid the floor was with the added height of the tunnel acting as a backbone.


|
05-15-2010, 09:33 PM
|
|
Senior Member
|
|
Join Date: Jan 2008
Location: Huntington Beach, Ca
Posts: 773
Thanks: 0
Thanked 0 Times in 0 Posts
|
|
The next items to be addressed were the tubs. At ride height, not only did I not have enough vertical clearance, but the tires were starting to come into contact with the first lip of the tubs (see pic). Im not sure what the purpose of this was, but it would have required the tires to be sucked in with a lot of clearance to the quarters, and I hate this look. I cut them out completely and fabbed up some new pieces. I used a wood form to create a 1 radius on the edges which I think gives them a better appearance. They also fit tight to the quarters, and do not just go straight up from the wheel lip. This gave me gobs of extra room over what the stock tubs offered. I probably have over 50 hours in these, but they were well worth it.


|
05-15-2010, 09:45 PM
|
 |
Senior Member
|
|
Join Date: Dec 2004
Posts: 871
Thanks: 0
Thanked 0 Times in 0 Posts
|
|
|
05-15-2010, 09:46 PM
|
|
Senior Member
|
|
Join Date: Jan 2008
Location: Huntington Beach, Ca
Posts: 773
Thanks: 0
Thanked 0 Times in 0 Posts
|
|
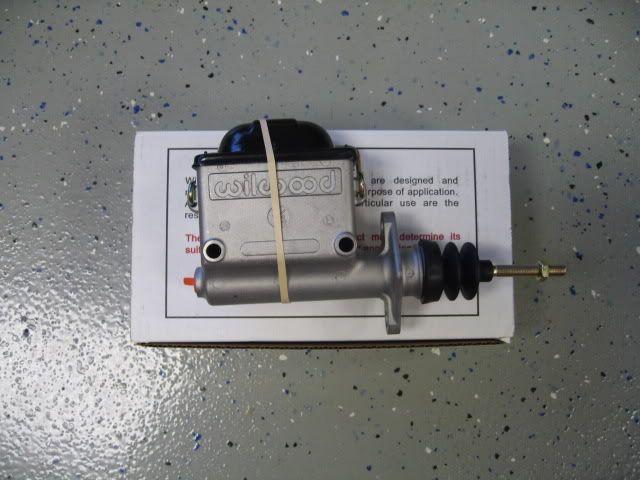
After getting all the floor work done, minus the trunk (still to come), I started on the firewall. I wanted a shaved firewall from the start, so thats what I did. I used a piece of 16ga and cut it out to fit. Its welded around the entire outside, along with all the little plug welds. It really rattled until I welded up the plugs, so Im glad I drilled all those holes to start. Its a solid THUD now. I will have to modify the area around the master cylinders. I originally welded it so that it flowed with the existing portion of the firewall, but this will most likely end up flat like the rest in order to mount the 3 M/Cs. I also wish I had access to a really good bead roller to put some character in this piece, but it is what it is with the tools I have on hand. I had used the cheap HF bead roller to make the rear seat piece, but there was no way it was doing more than 20 ga.


|
05-15-2010, 09:46 PM
|
|
Senior Member
|
|
Join Date: Jan 2008
Location: Huntington Beach, Ca
Posts: 773
Thanks: 0
Thanked 0 Times in 0 Posts
|
|
I also cut off most of the lip around the cowl and welded in some ¼ rod. This cleaned it up a bunch. It was wavy and the overlapping pieces were uneven in stock form. Now it is nice and smooth. Its amazing how little things really can clean an area up. This is going to need a lot of work prior to paint, but it was about 2 hours to this point. Making the top smooth will be easy, but making the firewall transition into this will require a few hours of welding, grinding, sanding, filling


|
05-15-2010, 09:49 PM
|
|
Senior Member
|
|
Join Date: Jan 2008
Location: Huntington Beach, Ca
Posts: 773
Thanks: 0
Thanked 0 Times in 0 Posts
|
|

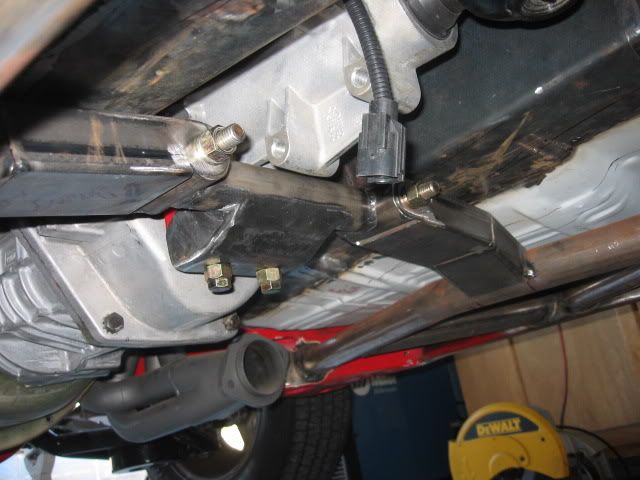
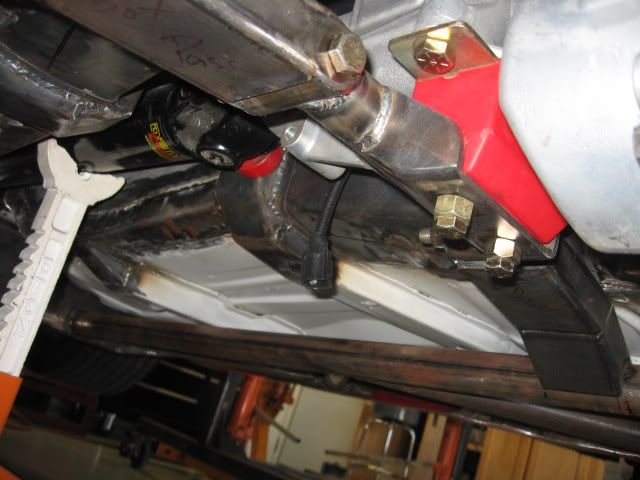
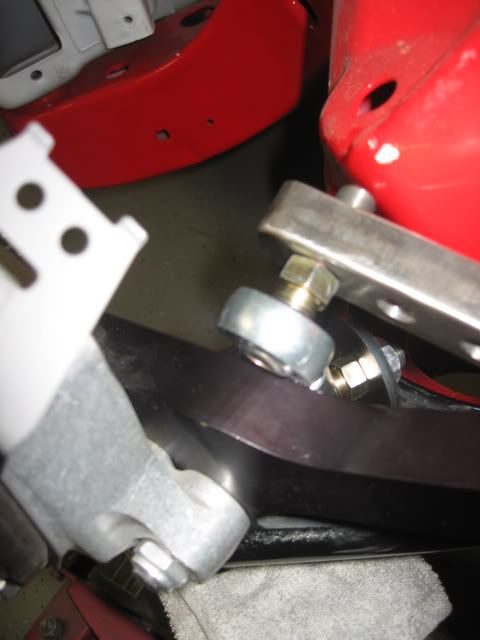
here are a couple of pictures of the trans crossmember. as i said before, i built a drop out center section thats about 3/4" wider than the trans on either side. since im doing a custom exhaust, i'll place here are a couple of pictures of the trans crossmember. as i said before, i built a drop out center section thats about 3/4" wider than the trans on either side. since im doing a custom exhaust, i'll place the X far enough back that i wont have to drop the exhaust or struggle with the crossmember when i need to get the tranny out. hopefully that wont happen, but it will make it easier if it does.
the crossmember is about 1/4" from the floor since i wanted to make sure that my 220 lbs wont make the floor touch it.
also, the side pieces are just tacked in since i will remove them to notch them for the exhaust and do some final welding. i plan on welding a strap on each side to thicken the tabs that the bolts go though. i had to cut more away than i thought, so it will be cheap insurance.
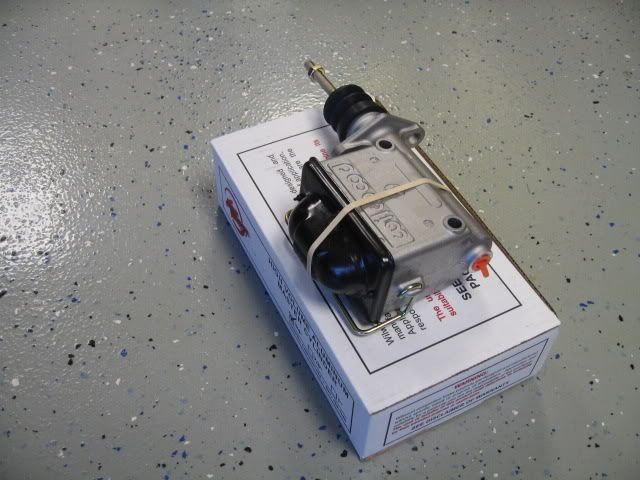
do you like my spacers? it needed WAY shorter bolts than i thought......

|
05-15-2010, 09:50 PM
|
|
Senior Member
|
|
Join Date: Jan 2008
Location: Huntington Beach, Ca
Posts: 773
Thanks: 0
Thanked 0 Times in 0 Posts
|
|
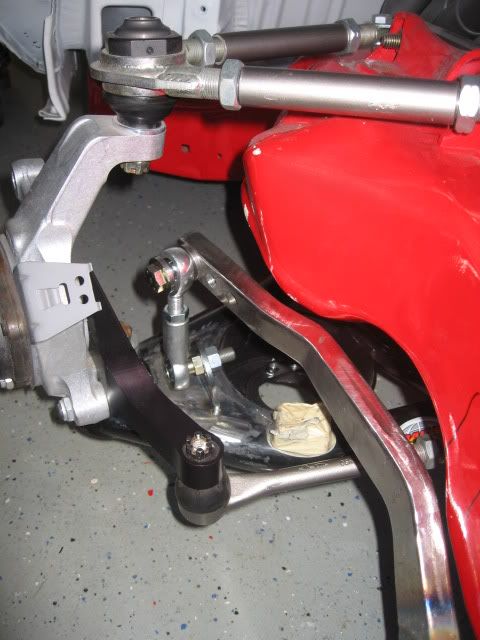
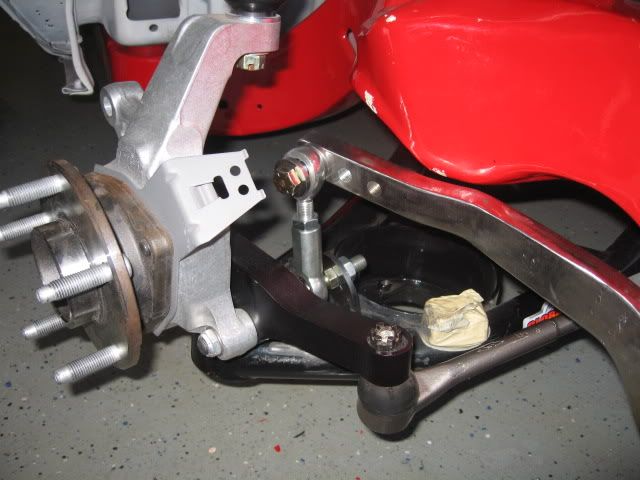
i have a few days off this week and ballistic fab sent me the end links, so i decided to get the sway bar done. i ran into a little snag though. at full lock and slightly before full compression there is a bind between the steering arm and end link. i cant ever think of a scenario where this would be possible, but either way i want it gone.
the issue starts with the fact that i got the rod ends with studs installed. i did this since it eliminated the number of parts required, but it positions the rod end further from the mounting hole. although the clearance required between the outside of the studded rod end and mounting hole, and the head of a bolt on a non studded rod end and the mounting hole are the same, thats not where the arms are coming into contact. i need to remove the studs tomorrow and install with bolts. this will get rid of the bind.
here are a couple of pics at full lock. i dont see how i would ever have this much compession at this point, even going over a speed bump or a driveway approach.
this is ride height with the spindle straight forward
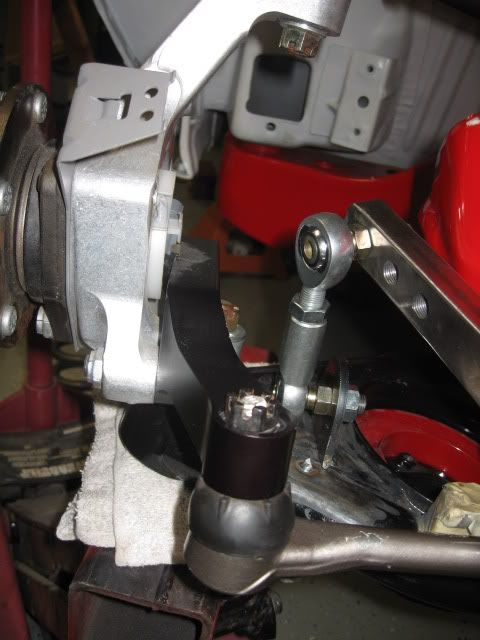
still straight but you can see the space the stud offsets the joint.
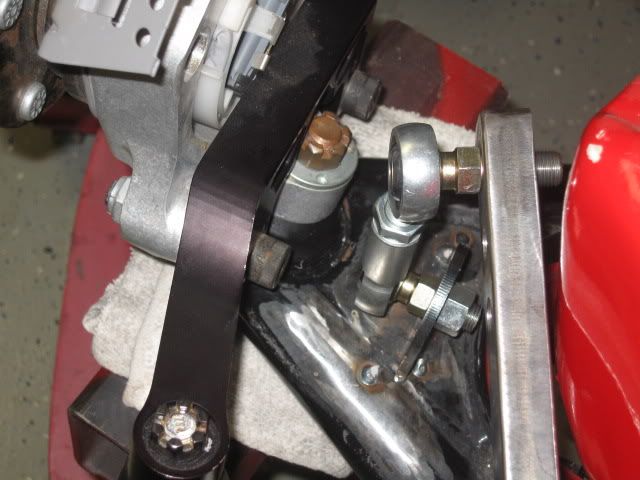
and bind. you cant see it, but the contact is at the base of the joints head. i can lengthen it even more if necessary. a bolt wouldnt contact, and it would give me over 1/4" more clearance.
i also need to finalize the lowers point once i get the upper situated. ive already moved it a few times as you can see from all the tacks.
more to come tomorrow.
|
05-15-2010, 09:51 PM
|
|
Senior Member
|
|
Join Date: Jan 2008
Location: Huntington Beach, Ca
Posts: 773
Thanks: 0
Thanked 0 Times in 0 Posts
|
|
here are some new pics of the sway bar. i had to add a couple of bends, but i clear through full travel at full lock. i still need to final weld the lower mount, but its pretty much done. next time i'll just spend the $800 on the dse bar.
|
05-15-2010, 09:52 PM
|
|
Senior Member
|
|
Join Date: Jan 2008
Location: Huntington Beach, Ca
Posts: 773
Thanks: 0
Thanked 0 Times in 0 Posts
|
|
|
05-15-2010, 09:54 PM
|
 |
Lateral-g Supporting Member
|
|
Join Date: Nov 2008
Posts: 1,109
Thanks: 214
Thanked 97 Times in 44 Posts
|
|
Nice work. Look forward to seeing more, keep the updates coming.
__________________
Corey
1989 Camaro RS
|
 Posting Rules
|
You may not post new threads
You may not post replies
You may not post attachments
You may not edit your posts
HTML code is Off
|
|
|
All times are GMT -7. The time now is 08:36 AM.
|


 Brian Hobaugh SCCA National Tour June 2014
 First Hemi 'Cuda Convertible Ever Built
 Short clips: Goodguys Pleasanton autocross and pit videos


 Linear Mode
