...

Go Back   Lateral-g Forums > Lateral-G Open Discussions > Project Updates
User Name
Password


Reply
 
Thread Tools Display Modes
  #201  
Old 08-07-2023, 10:17 PM
SuperBuickGuy SuperBuickGuy is offline
Senior Member
 
Join Date: Aug 2021
Location: Puget Sound Washington
Posts: 221
Thanks: 12
Thanked 188 Times in 117 Posts
Default

removed the last vestiges of Optima 2023.... put the wing back where it belongs

time to start considering what the front is going to look like - I don't think I'm getting enough air for cooling and adding more hp isn't going to help on that front (yes 511 ci is in sight)
time to make the second baffle...

I'm going to fasten this differently - not sure how, yet, but it's important to get this all together

because I dug all this stuff out


Paul's C3 - its motor is about ready to come out and several bits from my C3 are going on his motor...
my plan is to get the hard parts on the motor - though I may get dead stopped because I'm not 100% sure I have an intake gasket
Reply With Quote
The Following 2 Users Say Thank You to SuperBuickGuy For This Useful Post:
camcojb (08-08-2023), syborg tt (10-20-2023)
  #202  
Old 08-08-2023, 09:29 PM
SuperBuickGuy SuperBuickGuy is offline
Senior Member
 
Join Date: Aug 2021
Location: Puget Sound Washington
Posts: 221
Thanks: 12
Thanked 188 Times in 117 Posts
Default

time to do this

pictures to give a reference for putting all this stuff in Paul's car


I hope this fixes the oil pressure problem - it certainly looks like it might be too much lift... but there's another problem and that's they were just too tight in the bores. The Comp lifters are much smoother

and I'm just going to pretend I didn't see the cam.... billet cam. It'll be fine. Or it won't. I'm not doing anything with it at the moment....

wow, even room under the hood

Reply With Quote
The Following 2 Users Say Thank You to SuperBuickGuy For This Useful Post:
Goosesdad (11-07-2023), syborg tt (08-11-2023)
  #203  
Old 08-30-2023, 10:20 PM
SuperBuickGuy SuperBuickGuy is offline
Senior Member
 
Join Date: Aug 2021
Location: Puget Sound Washington
Posts: 221
Thanks: 12
Thanked 188 Times in 117 Posts
Default

One bite at a time... cooling
as much as I don't like chrome, it fits

then fix the coolant bypass.... for whatever reason, the FiTech coolant hole is about 1" closer to the water pump

rant ON
I paid money for a throttle cable adapter for this manifold. It simply doesn't work.... hell, I'm not even sure the pieces bolt together.... I've been apologetic about FiTech but this is quite literally it. Never use them.*

the bracket needs to be 5/8" wider to clear the throttle body.... now I either have to make or buy something else...
in an effort to calm down....I dropped the cam sensor in place - not the right place, but the place where the cat won't knock it off the bench...


but that is progress.... but now I need another bracket, and the more I look at it, the more likely I'm going to re-engineer the cooling system. I'm tired of cooling problems...

*I'll relate the story - but my first issue with them was faulty injectors on my FJ40 landcruiser. They did right by me and sent new injectors (which, to date, solve the problem). But now let's roll forward, I have had nothing but problems with their 800+ system. To the point that on the Friday before Memorial Day weekend, I drove from Willow Springs to their office to pick up a new computer. Which, I wouldn't have needed to buy if their 'tech' had called me back when the phone disconnected at Willow Springs (took more then an hour to get through).... not 100% their fault, but the cost, time and missing my first Optima Challenge greatly annoyed me since I drove 1200 miles (a direction) to go play. Their response? "sorry"... Okay, don't trust their electronics, check, but they make the only intake that will fit under my hood (without the gyrations I had before).... the holley was a stop gap before what I'm doing now.... but those people can't even make a bracket without screwing it up. I'm done. RantOFF.
Reply With Quote
The Following 3 Users Say Thank You to SuperBuickGuy For This Useful Post:
68454RS (08-31-2023), Goosesdad (11-07-2023), syborg tt (10-20-2023)
  #204  
Old 08-31-2023, 09:23 AM
camcojb's Avatar
camcojb camcojb is offline
Administrator
 
Join Date: Jul 2004
Location: Wilton, CA.
Posts: 13,281
Thanks: 6,886
Thanked 2,117 Times in 972 Posts
Default

Yours looks like a copy of the Holley bracket I was using before I swapped to drive by wire TB. Did you have it assembled like this? Mine had plenty of room around the TB. Wouldn't work if you had it swapped the opposite direction.

https://www.holley.com/products/fuel...saAuAwEALw_wcB
Attached Images
  
__________________
Jody

PAST CAR PROJECTS

Like Lateral-G on Facebook!

Follow Lateral-G on Instagram!

SPECIAL THANKS TO:
Jacob Ehlers and Amsoil for the lubricants and degreasers for my 70 Chevelle project
Shannon at Modo Innovations for the cool billet DBW bracket
Roadster Shop for their Chevelle SPEC Chassis
Dakota Digital for their Chevelle HDX Gauge Package
Painless Performance for their wiring harness

Ron Davis Radiators for their radiator and fan assembly.
Baer Brakes for their front and rear brakes

Texas Speed and Performance for their 427 LS Stroker
American Powertrain for their ProFit Magnum T56 kit
Currie Enterprises for their 9" Third Member
Forgeline for their GF3 Wheels
McLeod Racing for their RXT street twin clutch
Ididit for their steering column
Holley for their EFI and engine parts
Lokar and Clayton Machine for their pedals and door and window handles
Morris Classic Concepts for their 3 point belts and side mirrors
Thermotec for their heat sleeve and sound deadening products
Restomod Air for their Tru Mod A/C kit
Mightymouse Solutions for their catch can
Magnaflow for their 3" exhaust system
Aeromotive for their dual Phantom fuel system
Vintage Air for their new Mid Mount LS front drive
Hydratech Braking for their hydroboost system
Borgeson for their stainless steering shaft and u joints
Eddie Motorsports for their hood and trunk hinges and misc parts
TMI Products for their seats, door panels, and dash pad
Rock Valley Antique Auto Parts for their stainless fuel tank
Reply With Quote
The Following User Says Thank You to camcojb For This Useful Post:
SuperBuickGuy (10-17-2023)
  #205  
Old 10-17-2023, 09:18 PM
SuperBuickGuy SuperBuickGuy is offline
Senior Member
 
Join Date: Aug 2021
Location: Puget Sound Washington
Posts: 221
Thanks: 12
Thanked 188 Times in 117 Posts
Default

Quote:
Originally Posted by camcojb View Post
Yours looks like a copy of the Holley bracket I was using before I swapped to drive by wire TB. Did you have it assembled like this? Mine had plenty of room around the TB. Wouldn't work if you had it swapped the opposite direction.

https://www.holley.com/products/fuel...saAuAwEALw_wcB
that direction won't work with the FiTech intake. This is one of those questions I'm sure I'll be asking at SEMA

and I'm back
because the first step is always, take it further apart

time to pull the radiator (the hood wasn't a lot of fun by myself...)

there will be re-engineering - this bar causes cooling issues because it blocks the normal outlet port

red light, it works

and the crank trigger/wheel is in place

looks like alignment is my next trick

that said, it wasn't that great to begin with
Reply With Quote
The Following User Says Thank You to SuperBuickGuy For This Useful Post:
camcojb (10-18-2023)
  #206  
Old 10-19-2023, 09:11 PM
SuperBuickGuy SuperBuickGuy is offline
Senior Member
 
Join Date: Aug 2021
Location: Puget Sound Washington
Posts: 221
Thanks: 12
Thanked 188 Times in 117 Posts
Default

time to refit the Corvette radiator. well, the C3 Corvette radiator, the last was from a Z06 and it wasn't enough....

ain't going to win any award for the engine compartment... eff em.

I've spent WAY too much time on this.... there isn't a great spot and this has issues with its closeness to the alternator... but if I have to shield it, oh well... see the comment about show portion of life

that said, I have a lot of respect for a clean engine bay builder... but not enough to spend another year or two on this

first is build brackets

then tack them to the top of the frame... need to finish weld and paint... but time to move on

and the regulator is installed
Reply With Quote
The Following 3 Users Say Thank You to SuperBuickGuy For This Useful Post:
camcojb (10-19-2023), fleetus macmullitz (10-20-2023), syborg tt (10-20-2023)
  #207  
Old 10-23-2023, 08:08 AM
SuperBuickGuy SuperBuickGuy is offline
Senior Member
 
Join Date: Aug 2021
Location: Puget Sound Washington
Posts: 221
Thanks: 12
Thanked 188 Times in 117 Posts
Default

the $400 plug
FAST doesn't include the other half of this plug with their kit.... fyi.


reality is it's about $90 ($10 for plug, $70 for "should work" crimper, plus tax and transport).... but still, a little frustrating if you don't know
Reply With Quote
The Following User Says Thank You to SuperBuickGuy For This Useful Post:
camcojb (10-23-2023)
  #208  
Old 11-04-2023, 08:41 PM
SuperBuickGuy SuperBuickGuy is offline
Senior Member
 
Join Date: Aug 2021
Location: Puget Sound Washington
Posts: 221
Thanks: 12
Thanked 188 Times in 117 Posts
Default

As we all know, I LOVE wiring. Read that again. That is a lie. So what do I buy at SEMA? more wiring
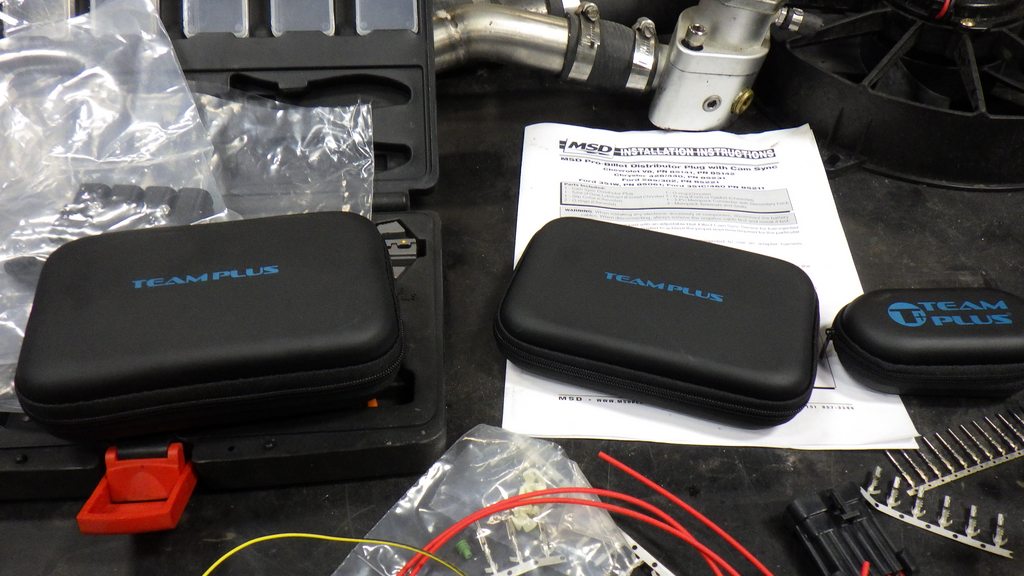


this isn't complaining, just explaining. I run by myself - no tire temp checkers, no pit crew, it's me. And at SEMA, I saw something that I think will be the utter cat's pjs for me. It gives me 120 degrees of temperature (real time). so with one sensor, I can monitor brake temp and tire temps. But wait, there's more. It also monitors tire pressure.


I really think it will be a game changer for me.

display screen it also blue-tooth connects to apple or android.


basically, it mounts above the wheel (on the inside, vertically) and gives me a reading across 120 degrees. Did I mention that it also tells me how far the suspension is traveling?

not cheap but invaluable for someone like me.


and yes, I thought a bit about sharing - why help competitors? well, here's the reason, I like the Australians who make this. I want them to win (small, son and dad business)....


so I'll wire a bit more. And mount it so that I can move it between cars... the tire pressure monitors screw onto the air fill.... which means I could use it on my 4x4 too

forgot, it also has a can-bus plug so it will work with your existing track gear.....
Reply With Quote
The Following 3 Users Say Thank You to SuperBuickGuy For This Useful Post:
camcojb (11-04-2023), Cramer4918 (11-06-2023), Goosesdad (11-07-2023)
  #209  
Old 11-07-2023, 10:00 PM
SuperBuickGuy SuperBuickGuy is offline
Senior Member
 
Join Date: Aug 2021
Location: Puget Sound Washington
Posts: 221
Thanks: 12
Thanked 188 Times in 117 Posts
Default

an update of the rest of the project
To get the larger radiator in, I need to remove this piece

it was useful for the original build, but I'm going to move where it lands and add to the area in front so I can install tow hooks

amazing how much there is on my list.... but getting there

a reminder to call FiTech tomorrow. Apparently, this one won't work (so I was told)... replacement is supposed to be free - so hopefully I can put done on the throttle

about the hardest part of this was soldering stuff together - most was pretty much plug and play but not this time... 4 into 1 wiring

fine wiring... done


I don't get it, it's like I do wiring and everything blows up. I have a short in the shop, working on the welder on the '40, doing the Corvette, and the Blazer is just one large wiring project itself.... then this went down

bit of solder and it was fixed but those high impedance air gaps will get your every time
Reply With Quote
The Following User Says Thank You to SuperBuickGuy For This Useful Post:
camcojb (11-08-2023)
  #210  
Old 11-08-2023, 09:27 PM
SuperBuickGuy SuperBuickGuy is offline
Senior Member
 
Join Date: Aug 2021
Location: Puget Sound Washington
Posts: 221
Thanks: 12
Thanked 188 Times in 117 Posts
Default

oooo shiny baubles. I like shiny things

remove the old

seal some bolts

spray some sealant

and install

the disaster that was the space behind the manifold is starting to look better

not perfect, but closer

talking to FiTech and holley - they suggested just doing deadhead runs to the rails. I can't do it. too many air locks on diesels so with a couple 45 degree fittings and some tube

and the cross over is built

radiator still fits, bonus


the next step is more wiring work - I'm going to move the 2nd fuse block and relay block. Apparently, someone thought the red strip on the back of the motor was how I wired.... so I'll make it go away and add a box where they can be assured it was done right then and now. That said, I hate the individual fuse holders - they were there for convenience, time for them to go
Reply With Quote
The Following User Says Thank You to SuperBuickGuy For This Useful Post:
68454RS (11-12-2023)
Reply


Posting Rules
You may not post new threads
You may not post replies
You may not post attachments
You may not edit your posts

BB code is On
Smilies are On
[IMG] code is On
HTML code is Off

Forum Jump


All times are GMT -7. The time now is 03:43 PM.


Powered by vBulletin® Version 3.8.11
Copyright ©2000 - 2025, vBulletin Solutions Inc.
Copyright Lateral-g.net