|
|

03-05-2012, 07:33 AM
|
 |
Lateral-g Supporting Member
|
|
Join Date: Jan 2007
Location: South Side Chicago
Posts: 2,912
Thanks: 7
Thanked 64 Times in 40 Posts
|
|
Free Parts And Free Labor!!!!!!!!:d
__________________
 Mario
USCOLLISION
|
03-05-2012, 08:24 AM
|
 |
Lateral-g Supporting Member
|
|
Join Date: Jun 2005
Posts: 8,449
Thanks: 5,660
Thanked 2,043 Times in 1,100 Posts
|
|
Quote:
Originally Posted by jy211

no safety goggles or steel toed boots...man time to call OSHA!  
Good job on the cheap labor too! |
There taking after there Uncle Kenny D
|
03-20-2012, 07:46 PM
|
|
Lateral-g Supporting Member
|
|
Join Date: Jun 2005
Posts: 8,449
Thanks: 5,660
Thanked 2,043 Times in 1,100 Posts
|
|

2nd Chance Camaro - Mocking up the Kore3 Brakes
2012 03-20 Update - Mocking up the Kore3 Brakes
www.2ndchancecamaro.com
Good Evening all,
Time to start putting on all of the cool parts I've acquired. First to go back on were the old spindles.

Then I installed the AFCO steering box from www.hoodpins.net .

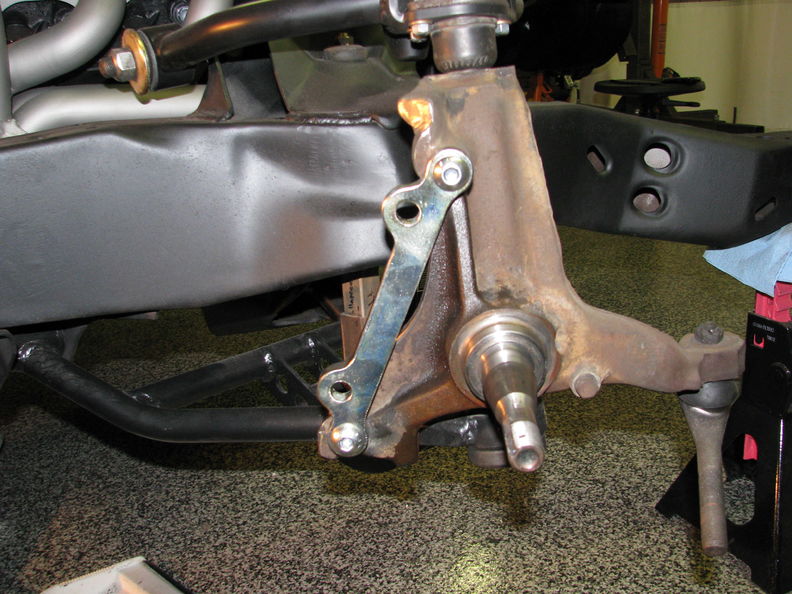
Next to install was the Kore3 Front Brakes it is a very complete kit and simple to install.

Per the easy to follow instructions.
First cut off the ears to make room for the new brackets. I took a little off at a time remember once it's gone it's gone so don't go
crazy. Be safe take off a little at a time.

Here is what the final spindle modification looked like. The next step it to drill out two of the dust shield bolt holes and re-tap them for new
hardware.

Now you can install the Bracket, Caliper & Hub
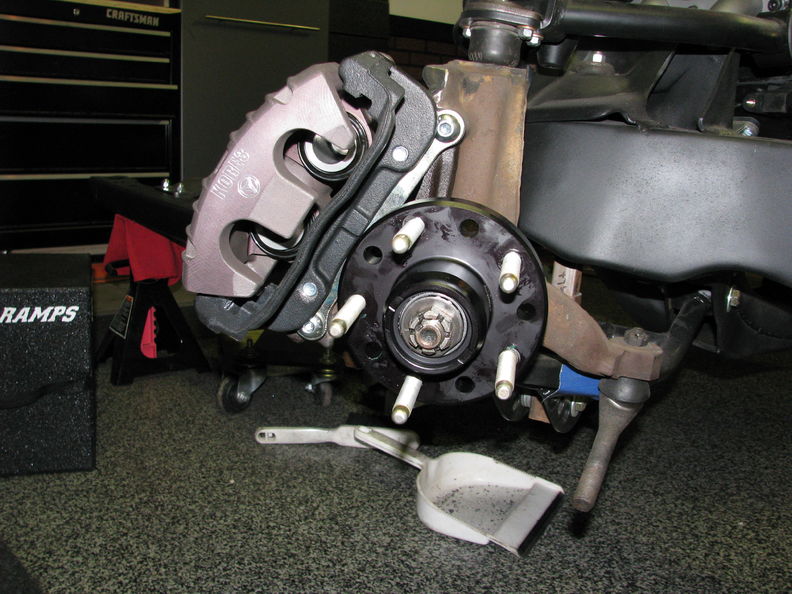
All I need now is the correct rotor however I left it at my warehouse so for now I am going to use the rear rotor. I just wanted to see
how the brakes will look installed. I am very happy with this kit and the total install time was less then 2 hours.

More to come later this week.
Pictures hosted by www.garagescene.net
Last edited by syborg tt; 05-03-2020 at 05:31 AM.
|
03-20-2012, 08:28 PM
|
 |
Lateral-g Supporting Member
|
|
Join Date: Oct 2006
Location: Ma
Posts: 8,491
Thanks: 939
Thanked 342 Times in 231 Posts
|
|
Tobin does make some nice stuff.
|
03-21-2012, 05:19 AM
|
 |
Senior Member
|
|
Join Date: Aug 2005
Location: Vinland Ks.
Posts: 4,315
Thanks: 0
Thanked 3 Times in 3 Posts
|
|
|
03-21-2012, 06:00 AM
|
 |
Senior Member
|
|
Join Date: Jan 2008
Location: Orlando, FL
Posts: 1,397
Thanks: 197
Thanked 186 Times in 111 Posts
|
|
I have the exact same kit on my Firebird! Upgraded to Z51 rotors front and rear though so it's a C5 caliper/C6 rotor hybrid. 13.4" up front and 13" out back.
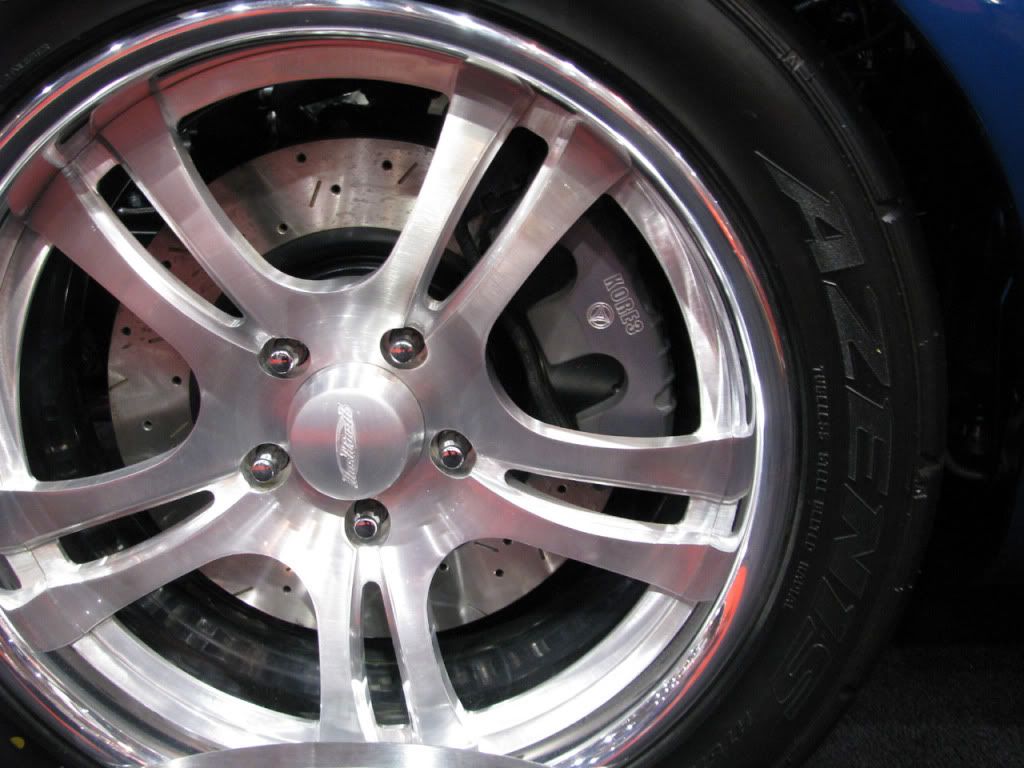
I think it fills the 18" Rushforth SuperSpokes out nicely!
__________________
Ty Ingle, USAF Retired 
FREEDOMBIRD Hoodpins.com, Inland Empire Driveline, Billet Accessories Direct, Modo Innovations, AutoRad Radiators, Morris Classic Concepts, Marquez Design, Anvil Auto, Fesler Billet, US Collision (DOOM), AGR, Pro-touringF-body.com, Phoenix Transmission Products, Shiftworks, ACC Carpet, Hedman Hedders, BMR Fabrication, American Autowire, MityMounts, TIN INDIAN Performance, Kauffman Racing Equipment, Pypes, RobbMc Performance, WMC, Holley, NOS, PST
|
03-21-2012, 08:53 AM
|
|
Lateral-g Supporting Member
|
|
Join Date: Jun 2005
Posts: 8,449
Thanks: 5,660
Thanked 2,043 Times in 1,100 Posts
|
|
Yep, We are going to be upgrading the rotors for sure. These were bought just for Mock up. Wait till you see what were doing it's going to be very cool.
ps - I can't tell you yet but it's going to be blow peoples mind.
Quote:
Originally Posted by OLDFLM
I have the exact same kit on my Firebird! Upgraded to Z51 rotors front and rear though so it's a C5 caliper/C6 rotor hybrid. 13.4" up front and 13" out back.
I think it fills the 18" Rushforth SuperSpokes out nicely! |
|
03-22-2012, 08:28 AM
|
|
Lateral-g Supporting Member
|
|
Join Date: Jun 2005
Posts: 8,449
Thanks: 5,660
Thanked 2,043 Times in 1,100 Posts
|
|
2nd Chance Camaro - Rear Axle Prep
2012 03-22 Update - Rear Axle Prep
www.2ndchancecamaro.com
Good Morning all,
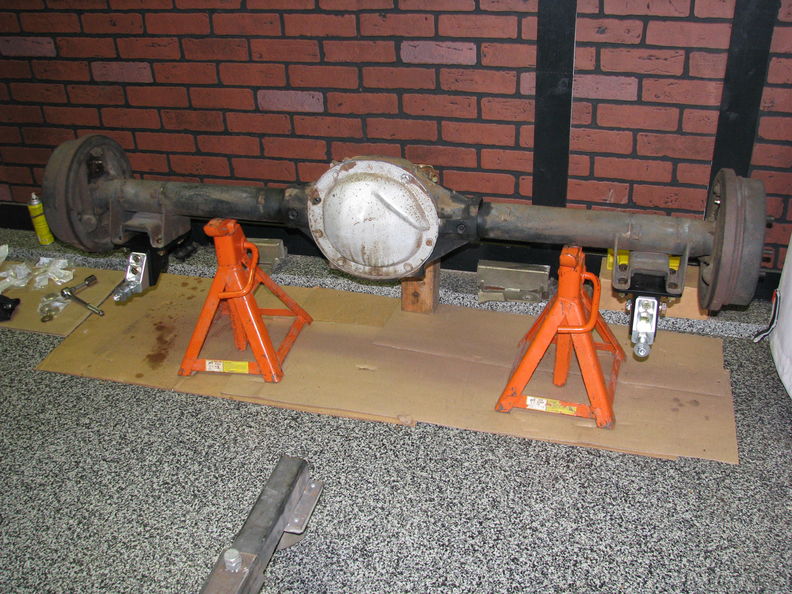
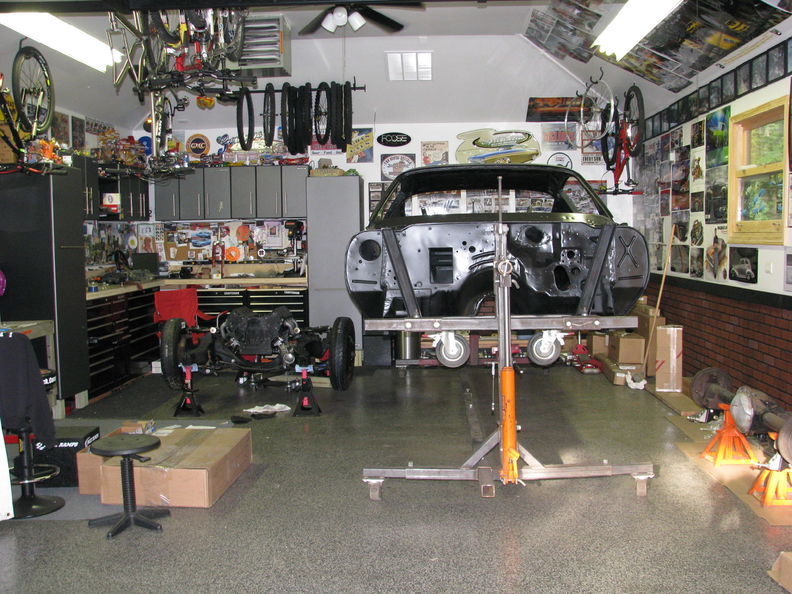
It's time to get the rear suspension on the car so I can get it off Mario's Rotissorie. The Rear suspension is a pretty straight forward install.
My oldest daughter figured I was hungry so she made me lunch. Now that is a good kid!

Since the upper link bar brackets needs to be welded to the axle I wanted to make sure the Powder Coating wouldn't get damaged on the
upper bars. Time to take stock in the 3m Blue Painters Tape.

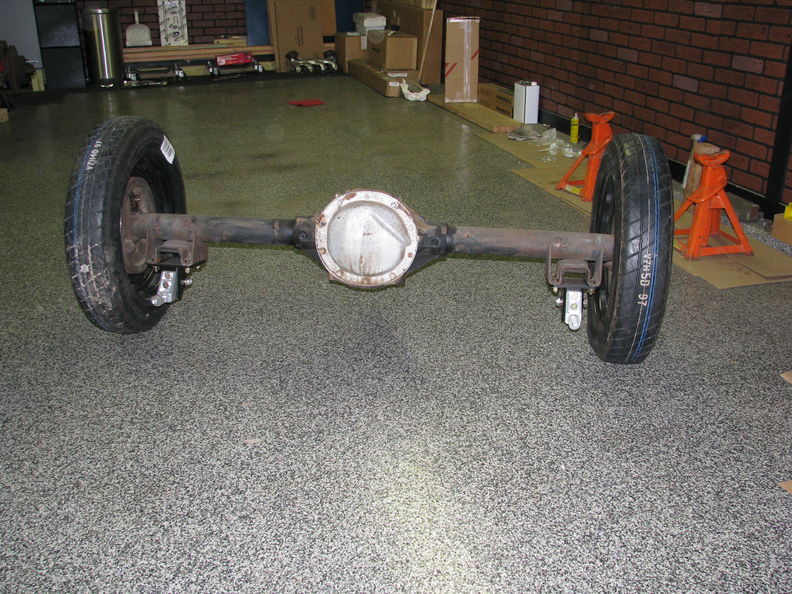
Lower Bar installed

I just like this picture.
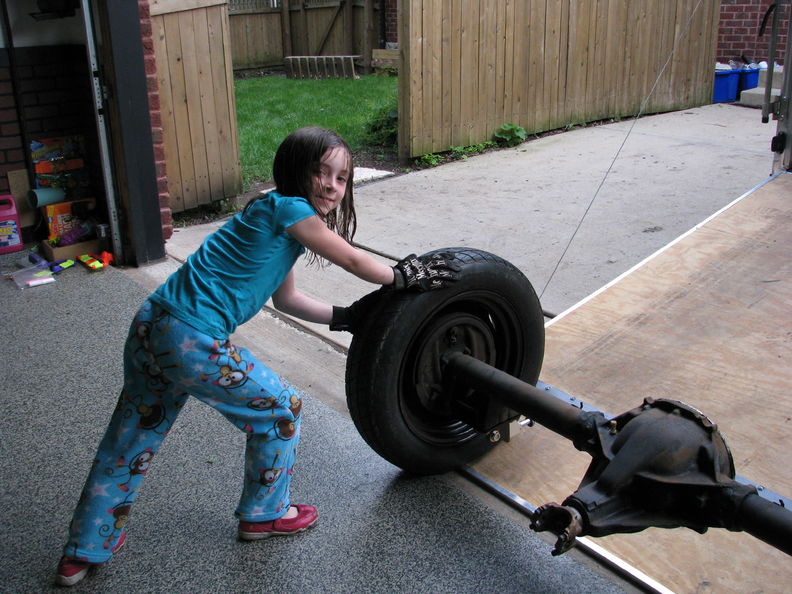
I needed to get the rear differential in the trailer so my daughter Kenzie and I installed the rear tires so she could roll the rear differential into the trailer.
and yes she did it all by herself. Man is this little girl strong.
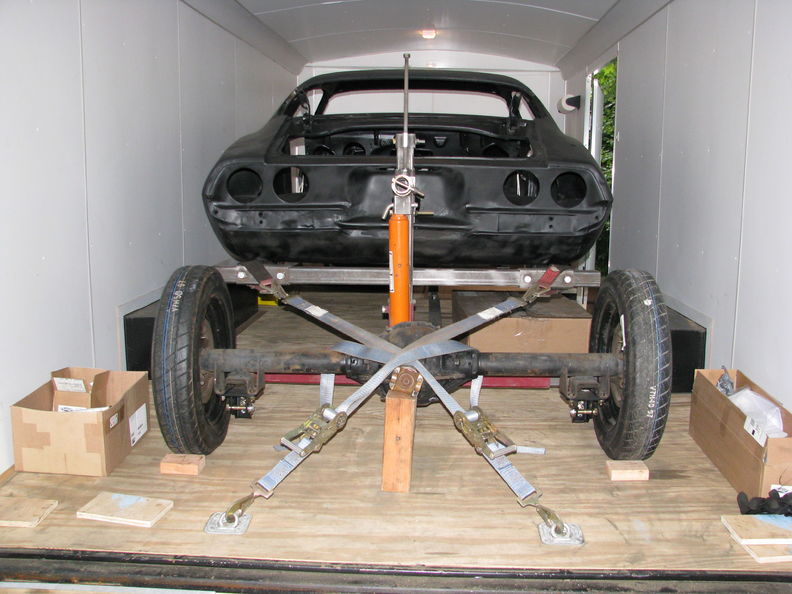
In the trailer and heading over to High Speed Welding so they can weld on the rear differential brackets.
Pictures hosted by www.garagescene.net
Last edited by syborg tt; 05-03-2020 at 05:32 AM.
|
03-26-2012, 03:35 PM
|
|
Lateral-g Supporting Member
|
|
Join Date: Jun 2005
Posts: 8,449
Thanks: 5,660
Thanked 2,043 Times in 1,100 Posts
|
|
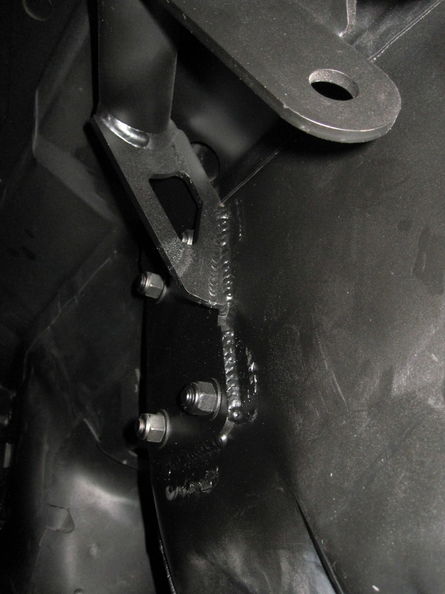
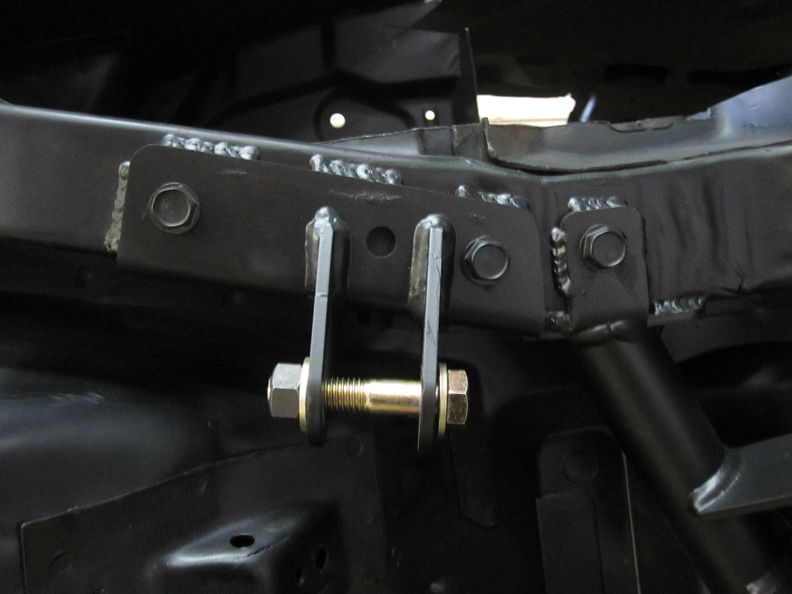
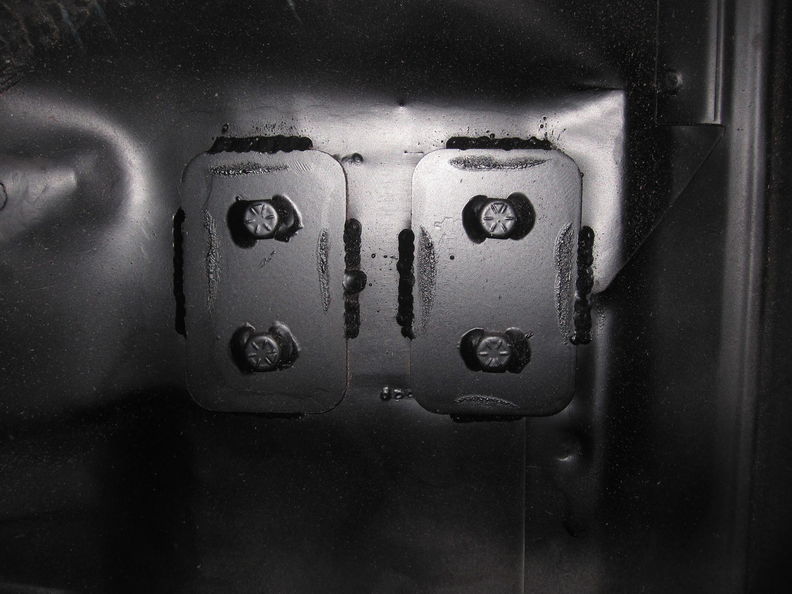
2nd Chance Camaro - Installing the Ride Tech Rear Brackets
2012 03-26 Update - Installing the Ride Tech Rear Brackets
www.2ndchancecamaro.com
Good Evening all,
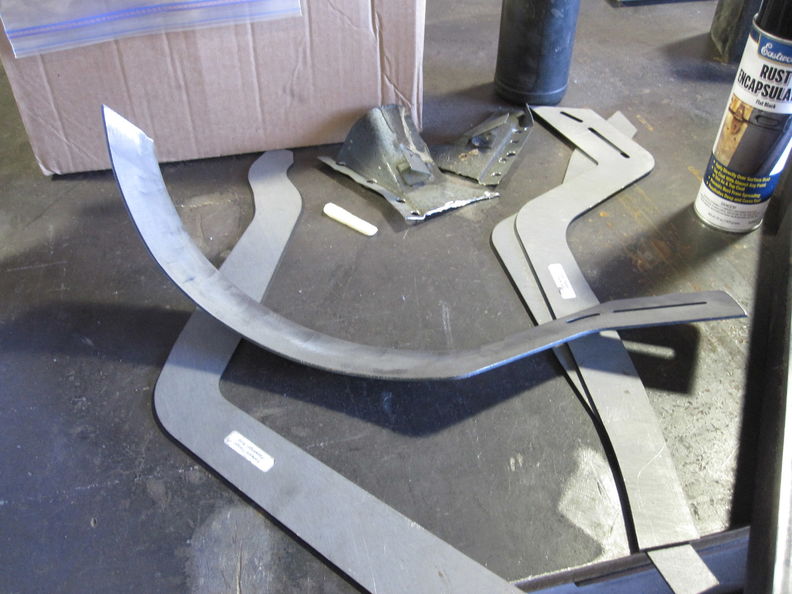
While the car was at High Speed Welding the guy's flattened the passenger side bracket to match this cars
floor pan. Very simple tweak that had to be done. Even though these parts are meant to be bolt-on some-times
they require a little work to fit better.
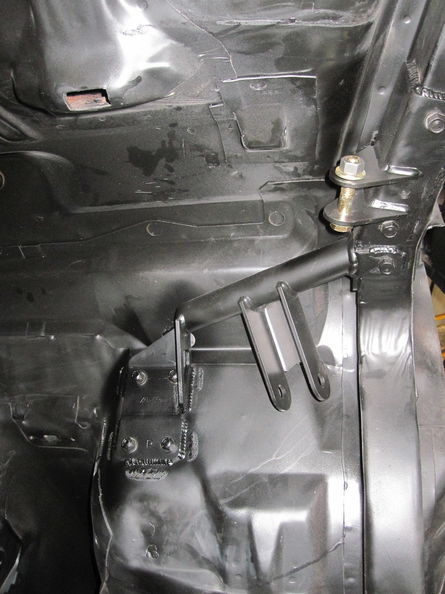
After some discussion Dennis at High Speed Welding felt it was important to retain the hardware supplied
by Ride-Tech and to weld the brackets to the stock subframe to help distribute the load on the stock frame rails.

More to come later this week.
Pictures hosted by www.garagescene.net
Last edited by syborg tt; 05-03-2020 at 05:32 AM.
|
03-26-2012, 08:06 PM
|
|
Lateral-g Supporting Member
|
|
Join Date: Jun 2005
Posts: 8,449
Thanks: 5,660
Thanked 2,043 Times in 1,100 Posts
|
|
2nd Chance Camaro - Finishing Up the Mini-Tub Install
2012 03-27 Update - Finishing Up the Mini-Tub Install
www.2ndchancecamaro.com
Good Morning all,
The guys at High Speed finished off the install of the Mini-Tubs.
Mario did a such great job cutting out the original tubs it made short work for the guys.
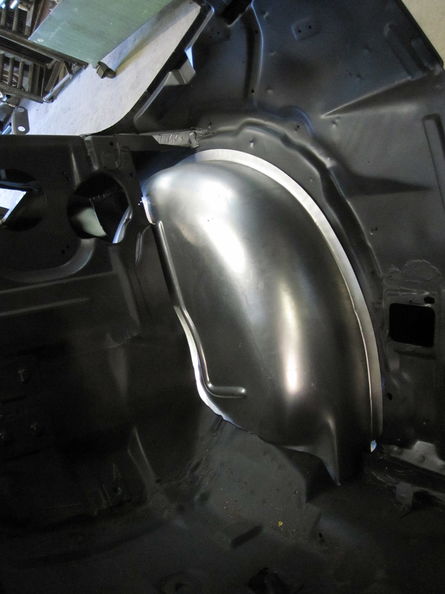
You can see that they have already bent up one side.
The passenger side is in and still needs a little patch work.

Quick look from inside the wheel well

Passenger Side Completed

More to come later this week.
Pictures hosted by www.garagescene.net
Last edited by syborg tt; 05-03-2020 at 05:33 AM.
|
 Posting Rules
|
You may not post new threads
You may not post replies
You may not post attachments
You may not edit your posts
HTML code is Off
|
|
|
All times are GMT -7. The time now is 08:26 PM.
|


 Brian Hobaugh SCCA National Tour June 2014
 First Hemi 'Cuda Convertible Ever Built
 Short clips: Goodguys Pleasanton autocross and pit videos


 It's like a ball of yarn unwinding, that has no end... Author DKz Garage

 Linear Mode
