...

Go Back   Lateral-g Forums > Lateral-G Open Discussions > Project Updates
User Name
Password


Reply
 
Thread Tools Display Modes
  #21  
Old 04-10-2013, 01:42 AM
FETorino's Avatar
FETorino FETorino is offline
Lateral-g Supporting Member
 
Join Date: Aug 2007
Location: Southern CA
Posts: 2,723
Thanks: 59
Thanked 62 Times in 20 Posts
Default

The Falcon looks great. I wish I had your time and ingenuity, this is a great owner build.
__________________
Rob in SoCal

https://lateral-g.net/forums/show...10645&page=171

Reply With Quote
  #22  
Old 04-10-2013, 11:24 AM
GrabberGT's Avatar
GrabberGT GrabberGT is offline
Senior Member
 
Join Date: Nov 2008
Location: Fort Worth TX
Posts: 674
Thanks: 0
Thanked 2 Times in 2 Posts
Default

Subscribed.

Really cool stuff. I was considering posting an update thread on my Ford here but that would be like me trying out for a pro football team. Just not gonna happen. You home builders are way out of my league.
__________________
Chris

Its not a Vega!!!!

Total Cost Involved - Total Control Products - Gateway Performance - Fatman - MaverickMan Carbon
Reply With Quote
  #23  
Old 04-10-2013, 08:34 PM
coolwelder62's Avatar
coolwelder62 coolwelder62 is offline
Senior Member
 
Join Date: Aug 2005
Location: Vinland Ks.
Posts: 4,315
Thanks: 0
Thanked 3 Times in 3 Posts
Default

Wow!!!!! What an awesome build thread.!!!I really Dig this DIY Stuff.
Reply With Quote
  #24  
Old 04-10-2013, 09:17 PM
66fury's Avatar
66fury 66fury is offline
Senior Member
 
Join Date: Feb 2013
Posts: 238
Thanks: 0
Thanked 9 Times in 8 Posts
Default

Home builds are the best cuz great ideas can come from using what you got . Love ur car also cuz its different
Reply With Quote
  #25  
Old 04-10-2013, 09:34 PM
craig510's Avatar
craig510 craig510 is offline
Senior Member
 
Join Date: Jul 2012
Location: Livermore, CA
Posts: 290
Thanks: 22
Thanked 14 Times in 10 Posts
Default

Thanks for the complements. I am lucky enough to have access to all of the big boy toys at work so I can build my own parts. My boss also lets me raid the drops bin so I can get most of my stock for free. I am too cheap to buy parts from the DSE or TCP so I just build them myself. I also like to make my own parts because I get to decide what the engineering compromises are. Metal working is one of the most challenging and rewarding activities that I do. The more I learn in the shop, the better and cheaper my designs get. I feel like it helps my driving also. You have to be really smooth when you are cutting on the lathe, never force it and feel the tool feedback in your hand, just like the autocross.

I consider all of my part prototypes at this point. I am not thrilled with my lower arms so a rev 3 will likely be in the works.

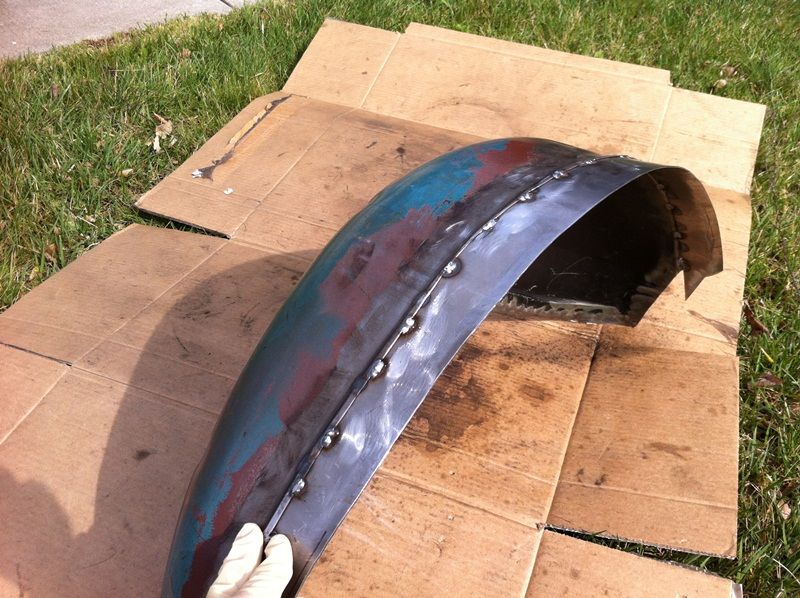
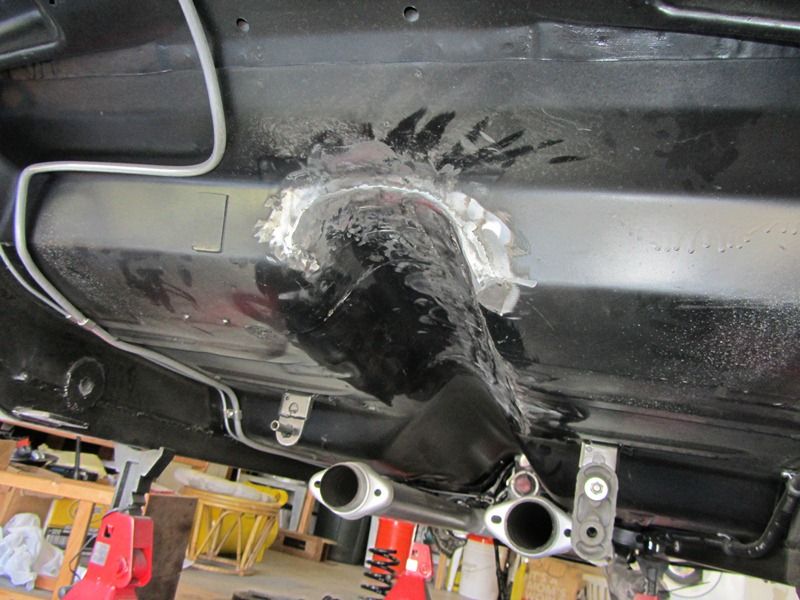
This is my zero dollar mini-tub (not really true, i bought a body saw and used at least $50 in wire, gas, blades and cutoff wheels):

It all starts with some careful mesurments. I figured I should start with the rearend, that way I couldn't chicken out and not cut up the car. I used my layout and mockups to learn that if I moved the springs in .5" per side I would still be able to use my leaves and not have to modify my Panhard bar or exhaust. On the axle, I simply welded up the center pin hole on my perches and welded some 1/4 thick strips to the side, ground smooth, then drilled holes for the u-bolts. It saved me from having to do any major cutting on my rearend.
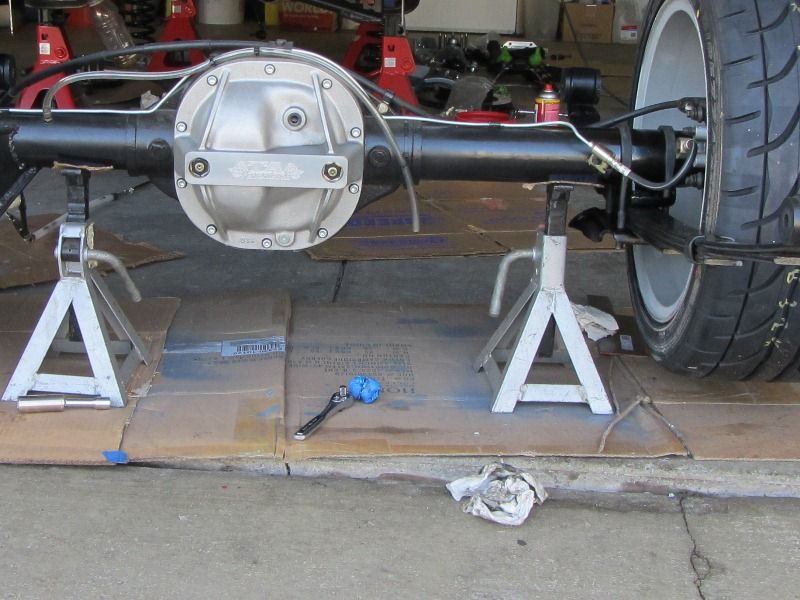
You can see how one u-bolt passes through the perch, and the other touches it on the inside.

I reworked my shock mount to match by welding up the outer set of holes, re-drilling, and sloting the center pin hole, then I cut off the excess material and painted black.
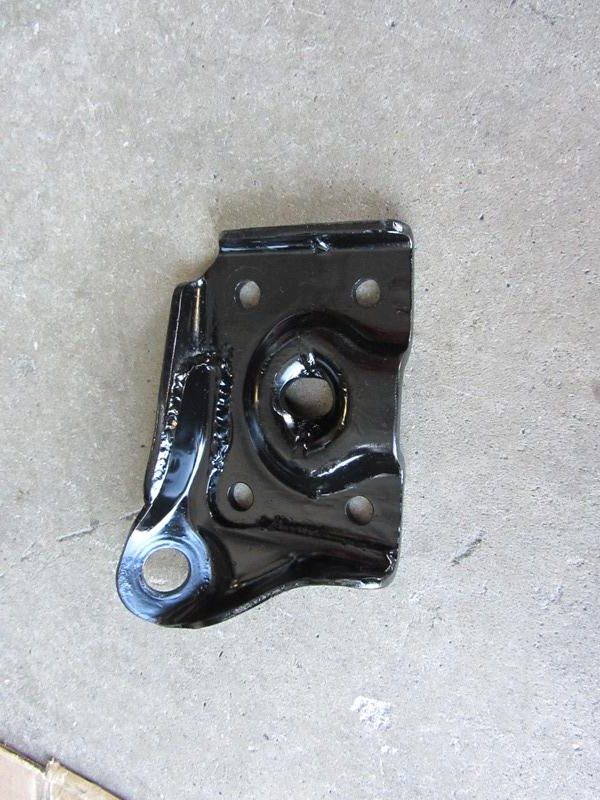

I also moved the driver's side brake line mount because it was nearly rubbing the rim.

I cut the front mount to match the new width (with an additional .134" per side for spring toe) and welded in some 3/16 plate I sheared up at work. I just love having a big shear at my disposal.


It was all welded in and ground smooth.

Now for the big cuts.

I made a cardboard template and marked the line, I was originally going to use a second set of wheel tubs so that I didn't need to add a strip, but they were a little too rusty. After looking at the DSE booth, I think the mustang tubs might be the same, it would save a bunch of extra welding, but cost about $300, so I probably wouldn't, even if I could.
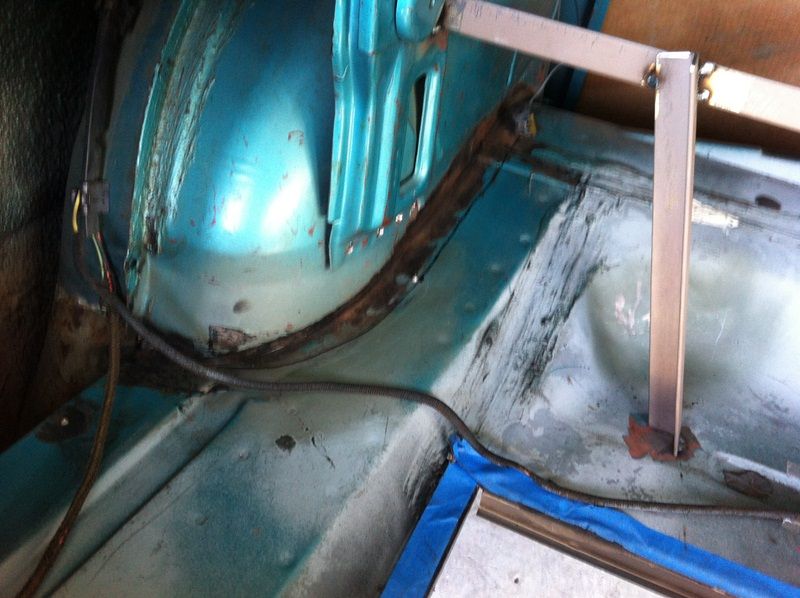

I also bulged the other houses:

clearanced, gained 7/8"
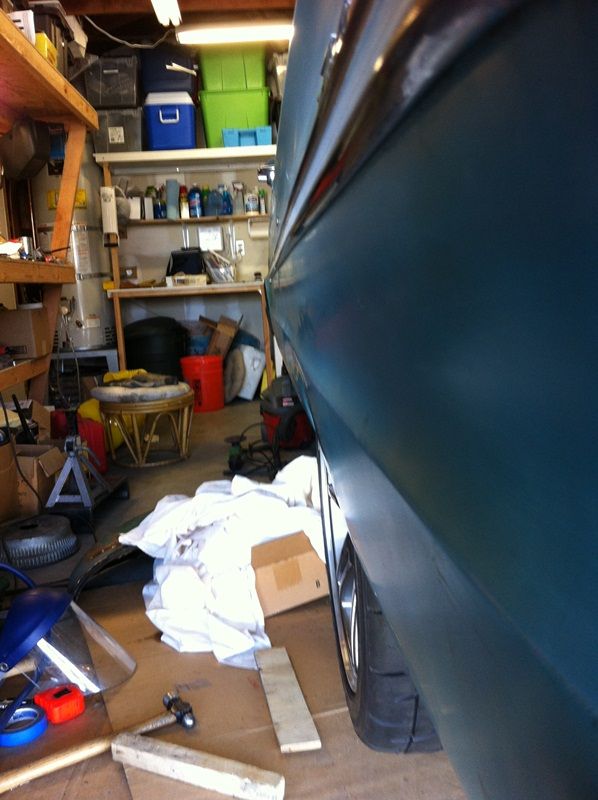
Ever so slighly bulged


2" wide 48" long 16 ga. I welded it in with about 1/8" per side overlap. I took it as far as I could without cutting the frame, gained about 1.75 inside and .875 outside.
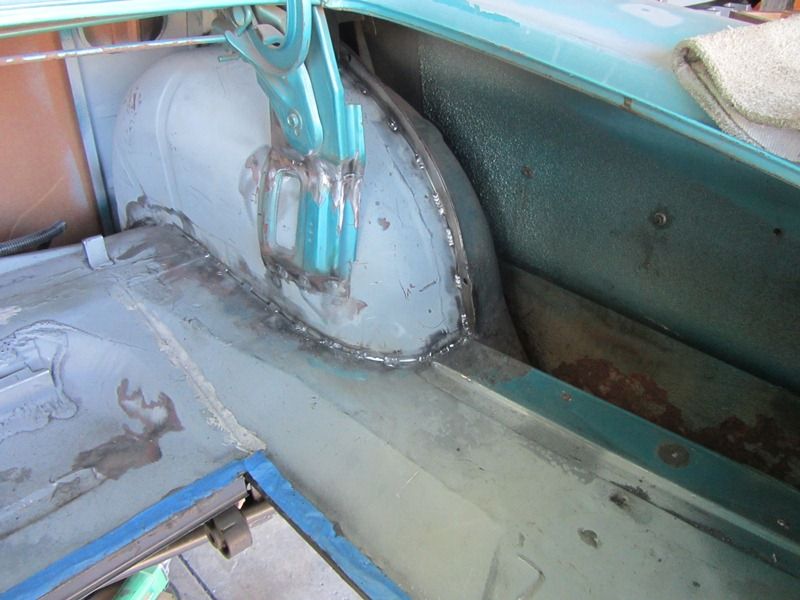

Don't worry, I seam sealed it inside and out.

I took it as far as I could without cutting the frame, gained about 1.75 inside and .875 outside.

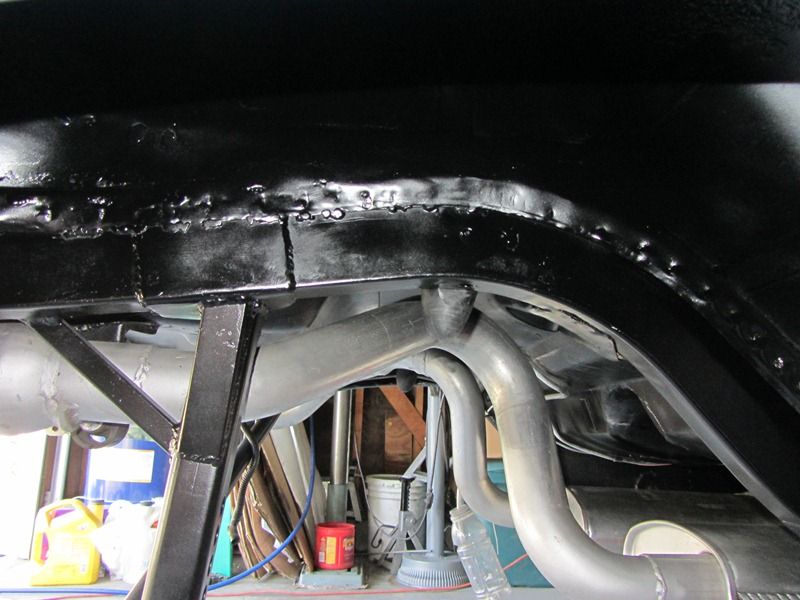


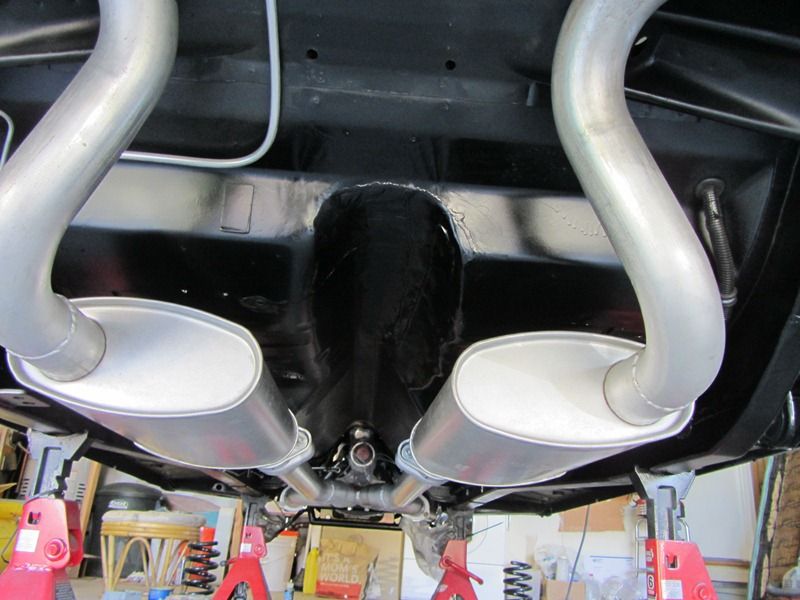
I also enlarged the rear of the tunnel where I was having some drive shaft clearanc issues


Enjoy.
Reply With Quote
  #26  
Old 04-25-2013, 12:12 AM
craig510's Avatar
craig510 craig510 is offline
Senior Member
 
Join Date: Jul 2012
Location: Livermore, CA
Posts: 290
Thanks: 22
Thanked 14 Times in 10 Posts
Default

Got the car out to the SCCA autocross this last Sunday after a hard thrash session to get the front suspension better sorted. I had a lot of fun, but double running and spending all day in the sun took its toll on me. I played around with my GoPro and I think it will really help as a learning tool. Especially after watching some fast runs on the same track on Youtube. I am not linking the elements very well and I need to get comfortable braking hard. The star spec tires have so much more traction than the Generals I can really get on the brakes and gas hard without swapping ends. I need to learn how to use the traction. Next run will be on 5/12

Here are some of the videos I took. The sound is not too good with the solid back cover.


https://www.youtube.com/watch?v=ROEVv9U8o-Q


https://www.youtube.com/watch?v=1f5L_vAcWv4

In the grid


I had some clearance issues even after cutting down the shock tower supports:


Turned some "low misalignment spacers" out of 316SST and clearanced the my strut rod brackets. I ordered some 7075 and will build another set now that I got the design right. I am a little uncomfortable with a the safety factor (1.6) on the current design with 6061. 7075 is almost twice as strong and I needed to order some for some bike parts I was making so I got some more 2.25" rounds.


I have not had bump stops for the last month. So I spent some quality time on the lathe making some bungs to weld into 1.25x.120 wall tube and made some round top caps.


And added the Boss style shock tower gussets:


and some load spreaders:


and welded it all in:


"Finshed" Suspension:


Last edited by craig510; 04-25-2013 at 11:53 PM. Reason: Fixed YouTube Links
Reply With Quote
  #27  
Old 04-25-2013, 08:56 AM
GrabberGT's Avatar
GrabberGT GrabberGT is offline
Senior Member
 
Join Date: Nov 2008
Location: Fort Worth TX
Posts: 674
Thanks: 0
Thanked 2 Times in 2 Posts
Default

I just noticed the belly bar/frame cross member you have. Have any more pictures of it and how its connected. I've been looking at beefing mine up a little. I just have the stack belly bar.


Felt like I was on a boat watching that helmet cam vid LOL. I like the comments your rider made at the end. "Fun as hell" Those guys dont get to ride in older cars much and seem to really get a kick out of riding with us.
__________________
Chris

Its not a Vega!!!!

Total Cost Involved - Total Control Products - Gateway Performance - Fatman - MaverickMan Carbon

Last edited by GrabberGT; 04-25-2013 at 09:04 AM.
Reply With Quote
  #28  
Old 04-26-2013, 12:27 AM
craig510's Avatar
craig510 craig510 is offline
Senior Member
 
Join Date: Jul 2012
Location: Livermore, CA
Posts: 290
Thanks: 22
Thanked 14 Times in 10 Posts
Default

Chris,

I had to go way back in the archive, but here is the skid plate build:

I got the basic design from the 1964 Monte Carlo Rally Falcon


And after watching the GT Racer episode of the La Carrera Panamericana where the Mustang rips the sump off the oil pan on a topes I had to have one.

It always starts with some templates


Frame Brackets


Insert for core support


Completed Frame work


Final cut on the skin, 1/8" 6061-T6


The finished skid plate is a great place to jack the car. And yes, it gets used!

Reply With Quote
  #29  
Old 04-26-2013, 02:35 AM
Flash68's Avatar
Flash68 Flash68 is offline
Moderator
 
Join Date: Sep 2005
Location: NorCal
Posts: 9,180
Thanks: 58
Thanked 158 Times in 104 Posts
Default

That skid plate is fantastic. Very very cool!
__________________
2004 NASA AIX Mustang LS2 #14
1964 Lincoln Continental
2014 4 tap Keezer
Reply With Quote
  #30  
Old 04-26-2013, 08:04 AM
GrabberGT's Avatar
GrabberGT GrabberGT is offline
Senior Member
 
Join Date: Nov 2008
Location: Fort Worth TX
Posts: 674
Thanks: 0
Thanked 2 Times in 2 Posts
Default

Just as expected. More Awesomeness!
__________________
Chris

Its not a Vega!!!!

Total Cost Involved - Total Control Products - Gateway Performance - Fatman - MaverickMan Carbon
Reply With Quote
Reply


Posting Rules
You may not post new threads
You may not post replies
You may not post attachments
You may not edit your posts

BB code is On
Smilies are On
[IMG] code is On
HTML code is Off

Forum Jump


All times are GMT -5. The time now is 07:21 AM.


Powered by vBulletin® Version 3.8.11
Copyright ©2000 - 2024, vBulletin Solutions Inc.
Copyright Lateral-g.net