...

Go Back   Lateral-g Forums > Lateral-G Open Discussions > Project Updates
User Name
Password


Reply
 
Thread Tools Display Modes
  #371  
Old 03-24-2016, 07:00 AM
mdprovee's Avatar
mdprovee mdprovee is offline
Senior Member
 
Join Date: Jul 2004
Location: Suisun City
Posts: 1,155
Thanks: 0
Thanked 4 Times in 3 Posts
Default

Looking good and getting close.
__________________
Mike
Reply With Quote
  #372  
Old 03-25-2016, 02:56 PM
WSSix WSSix is offline
Lateral-g Supporting Member
 
Join Date: Nov 2008
Location: Dunwoody, GA
Posts: 6,618
Thanks: 1,759
Thanked 920 Times in 685 Posts
Default

No worries, Mike, lol. It's your car anyway. I think it looks good.

I found this powder coat after seeing the red translucent wheels posted in the wheel gallery

http://www.columbiacoatings.com/stor...cent-TGIC.aspx

I ordered a pound of it to do my aluminum dash panel. I think it will turn out nice. You might find that it will give you the look you're after, too. You don't have to do a silver or chrome coating first if you're putting it on a bright metal base. You could also take their suggestion and try a different base color/coat all together and create a unique look.
__________________
Trey

Current ride: 2001 BMW 540iT soon to be manual swapped.

Former rides: 1979 Trans Am WS6: LT1/T56, Kore 3 C5/6 brakes, BMW 18in rims

00 BMW 540i/6: Suspension, wheels, and ACS bits.
Reply With Quote
  #373  
Old 03-26-2016, 10:28 AM
Ron in SoCal's Avatar
Ron in SoCal Ron in SoCal is offline
Senior Member
 
Join Date: Dec 2009
Posts: 5,044
Thanks: 6
Thanked 9 Times in 6 Posts
Default

Quote:
Originally Posted by glassman View Post
not sure, josh knows though. specs are.595 intake .605 exhaust, 281/287 duration 112 lobe sep. by Comp Cam,
Yikes!

Quote:
Originally Posted by cjsgarage View Post
The black wheels really do look good on there.

the cam is a 233/239 @ .050", lift is 595"/605", on a 112 degree lobe separation
^ that's more like it. Wheels look great!
__________________
Ron in SoCal
69 Camaro in progress
https://lateral-g.net/forums/showthread.php4?t=31246

Reply With Quote
  #374  
Old 03-26-2016, 10:24 PM
glassman's Avatar
glassman glassman is offline
Lateral-g Supporting Member
 
Join Date: Apr 2012
Location: Livermore
Posts: 2,466
Thanks: 111
Thanked 84 Times in 62 Posts
Default

Quote:
Originally Posted by Ron in SoCal View Post
Yikes!


^ that's more like it. Wheels look great!
Ha, read the wrong part of the cam card. Thanx for the thumbs
__________________
Mike
Reply With Quote
  #375  
Old 04-07-2016, 02:28 PM
cjsgarage cjsgarage is offline
Senior Member
 
Join Date: Aug 2013
Location: Livermore, CA
Posts: 195
Thanks: 0
Thanked 3 Times in 3 Posts
Default

Quote:
Originally Posted by Ron in SoCal View Post
Yikes!


^ that's more like it. Wheels look great!
that is advertised duration. I just don't think anyone pays attention to those numbers.
__________________
I like wiring. No joke.
Reply With Quote
  #376  
Old 04-11-2016, 02:06 AM
cjsgarage cjsgarage is offline
Senior Member
 
Join Date: Aug 2013
Location: Livermore, CA
Posts: 195
Thanks: 0
Thanked 3 Times in 3 Posts
Default

Back to where we left on on the build part of the build thread:

Mike installed the front accessories and I got to working on the wiring harness. Mike had installed the dash harness and the lighting harnesses front and rear. It got everything measured up so I could cut out what we weren't going to use and plan out the additions like the fuel injection system, computer, vintage air and stereo head unit/amplifier.

Dash harness initial


Replacing the old with new


Adding relays for the electric fan and the fuel pump


and a completed piece
__________________
I like wiring. No joke.
Reply With Quote
  #377  
Old 04-11-2016, 02:13 AM
cjsgarage cjsgarage is offline
Senior Member
 
Join Date: Aug 2013
Location: Livermore, CA
Posts: 195
Thanks: 0
Thanked 3 Times in 3 Posts
Default

Those stringy bits in the middle are how the VHX by Dakota Digital wants to be plugged in. If I were to do it again, I think I would make a connector and make it disconnectable.


So the dash harness gets me to about here:


Then I took off the radiator support and started on the front lighting harness


and I'll skip to the good part. Here's the lighting harness done and laid on the engine:
__________________
I like wiring. No joke.
Reply With Quote
  #378  
Old 04-11-2016, 02:23 AM
cjsgarage cjsgarage is offline
Senior Member
 
Join Date: Aug 2013
Location: Livermore, CA
Posts: 195
Thanks: 0
Thanked 3 Times in 3 Posts
Default

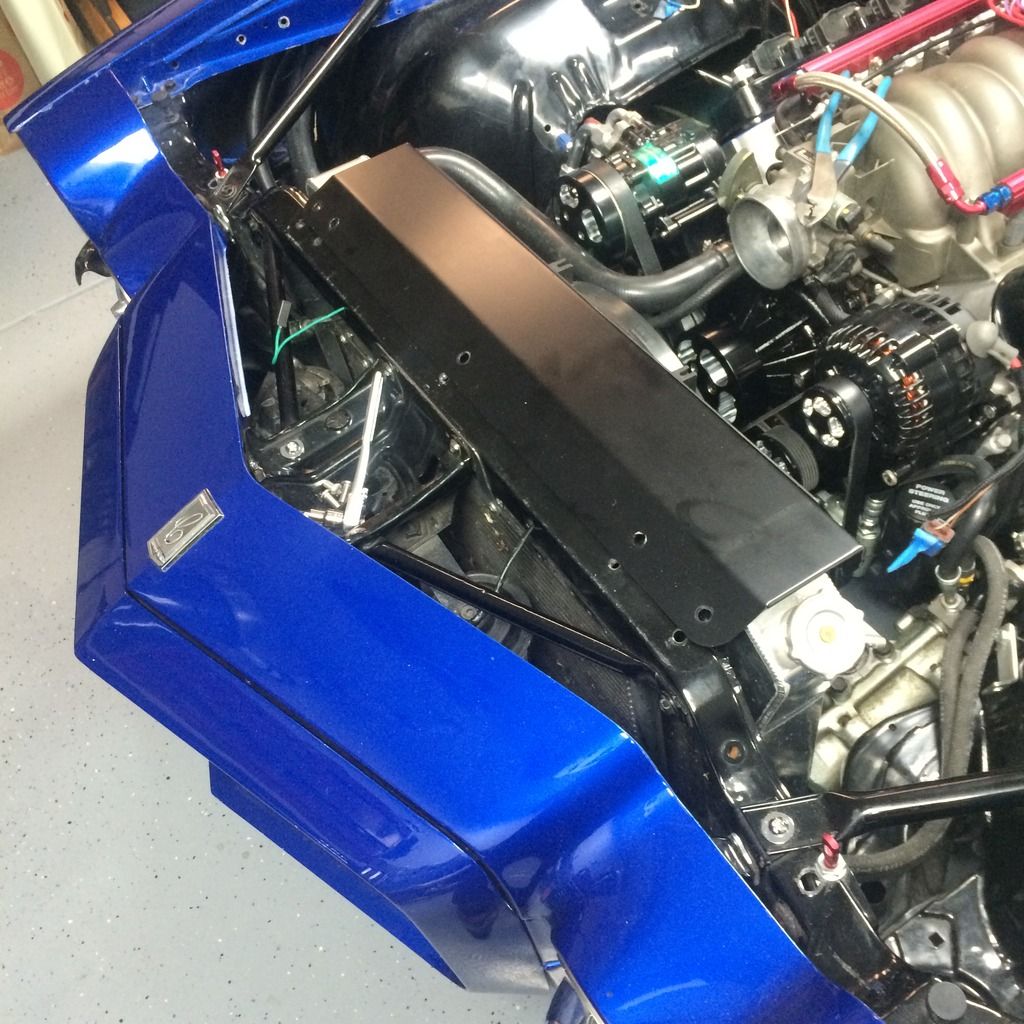
I prefer the ultra cleanest install I can get. and I've never liked how the wipers came out of the engine side of the bulkhead. I always thought it would be a whole lot easier to disconnect the engine as a whole from the bulkhead. Besides that, Mike is considering doing a remote mount wiper since the firewall smooth sheet he made required a wiper delete. So I moved the wipers over to the lighting side.


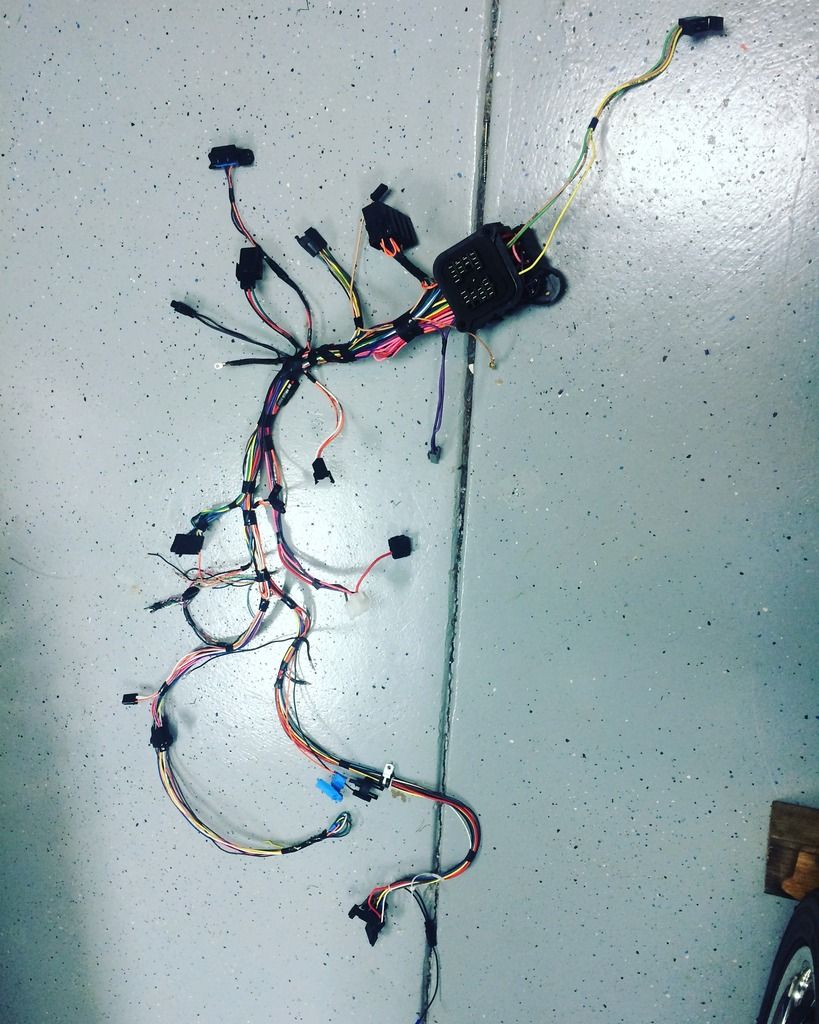
Speaking of ultra clean.. Here's what I did with the rear lighting harness. I included the fuel pump wiring and the stereo amplifier wiring and the gas gauge wiring right into the same harness. One harness disconnects the entire rear of the car. Nice.
The former fuel sending unit ground was ran through the roof of the car.


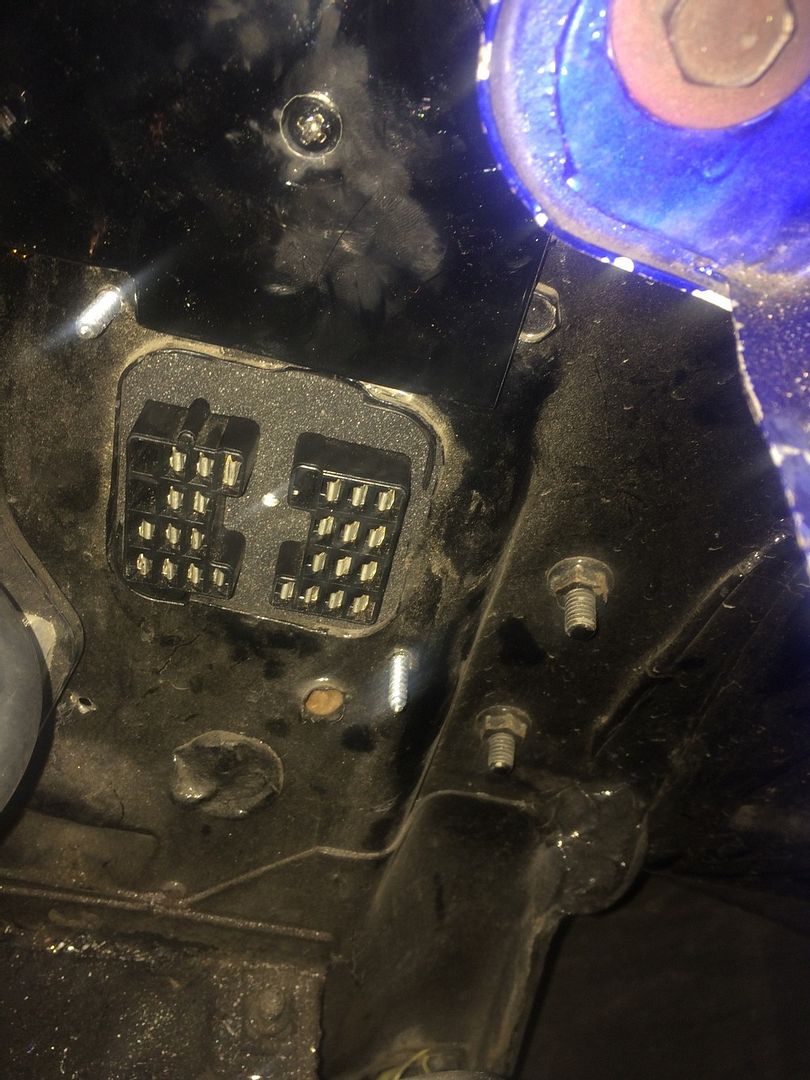
So here's the leg bone being connected to the hip bone again.. the entire interior had to come out (less carpet) for the new lines to be run and the old to be removed. There were powers and ground running down the passenger side for the vintage air and speaker wires.
__________________
I like wiring. No joke.
Reply With Quote
  #379  
Old 04-11-2016, 02:27 AM
cjsgarage cjsgarage is offline
Senior Member
 
Join Date: Aug 2013
Location: Livermore, CA
Posts: 195
Thanks: 0
Thanked 3 Times in 3 Posts
Default

Engine harness pre assembly:


And here's partially through assembly:
__________________
I like wiring. No joke.
Reply With Quote
  #380  
Old 04-11-2016, 02:32 AM
cjsgarage cjsgarage is offline
Senior Member
 
Join Date: Aug 2013
Location: Livermore, CA
Posts: 195
Thanks: 0
Thanked 3 Times in 3 Posts
Default

Here's a little section I had to redo because the sheathing wasn't long enough and pulled out the shrink:


Here's what it looked like before it was finished:


Lastly, I had to wait for a special tool to come in so I could finish the MilSpec connector that makes the engine truly disconnectable in a few seconds.


Here's the mating side of the connector and where it plugs into the ECM and the dash harness
__________________
I like wiring. No joke.
Reply With Quote
Reply


Posting Rules
You may not post new threads
You may not post replies
You may not post attachments
You may not edit your posts

BB code is On
Smilies are On
[IMG] code is On
HTML code is Off

Forum Jump


All times are GMT -7. The time now is 10:23 PM.


Powered by vBulletin® Version 3.8.11
Copyright ©2000 - 2026, vBulletin Solutions Inc.
Copyright Lateral-g.net