...

Go Back   Lateral-g Forums > Lateral-G Open Discussions > Project Updates
User Name
Password


Reply
 
Thread Tools Display Modes
  #31  
Old 03-13-2013, 06:30 PM
HEEP's Avatar
HEEP HEEP is offline
Senior Member
 
Join Date: Dec 2008
Location: Chattanooga, TN
Posts: 520
Thanks: 0
Thanked 70 Times in 29 Posts
Default

Quote:
Originally Posted by 64pontiac View Post
I spy our k brace kit installed in your frame! Nice job, any more pics?

Also, ABC only lists their mini tub pieces as 64-67, I assume they worked for you or they now have a 68-72 version? I figured that section of the frame was very similar from 64 up......
Tyler, yes you can see that brace kit. Very well thought out kit. thanks for coming up with it.

Here are some more pics. If you look at the back you will see where I got a little over zealous with the disc sander.


Trying to get the tubes at the correct level was a bit of work, but I made it.


Here's a good shot of everything in place.


Now as far as the ABC kit, yes he does have a new 70-72 A-body kit. I will say I am impressed with it. Very well thought out process. I'm going to get with him on some measurement questions I had, but everything has worked out.

HEEP
Reply With Quote
  #32  
Old 03-13-2013, 07:23 PM
64pontiac 64pontiac is offline
Senior Member
 
Join Date: Apr 2008
Location: Manitoba, Canada
Posts: 631
Thanks: 0
Thanked 0 Times in 0 Posts
Default

Cool thanks for posting the pics! You came up with a really neat jig there.....I am going to keep that in the back of my mind!

Keep us updated, looks real great!
__________________
Tyler
HPI Customs
Manitoba, Canada
www.hpicustoms.com
Reply With Quote
  #33  
Old 03-24-2013, 08:10 PM
HEEP's Avatar
HEEP HEEP is offline
Senior Member
 
Join Date: Dec 2008
Location: Chattanooga, TN
Posts: 520
Thanks: 0
Thanked 70 Times in 29 Posts
Default

Just a little update. Finished up both sides of the frame. The right was a little tougher than the left. I talked with Tony at ABC and he said he has seen the problem I had. It tested my amateur fabrication skills to the max. However, the good thing about metal is you can add more and make it smooth again.

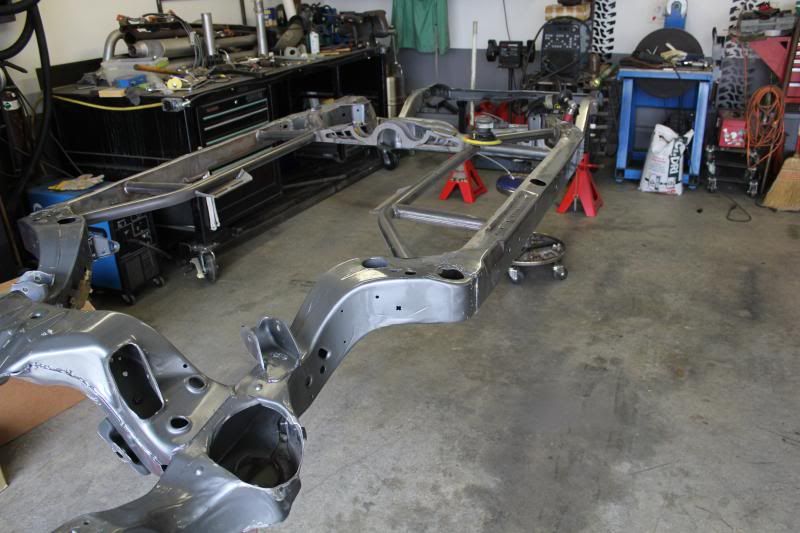
Here is the finished frame. There are a couple of welds that need to be finished on the bottom.
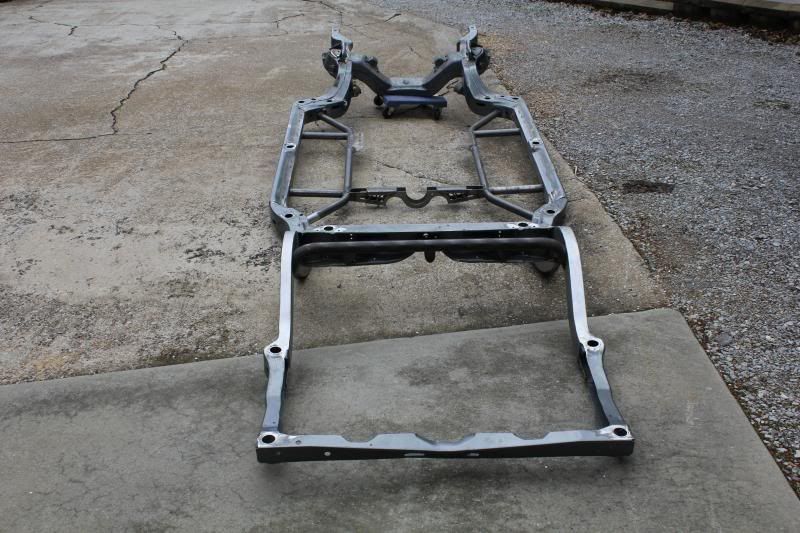

Another shot.


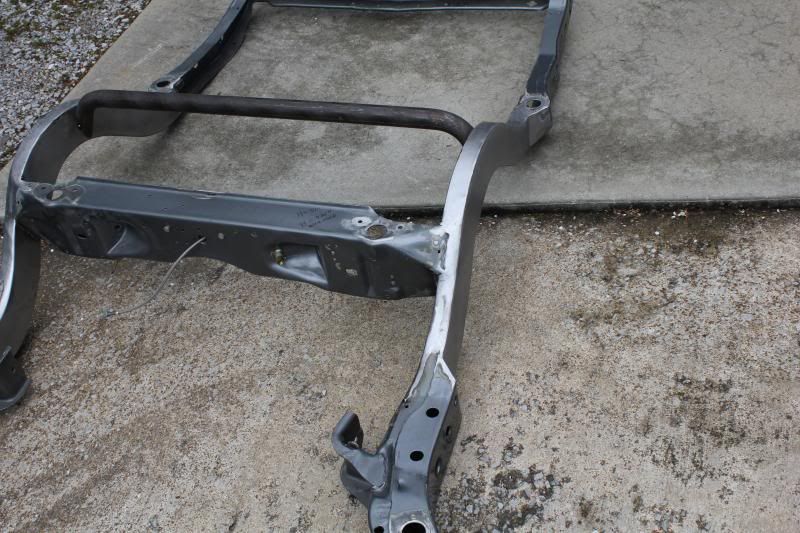
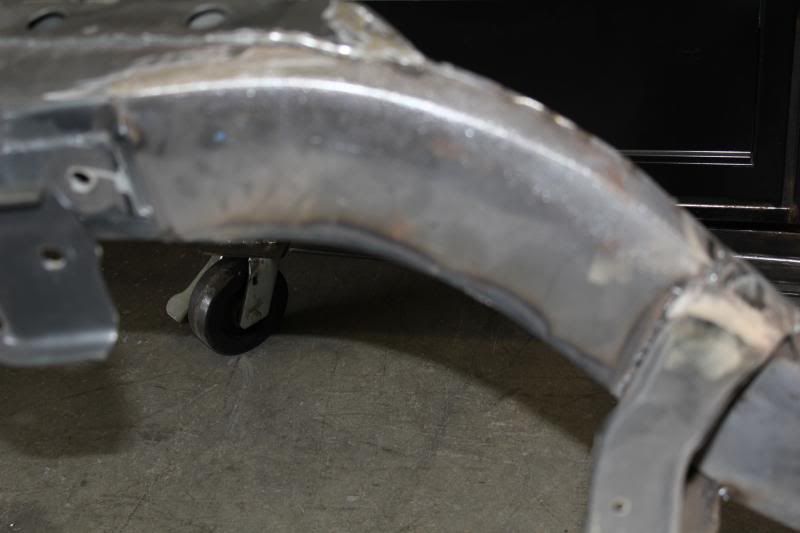
Here is the HPI portion of the frame.
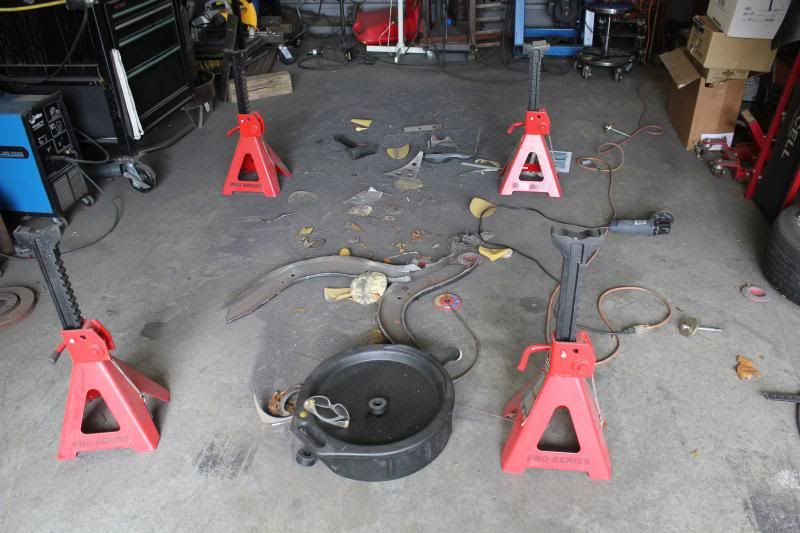

WOW. what a mess.


There is a lot of dust on the floor. Went through many discs and flapper wheels.


Tore down the frame jig.


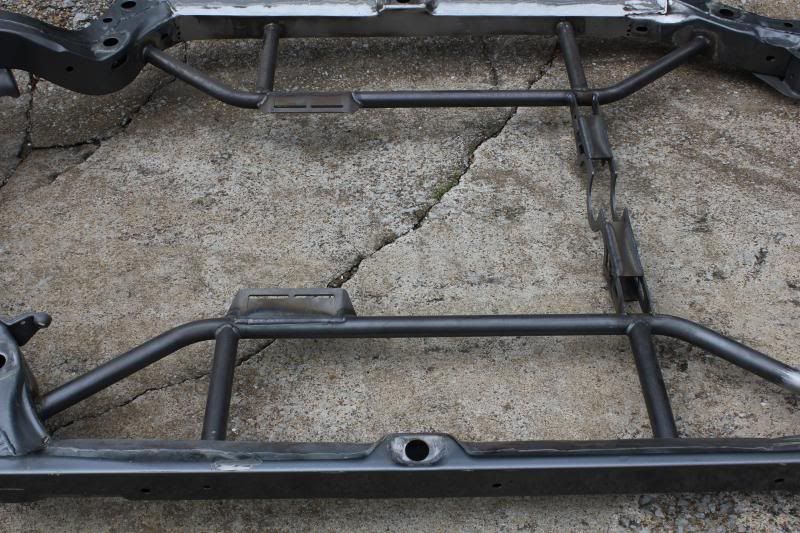
Cleaned up the floor and the garage. Took a while. Got the frame back in and turned over, ready for the few welds on the bottom that need to be finished.


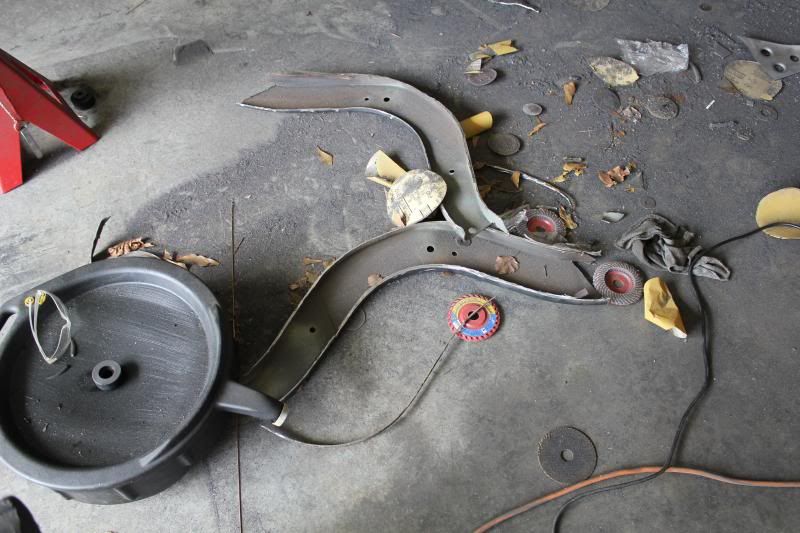
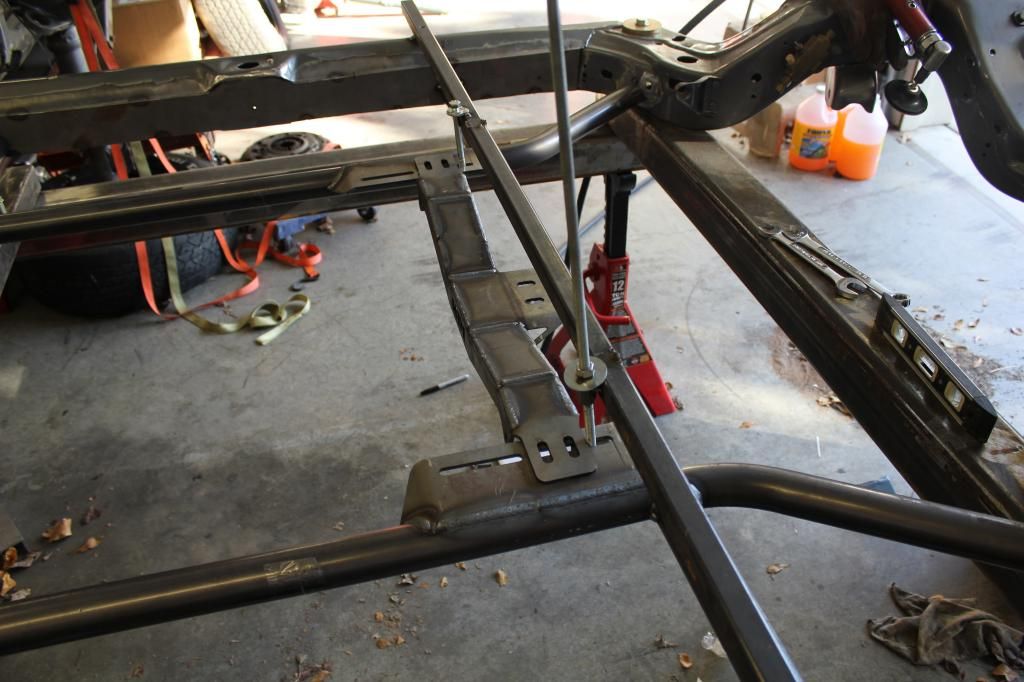
Her is one of the plates that ABC provides in their kit. It finishes out the frame rail and strengthens it at the control arm mount.


That's about it for now. I hope to finish up the welding this week. I had planned to have the body blasted before I put the frame under it. I think I am going to wait. I'll mount the body, do the tubs in the rear. and get everything done and then go back to blasting the body.

HEEP
Reply With Quote
  #34  
Old 03-24-2013, 09:20 PM
Che70velle's Avatar
Che70velle Che70velle is offline
Senior Member
 
Join Date: Aug 2012
Location: Dawsonville Georgia
Posts: 2,242
Thanks: 628
Thanked 167 Times in 113 Posts
Default

Nice work! Post some pics of the rear inner fender to frame clearance, before you begin the mini tub work. I'd like to see what your working with in that area.
Frame looks great!
__________________
Scott
---------------------------------------------------------------
70 velle' on custom chassis w/custom RideTech coilovers, RED sleeved 434” with Mamo 265’s, F-body Magnum, 12 bolt 3:73, wilwood 6/4's, bla, bla, bla...build. thread https://lateral-g.net/forums/showthread.php4?t=39631
New 434” engine build here https://ls1tech.com/forums/generatio...ved-block.html

Thanks Dad!!

My Chevelle is old school... It has a belt driven power steering pump.
They're 17's, but I keep em clean!
Reply With Quote
  #35  
Old 03-25-2013, 06:58 AM
214Chevy's Avatar
214Chevy 214Chevy is offline
Lateral-g Supporting Member
 
Join Date: Jul 2008
Location: DALLAS, Texas
Posts: 4,660
Thanks: 390
Thanked 619 Times in 387 Posts
Default

Looking good bro. With the framework on the rear, how wide of a tire can you now go?
__________________
'68 C10 swb
'69 Camaro convertible
'72 Chevelle

Reply With Quote
  #36  
Old 03-25-2013, 08:20 AM
strtcar strtcar is offline
Senior Member
 
Join Date: Mar 2010
Location: Buffalo Grove, IL
Posts: 274
Thanks: 0
Thanked 0 Times in 0 Posts
Default

looking great.
Reply With Quote
  #37  
Old 03-25-2013, 08:25 AM
dug dug is offline
Senior Member
 
Join Date: Mar 2012
Posts: 153
Thanks: 0
Thanked 2 Times in 2 Posts
Default

How many hours do you think you have in doing the frame modifications shown?
__________________
Doug

1970 chevelle, 383/turbocharged/carb'd/5 speed.
Reply With Quote
  #38  
Old 03-25-2013, 10:57 AM
HEEP's Avatar
HEEP HEEP is offline
Senior Member
 
Join Date: Dec 2008
Location: Chattanooga, TN
Posts: 520
Thanks: 0
Thanked 70 Times in 29 Posts
Default

Quote:
Originally Posted by Che70velle View Post
Nice work! Post some pics of the rear inner fender to frame clearance, before you begin the mini tub work. I'd like to see what your working with in that area.


Frame looks great!
I definitely will. I am anxious to get to that point. It will be a big undertaking for me to do the tubs.


Quote:
Originally Posted by 214Chevelle View Post
Looking good bro. With the framework on the rear, how wide of a tire can you now go?
ABC is saying 335s back there. I will have to wait to see. I need to get my hands on some tires for testing.

Quote:
Originally Posted by strtcar View Post
looking great.
Thanks, I am happy with how it is turning out.

Quote:
Originally Posted by dug View Post
How many hours do you think you have in doing the frame modifications shown?
Dug, in my mind too many. However, I was trying to learn to TIG while installing the HPI kit.
I think I had about 24hrs in the front portion, and about 30hrs in the rear.

HEEP

Last edited by HEEP; 03-25-2013 at 10:59 AM.
Reply With Quote
  #39  
Old 03-25-2013, 07:56 PM
E.rodz's Avatar
E.rodz E.rodz is offline
Senior Member
 
Join Date: Sep 2008
Location: st. paul mn.
Posts: 649
Thanks: 0
Thanked 4 Times in 4 Posts
Default

nice job on the build so far keep the picts. coming! way to step up and go for it having new skills is a great thing!
__________________
my name is Eric Hokenson I have a dream of building ten of the coolest hot rods out of my home shop wish me luck I am going to need it! - more pics on my web site www.erodzcustoms.com this is just for fun and i am NOT looking for any more work!
Thank you supporting sponsors! without you guys there is no way I could do this myself !
Modern automotive performance,Ring bros.,Yank convertors,extreme drive systems,Cj tunes,race coatings stainless works,Modern Automotive Performance.all of these shops have the experience to get your car to the top.
Reply With Quote
  #40  
Old 03-25-2013, 08:00 PM
214Chevy's Avatar
214Chevy 214Chevy is offline
Lateral-g Supporting Member
 
Join Date: Jul 2008
Location: DALLAS, Texas
Posts: 4,660
Thanks: 390
Thanked 619 Times in 387 Posts
Default

Quote:
Originally Posted by 214Chevelle View Post
A 335 would be money. Any wheel choice in mind? I vote Forgeline RB3C. Man, I love those wheels.
^^^^^ Uhh, so have we made a decision yet. Like I previously stated...Forgeline RBC3's right?
__________________
'68 C10 swb
'69 Camaro convertible
'72 Chevelle

Reply With Quote
Reply


Posting Rules
You may not post new threads
You may not post replies
You may not post attachments
You may not edit your posts

BB code is On
Smilies are On
[IMG] code is On
HTML code is Off

Forum Jump


All times are GMT -5. The time now is 05:22 PM.


Powered by vBulletin® Version 3.8.11
Copyright ©2000 - 2024, vBulletin Solutions Inc.
Copyright Lateral-g.net