...

Go Back   Lateral-g Forums > Lateral-G Open Discussions > Project Updates
User Name
Password


Reply
 
Thread Tools Display Modes
  #31  
Old 12-29-2021, 01:16 AM
SuperBuickGuy SuperBuickGuy is offline
Senior Member
 
Join Date: Aug 2021
Location: Puget Sound Washington
Posts: 221
Thanks: 12
Thanked 188 Times in 117 Posts
Default

Digging through my photos... my first Autox ever....

https://i.imgur.com/nc3blui.mp4
https://i.imgur.com/9v1RqjF.mp4

please be kind... there's a much funnier one but I'll save that for later.. it's from inside the car and had a bit of editorial

Last edited by SuperBuickGuy; 12-29-2021 at 01:21 AM.
Reply With Quote
The Following User Says Thank You to SuperBuickGuy For This Useful Post:
camcojb (12-29-2021)
  #32  
Old 12-29-2021, 11:56 PM
SuperBuickGuy SuperBuickGuy is offline
Senior Member
 
Join Date: Aug 2021
Location: Puget Sound Washington
Posts: 221
Thanks: 12
Thanked 188 Times in 117 Posts
Default measure for wing

so there's a much larger discussion about requirements of Optima and SCCA.... suffice to say Ciro Racing is helping then making the wing for my car.... and this is the information they need

the tl;dr

find the center line, then make a straight line above it (roof line)


an issue that is important is that the spoiler isn't straight

and the furthest point (as required for the rules)

the angle at the point where the spoiler will live

the legs will drop onto or beside the frame rails - this is where the frame rails are

and the total width of the legs

again with dimensions


center line is 4"

this is more for info purposes only and not directly related to the issue at hand


Reply With Quote
  #33  
Old 01-02-2022, 11:09 PM
SuperBuickGuy SuperBuickGuy is offline
Senior Member
 
Join Date: Aug 2021
Location: Puget Sound Washington
Posts: 221
Thanks: 12
Thanked 188 Times in 117 Posts
Default

First... nutty dog shot....


today was mostly organizing my shop but got started (again) on the gas tank

then lay out
​​​​​​​
I need to build a die

there it is, just got to get metal tomorrow
Reply With Quote
  #34  
Old 01-04-2022, 01:12 AM
SuperBuickGuy SuperBuickGuy is offline
Senior Member
 
Join Date: Aug 2021
Location: Puget Sound Washington
Posts: 221
Thanks: 12
Thanked 188 Times in 117 Posts
Default

Big (stupid) wing coming
​​​​​​​


I bought from CIRO racing. The guy who owns the company races a C3 and has done really well autocrossing. Nice guy too...

Okay so to explain 'stupid' I made a friend a couple years ago now, he's an autistic kid named Anthony.... he is amazing at forced perspective photography.... what is that?

go here and ask yourself 'real' or 'toy'

https://anthonyryanschmidt.com/gallery

some are easier to tell.... truth is, they're all toys. And he's 13. We've become friends - so much shadow of who I was at his age - anywho, his brother is a car nut too.... I think he's 8. But he's a car nut too - likes imports (I'll fix this - I already Anthony saying 'stock is boring') - and I showed him what I plan... his response was "big stupid wing".... so I explained to him why the big stupid wing and as any good 8 year old, he's fully on board with the idea now. But from here on out, it's the big, stupid wing.

and to close the circle there a bit - the family lives 5 miles from me and Luigi's brother is their dog.

but I'll have a pinstriped on the carbon wing 'big stupid wing'
Reply With Quote
  #35  
Old 01-06-2022, 12:09 AM
SuperBuickGuy SuperBuickGuy is offline
Senior Member
 
Join Date: Aug 2021
Location: Puget Sound Washington
Posts: 221
Thanks: 12
Thanked 188 Times in 117 Posts
Default

New tool

in use

so time to fix 2 problems... first I can't get enough caster but also too wide, this will gain me almost an inch - which, major bonus is the front tires won't rub on the fenders....

quite frankly, this is why I built this in... so now mark... tomorrow cut
​​​​​​​
Reply With Quote
  #36  
Old 01-07-2022, 12:07 AM
SuperBuickGuy SuperBuickGuy is offline
Senior Member
 
Join Date: Aug 2021
Location: Puget Sound Washington
Posts: 221
Thanks: 12
Thanked 188 Times in 117 Posts
Default

Sooo, I know, brakes only slow you down....
and I know, no holes

these actually came with the rear when I bought it.... no idea miles but they got me on the road

back is done....

front is going to take a minute since I don't have a 10 mm tap
chop is done

tacked the fronts again.... a bit more grinding but I also need a tap to chase the threads

Last edited by SuperBuickGuy; 01-07-2022 at 12:55 PM.
Reply With Quote
The Following User Says Thank You to SuperBuickGuy For This Useful Post:
camcojb (01-07-2022)
  #37  
Old 01-09-2022, 12:46 AM
SuperBuickGuy SuperBuickGuy is offline
Senior Member
 
Join Date: Aug 2021
Location: Puget Sound Washington
Posts: 221
Thanks: 12
Thanked 188 Times in 117 Posts
Default

Tap got, reassembled...


gained 2* I need to open up the new rotors a bit then align it.... all by 1 tomorrow
Reply With Quote
  #38  
Old 01-10-2022, 12:00 AM
SuperBuickGuy SuperBuickGuy is offline
Senior Member
 
Join Date: Aug 2021
Location: Puget Sound Washington
Posts: 221
Thanks: 12
Thanked 188 Times in 117 Posts
Default

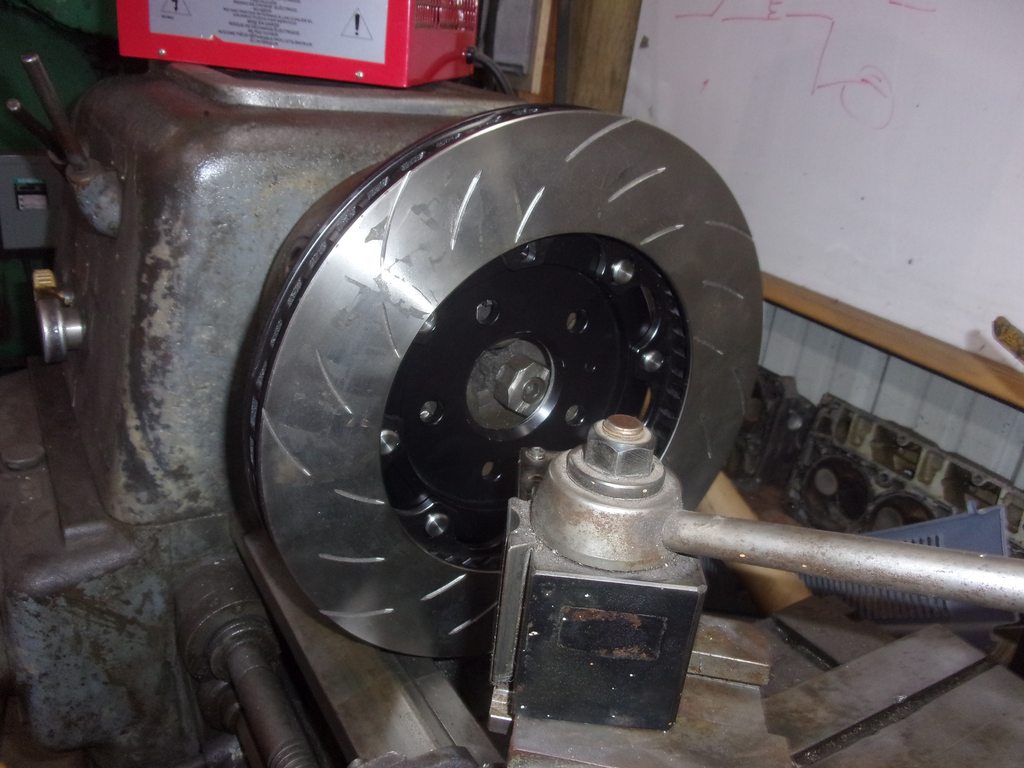
Brakes. To catch up, the spindle is C5/C6 corvette - which has a larger hub ring then the Camaro - why, dunno, but it does so a warranty was broken, again
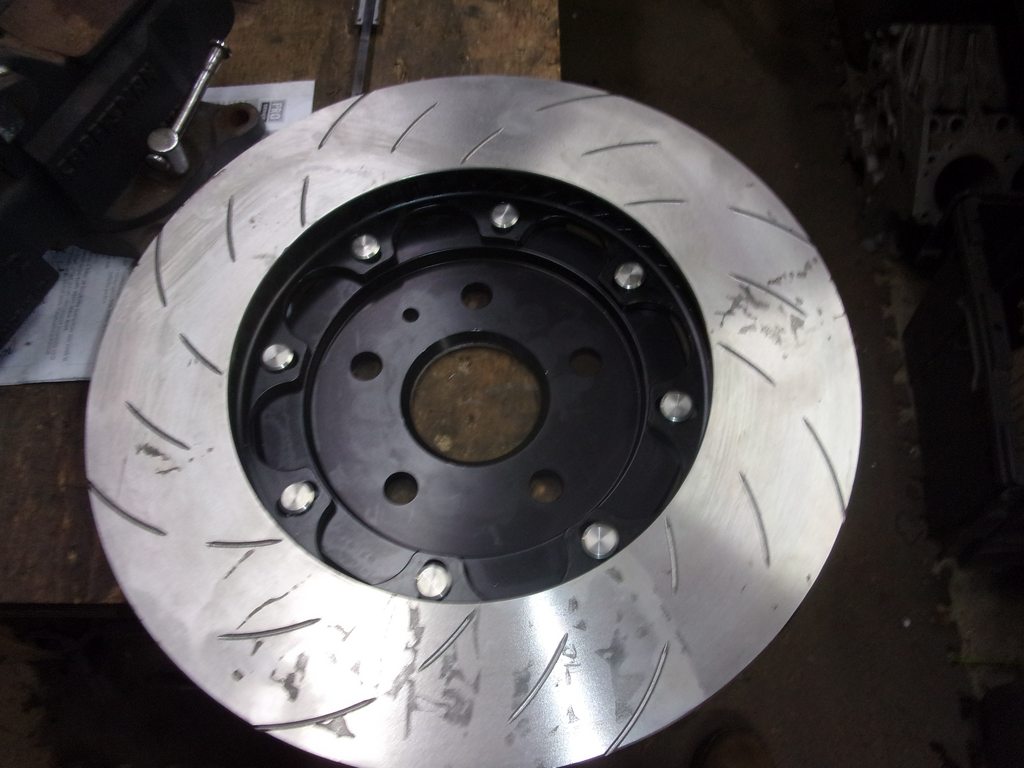
I may not use my lathe often, but when I need it, it really is handy
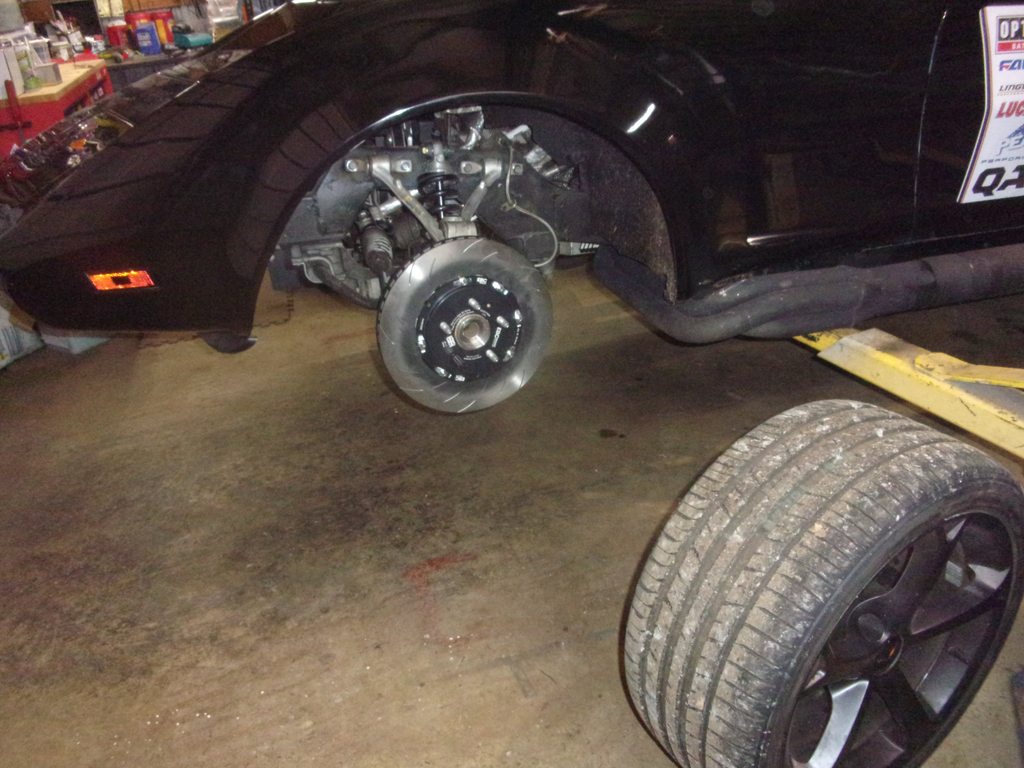
2.5 degrees camber, 7 degree caster. Drove it today, drives great... I may put shims in it for 'normal' driving and get back to 1.5* and 5 or so caster

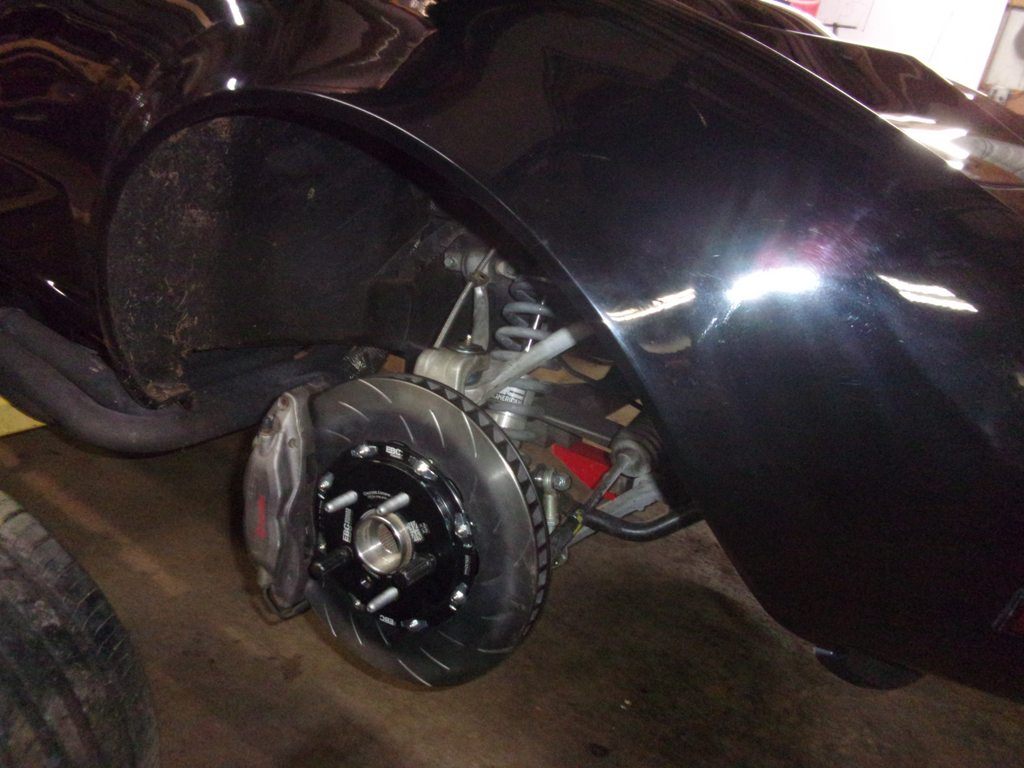
bling
trying to decide whether or not to repaint the caliper.... probably won't, but at least I considered it?
It's their rules, but I refuse to invest big dollars in something that I don't need....

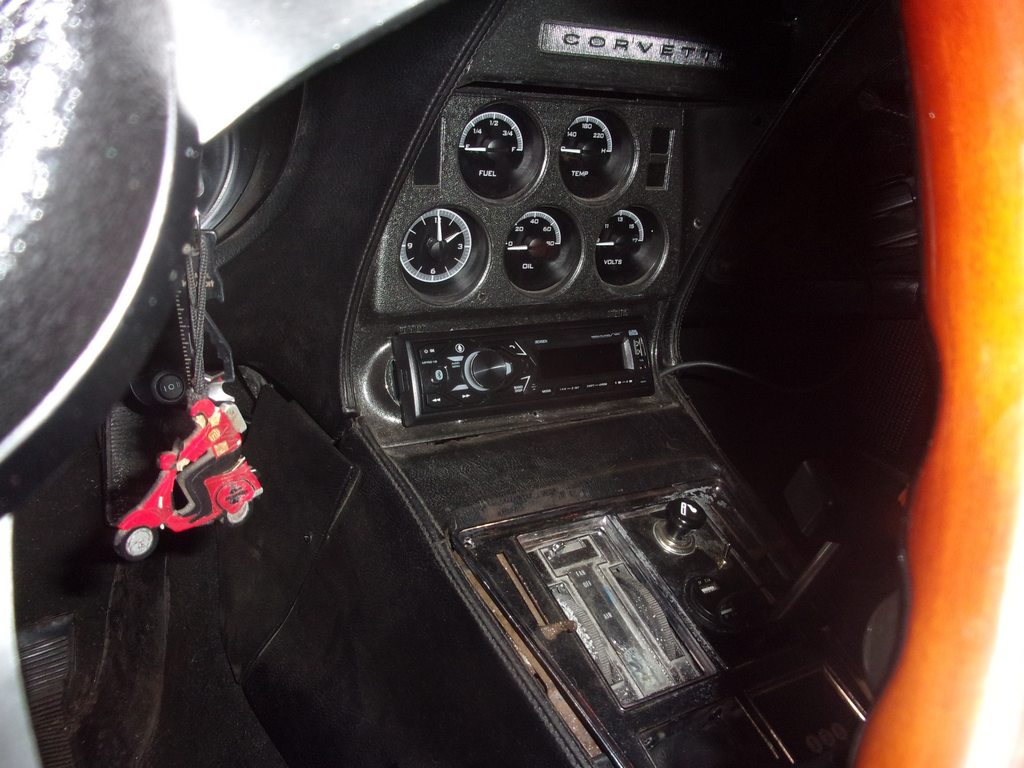
$36.00 - I think the speakers set me back $12
Reply With Quote
  #39  
Old 01-12-2022, 12:47 AM
SuperBuickGuy SuperBuickGuy is offline
Senior Member
 
Join Date: Aug 2021
Location: Puget Sound Washington
Posts: 221
Thanks: 12
Thanked 188 Times in 117 Posts
Default

time to clean up some wiring and install the radio
easier to just take it apart

one of the really cool things about the Dakota Digital dash is it's 2 plugs to remove it all

and install the chassis

the vent didn't secure to the dash pad... fixing that and that stuff can fall into it

the tabs will hold the duct to the dash pad... all epoxied in place

now no stuff down the vent
Reply With Quote
The Following User Says Thank You to SuperBuickGuy For This Useful Post:
camcojb (01-12-2022)
  #40  
Old 01-14-2022, 12:28 AM
SuperBuickGuy SuperBuickGuy is offline
Senior Member
 
Join Date: Aug 2021
Location: Puget Sound Washington
Posts: 221
Thanks: 12
Thanked 188 Times in 117 Posts
Default

most of the reason I took the dash out was to put speakers and clean up wiring... also, to install the remote door locks... first speakers

epoxy is great for stopping rattles

and speaker installs


I'd never put a stereo in this but it's what gets me points.... next up is reinstall, align the windows, install the remote locks, install reverse lights.... all for the points
​​​​​​

I'll also probably have the wheels powder coated... they've grown on me....
Reply With Quote
Reply


Posting Rules
You may not post new threads
You may not post replies
You may not post attachments
You may not edit your posts

BB code is On
Smilies are On
[IMG] code is On
HTML code is Off

Forum Jump


All times are GMT -5. The time now is 05:00 PM.


Powered by vBulletin® Version 3.8.11
Copyright ©2000 - 2024, vBulletin Solutions Inc.
Copyright Lateral-g.net