...

Go Back   Lateral-g Forums > Technical Discussions > How To's, Tips, and Tricks
User Name
Password


Reply
 
Thread Tools Display Modes
  #31  
Old 01-24-2017, 03:53 PM
NOT A TA's Avatar
NOT A TA NOT A TA is offline
Senior Member
 
Join Date: Mar 2007
Location: South Florida
Posts: 671
Thanks: 6
Thanked 25 Times in 23 Posts
Default

Quote:
Originally Posted by Doug1 View Post
Thought's I'd post this since it came in my email today....

https://garage.eastwood.com/eastwood...ontent=1EM4641
Thanks Doug, just when I'd finally stopped searching CL for a used EW I don't have space for. uggggh

Here's some correct reproduction inner fender extensions I make in small batches for 77-78 and 79-81 Firebirds. Just use a cheapo HF roller for them.


__________________
John Paige

70 Firebird Esprit, 400 TA clone type "The 14 car"
lab-14.com
Reply With Quote
  #32  
Old 01-24-2017, 04:15 PM
SuperB70's Avatar
SuperB70 SuperB70 is offline
Senior Member
 
Join Date: Nov 2009
Location: Finland, Europe
Posts: 299
Thanks: 18
Thanked 69 Times in 28 Posts
Default

Here is my new machine, frame 8mm ~almost 3/8" steel, 25mm~ 1" shafts. Here you can see handels for upper shalf 3" adjustment. Same set up as old one but bigger, deeper and much more heavier.


And here something I've done with it:

Lion of Finland:


This was just a pragtice, new plastic die I made:


A simple flame job:

__________________
Juhani
Custom Creations Oy (inc.)
CeeCeeOy IG page
Reply With Quote
  #33  
Old 01-24-2017, 10:30 PM
NOT A TA's Avatar
NOT A TA NOT A TA is offline
Senior Member
 
Join Date: Mar 2007
Location: South Florida
Posts: 671
Thanks: 6
Thanked 25 Times in 23 Posts
Default

Nice machine! I'd love to play with one that big.
__________________
John Paige

70 Firebird Esprit, 400 TA clone type "The 14 car"
lab-14.com
Reply With Quote
  #34  
Old 01-25-2017, 08:10 AM
Josh@Ridetech's Avatar
Josh@Ridetech Josh@Ridetech is offline
Lateral-g Supporting Vendor
 
Join Date: Apr 2013
Posts: 382
Thanks: 17
Thanked 21 Times in 13 Posts
Default

Quote:
Originally Posted by SuperB70 View Post
Here is my new machine, frame 8mm ~almost 3/8" steel, 25mm~ 1" shafts. Here you can see handels for upper shalf 3" adjustment. Same set up as old one but bigger, deeper and much more heavier.


And here something I've done with it:

Lion of Finland:


This was just a pragtice, new plastic die I made:


A simple flame job:

"Just practice" he says... lol

You're talented! Keep it up
__________________
Reply With Quote
  #35  
Old 01-25-2017, 12:13 PM
Doug1's Avatar
Doug1 Doug1 is offline
Senior Member
 
Join Date: Sep 2009
Posts: 266
Thanks: 1
Thanked 10 Times in 3 Posts
Default

That is a serious piece of equipment!

I'm just getting started and doubt I will make anything too complex. Being able to build floor pan pieces and other small patch pieces would be my goal. My brother bought this for me for Christmas, completely unexpected. Heaviest present I ever got. I still have to get it out the box and assemble it when I get some free time.

http://www.northerntool.com/shop/too...0087_200660087
Reply With Quote
  #36  
Old 01-25-2017, 02:34 PM
SuperB70's Avatar
SuperB70 SuperB70 is offline
Senior Member
 
Join Date: Nov 2009
Location: Finland, Europe
Posts: 299
Thanks: 18
Thanked 69 Times in 28 Posts
Default

Thanks guy's

I builded my first beadroller about 20 years ago.

I still stand behind that you need to practice. Also need to know how to work.

For these better to have motorized model w/food pedal.

Plan first how and in what order.

If doing multible beads or deep ones, pre strech. I use EW or planishing hammer.

Get good tools, practice with them. Get enough free space, a comfortable position, good chair, support table.

One important matter is how to draw your lines, picture to sheet. Some print to sticky paper, I print idea to clear film and shoot it to wall with old school projector. Hang my work piece to wall and trow the lines with marker. I made inner fender to one of my project today:


Cant show you any more yet so dont ask. All in good times.
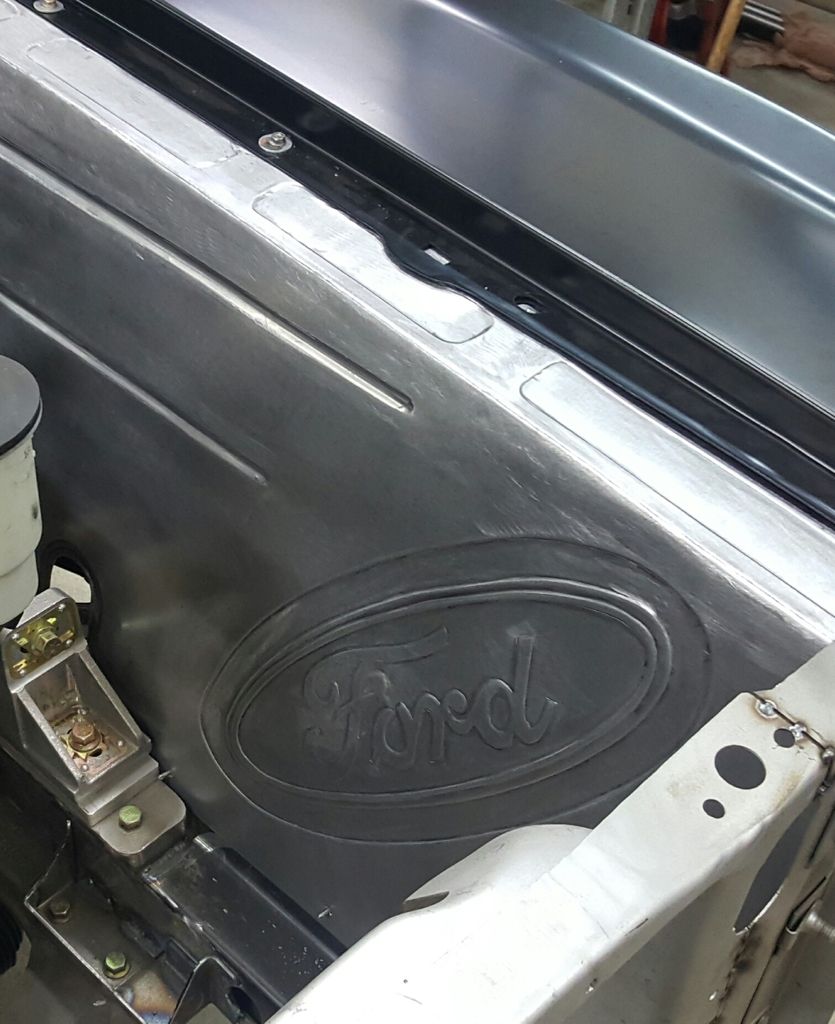

Its just one way to do it. What works best. World is full with better ones than me. But thx anyway.
__________________
Juhani
Custom Creations Oy (inc.)
CeeCeeOy IG page

Last edited by SuperB70; 06-03-2019 at 02:30 PM.
Reply With Quote
  #37  
Old 01-25-2017, 02:37 PM
SuperB70's Avatar
SuperB70 SuperB70 is offline
Senior Member
 
Join Date: Nov 2009
Location: Finland, Europe
Posts: 299
Thanks: 18
Thanked 69 Times in 28 Posts
Default

Quote:
Originally Posted by Doug1 View Post
That is a serious piece of equipment!

I'm just getting started and doubt I will make anything too complex. Being able to build floor pan pieces and other small patch pieces would be my goal. My brother bought this for me for Christmas, completely unexpected. Heaviest present I ever got. I still have to get it out the box and assemble it when I get some free time.

http://www.northerntool.com/shop/too...0087_200660087
I got that same chinise EW. Add 20ft of thick squaretube and it will stop flexing. Anvils are ok, lower anvil quick adjuster is a joke. You can work with out modifications but it flex and takes longer time to get job done.
__________________
Juhani
Custom Creations Oy (inc.)
CeeCeeOy IG page
Reply With Quote
  #38  
Old 04-08-2017, 10:06 AM
Grnova's Avatar
Grnova Grnova is offline
Senior Member
 
Join Date: Apr 2010
Location: Crown Point IN 46307
Posts: 196
Thanks: 1
Thanked 5 Times in 3 Posts
Default

Picked up a bead roller just need to clean it up a little. I was told it had not been used in 5 years


Tore it all apart cleaned it up all sanded down ready for prime.


__________________
Tim
Reply With Quote
  #39  
Old 04-08-2017, 10:08 AM
GregWeld's Avatar
GregWeld GregWeld is offline
Lateral-g Supporting Member
 
Join Date: Jul 2005
Location: Scottsdale, AriDzona
Posts: 20,741
Thanks: 504
Thanked 1,079 Times in 387 Posts
Default

WTF --- you painted all of that and left rusty stuff???


Hey -- nice find!!!!
Reply With Quote
  #40  
Old 04-08-2017, 10:16 AM
Grnova's Avatar
Grnova Grnova is offline
Senior Member
 
Join Date: Apr 2010
Location: Crown Point IN 46307
Posts: 196
Thanks: 1
Thanked 5 Times in 3 Posts
Default

Ha ha Greg still in the process. Everything should be done by end of today.

Just got it fitted on the new stand.

__________________
Tim
Reply With Quote
Reply


Posting Rules
You may not post new threads
You may not post replies
You may not post attachments
You may not edit your posts

BB code is On
Smilies are On
[IMG] code is On
HTML code is Off

Forum Jump


All times are GMT -5. The time now is 01:17 PM.


Powered by vBulletin® Version 3.8.11
Copyright ©2000 - 2024, vBulletin Solutions Inc.
Copyright Lateral-g.net