...

Go Back   Lateral-g Forums > Lateral-G Open Discussions > Project Updates
User Name
Password


Reply
 
Thread Tools Display Modes
  #31  
Old 10-24-2015, 05:26 PM
kwhizz's Avatar
kwhizz kwhizz is offline
Lateral-g Supporting Member
 
Join Date: Nov 2005
Location: Kenosha , wi
Posts: 1,138
Thanks: 755
Thanked 440 Times in 165 Posts
Default

That Shoddy workmanship just makes a guy Crazy !!!!..........Sheesh.....If they are going to take the time to fix some issues......Do it correctly !!!Great job Kev............

Ken
Reply With Quote
  #32  
Old 11-12-2015, 09:27 AM
V8TV's Avatar
V8TV V8TV is offline
Lateral-g Supporting Vendor
 
Join Date: Nov 2005
Posts: 1,889
Thanks: 8
Thanked 22 Times in 15 Posts
Default


Meanwhile, the crew was preparing to trial fit the Ridetech Street challenge suspension system on the Impala’s frame.


This kit consists of tubular upper and lower control arms, specific rate coil springs and coil over shock assemblies, and an oversized front sway bar. We were also installing an upgraded quick ratio steering box.


The original front suspension design used a straight lower control arm and a radius rod bolted to it. The Ridetech design is a vast improvement, using an “A” shaped tubular lower arm with an articulating end in the forward mount rather than a rubber bushing.


__________________
Kevin Oeste
V8 Speed and Resto Shop
V8TV
Muscle Car Of The Week
V8 Radio Podcast

All about us:
https://www.v8speedshop.com

Reply With Quote
  #33  
Old 11-12-2015, 01:16 PM
waynieZ's Avatar
waynieZ waynieZ is offline
Lateral-g Supporting Member
 
Join Date: Oct 2006
Location: Ma
Posts: 8,491
Thanks: 939
Thanked 342 Times in 231 Posts
Default

You almost need an extra tall rotisserie for that big boy! That suspension kit should make a big difference in the ride and handling.
__________________
_Wayne________

___________________________________
https://lateral-g.net/forums/show...ghlight=FNQUIK
Reply With Quote
  #34  
Old 12-06-2015, 12:34 PM
V8TV's Avatar
V8TV V8TV is offline
Lateral-g Supporting Vendor
 
Join Date: Nov 2005
Posts: 1,889
Thanks: 8
Thanked 22 Times in 15 Posts
Default

The rear suspension consists of tubular control arms with adjustable upper control arms, and a stronger panhard bar with improved bushings.


This frame had some old-school hot rod tricks, like these control arm support brackets that were stick-welded in. We removed them and reinforced the frame to appear more original.


We disassembled the rear axle assembly and media blasted the housing.


After epoxy and Imron enamel in satin black paint were applied, a new gearset was installed along with bearings and seals to make this 12 bolt rear axle like new again.


Here, the yellow paint illustrates the proper gear mesh contact pattern ensuring quiet operation.
__________________
Kevin Oeste
V8 Speed and Resto Shop
V8TV
Muscle Car Of The Week
V8 Radio Podcast

All about us:
https://www.v8speedshop.com

Reply With Quote
  #35  
Old 12-06-2015, 03:05 PM
kwhizz's Avatar
kwhizz kwhizz is offline
Lateral-g Supporting Member
 
Join Date: Nov 2005
Location: Kenosha , wi
Posts: 1,138
Thanks: 755
Thanked 440 Times in 165 Posts
Default

Make sure you put the steel bushings in the lower control arm bushings where the Camber adjusting screw goes thru the cross member.....easy to miss....ask me how I know........If you need some let me know as I have an extra set.........Also....when you finish the car and get the front end aligned....We had to put a lot of pressure on the front strut rod to get some caster in the front........Because the strut rods are solid mounted in the spherical bushing in the front.......the lower arm pulled forward on the bushings and the control arms were now rubbing against the inside of the cross member.........so we ended up shimming the control arm to get the Caster without the pressure on the arms...............Just Say'in !!!!

Ken
Reply With Quote
  #36  
Old 12-15-2015, 03:10 PM
V8TV's Avatar
V8TV V8TV is offline
Lateral-g Supporting Vendor
 
Join Date: Nov 2005
Posts: 1,889
Thanks: 8
Thanked 22 Times in 15 Posts
Default

Quote:
Originally Posted by kwhizz View Post
Make sure you put the steel bushings in the lower control arm bushings where the Camber adjusting screw goes thru the cross member.....easy to miss....ask me how I know........If you need some let me know as I have an extra set.........Also....when you finish the car and get the front end aligned....We had to put a lot of pressure on the front strut rod to get some caster in the front........Because the strut rods are solid mounted in the spherical bushing in the front.......the lower arm pulled forward on the bushings and the control arms were now rubbing against the inside of the cross member.........so we ended up shimming the control arm to get the Caster without the pressure on the arms...............Just Say'in !!!!

Ken
Thanks for the feedback Ken! We always appreciate the tips from others who've been "down the road before..."
__________________
Kevin Oeste
V8 Speed and Resto Shop
V8TV
Muscle Car Of The Week
V8 Radio Podcast

All about us:
https://www.v8speedshop.com

Reply With Quote
  #37  
Old 12-15-2015, 03:47 PM
V8TV's Avatar
V8TV V8TV is offline
Lateral-g Supporting Vendor
 
Join Date: Nov 2005
Posts: 1,889
Thanks: 8
Thanked 22 Times in 15 Posts
Default

The front suspension parts bolted to the frame. These are obviously not torqued to spec for driving, but in place to mock-up the build.


Quick-ratio steering gear.


The body was placed back on the frame, and the whole rig was supported on jackstands. It was time to finish fitting the 6.0 LS and T56 transmission in the car.


The transmission tunnel would need completion, but there’s only one way to know if something really fits, and that is to put it together and measure.


__________________
Kevin Oeste
V8 Speed and Resto Shop
V8TV
Muscle Car Of The Week
V8 Radio Podcast

All about us:
https://www.v8speedshop.com

Reply With Quote
  #38  
Old 12-15-2015, 03:48 PM
V8TV's Avatar
V8TV V8TV is offline
Lateral-g Supporting Vendor
 
Join Date: Nov 2005
Posts: 1,889
Thanks: 8
Thanked 22 Times in 15 Posts
Default

The floor opening was increased for the transmission and Quicktime bellhousing.


A loose cardboard mock-up was made to get an idea of the shape of the tunnel. This car will be running a stock 1965 Impala console, so a mounting surface was required for that as well.


The new tunnel was made and welded in place.


A few ribs were added to strengthen the firewall at the tunnel.


Now we had plenty of clearance for the transmission.

__________________
Kevin Oeste
V8 Speed and Resto Shop
V8TV
Muscle Car Of The Week
V8 Radio Podcast

All about us:
https://www.v8speedshop.com

Reply With Quote
  #39  
Old 01-19-2016, 02:36 PM
V8TV's Avatar
V8TV V8TV is offline
Lateral-g Supporting Vendor
 
Join Date: Nov 2005
Posts: 1,889
Thanks: 8
Thanked 22 Times in 15 Posts
Default

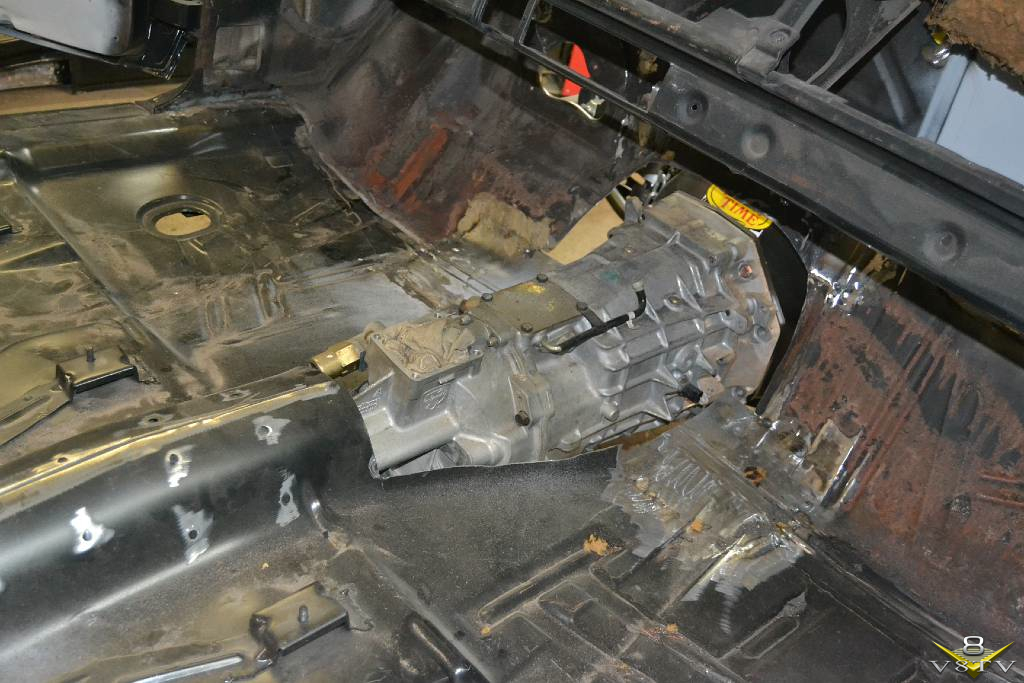
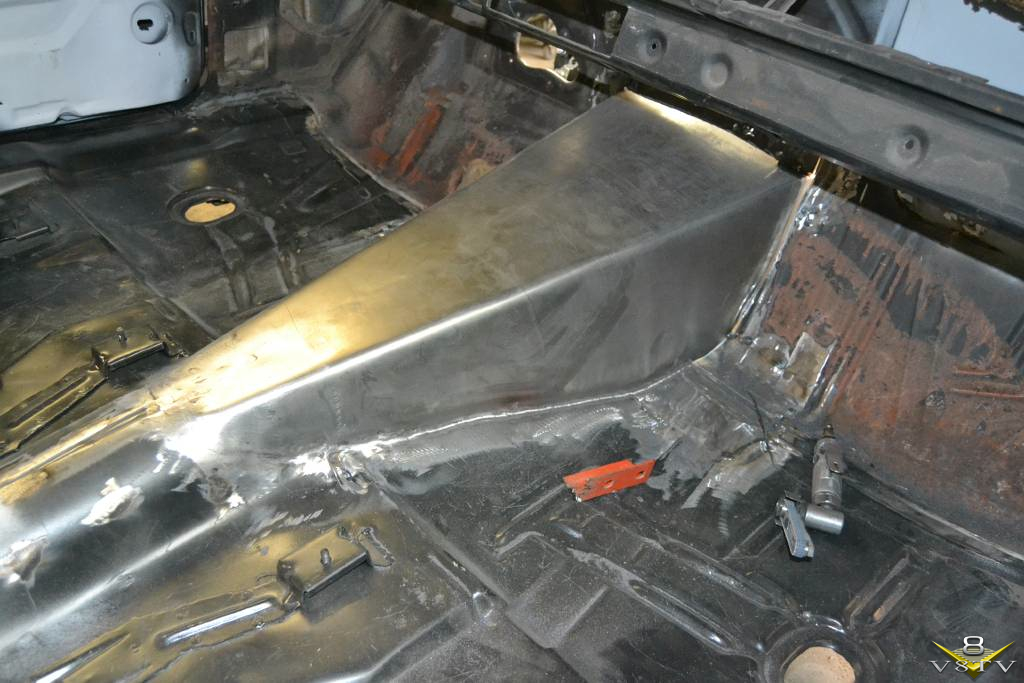
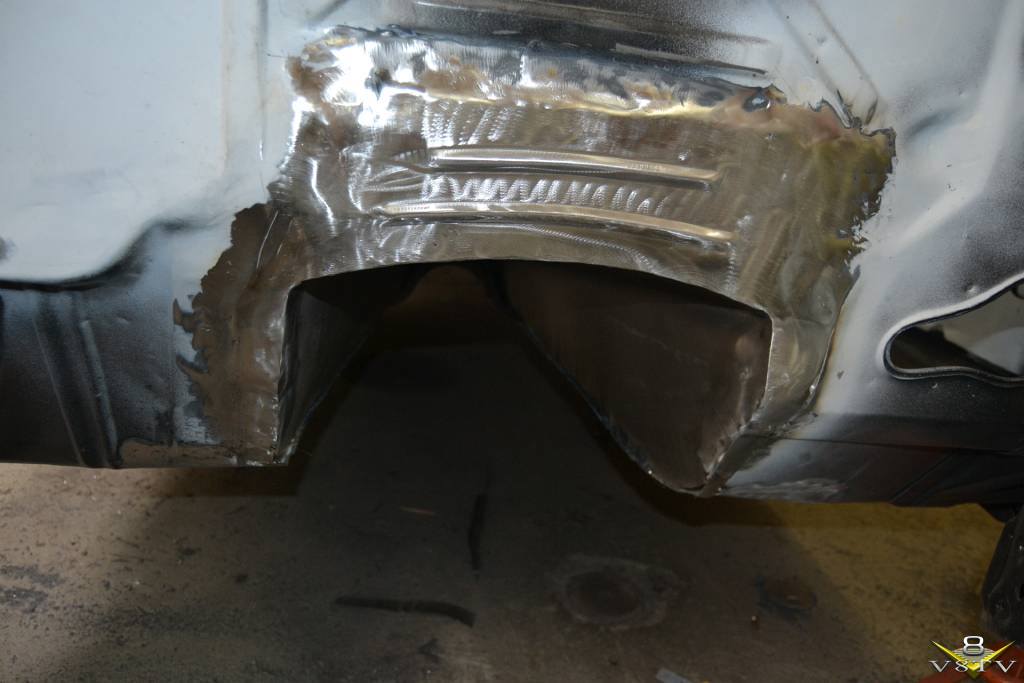
Next, the new transmission tunnel was fit to the original SS floor console.


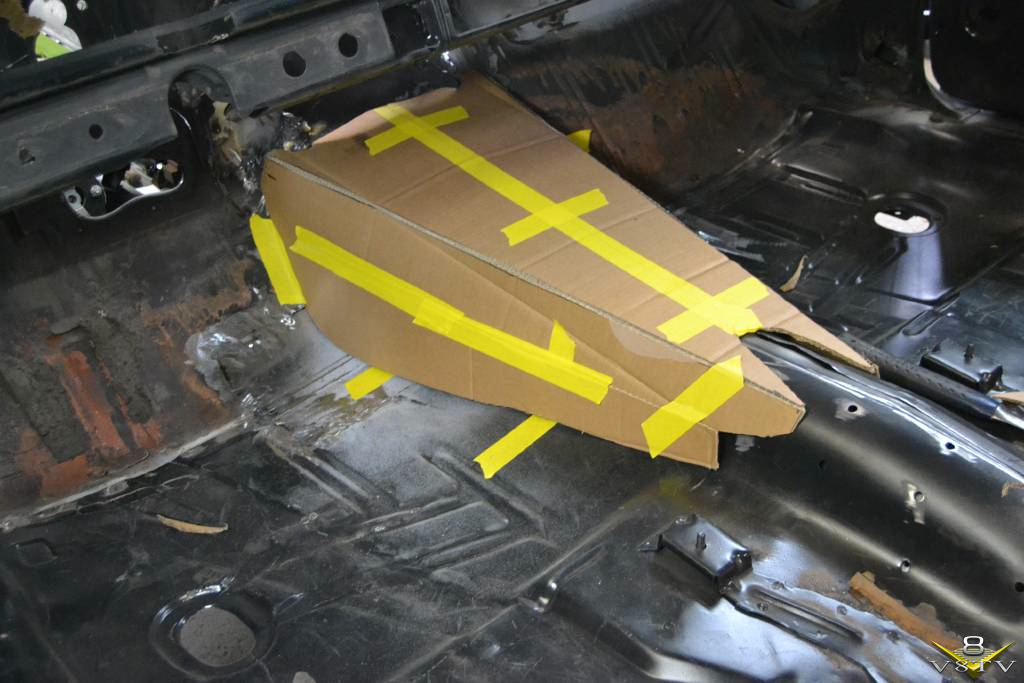
After the new console mounting brackets were made and installed, a considerable gap existed between the side of the console and the transmission tunnel, so a new base was made out of fiberglass to fill the void.


Wire framing was used to form the shape.


Fiberglass matting and resin was used to make the structure.


With the seats in place, and the new base sanded and primed, the gap is now filled.


This will be covered with carpet when finished.
__________________
Kevin Oeste
V8 Speed and Resto Shop
V8TV
Muscle Car Of The Week
V8 Radio Podcast

All about us:
https://www.v8speedshop.com

Reply With Quote
  #40  
Old 01-19-2016, 04:11 PM
im4u2nvss im4u2nvss is offline
Senior Member
 
Join Date: Jun 2013
Posts: 122
Thanks: 1
Thanked 6 Times in 5 Posts
Default

Quote:
Originally Posted by V8TV View Post
The floor opening was increased for the transmission and Quicktime bellhousing.


A few questions about transmission setup.

Did you run viper to ls bellhousing and turn input down, or convert front plate and input to LS?

Also, what are your plans for speed sensor?

Thanks
Reply With Quote
Reply


Posting Rules
You may not post new threads
You may not post replies
You may not post attachments
You may not edit your posts

BB code is On
Smilies are On
[IMG] code is On
HTML code is Off

Forum Jump


All times are GMT -7. The time now is 04:33 PM.


Powered by vBulletin® Version 3.8.11
Copyright ©2000 - 2026, vBulletin Solutions Inc.
Copyright Lateral-g.net