...

Go Back   Lateral-g Forums > Lateral-G Open Discussions > Project Updates
User Name
Password


Reply
 
Thread Tools Display Modes
  #401  
Old 01-20-2016, 12:39 PM
Ben@SpeedTech's Avatar
Ben@SpeedTech Ben@SpeedTech is offline
Senior Member
 
Join Date: Jul 2013
Posts: 939
Thanks: 0
Thanked 15 Times in 12 Posts
Default

Thanks for sharing the pics Lance! If you know of anyone with a filter top you can borrow, I'd be real curious how it affects airflow if you hit the chassis dyno. Amazing that something as simple as directing airflow can affect power.

When I had a cowl ind. scoop on my car in the fall it would "suck" leaves into it because of the pressure zone at the base of the windshield. It was a 2.5" scoop attached on top of the factory steel hood with the back completely open. Photo below shows my air cleaner housing (without the seal on it), and the leaves would collect down in there around the air cleaner. I guess that proves cowl induction really works. If you run the hood down on the dyno, maybe a small fan blowing into the back of the scoop would more accurately duplicate driving time.

__________________
-Ben, Creative Director
Reply With Quote
  #402  
Old 02-20-2016, 05:39 PM
SSLance's Avatar
SSLance SSLance is offline
Senior Member
 
Join Date: Oct 2013
Location: Peoria, AZ
Posts: 2,683
Thanks: 72
Thanked 338 Times in 212 Posts
Default

So, got back on it again today.


Over the past few days I replaced the motor mount inserts, removed and rinsed the radiator, over flow and heater core and cleaned up a bit of the wiring.

Today my job was to replace the pilot bearing and install the engine.

I'm almost 50 years old and I still find things that I am doing for the first time, this was one of those. A great resource for this is YouTube...I must have watched about 6 or 7 videos of people removing pilot bearings by packing some sort of crap inside the bearing, pounding a bolt in and the crap forces the bearing out of the crank. Eff That!! I spent over an hours first trying this with wheel bearing grease, then resorting to bread... Eventually I was so pissed, I drove up to O'Reilly, rented a pilot bearing removal tool and after setting it up it literally took me less than 30 seconds to remove the bearing.

Before starting


End of crank full of grease and clutch alignment tool used as a punch


All of the grease just flowed back out through the needle bearings.

Let's try bread...


Finally got smart


30 seconds later...waa laa...


After that, things went pretty smooth. Just took my time, went slow, made sure that the changes I made would work without issue.


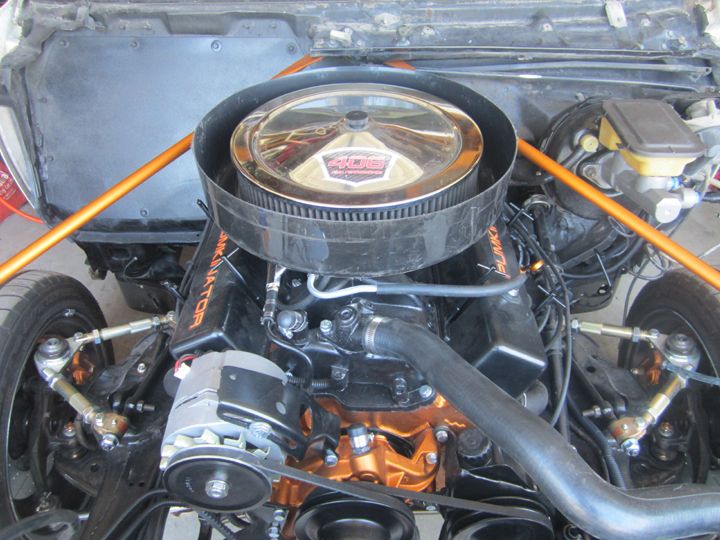
The engine is bolted in place, clutch installed, and starter wired up. Tomorrow I'll tidy up a few more new wire changes, drop the headers in...then maybe get the trans installed. But for now, here she sits...

__________________
Lance
1985 Monte Carlo SS Street Car
Reply With Quote
  #403  
Old 02-23-2016, 09:37 AM
SSLance's Avatar
SSLance SSLance is offline
Senior Member
 
Join Date: Oct 2013
Location: Peoria, AZ
Posts: 2,683
Thanks: 72
Thanked 338 Times in 212 Posts
Default

Who says you can't be fast...and beautiful...


My headers are about 4 years old now and the ceramic coating on them had taken quite a beating. Between the many many excessive heat cycles and the banging off other things in the engine compartment, they had some significant wear. I scuffed them up with some scotch brite, cleaned real good with prep spray and applied 3 light coats of Eastwoods aerosol Ceramic coating that is supposedly good to 1400 degrees. They turned out great so far, once in the car you are supposed to start the car and have it idle for 20 minutes to cure the coating. Can't wait to see how they turn out, can't be any worse than they already were.

Along the same lines, one thing that happens when you build a custom car...and then race the wee out of it like I have the past few years is things hit things, and things not properly placed melt. As I have the car apart, I took this opportunity to assess previous arrangements, plan changes, and put plans into motion. Getting the passenger and driver side engine wire harnesses to stay off of the headers better was a priority. I rearranged the harnesses, re-loomed them and have them secured much better now. This is something most will never see, but I'll know now that things are safer from heat under the hood.

I also noticed some witness marks where the transmission had been hitting the body. Specifically the shifter had been hitting the passenger side of the hole in the trans tunnel enough to actually tear the shifter cover. The cover has been replaced and the hole enlarged. I also used the BFH to make a bit more room for the two bolt heads on the top of the trans that were also contacting the trans tunnel at times. I then applied a fresh coat of Eastwoods Extreme Chassis black to tidy things back up underneath.


Next up, installing the transmission and then back up top to finish a few other detail items.
__________________
Lance
1985 Monte Carlo SS Street Car
Reply With Quote
  #404  
Old 02-23-2016, 08:13 PM
WSSix WSSix is offline
Lateral-g Supporting Member
 
Join Date: Nov 2008
Location: Dunwoody, GA
Posts: 6,539
Thanks: 1,344
Thanked 806 Times in 611 Posts
Default

nice work, Lance. Glad to know you're getting close to having the car back on the road.

What flywheel and clutch combo did you go with? I see that's a McLeod clutch. Is it their street twin? I'm finally working on getting my 383 built and am looking into clutches. I currently run a Fidanza aluminum flywheel and Luk replacement clutch and pp. I'd like to upgrade at least the clutch and pp. Not sure what to do about the flywheel. The aluminum has been fine and got even better once I installed 3.90s out back, no more difficult starts from stop. I'm just not sure if I should stay with it.

Thanks
__________________
Trey

Current rides: 2000 BMW 540i/6 and 86 C10.

Former ride: 1979 Trans Am WS6: LT1/T56, Kore 3 C5/6 brakes, BMW 18in rims
Reply With Quote
  #405  
Old 02-23-2016, 09:59 PM
SSLance's Avatar
SSLance SSLance is offline
Senior Member
 
Join Date: Oct 2013
Location: Peoria, AZ
Posts: 2,683
Thanks: 72
Thanked 338 Times in 212 Posts
Default

Thanks... I went with the Mcleod Street Extreme kit

http://www.mcleodracing.com/index.ph...lutch-kit.html

It is supposed to be good for up to 700 ft lbs. The RST twin was considered but with the new required flywheel it was going to be almost twice the money this setup cost.

I'm just hoping this is halfway street compliant...not like an on off switch. Also hoping it lasts longer than a year. I did find it interesting that the pressure plate that came with this kit has the exact same part number as the pressure plate that came with the RAM kit that I put in last year. The way I understand it, there is only one company that makes replacement PPs for the LT1 style clutch kits and everyone that sells an LT1 clutch kit uses them.
__________________
Lance
1985 Monte Carlo SS Street Car
Reply With Quote
  #406  
Old 02-24-2016, 02:55 PM
WSSix WSSix is offline
Lateral-g Supporting Member
 
Join Date: Nov 2008
Location: Dunwoody, GA
Posts: 6,539
Thanks: 1,344
Thanked 806 Times in 611 Posts
Default

Thanks Lance. Yeah, the street twin clutch has always been expensive and heavy. It was the best at holding the power back in the day though.

Luk is the company that produces the pp. You might be able to find a stamping on the pp from Luk. Factory replacement units are also supposedly LT4 equivalent designs. Let me know how it drives once you get it on the road.
__________________
Trey

Current rides: 2000 BMW 540i/6 and 86 C10.

Former ride: 1979 Trans Am WS6: LT1/T56, Kore 3 C5/6 brakes, BMW 18in rims
Reply With Quote
  #407  
Old 02-25-2016, 08:03 PM
Centerforce's Avatar
Centerforce Centerforce is offline
Lateral-g Supporting Vendor
 
Join Date: Feb 2016
Posts: 149
Thanks: 0
Thanked 1 Time in 1 Post
Default

Making good progress! Sorry to hear the bread didnt work out for you
Reply With Quote
  #408  
Old 02-28-2016, 06:39 PM
SSLance's Avatar
SSLance SSLance is offline
Senior Member
 
Join Date: Oct 2013
Location: Peoria, AZ
Posts: 2,683
Thanks: 72
Thanked 338 Times in 212 Posts
Default

Well, Barney moved under it's own power yesterday...twice actually... I made two ten mile easy drives just to shake it down and all systems are go, except for a somewhat nasty header leak that made it sound like a connecting rod was trying to fight it's way out of the engine.

Naturally this ruined the mood for me and I went dark for most of the weekend while I chased the problem...which I found today. Because I am running smallish oval port headers on raised D-port exhaust port heads, apparently there is very little margin for error in gasket placement. The gasket has about a 1/4" of wiggle room on the bolts where it moves around and if it is at any extreme edge of that movement, there is very little gasket material coverage of the flange. Here you can see where the gasket was stuck to the header flange and near the top you can where it blew thru as the heads heated up.


This was the other header where you can tell that the gasket was centered and there was no leaks on this side.


Once I had the new gaskets in hand, I discovered that the very same thing could happen to it if I didn't get the gasket set perfectly in place. I was standing there scratching my head, making marks on the gasket trying to figure out how I was going to line it up perfectly once the header was on the head...and Terri walked up and said, "why don't you just glue the gasket to the header?" So I did just that.


I'm letting the RTV set up now and next time I have a couple of free hours, I'll get the headers back on the car and continue on with a start up and tuning of the new mill. The new clutch feels great, no fluid leaks so far, no strange vibrations or running issues, everything else seems pretty good. Just need to do some tuning on it once I can hear if there is any detonation, which was impossible before over the header leak.
__________________
Lance
1985 Monte Carlo SS Street Car
Reply With Quote
  #409  
Old 02-28-2016, 07:28 PM
Vegas69's Avatar
Vegas69 Vegas69 is offline
Senior Member
 
Join Date: Dec 2006
Posts: 8,692
Thanks: 87
Thanked 215 Times in 120 Posts
Default

I wouldn't glue them around the ports. I know they make a high temp rtv, is that what you used?
__________________
Todd
Reply With Quote
  #410  
Old 02-28-2016, 07:47 PM
SSLance's Avatar
SSLance SSLance is offline
Senior Member
 
Join Date: Oct 2013
Location: Peoria, AZ
Posts: 2,683
Thanks: 72
Thanked 338 Times in 212 Posts
Default

I didn't have the High temp RTV on hand so I just used a few dabs of grey RTV on the parts between the ports. I did not put any too close to any of the ports.

I just need it to hold the gasket in place until the bolts are snugged up. I'm sure the RTV will cook out after a few heat cycles but at this point if that is the worst of the evils I'm dealing with, I'm okay with it.
__________________
Lance
1985 Monte Carlo SS Street Car
Reply With Quote
Reply


Posting Rules
You may not post new threads
You may not post replies
You may not post attachments
You may not edit your posts

BB code is On
Smilies are On
[IMG] code is On
HTML code is Off

Forum Jump


All times are GMT -5. The time now is 09:29 AM.


Powered by vBulletin® Version 3.8.11
Copyright ©2000 - 2025, vBulletin Solutions Inc.
Copyright Lateral-g.net