...

Go Back   Lateral-g Forums > Lateral-G Open Discussions > Project Updates
User Name
Password


Reply
 
Thread Tools Display Modes
  #51  
Old 01-13-2023, 10:40 AM
Ricochet's Avatar
Ricochet Ricochet is offline
Moderator
 
Join Date: Jul 2004
Location: Sacramento, Ca
Posts: 2,392
Thanks: 278
Thanked 334 Times in 109 Posts
Default

So cool to see this car coming together for V3, Andrew. As was mentioned so much history. Keep up the great work. Can't wait to see it done and being put the paces...
__________________
Brent
Reply With Quote
The Following User Says Thank You to Ricochet For This Useful Post:
andrewb70 (01-13-2023)
  #52  
Old 01-14-2023, 08:23 AM
WSSix WSSix is offline
Lateral-g Supporting Member
 
Join Date: Nov 2008
Location: Dunwoody, GA
Posts: 6,458
Thanks: 935
Thanked 688 Times in 540 Posts
Default

Do a single exhaust that dumps behind the bumper so it's mainly hidden?

I've thought about doing this with the C10 just to keep costs down. All I want is a good sound. I don't care about seeing the exhaust tips.
__________________
Trey

Current rides: 2000 BMW 540i/6 and 86 C10.

Former ride: 1979 Trans Am WS6: LT1/T56, Kore 3 C5/6 brakes, BMW 18in rims
Reply With Quote
  #53  
Old 01-14-2023, 09:39 AM
andrewb70's Avatar
andrewb70 andrewb70 is offline
Lateral-g Supporting Vendor
 
Join Date: Jul 2005
Posts: 892
Thanks: 232
Thanked 512 Times in 226 Posts
Default

Quote:
Originally Posted by WSSix View Post
Do a single exhaust that dumps behind the bumper so it's mainly hidden?

I've thought about doing this with the C10 just to keep costs down. All I want is a good sound. I don't care about seeing the exhaust tips.
Normally I would do just that, like I did with the Cougar. However, one of the distinct styling features of 1970 GTOs is that the exhaust tips pass through cut-outs in the car valance. So I either get a LeMans rear valance and have it painted, or I split the exhaust and do dual tips.


I already have a 4" to dual 3" splitter from Burns Stainless. It will just be a matter of splitting out the pipes, adding 2 mufflers and tail pipes.

Andrew
__________________
Instagram @projectgattago
I offer remote Holley EFI tuning.
I deliver what EFI promises.
Please get in touch if I can be of service.
My YouTube Channel

Last edited by andrewb70; 01-14-2023 at 10:00 AM.
Reply With Quote
  #54  
Old 01-14-2023, 12:24 PM
camcojb's Avatar
camcojb camcojb is offline
Administrator
 
Join Date: Jul 2004
Location: Wilton, CA.
Posts: 12,876
Thanks: 5,303
Thanked 1,570 Times in 699 Posts
Default

Quote:
Originally Posted by andrewb70 View Post
Normally I would do just that, like I did with the Cougar. However, one of the distinct styling features of 1970 GTOs is that the exhaust tips pass through cut-outs in the car valance. So I either get a LeMans rear valance and have it painted, or I split the exhaust and do dual tips.


I already have a 4" to dual 3" splitter from Burns Stainless. It will just be a matter of splitting out the pipes, adding 2 mufflers and tail pipes.

Andrew
Split it...
__________________
Jody

PAST CAR PROJECTS

Like Lateral-G on Facebook!

Follow Lateral-G on Instagram!

SPECIAL THANKS TO:
Jacob Ehlers and Amsoil for the lubricants and degreasers for my 70 Chevelle project
Shannon at Modo Innovations for the cool billet DBW bracket
Roadster Shop for their Chevelle SPEC Chassis
Dakota Digital for their Chevelle HDX Gauge Package
Painless Performance for their wiring harness

Ron Davis Radiators for their radiator and fan assembly.
Baer Brakes for their front and rear brakes

Texas Speed and Performance for their 427 LS Stroker
American Powertrain for their ProFit Magnum T56 kit
Currie Enterprises for their 9" Third Member
Forgeline for their GF3 Wheels
McLeod Racing for their RXT street twin clutch
Ididit for their steering column
Holley for their EFI and engine parts
Lokar and Clayton Machine for their pedals and door and window handles
Morris Classic Concepts for their 3 point belts and side mirrors
Thermotec for their heat sleeve and sound deadening products
Restomod Air for their Tru Mod A/C kit
Mightymouse Solutions for their catch can
Magnaflow for their 3" exhaust system
Aeromotive for their dual Phantom fuel system
Vintage Air for their new Mid Mount LS front drive
Hydratech Braking for their hydroboost system
Borgeson for their stainless steering shaft and u joints
Eddie Motorsports for their hood and trunk hinges and misc parts
TMI Products for their seats, door panels, and dash pad
Rock Valley Antique Auto Parts for their stainless fuel tank
Reply With Quote
The Following 2 Users Say Thank You to camcojb For This Useful Post:
colorado80439 (01-15-2023), kwhizz (01-15-2023)
  #55  
Old 01-14-2023, 08:59 PM
andrewb70's Avatar
andrewb70 andrewb70 is offline
Lateral-g Supporting Vendor
 
Join Date: Jul 2005
Posts: 892
Thanks: 232
Thanked 512 Times in 226 Posts
Default

Quote:
Originally Posted by camcojb View Post
Split it...
That's the plan. I am taking inspiration from your exhaust build. I got the same splitter from Burns as you have.

Today's update is a bit random because we kind of jumped around doing various tasks. Since the brake lines were done, I figured it was about time to see if the iBooster actually works ad if we can bled the brakes.

I have heard a lot of good things about the Motive Products brake bleeders, so I thought I would get one to try. I have to say that I will never bleed brakes any other way. The process was super simple and I barely spilled any brake fluid.


I got the version of the Motive brake blender that came with a MC cap that was compatible with the Tesla MC cap. It also works on many newer GM cars.


While I wasn't around, Vic changed the angle of the downpipe a little bit to move it a little further from the firewall. There is a little over an inch now.


Yesterday I also finished up the turbo oil drain pipe by welding on an extension that will feed the drain under the turbo hot parts and feed into the oil pan.


Vic also made these little tabs that position the coils a little higher and over. This was done to move the spark plug wires away from the downpipe.


Andrew
__________________
Instagram @projectgattago
I offer remote Holley EFI tuning.
I deliver what EFI promises.
Please get in touch if I can be of service.
My YouTube Channel
Reply With Quote
The Following 6 Users Say Thank You to andrewb70 For This Useful Post:
130fe (01-15-2023), camcojb (01-14-2023), Goosesdad (01-17-2023), Ketzer (01-15-2023), kwhizz (01-15-2023), WSSix (01-15-2023)
  #56  
Old 01-15-2023, 09:09 PM
andrewb70's Avatar
andrewb70 andrewb70 is offline
Lateral-g Supporting Vendor
 
Join Date: Jul 2005
Posts: 892
Thanks: 232
Thanked 512 Times in 226 Posts
Default

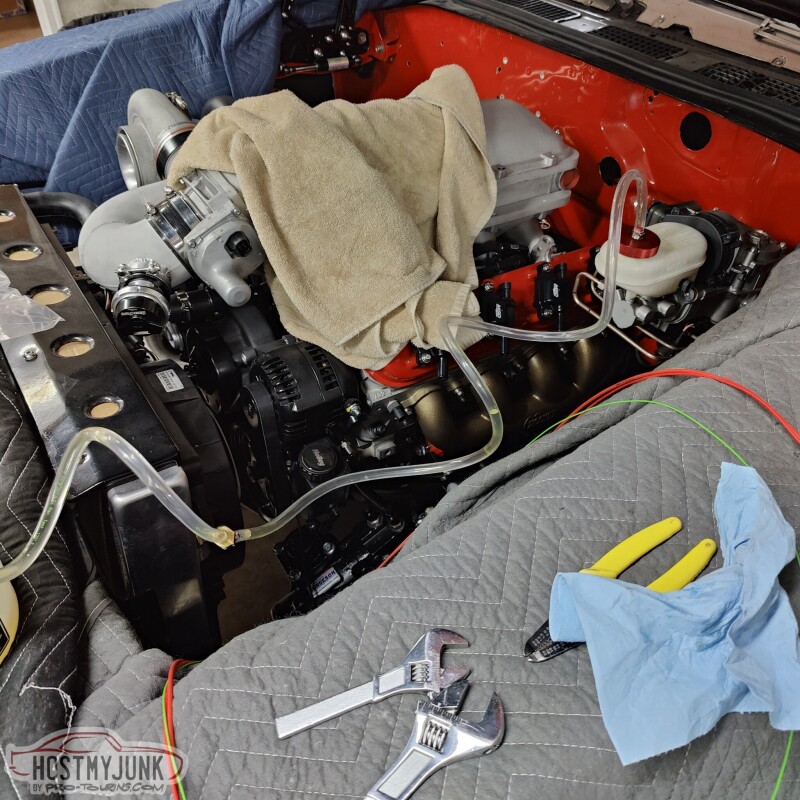
Before talking about today's update, I realized that I really didn't mention how the iBooster feels. After bleeding the brakes, we powered up the iBooster and it just started working. The pedal effort is pretty light, but very smooth. Pedal travel is also fairly short before the pedal gets really hard to press. As of now I think the driving experience is going to be greatly improved over the manual brakes that I had before.

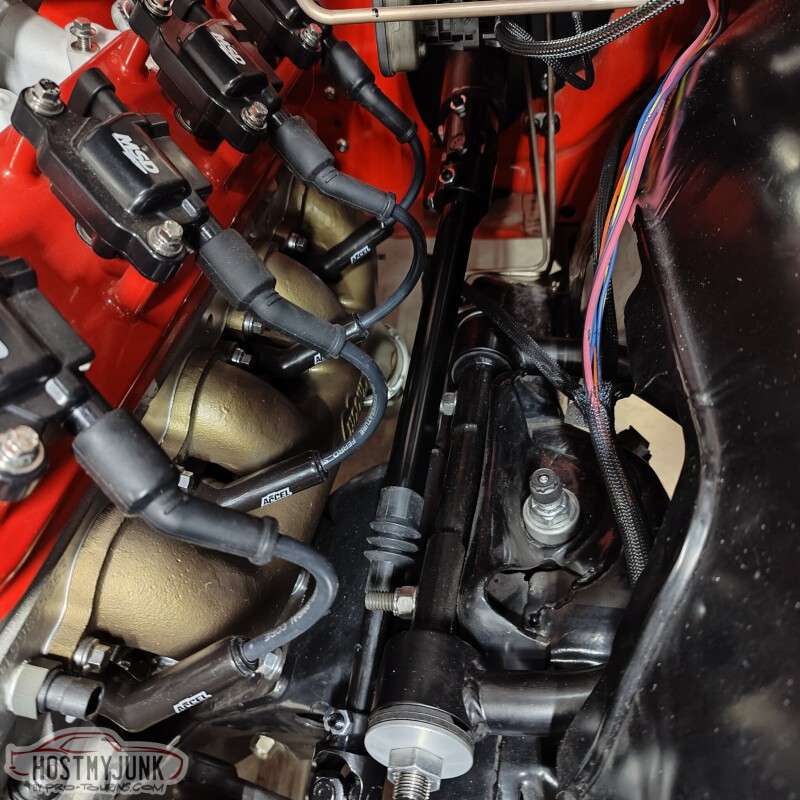
Today's update is also just a random collection of small projects. Last week I ordered all new ARP hardware for the intake lid and the intercooler. The included hardware was adequate, but silver cad plated bolts tend to look like garbage after a very short time. The ARP stainless hardware will look great for a long time.


I also finished installing the new, collapsable steering shaft and new u-joints from Borgeson.


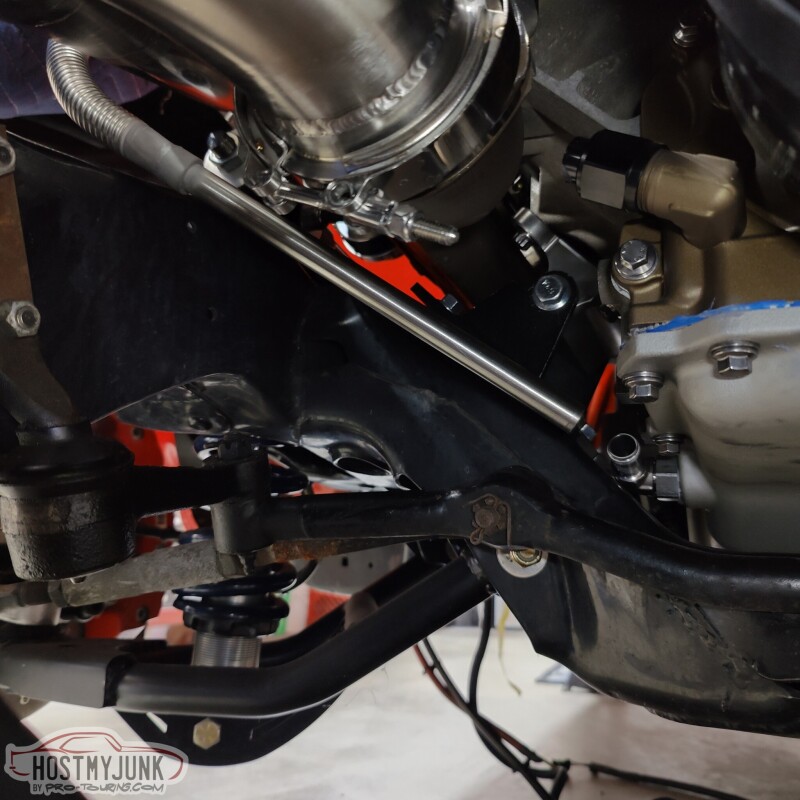
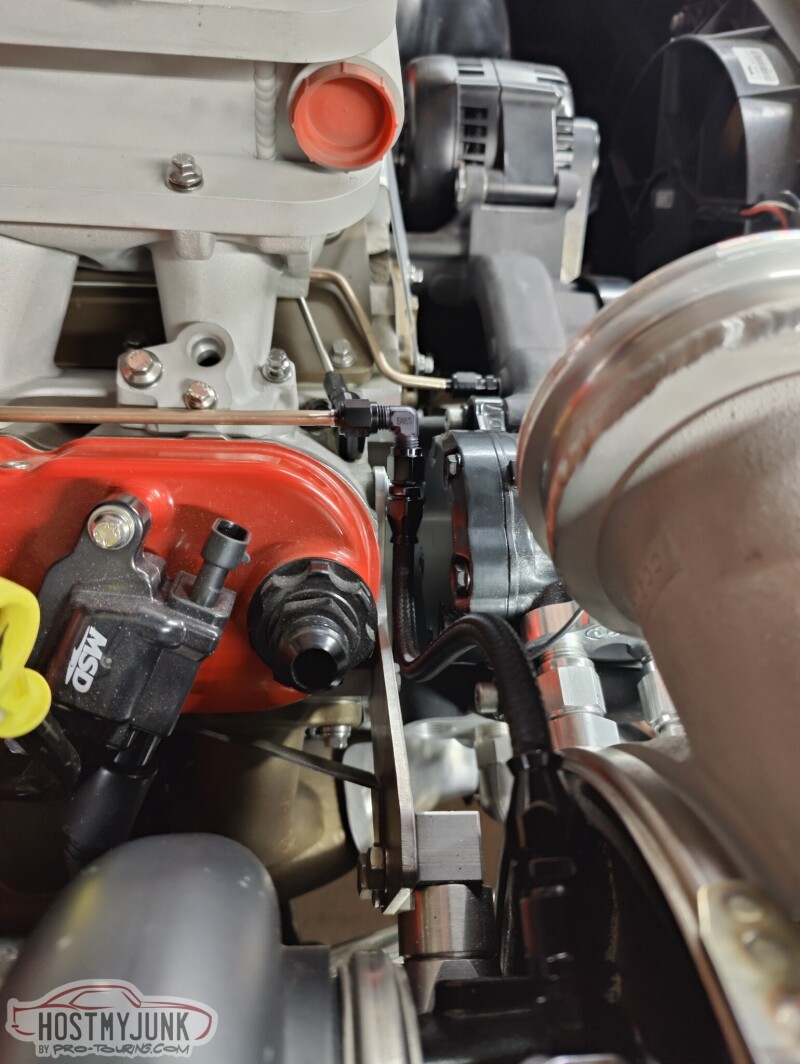
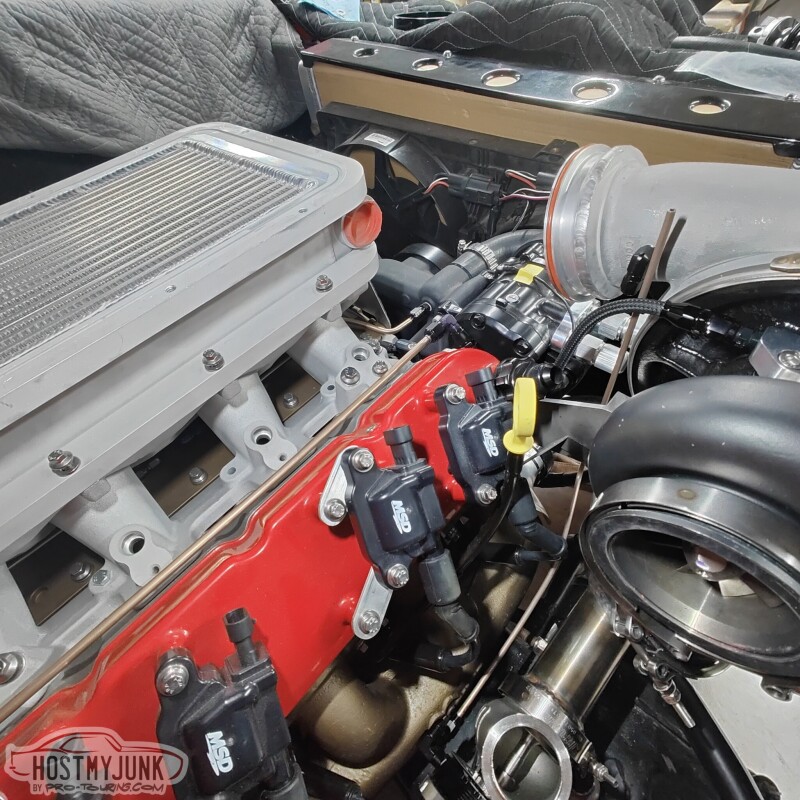
I also finished up the oil drain for the turbo. Here is how it wraps around the up-pipe.


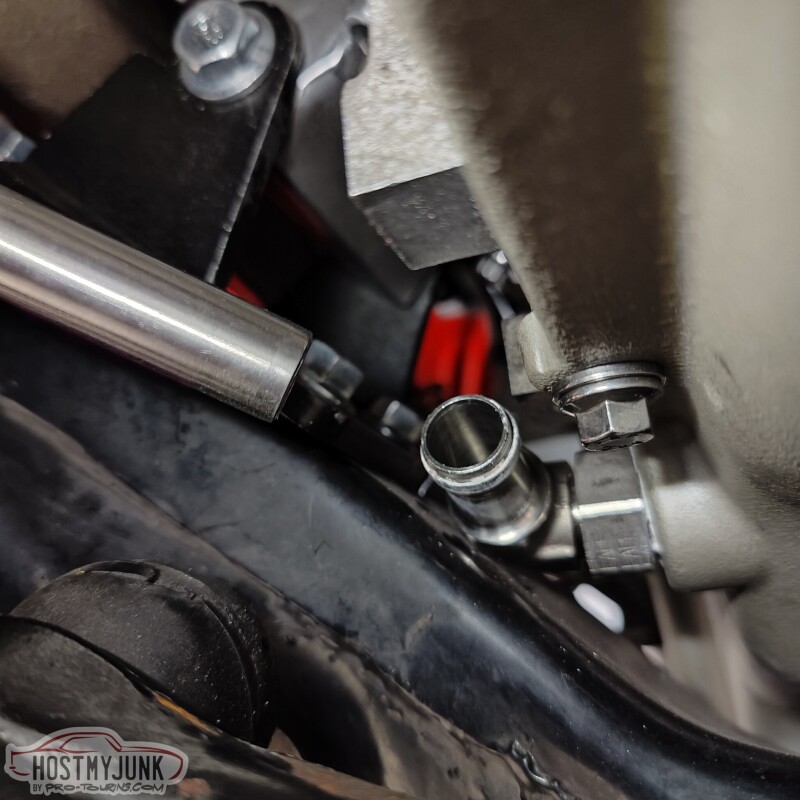
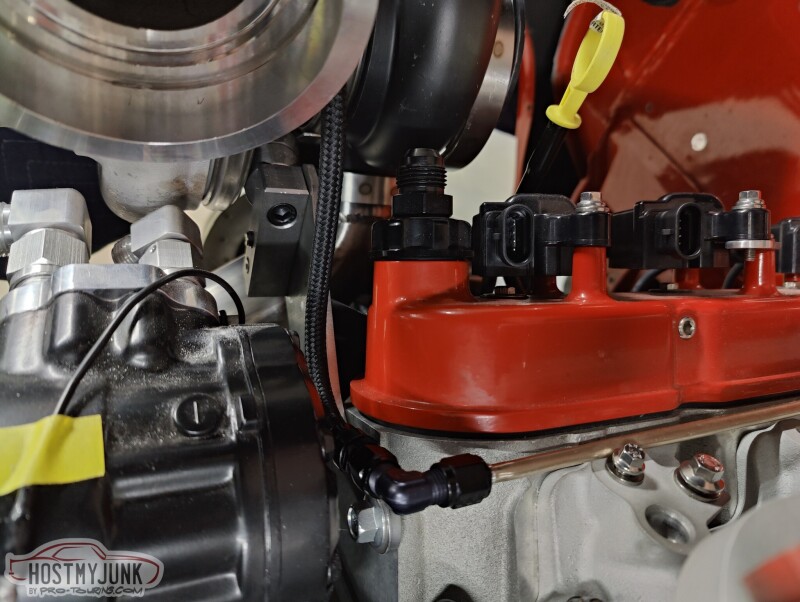
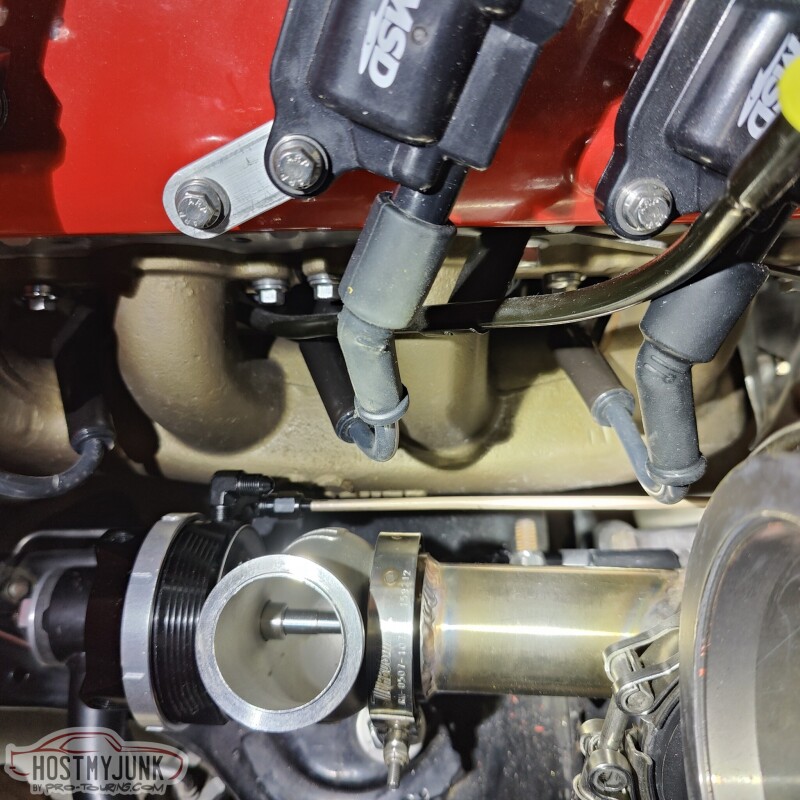
Then it goes under all of the turbo hot pipes, pointing at the fitting in the oil pan.


The only thing left is to put a bead on the 5/8" tube and add a short length of rubber hose between the tube and the oil pan fitting.


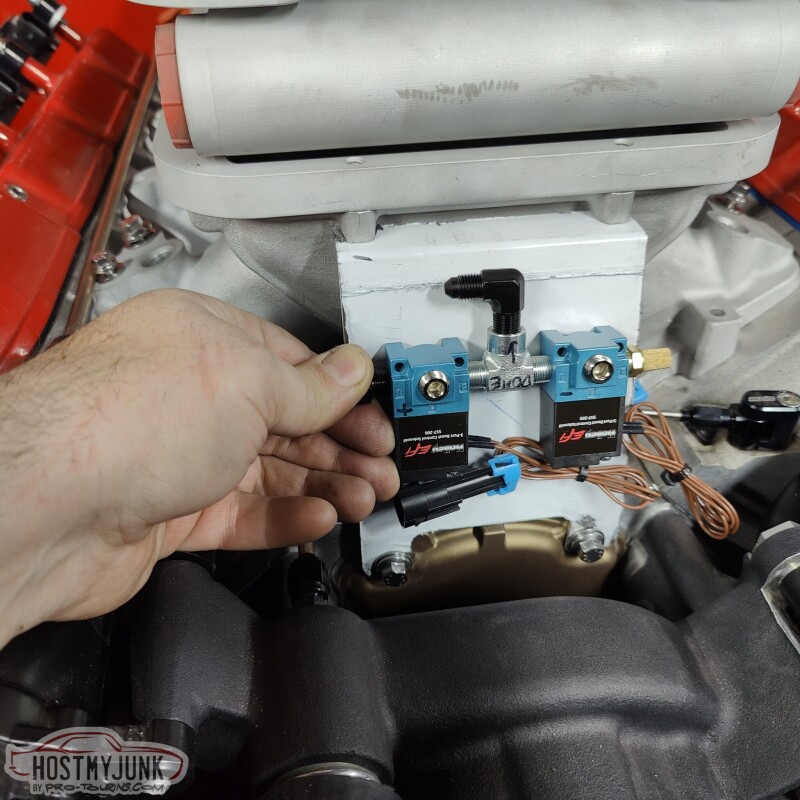
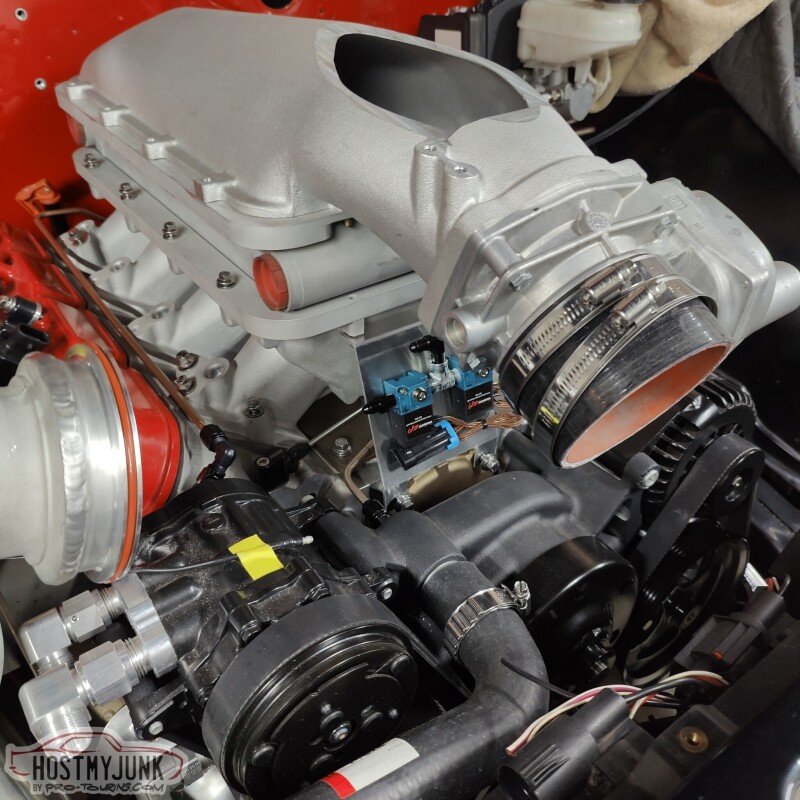
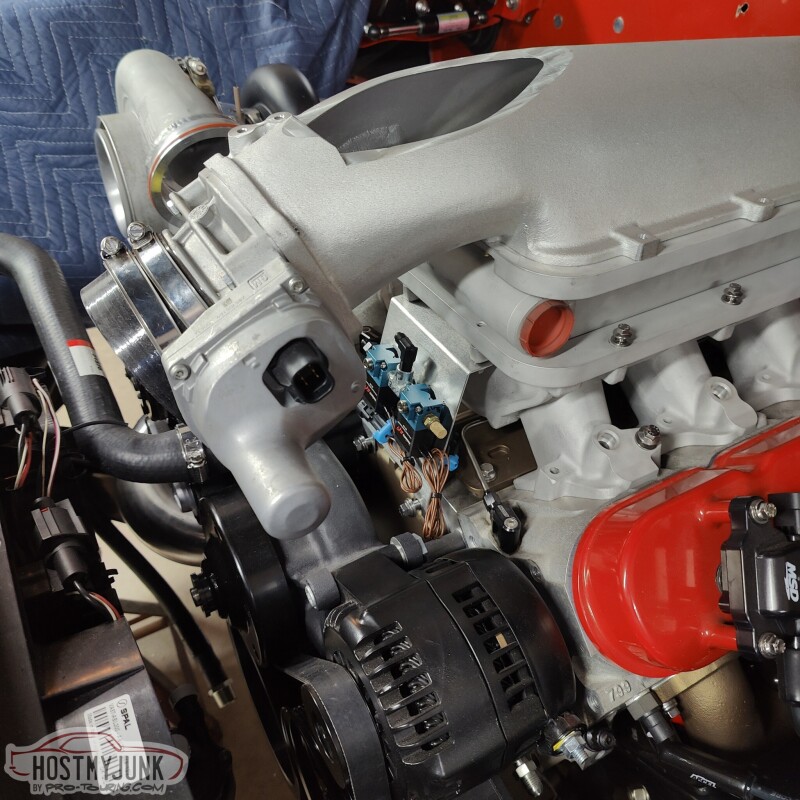
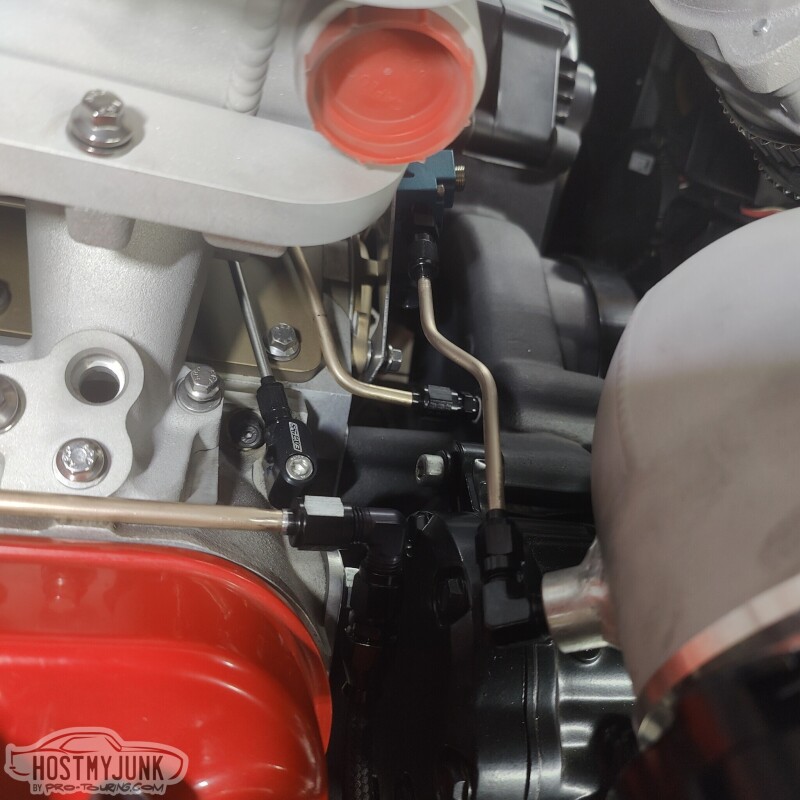
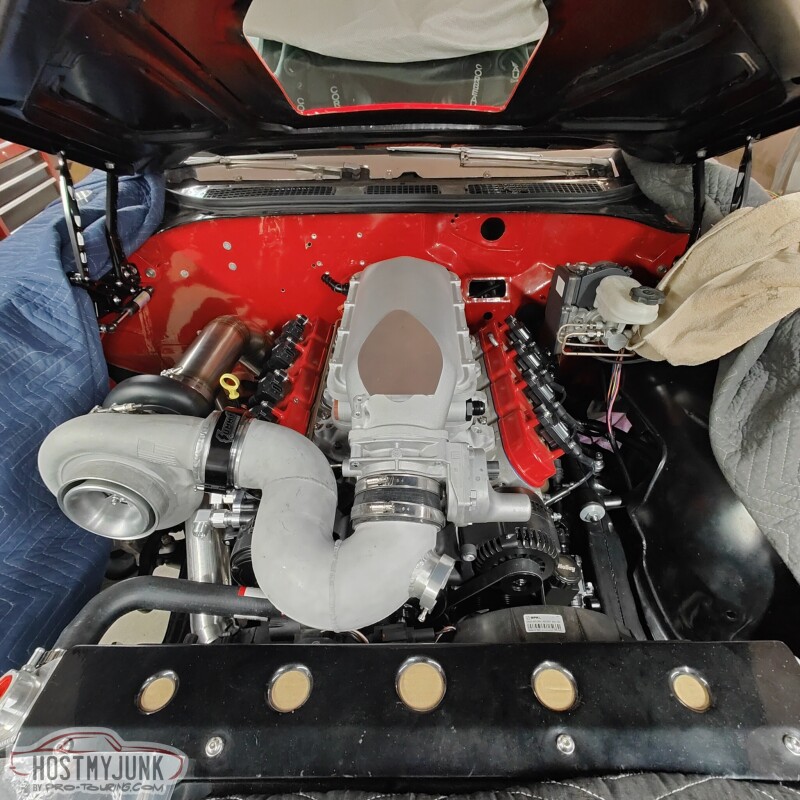
Lastly, I have been doing a lot of looking and thinking about where to mount the boost control solenoids. There is quite a bit of plumbing that needs to go between the wastegate, turbo compressor outlet, and the boost solenoids. I want to keep that plumbing as short and simple as possible, so I am thinking about making a bracket and mounting them under the nose of the intake lid.

This location will make the plumbing relatively short and keep the solenoids relatively hidden.


Andrew
__________________
Instagram @projectgattago
I offer remote Holley EFI tuning.
I deliver what EFI promises.
Please get in touch if I can be of service.
My YouTube Channel
Reply With Quote
The Following 4 Users Say Thank You to andrewb70 For This Useful Post:
camcojb (01-15-2023), Goosesdad (01-17-2023), kwhizz (01-16-2023), WSSix (01-16-2023)
  #57  
Old 01-16-2023, 09:13 PM
andrewb70's Avatar
andrewb70 andrewb70 is offline
Lateral-g Supporting Vendor
 
Join Date: Jul 2005
Posts: 892
Thanks: 232
Thanked 512 Times in 226 Posts
Default

Today I got some PTFE hose and -4AN fittings and made the flex line for the turbo oil feed.


I gave it a nice, soft S-shape to keep it tucked away.


Vic made a little bracket to hold the boost solenoids just under the intake lid snout. The mounting points for the bracket have slots, so the bolts just need to be loosened up to put it on or remove it.


One of the big reasons for choosing this location and orientation is so that the two nipples face the general direction of the wastegate and turbo. One of the lines needs to go to the top of the wastage dome and the other needs to go to the turbo compressor discharge.


Here is the view from the other side. I am going to have my friend Blake design and print a cover for the solenoids.


Since the wastegate is not super accessible and is surrounded by hot parts, I decided to plumb everything going to it using NiCopp 3/16" tubing. That way I don't have to worry about melting through the typical nylon hose and push-lock fittings.


This is the line from the compressor discharge to the bottom of the dome.


This TurboSmart wastegate has provisions for water cooling, so once the heater hose fittings are finalized, I will tap them and feet coolant to the dome of the wastegate.

Andrew
__________________
Instagram @projectgattago
I offer remote Holley EFI tuning.
I deliver what EFI promises.
Please get in touch if I can be of service.
My YouTube Channel
Reply With Quote
The Following 4 Users Say Thank You to andrewb70 For This Useful Post:
214Chevy (01-17-2023), camcojb (01-16-2023), Goosesdad (01-17-2023), kwhizz (01-17-2023)
  #58  
Old 01-17-2023, 04:49 AM
Jimbo1367 Jimbo1367 is offline
Senior Member
 
Join Date: Sep 2015
Location: USA
Posts: 312
Thanks: 81
Thanked 96 Times in 77 Posts
Default

Very well thought out.
Reply With Quote
The Following User Says Thank You to Jimbo1367 For This Useful Post:
andrewb70 (01-17-2023)
  #59  
Old 01-19-2023, 07:04 AM
andrewb70's Avatar
andrewb70 andrewb70 is offline
Lateral-g Supporting Vendor
 
Join Date: Jul 2005
Posts: 892
Thanks: 232
Thanked 512 Times in 226 Posts
Default

I try to do a little something everyday to keep making progress. We added a bung for the oxygen sensor. I wanted it easily accessible, but also not super visible.


We also added a bung in the charge pipe and I added a small tube to feed boost pressure to the feed side of the boost solenoids.


It was also time to think about where the fill tank for the A2W intercooler might go. I am thinking about this location on the firewall. I added a 45 degree fitting to the intercooler just to see how the hoses might be routed.


The tank looks like it is close to the downpipe, but there is actually quite a bit of space. The tank also needs to have a fill bung aded to the top of the right side and an outlet on the left side.


This is just an overall shot of the engine compartment as it sits now.


Baby steps...

Andrew
__________________
Instagram @projectgattago
I offer remote Holley EFI tuning.
I deliver what EFI promises.
Please get in touch if I can be of service.
My YouTube Channel
Reply With Quote
The Following 3 Users Say Thank You to andrewb70 For This Useful Post:
214Chevy (01-20-2023), camcojb (01-19-2023), Goosesdad (01-19-2023)
  #60  
Old 01-19-2023, 10:44 AM
camcojb's Avatar
camcojb camcojb is offline
Administrator
 
Join Date: Jul 2004
Location: Wilton, CA.
Posts: 12,876
Thanks: 5,303
Thanked 1,570 Times in 699 Posts
Default

Things get busy in a hurry with a turbo(s). You've done a great job keeping it clean and compact.
__________________
Jody

PAST CAR PROJECTS

Like Lateral-G on Facebook!

Follow Lateral-G on Instagram!

SPECIAL THANKS TO:
Jacob Ehlers and Amsoil for the lubricants and degreasers for my 70 Chevelle project
Shannon at Modo Innovations for the cool billet DBW bracket
Roadster Shop for their Chevelle SPEC Chassis
Dakota Digital for their Chevelle HDX Gauge Package
Painless Performance for their wiring harness

Ron Davis Radiators for their radiator and fan assembly.
Baer Brakes for their front and rear brakes

Texas Speed and Performance for their 427 LS Stroker
American Powertrain for their ProFit Magnum T56 kit
Currie Enterprises for their 9" Third Member
Forgeline for their GF3 Wheels
McLeod Racing for their RXT street twin clutch
Ididit for their steering column
Holley for their EFI and engine parts
Lokar and Clayton Machine for their pedals and door and window handles
Morris Classic Concepts for their 3 point belts and side mirrors
Thermotec for their heat sleeve and sound deadening products
Restomod Air for their Tru Mod A/C kit
Mightymouse Solutions for their catch can
Magnaflow for their 3" exhaust system
Aeromotive for their dual Phantom fuel system
Vintage Air for their new Mid Mount LS front drive
Hydratech Braking for their hydroboost system
Borgeson for their stainless steering shaft and u joints
Eddie Motorsports for their hood and trunk hinges and misc parts
TMI Products for their seats, door panels, and dash pad
Rock Valley Antique Auto Parts for their stainless fuel tank
Reply With Quote
The Following User Says Thank You to camcojb For This Useful Post:
andrewb70 (01-19-2023)
Reply


Posting Rules
You may not post new threads
You may not post replies
You may not post attachments
You may not edit your posts

BB code is On
Smilies are On
[IMG] code is On
HTML code is Off

Forum Jump


All times are GMT -5. The time now is 01:35 PM.


Powered by vBulletin® Version 3.8.11
Copyright ©2000 - 2024, vBulletin Solutions Inc.
Copyright Lateral-g.net