While we wait for the car to return from the media blaster I thought I might provide an update on some details and parts we have ordered.
Our cooling strategy has evolved. We decided to upgrade from our original plan of just copying what is used in the ZL1. We listened to some of the good advice we got from this thread and others.
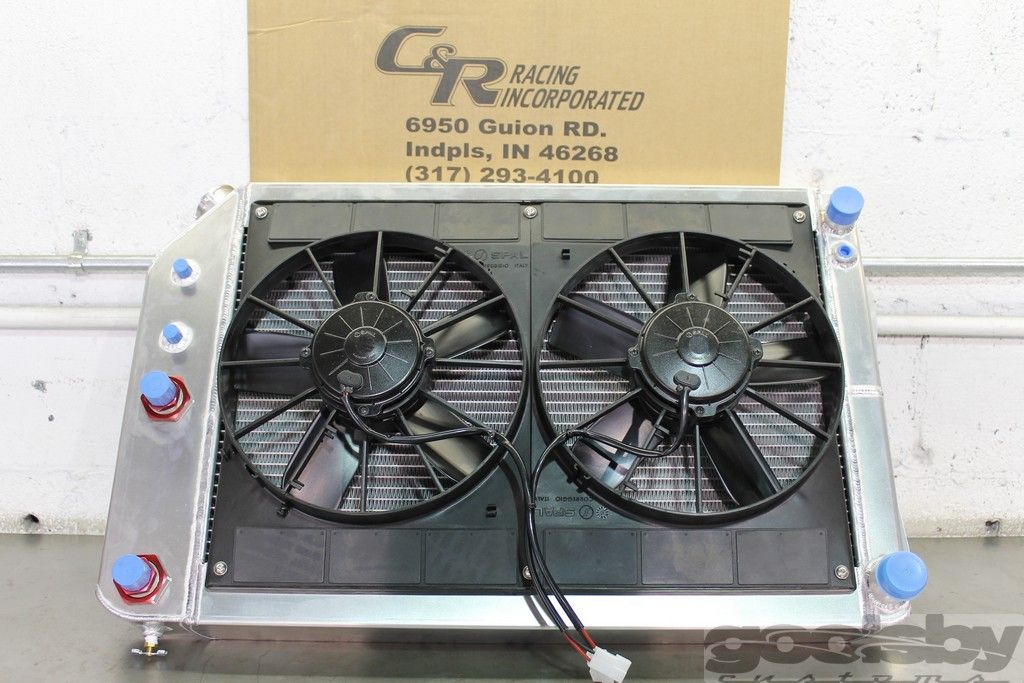
We ended up ordering a C&R radiator module rated for 1000HP. The module is made to drop right into the first gen Camaro. It includes two mounted fans, engine oil cooling and power steering cooling. It also has both the engine coolant inlet and exit on the passenger side.
For an intercooler, we decided to go with C&R's GT500 intercooler. It also comes complete with two fans already mounted.

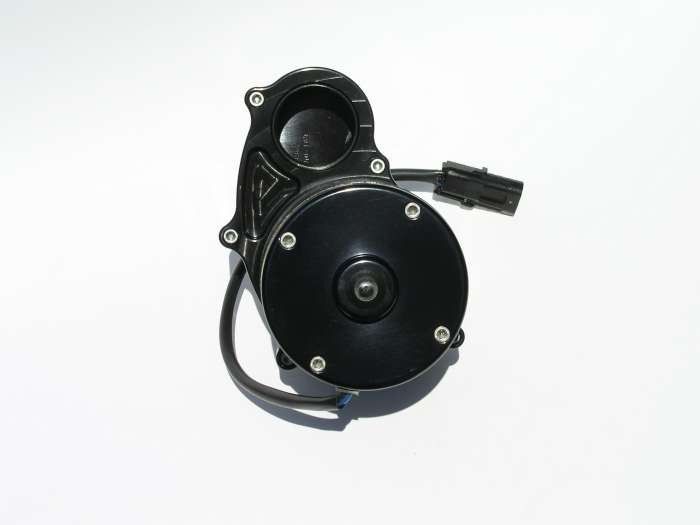
For the intercooler pump, we decided on the 55 GPM rated unit sold by Torq.

With all that cooling packaging in the vacinity of the core support we decided that a hood latch assembly similar to the one Stielow used in Charlie's JackAss was in order.
The arrangement they used is cable accuated which also offers a little more secure access to the engine compartment.
It also just looks cool.
Here is the hood latch in JackAss. Like the rest of the engine bay, it's a very clean solution:

When we started our research on where to buy parts to do something similar, we first figured out the latch/lock pieces were similar to those used in some mid 80s-early 90s era Volkswagens.
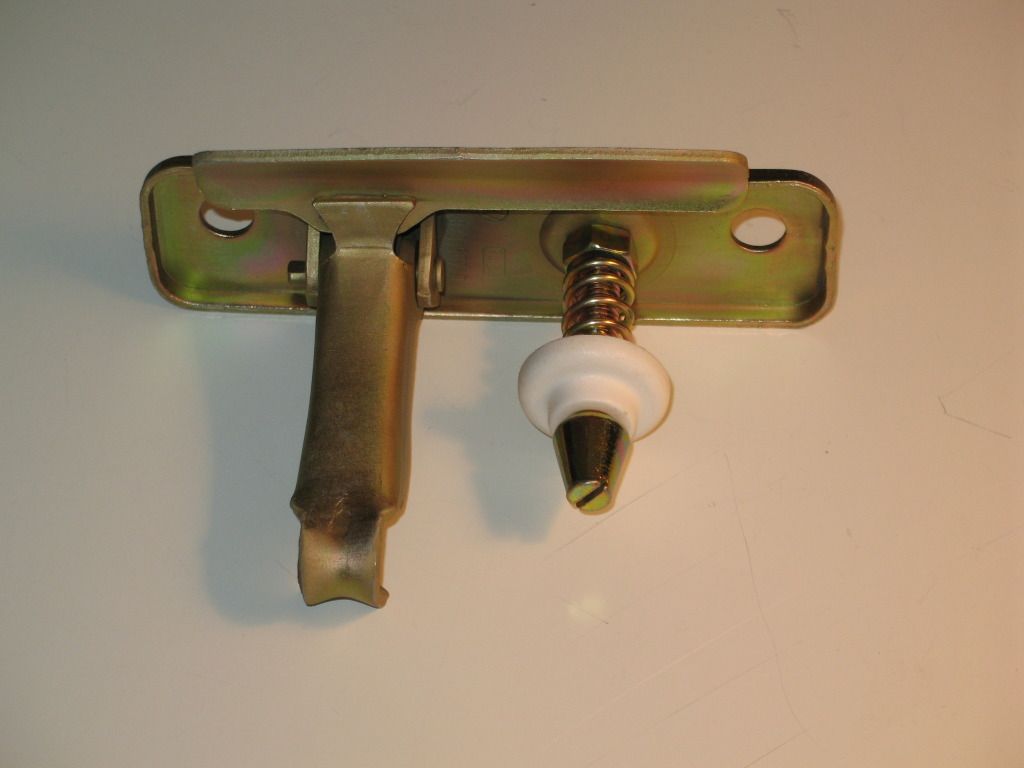
For instance, here is a Lower hood latch for a 1990 Volkswagen Jetta:

Here is the Upper hood latch for the same car:

For these pieces, it appears there are genuine Volkswagen parts and then there are cheap imitations. Even on the genuine VW parts, we were a little hesitant relative to the safety catch design which looks pretty light weight.
Next we found a very nice, turn key solution already customized to drop right into first gens. The kit is made by Screamin' Performance. Here are some pics from their web site:

Not only did Screamin' Performance engineer a total drop in solution, it looks like they also beefed up the safety catch and some other aspects of the latches.
Since we are planning to custom build the covers in and around the core support anyway, we decided to just buy the beefiest latch components we could find of similar construction.
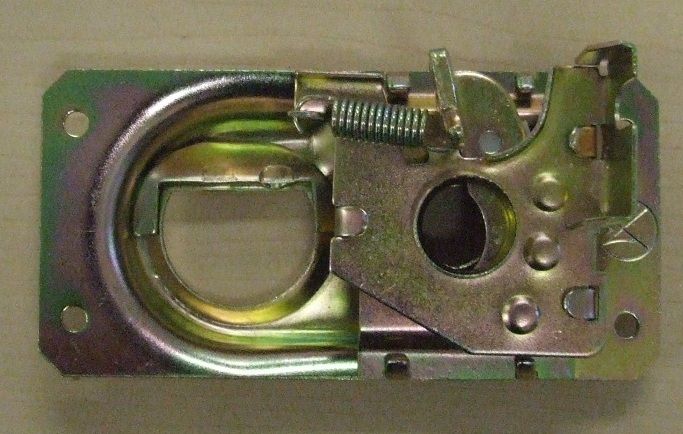
That led us to the hood latches that were used on the Volkswagen Thing back in the 70's. I know, most of you are probably too young to rememeber that vehicle....
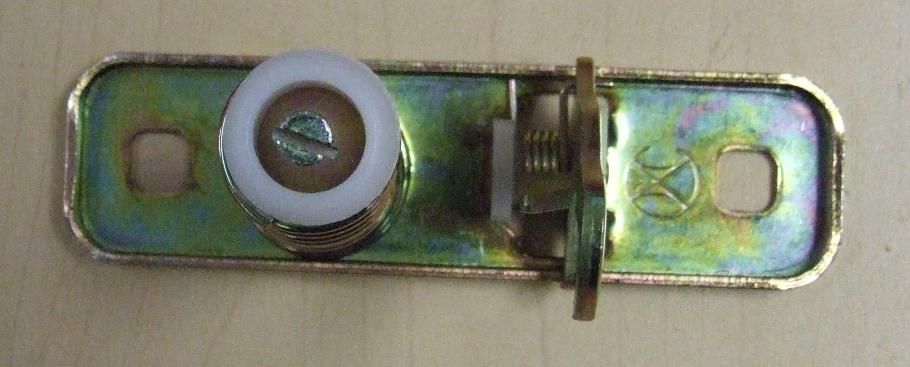
These are the pieces we ended up with because they are very similar but considerably stronger. For instance, note how the safety catch is a U shaped, wide claw design vs. a single metal thickness design. The easier to access opening lever/tab is also a nice upgrade.


In case you decide to go this route one day, the part numbers are as follows:
Upper latch: VW 175 823 507
Lower latch: VW 411 823 509
They are still available through sites who sell parts to restore the old VW Things.


 Brian Hobaugh SCCA National Tour June 2014
 First Hemi 'Cuda Convertible Ever Built
 Short clips: Goodguys Pleasanton autocross and pit videos


 Linear Mode

