...

Go Back   Lateral-g Forums > Lateral-G Open Discussions > Project Updates
User Name
Password


Reply
 
Thread Tools Display Modes
  #71  
Old 06-14-2016, 04:34 AM
dhutton dhutton is offline
Senior Member
 
Join Date: Nov 2006
Location: Mountain Springs, Texas
Posts: 1,928
Thanks: 1,192
Thanked 553 Times in 299 Posts
Default

Quote:
Originally Posted by CamaroAJ View Post
So I got good news and bad news.

The good news is I called Anvil and they told be the secret to bolting the extensions in.

The bad news is you have to cut the inner fenders then bolt, rivet, bond, or fiberglass the extensions to the inner fender.
That's the same thing they told me. A little daunting to start cutting up those inner fenders. I am planning to use 3M 8115 panel adhesive to bond mine together.

Thanks,
Don
Reply With Quote
  #72  
Old 06-14-2016, 06:00 AM
CamaroAJ's Avatar
CamaroAJ CamaroAJ is offline
Lateral-g Supporting Member
 
Join Date: Mar 2010
Location: San Antonio, Tx
Posts: 882
Thanks: 104
Thanked 321 Times in 138 Posts
Default

Quote:
Originally Posted by raustinss View Post
How long did it take from the order date to get your fenders
Almost a year. I'm still missing the lower valance too.
Reply With Quote
  #73  
Old 06-16-2016, 08:46 PM
CamaroAJ's Avatar
CamaroAJ CamaroAJ is offline
Lateral-g Supporting Member
 
Join Date: Mar 2010
Location: San Antonio, Tx
Posts: 882
Thanks: 104
Thanked 321 Times in 138 Posts
Default

We've been slow at work so I've been playing with the Camaro. So far I've finished both roof/A pillar transitions, built another recess box for my InfinityBox module, and started on my rear bumper mounting and modding. Now to the pics

Driver side is the same


Reply With Quote
  #74  
Old 06-26-2016, 08:31 AM
CamaroAJ's Avatar
CamaroAJ CamaroAJ is offline
Lateral-g Supporting Member
 
Join Date: Mar 2010
Location: San Antonio, Tx
Posts: 882
Thanks: 104
Thanked 321 Times in 138 Posts
Default

I've been working on this rear bumper trying to get it how I want it. I'm close now, just needs a few tweaks on the driver side then I'll be happy. I wasn't too concerned with getting the metal work perfect as I'm going to make a mold from this and do it in carbon fiber.


I also got my holes cut to mount the hood vents


And I got part of my tail lamp housing from the 3D printer
Reply With Quote
  #75  
Old 06-26-2016, 02:00 PM
Jr's Avatar
Jr Jr is offline
Senior Member
 
Join Date: Sep 2005
Location: so cal
Posts: 1,772
Thanks: 0
Thanked 0 Times in 0 Posts
Default

Are those hood vents from anvil?

Car looks good.
Reply With Quote
  #76  
Old 06-26-2016, 04:04 PM
CamaroAJ's Avatar
CamaroAJ CamaroAJ is offline
Lateral-g Supporting Member
 
Join Date: Mar 2010
Location: San Antonio, Tx
Posts: 882
Thanks: 104
Thanked 321 Times in 138 Posts
Default

Quote:
Originally Posted by Jr View Post
Are those hood vents from anvil?

Car looks good.
Thanks. Yes they are. I got the fiberglass ones since I was going to paint them and they weighed the same as the carbon fiber ones.
Reply With Quote
  #77  
Old 07-02-2016, 07:55 PM
CamaroAJ's Avatar
CamaroAJ CamaroAJ is offline
Lateral-g Supporting Member
 
Join Date: Mar 2010
Location: San Antonio, Tx
Posts: 882
Thanks: 104
Thanked 321 Times in 138 Posts
Default

Just a quick update. I've been working on the body work aspect of the bumper as I want it as perfect as I can get it to make a mold from. Now that I have it really close I started with the fill pockets with tape patterns then marking where I want the body line.


The driver side looked to be the harder side to do because I cut a little more than I meant to, we all make McSteaks. Just a little more welding to do, but it's slow as to not warp any metal.

Reply With Quote
  #78  
Old 07-05-2016, 04:32 PM
CamaroAJ's Avatar
CamaroAJ CamaroAJ is offline
Lateral-g Supporting Member
 
Join Date: Mar 2010
Location: San Antonio, Tx
Posts: 882
Thanks: 104
Thanked 321 Times in 138 Posts
Default

I finished up the driver side bumper recess today. I'm pretty happy with it, but it's not perfect.


Reply With Quote
  #79  
Old 07-05-2016, 09:37 PM
Dr. Jekyll Dr. Jekyll is offline
Member
 
Join Date: Jul 2008
Posts: 90
Thanks: 1
Thanked 0 Times in 0 Posts
Default

Very nice and tasteful modifications. I'm digging how this project is coming together!
Reply With Quote
  #80  
Old 07-10-2016, 08:54 PM
CamaroAJ's Avatar
CamaroAJ CamaroAJ is offline
Lateral-g Supporting Member
 
Join Date: Mar 2010
Location: San Antonio, Tx
Posts: 882
Thanks: 104
Thanked 321 Times in 138 Posts
Default

Quote:
Originally Posted by Dr. Jekyll View Post
Very nice and tasteful modifications. I'm digging how this project is coming together!
Thank you.

I got a lot done Friday night. Finished the right bumper recess then moved onto other tasks. I cut the seams for both quarters to tail panel then hammer and dollied the area to fit better then it was. After I was happy with the fitment I welded the seams for a cleaner look.


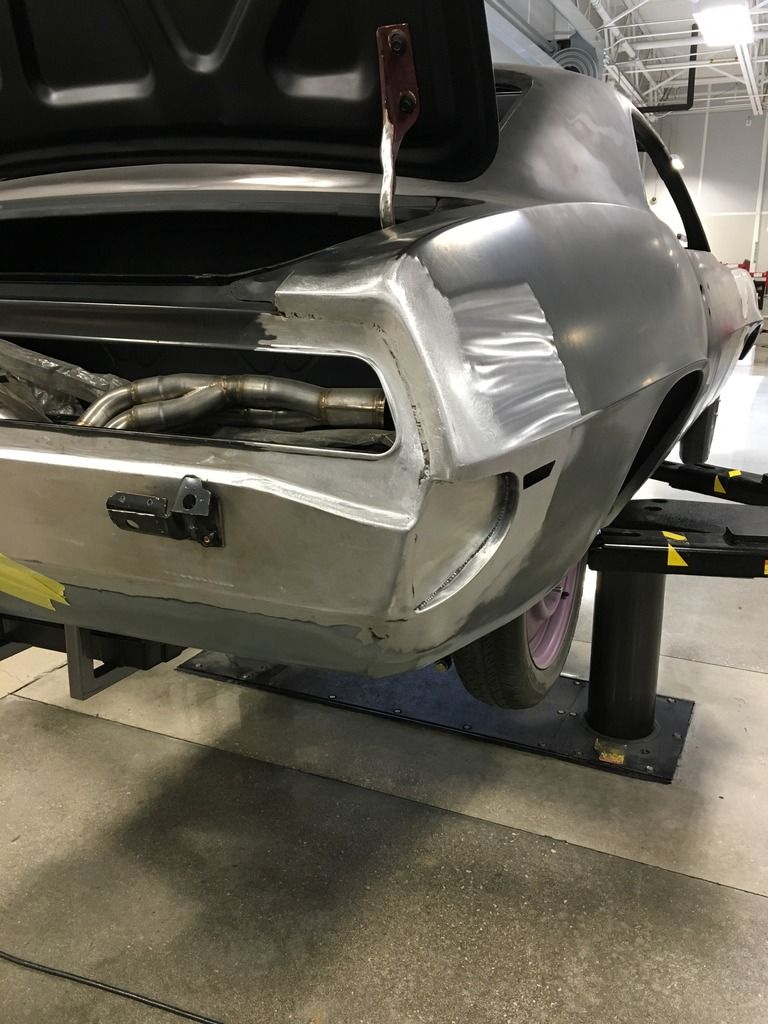
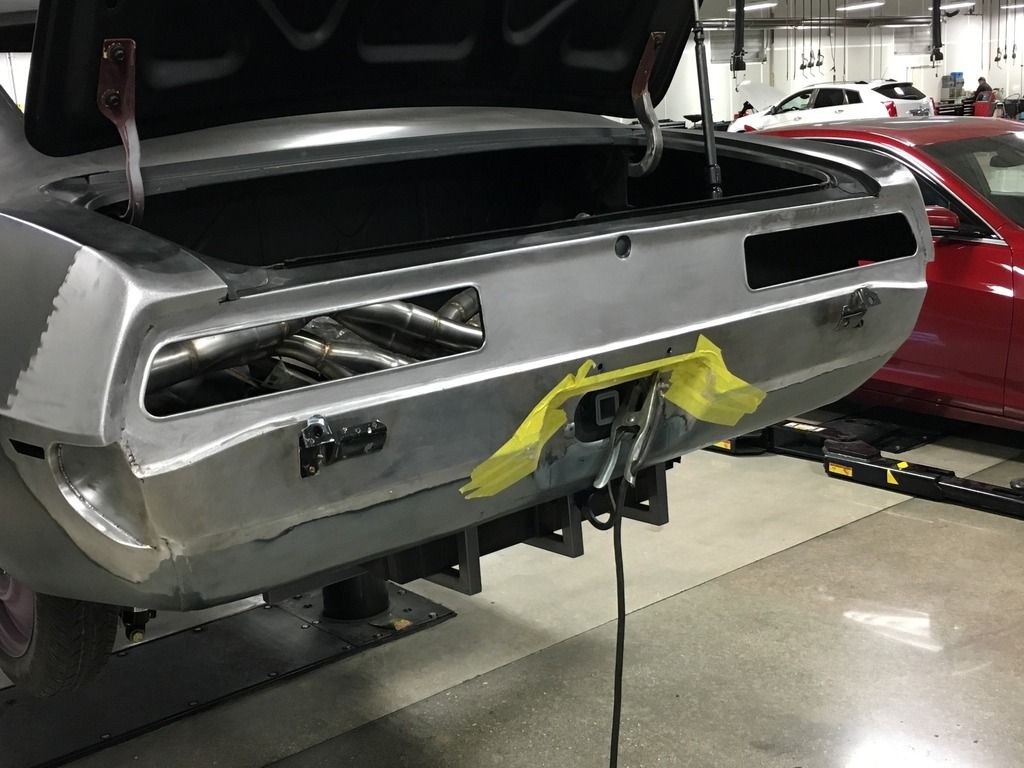
I also filled the factory emblem holes then hammer and dollied the area and metal finished it.


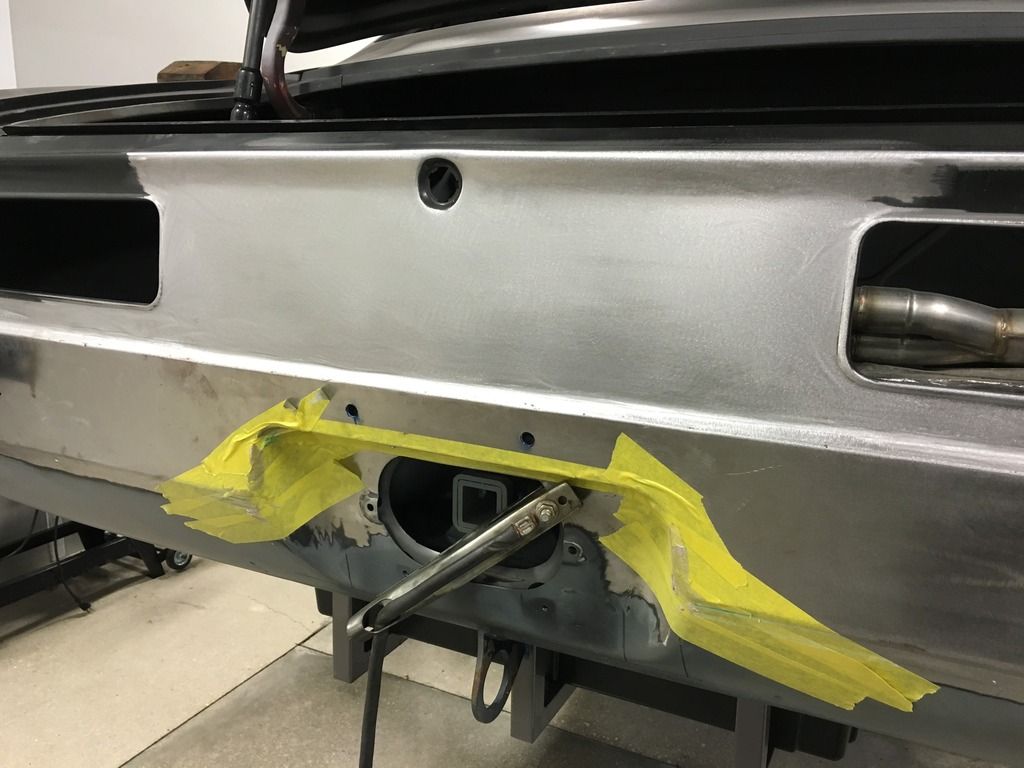
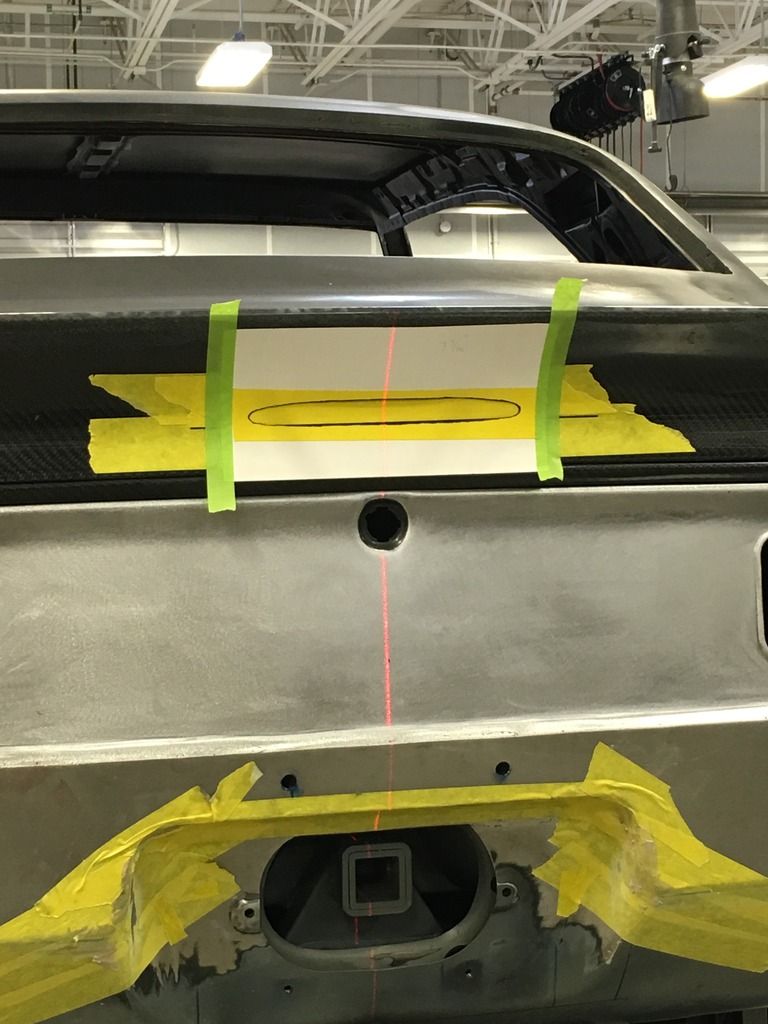
Saturday I wasn't feeling like working on the car, but I got the Ring Brothers trunk hinges mounted so I could start fitting the deck lit to fix the gaps. Sorry, I forgot to get a picture. I also added some safety to the car in the form of a C6 3rd brake lamp. Lots of measuring, remeasuring, cutting, hand filing, and hand sanding. I'm pretty happy with how it came out though.

Reply With Quote
Reply


Posting Rules
You may not post new threads
You may not post replies
You may not post attachments
You may not edit your posts

BB code is On
Smilies are On
[IMG] code is On
HTML code is Off

Forum Jump


All times are GMT -7. The time now is 09:59 PM.


Powered by vBulletin® Version 3.8.11
Copyright ©2000 - 2025, vBulletin Solutions Inc.
Copyright Lateral-g.net