...

Go Back   Lateral-g Forums > Lateral-G Open Discussions > Project Updates
User Name
Password


Reply
 
Thread Tools Display Modes
  #81  
Old 07-11-2016, 08:52 AM
NOPANTS68 NOPANTS68 is offline
Senior Member
 
Join Date: Sep 2007
Location: Orangevale CA
Posts: 916
Thanks: 2
Thanked 22 Times in 20 Posts
Default

Man I really like that bumper treatment. That's very sharp. Nicely done.
__________________
1929 Roadster Pickup
1961 Chevy Parkwood Wagon
1956 Chevy 210


Smithcraft Collision and Restoration
Newcastle , CA
Reply With Quote
  #82  
Old 07-11-2016, 02:24 PM
CamaroAJ's Avatar
CamaroAJ CamaroAJ is offline
Lateral-g Supporting Member
 
Join Date: Mar 2010
Location: San Antonio, Tx
Posts: 882
Thanks: 104
Thanked 316 Times in 138 Posts
Default

Quote:
Originally Posted by NOPANTS68 View Post
Man I really like that bumper treatment. That's very sharp. Nicely done.
Thanks, I'm pretty happy with how it came out as well.
Reply With Quote
  #83  
Old 07-11-2016, 09:44 PM
meenaggie meenaggie is offline
Member
 
Join Date: Aug 2008
Posts: 81
Thanks: 0
Thanked 0 Times in 0 Posts
Default

I really like the 3rd brake light in the rear spoiler . . . nicely integrated! I almost hate to say it but kind of disappointed with all the CF on your camaro after seeing your metal working skills. Nice updates and looking forward to seeing this one in person some day as a fellow Texan.
Reply With Quote
  #84  
Old 07-12-2016, 06:07 AM
CamaroAJ's Avatar
CamaroAJ CamaroAJ is offline
Lateral-g Supporting Member
 
Join Date: Mar 2010
Location: San Antonio, Tx
Posts: 882
Thanks: 104
Thanked 316 Times in 138 Posts
Default

Quote:
Originally Posted by meenaggie View Post
I really like the 3rd brake light in the rear spoiler . . . nicely integrated! I almost hate to say it but kind of disappointed with all the CF on your camaro after seeing your metal working skills. Nice updates and looking forward to seeing this one in person some day as a fellow Texan.
Thank you. No worries, carbon cuts and grinds easier then metal lol. I will say though, I think I'd find it easier to cut up metal than the carbon. Easier to fix if I mess up for me. Maybe not when I learn more about working it.
Reply With Quote
  #85  
Old 07-25-2016, 08:01 PM
CamaroAJ's Avatar
CamaroAJ CamaroAJ is offline
Lateral-g Supporting Member
 
Join Date: Mar 2010
Location: San Antonio, Tx
Posts: 882
Thanks: 104
Thanked 316 Times in 138 Posts
Default

I've been working on the car more than pictures show and taking care of a few non car related things along with a problem with Anvil's warped deck lid. They are gonna make it right so I'm able to cross that problem off my list.

I got the vintage air mock up case mounted. It fit better with the modified firewall than I thought it would.


I've sanded about 90% of the EDP coating off the car.


I also picked up Marquez Design door panels from a fellow Lat-g member. They for sure need some work to fit right.


Hopefully I'll get more done this week. I feel like I'm stalled and not getting anything done.

Last edited by CamaroAJ; 07-25-2016 at 08:23 PM.
Reply With Quote
  #86  
Old 07-31-2016, 09:03 AM
CamaroAJ's Avatar
CamaroAJ CamaroAJ is offline
Lateral-g Supporting Member
 
Join Date: Mar 2010
Location: San Antonio, Tx
Posts: 882
Thanks: 104
Thanked 316 Times in 138 Posts
Default

So I figure out very quickly that I need all the windows and hardware to fit the door panels. So now that's in a holding pattern waiting on parts. I did check fitment with a seat though and everything fits close, but won't require and mods.

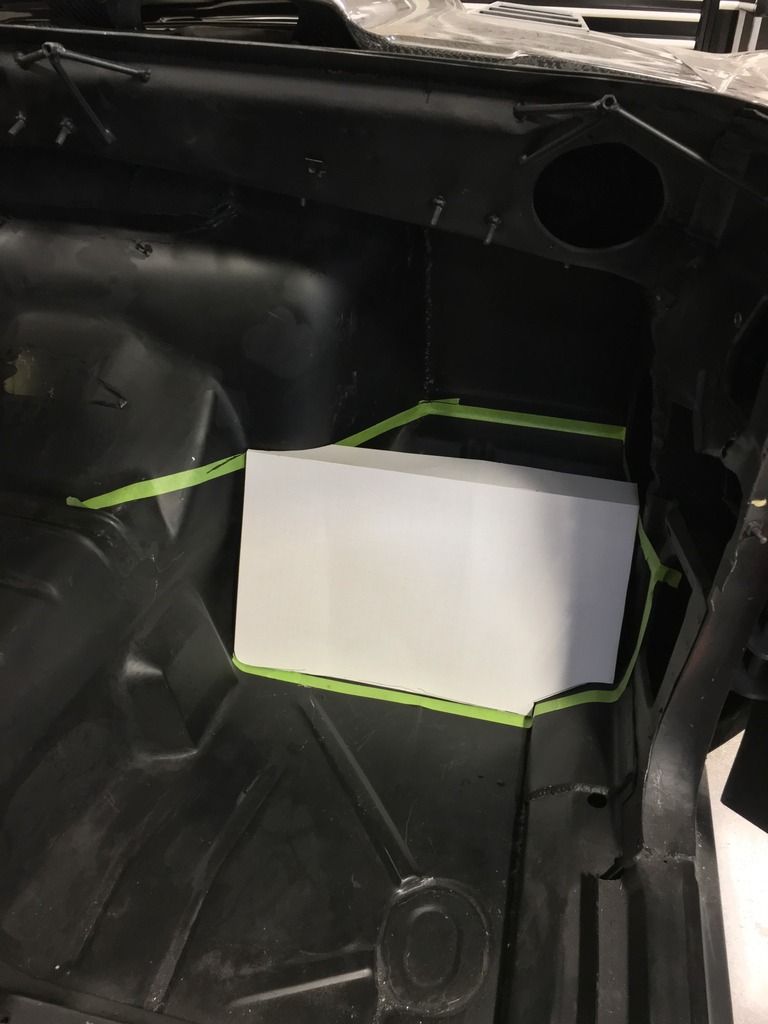
I did get started on a raised floor toe board though to hide my InfinityBox power modules. With the seats set back to match the engine set back it left a ton of foot room, so I'm not losing anything in this area. Plus it helps move weight lower in the car and is easy to get to if I need access to the fuses.

Start with cardboard to see how it looks and check clearance to the HVAC.


With it fit pretty good I went ahead and cut it in metal and rechecked the room behind it for the modules


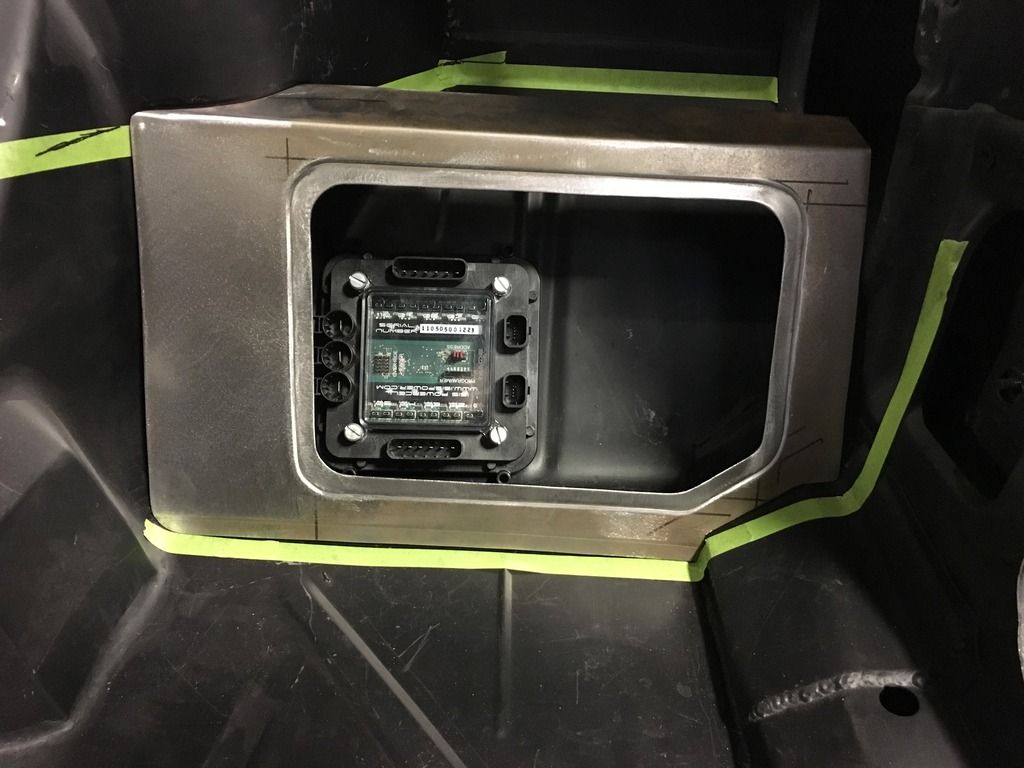
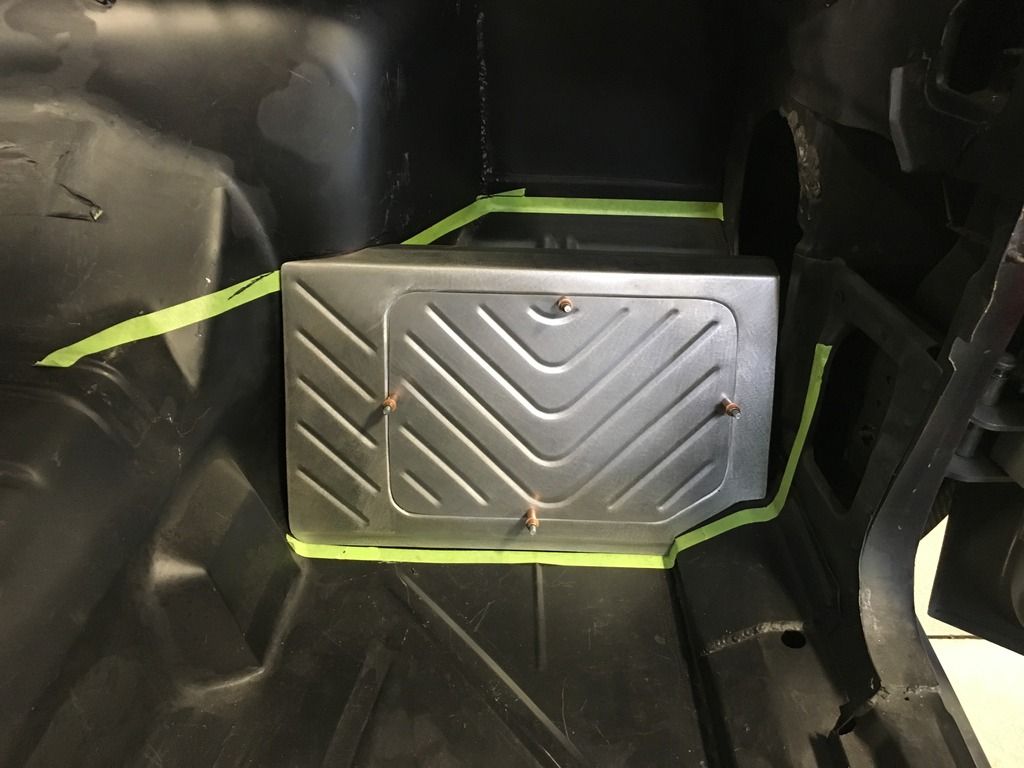
As I was pretty happy with the additional room I went ahead and cut a hole cover and bead rolled it. Now I need to build a frame to mount it to, mount the modules, and build a top enclosure to the firewall.
Reply With Quote
  #87  
Old 08-25-2016, 01:24 AM
Jafa Jafa is offline
Junior Member
 
Join Date: Jun 2015
Location: Auckland, NZ
Posts: 19
Thanks: 5
Thanked 0 Times in 0 Posts
Default

Quote:
Originally Posted by CamaroAJ View Post
[/URL]
Great build so far!! I really like and appreciate your metal working skills, and thanks for taking the time to show us "as you go" photos so we can see and learn how to achieve things like the flush glass, bumper fitting etc. You are exceptional with the bead roller too, I am jealous of your fabrication skills.

Those car lifts in the pic, what brand / model are they? They look good for someone that doesn't have the head height for a traditional 2 post lift. Do you know how deep the hole in the ground has to be to install them?

Keep up the great work!
Reply With Quote
  #88  
Old 08-25-2016, 07:49 AM
CamaroAJ's Avatar
CamaroAJ CamaroAJ is offline
Lateral-g Supporting Member
 
Join Date: Mar 2010
Location: San Antonio, Tx
Posts: 882
Thanks: 104
Thanked 316 Times in 138 Posts
Default

Quote:
Originally Posted by Jafa View Post
Great build so far!! I really like and appreciate your metal working skills, and thanks for taking the time to show us "as you go" photos so we can see and learn how to achieve things like the flush glass, bumper fitting etc. You are exceptional with the bead roller too, I am jealous of your fabrication skills.

Those car lifts in the pic, what brand / model are they? They look good for someone that doesn't have the head height for a traditional 2 post lift. Do you know how deep the hole in the ground has to be to install them?

Keep up the great work!
Thank you.

The lifts are made by Rotary. They go about 10' into the ground and go up a little higher than normal above ground lifts. They are also a lot more expensive than normal above ground lifts, somewhere in the $7-8k range. I work for a Cadillac dealer and they let me work on the car here, other wise I'd be on jack stands just like everyone else.
Reply With Quote
  #89  
Old 08-25-2016, 10:46 AM
DannyZ's Avatar
DannyZ DannyZ is offline
Junior Member
 
Join Date: Aug 2016
Location: Portland Oregon
Posts: 18
Thanks: 0
Thanked 0 Times in 0 Posts
Default

I think it is an amazing build and love your skills. I do have one thing that I'm having trouble with and it's the rear bumper. I think it looks too big for the lines of the car but that's just me, and it might grow on me, sorry not trying to dis your ride at all, it's fantastic!!
Reply With Quote
  #90  
Old 08-25-2016, 12:28 PM
CamaroAJ's Avatar
CamaroAJ CamaroAJ is offline
Lateral-g Supporting Member
 
Join Date: Mar 2010
Location: San Antonio, Tx
Posts: 882
Thanks: 104
Thanked 316 Times in 138 Posts
Default

Quote:
Originally Posted by DannyZ View Post
I think it is an amazing build and love your skills. I do have one thing that I'm having trouble with and it's the rear bumper. I think it looks too big for the lines of the car but that's just me, and it might grow on me, sorry not trying to dis your ride at all, it's fantastic!!

Thank you.

It's just the way it looks in pictures. In person it's smaller. Also once it's pained black and the body is blue I think it will blend more and seem more integrated. This isn't a great angle, but its a little farther back.
Reply With Quote
Reply


Posting Rules
You may not post new threads
You may not post replies
You may not post attachments
You may not edit your posts

BB code is On
Smilies are On
[IMG] code is On
HTML code is Off

Forum Jump


All times are GMT -7. The time now is 10:46 PM.


Powered by vBulletin® Version 3.8.11
Copyright ©2000 - 2025, vBulletin Solutions Inc.
Copyright Lateral-g.net