...

Go Back   Lateral-g Forums > Lateral-G Open Discussions > Project Updates
User Name
Password


Reply
 
Thread Tools Display Modes
  #51  
Old 11-06-2008, 01:17 AM
Damn True's Avatar
Damn True Damn True is offline
Senior Member
 
Join Date: Sep 2005
Location: San Jose, CA
Posts: 795
Thanks: 0
Thanked 0 Times in 0 Posts
Default

....and with far less cleanup with the grinder required as well. All told a much better result with the plasma.


The next step is to begin trial fitting the coil over bracket to the UCA mount. Now remember, we are dealing with a 40 year old car. Tolerances on these things when built were shall we say........loose. The bracket will have to be trimmed here and there to fit.

Here is the bracket as delivered. You can see that the gaps around the bracket are big.


You'll have to nip away at the c/o bracket and perhaps the UCA bracket some to get your joints tight enough to weld and to locate your shock in the hole such that the spring perch or spring wont make contact with the subframe. There is no sense in me describing where you'll have to trim he bracket as it will be different on your car. It was different on mine from left side to right.


.

Last edited by Damn True; 11-06-2008 at 01:21 AM.
Reply With Quote
  #52  
Old 11-06-2008, 01:20 AM
Damn True's Avatar
Damn True Damn True is offline
Senior Member
 
Join Date: Sep 2005
Location: San Jose, CA
Posts: 795
Thanks: 0
Thanked 0 Times in 0 Posts
Default

....and after considerable trimming


Yes I know the shock is upside down. The adjustable perch is slightly larger than the fixed one and I assumed closer to the OD of the spring.


Again, YMMV on the trimming required. This is just what had to happen to get it to fit up nicely on MY particular subframe. It isn't hard. Just time consuming. You grind a little, then test. Rinse and repeat until you get a nice fit then tack the sucker in place.

Reply With Quote
  #53  
Old 11-06-2008, 01:20 AM
Damn True's Avatar
Damn True Damn True is offline
Senior Member
 
Join Date: Sep 2005
Location: San Jose, CA
Posts: 795
Thanks: 0
Thanked 0 Times in 0 Posts
Default

Then weld it up...


Still pretty messy with spatter and the goo from the flux-core wire but it got late and I needed dinner. Now it's even later and I need to go to bed, so more tomorrow if I get home from work early enough to work on it.

Thanks for watching.......
Reply With Quote
  #54  
Old 11-06-2008, 10:10 AM
city_ofthe_south's Avatar
city_ofthe_south city_ofthe_south is offline
Senior Member
 
Join Date: Feb 2007
Posts: 428
Thanks: 0
Thanked 0 Times in 0 Posts
Default

love seeing the flux-core at work. Gonna be a really awesome car from the sound of things. Keep it up.
__________________
www.odellstudios.com ... it's turned in to more than cars.
Reply With Quote
  #55  
Old 11-18-2008, 12:46 PM
Damn True's Avatar
Damn True Damn True is offline
Senior Member
 
Join Date: Sep 2005
Location: San Jose, CA
Posts: 795
Thanks: 0
Thanked 0 Times in 0 Posts
Default

Ok, brief update.

Topic: Fitting new suspension bits on 40 year old subframes.


As previously mentioned, the tolerances on 40 year old cars are......not good. You saw above how fitting of the ATS coil over brackets required widely disparate adjustments to the brackets to get them to fit in the UCA mount stands. The brackets were identical, the mount stands.....not so much. I guess that explains the goofy mix of alignment shims that were in the car when I disassembled it.

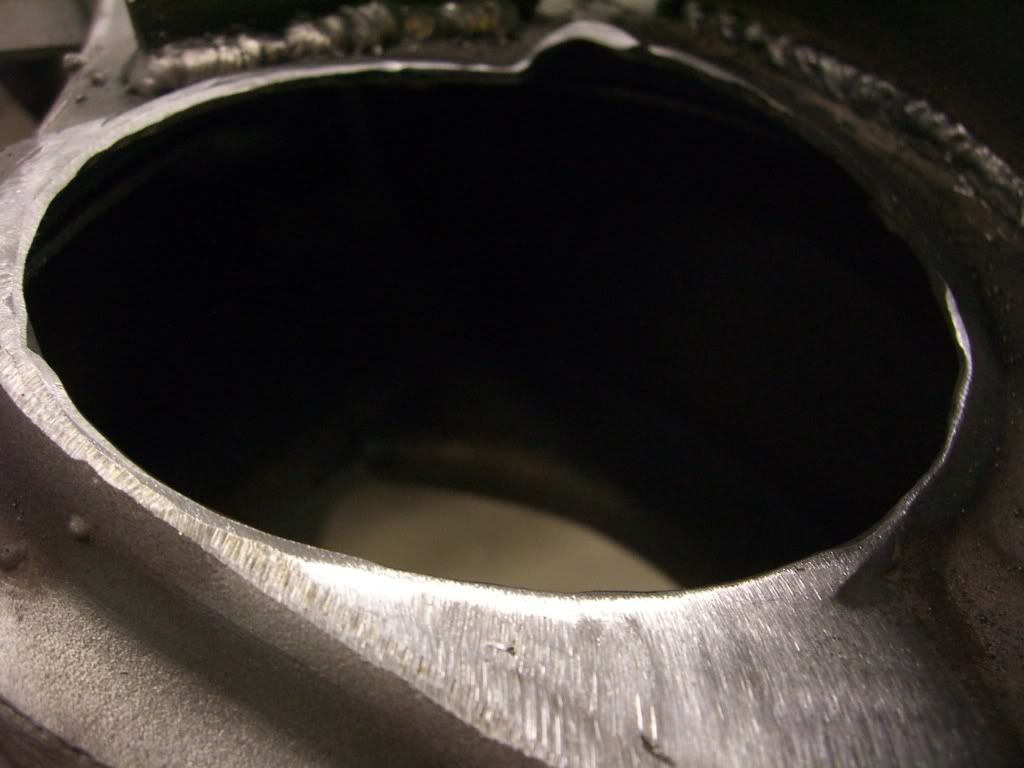
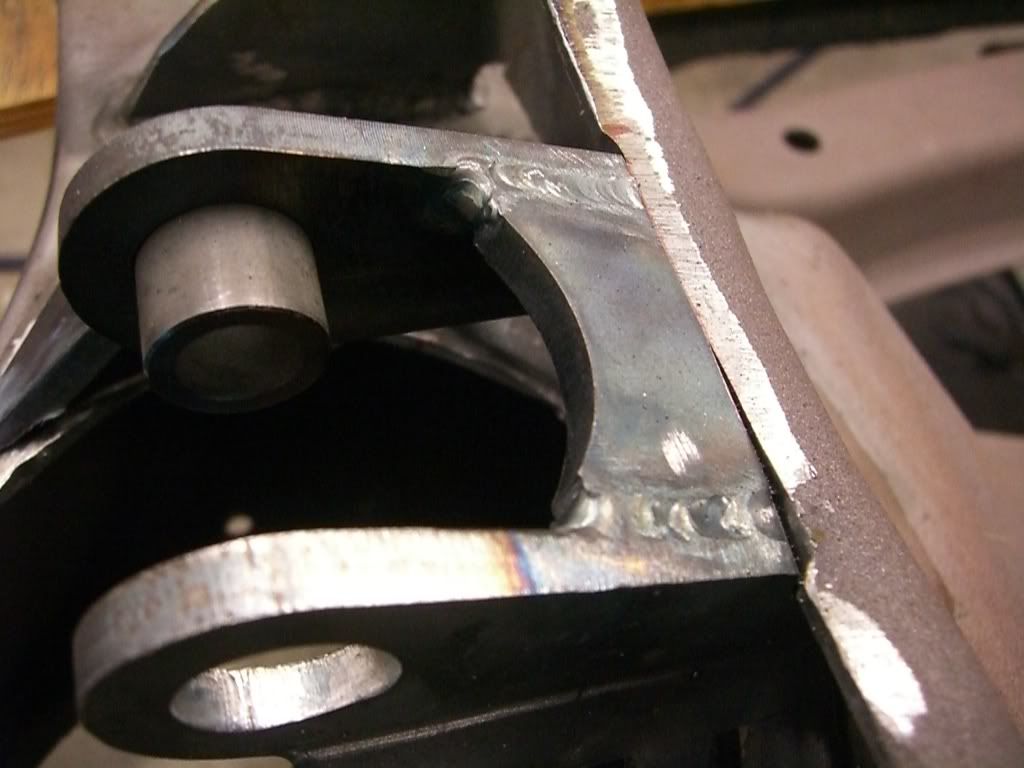
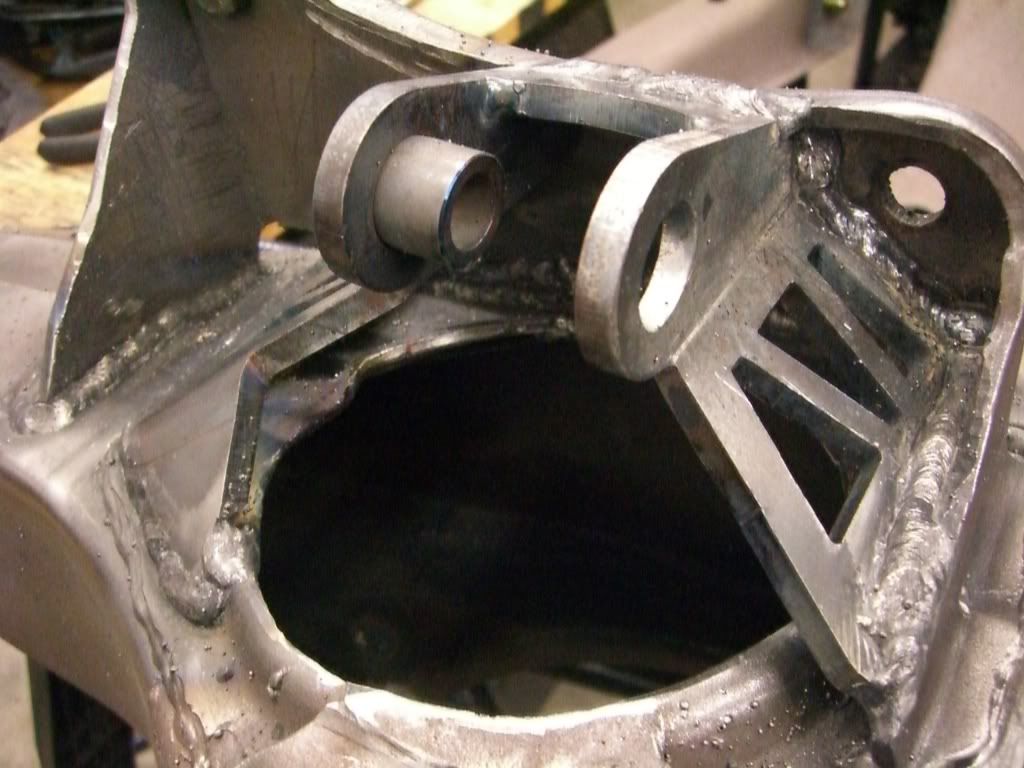
So the new challenge is fitting the Speed-Tech lower control arms. I attempted to test-fit them prior to painting the subframe. To say that they required "persuasion" would be a gross understatement. I thought for a second that I had gotten arms for the wrong year Camaro. I measured everything, twice and it wasn't the arms. It was the LCA mount pockets. They varied in width by as much as 3/16" and the angles relative to each other were off as well.

I spoke to Blake at Speed-Tech about this and his reply was that this was fairly common. Though more common in LA vs Norwood cars.

His suggestion:


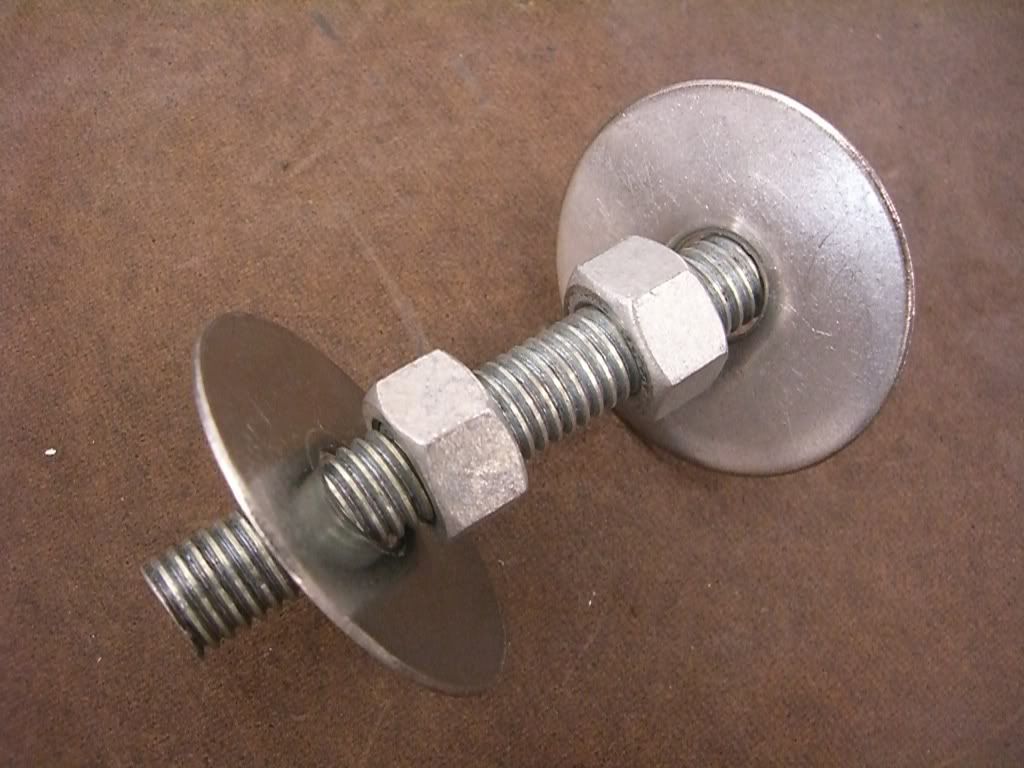
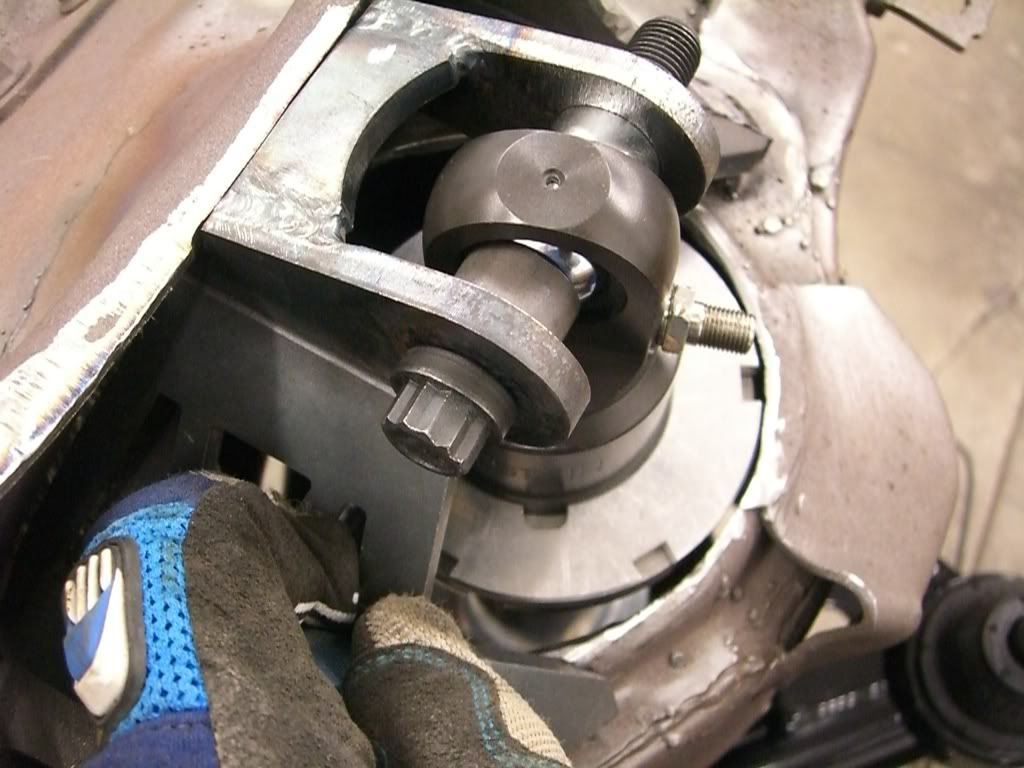
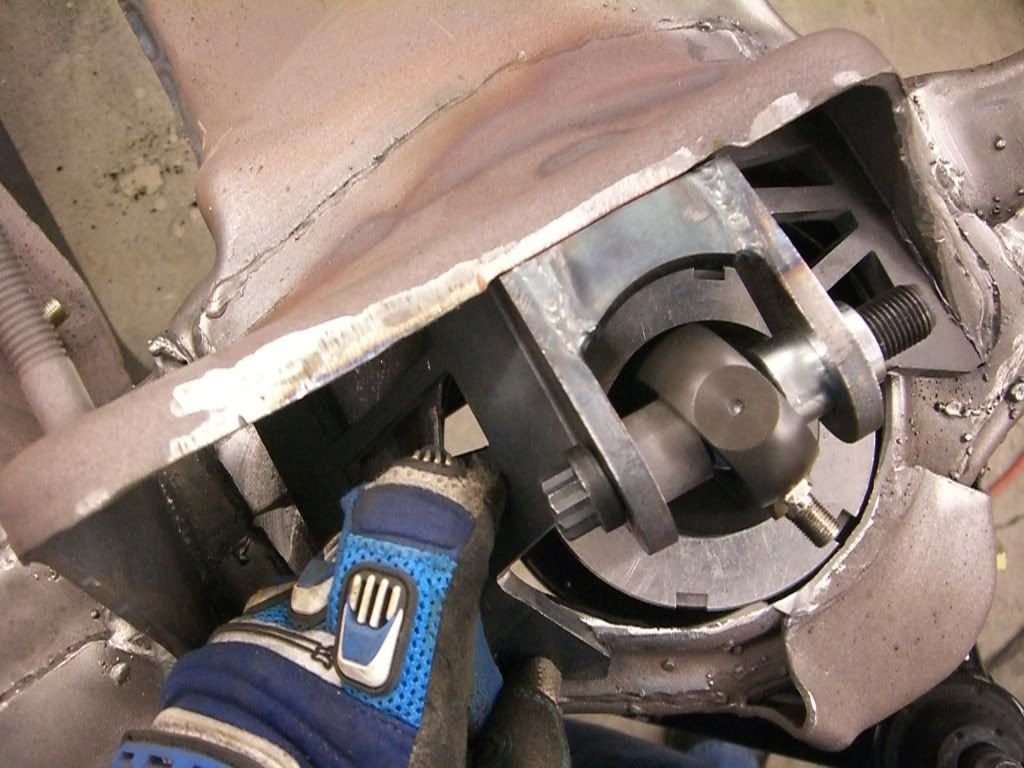
A 4" length of 1/2" all-thread
Two 1/2" nuts
Two fat washers

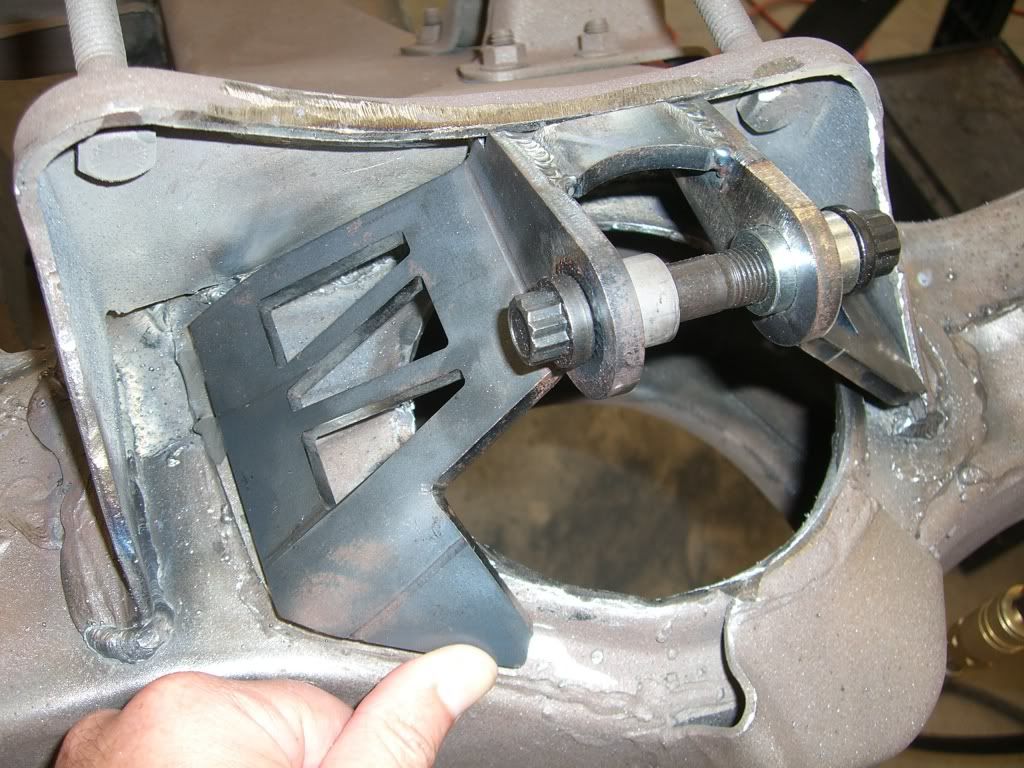
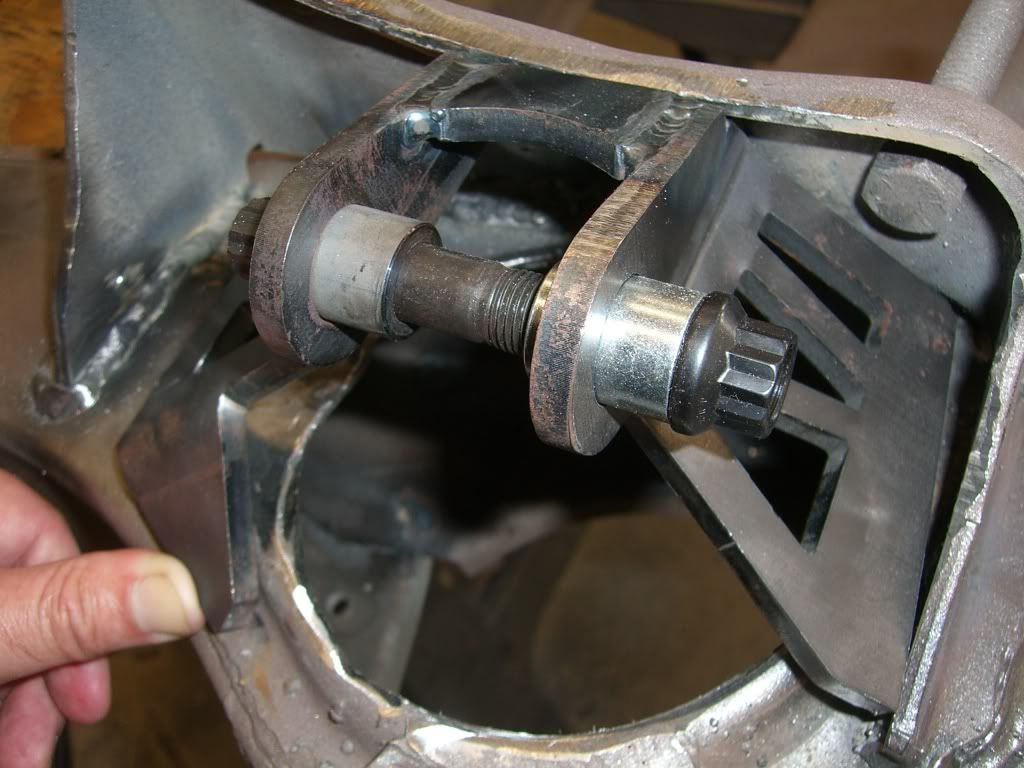
This nifty little device is used to "adjust" the width of the LCA mount pockets so that the LCA bushings will slip into place. Like so:


The end result is that the LCA now slips easily into place w/o the need to force, sweat, curse, cajole or grab a BFH to get it in place.

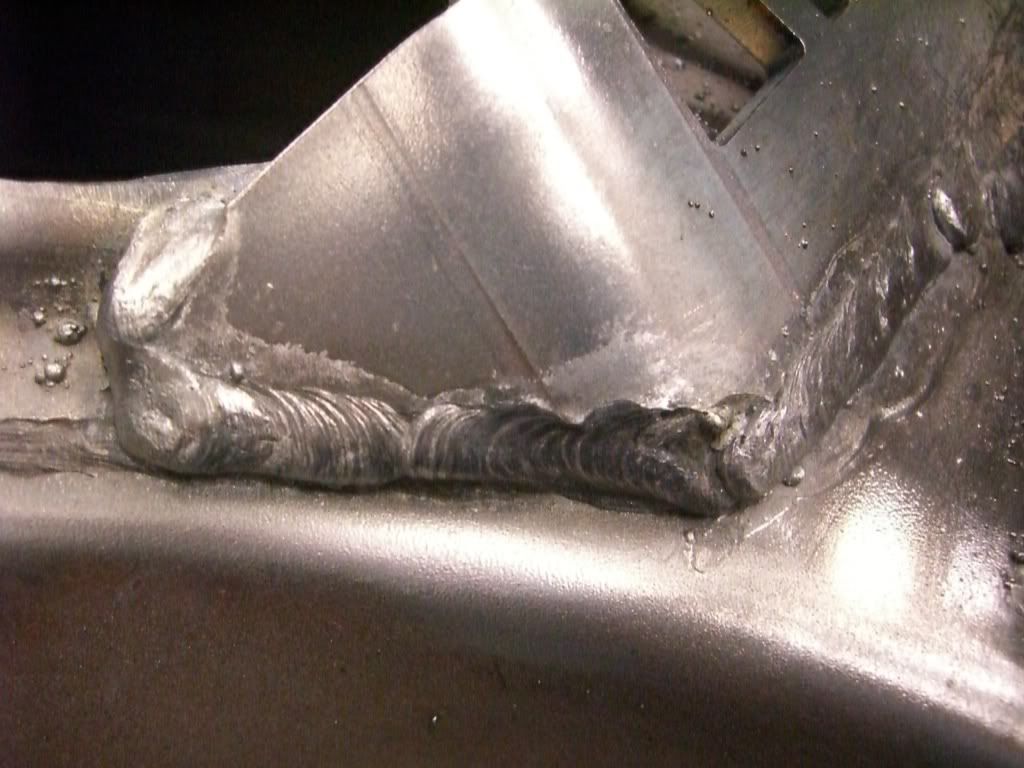
The subframe and core support are now painted. I have a few more photos to take and I'll post an update on that and a more complete review of the Eastwood products in a couple of days.....maybe tonight....depends on what my wife has planned for me after work.
Reply With Quote
  #56  
Old 11-18-2008, 04:49 PM
Blake Foster's Avatar
Blake Foster Blake Foster is offline
Senior Member
 
Join Date: Oct 2005
Location: St George Utah
Posts: 2,526
Thanks: 6
Thanked 101 Times in 44 Posts
Default

whad i tell ya........ haha thank for posting that now i can add it to our instructions. hahaha that should cut down on a few phone calls
__________________
Blake Foster
www.speedtechperformance.com
Reply With Quote
  #57  
Old 11-18-2008, 06:29 PM
69Nova's Avatar
69Nova 69Nova is offline
Senior Member
 
Join Date: Sep 2005
Location: St. Augustine, FL
Posts: 306
Thanks: 0
Thanked 0 Times in 0 Posts
Default

That's pretty clever. Was there any heating involved or did you just crank it by hand and the pockets bent it just fine?
__________________
Andrew Petty
1969 Nova:Pics of my car

Last edited by 69Nova; 11-18-2008 at 09:48 PM.
Reply With Quote
  #58  
Old 11-18-2008, 09:42 PM
VP23271's Avatar
VP23271 VP23271 is offline
Member
 
Join Date: May 2007
Location: Huntington Beach, CA
Posts: 61
Thanks: 0
Thanked 0 Times in 0 Posts
Default

Very cool little easy fix!

Thanks for posting all the pic's. Keep them coming.
__________________
Rick
-----------------------------
"Better to Be Lucky than Good "
Reply With Quote
  #59  
Old 11-18-2008, 10:04 PM
rwhite692's Avatar
rwhite692 rwhite692 is offline
Senior Member
 
Join Date: Sep 2004
Location: Tracy, CA
Posts: 1,912
Thanks: 0
Thanked 0 Times in 0 Posts
Default

That is a neat trick, you should send it into PHR.

I've used a porta-power hydraulic tool to open them up but that is simpler and no special tools required. Nice
__________________
______________________________________________
1969 Camaro/ Tom Nelson TT 434 / Wayne Due C5 / DSE QLink / and a bunch of other stuff...

Project update thread here:
https://lateral-g.net/forums/showthread.php4?t=12743

My Lateral-G Page

My Shop Build:

http://www.garagejournal.com/forum/s...ad.php?t=16310
Reply With Quote
  #60  
Old 11-19-2008, 10:03 AM
Damn True's Avatar
Damn True Damn True is offline
Senior Member
 
Join Date: Sep 2005
Location: San Jose, CA
Posts: 795
Thanks: 0
Thanked 0 Times in 0 Posts
Default

Quote:
Originally Posted by 69Nova View Post
That's pretty clever. Was there any heating involved or did you just crank it by hand and the pockets bent it just fine?
Thought about it, and had a torch at the ready but I didn't seem to need it. YMMV.

Good point though and I'd recommend that someone be prepared to apply a little thermal assistance.
Reply With Quote
Reply


Posting Rules
You may not post new threads
You may not post replies
You may not post attachments
You may not edit your posts

BB code is On
Smilies are On
[IMG] code is On
HTML code is Off

Forum Jump


All times are GMT -7. The time now is 09:34 PM.


Powered by vBulletin® Version 3.8.11
Copyright ©2000 - 2025, vBulletin Solutions Inc.
Copyright Lateral-g.net