Ok here it goes, I am NOT new to the site but have been fairly quiet on here. I was kind of holding out on posting my project because the progress has been painfully slow. I bought it back in Jan of 06 while going to school. I was taking a ten month CNC machinist program that also started me off as a first year apprentice. Here is the car in 06 when I brought it home.

It was in very good shape, and the gaps were perfect throughout. I should have just painted it and drove it. The only problem was the previous owner had shaved the door handles and trunk lock, along with the filler cap; it also had a makeshift roll pan on the back

It was all cool, but not quite what I wanted.
Moving on, I finished my machinist course with a scholarship and a job working for a pipe threading company in Edmonton. I ended up doing my practicum with the company, but did not like the repetitiveness, or the city for that matter so I moved back home where I was offered a job at the restoration shop I bought the car from.
I thought this was going to be great, I would get to learn the skills to do all the work on my car myself leaving money to buy some of the items on my growing wish list: A Viper T-56 from DandD performance, DSE minitubs, quadralink, hydroformed subframe, and Fikse profile 5-S wheels.
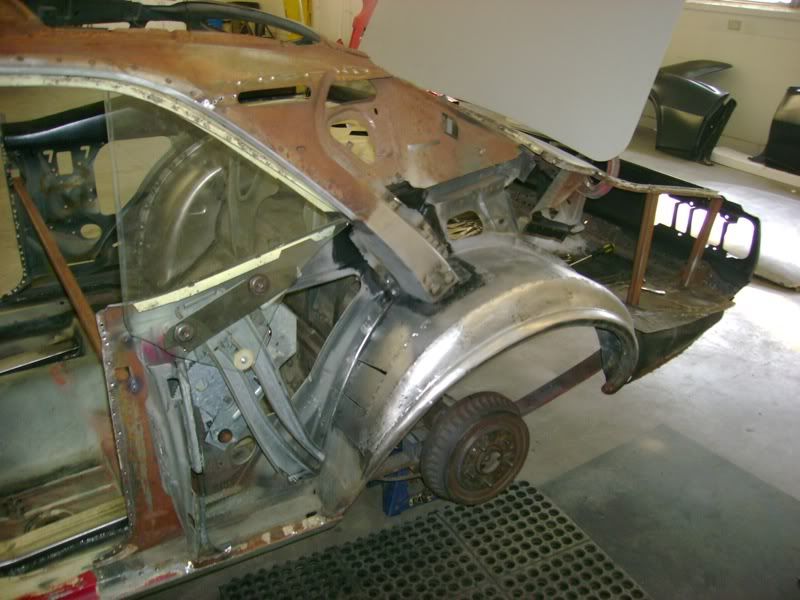
Shortly after starting at the body shop I tore the car down, and began working on it. First off was getting rid of the ugly roll pan that was on the back of the car, and getting the door handles back in which lead me to this

I was not overly happy with the original tail pan once I got the roll pan removed so I ordered a new one. Then I got looking at the quarters, and decided to replace them; not because of rust but because of some minor damage lurking underneath.

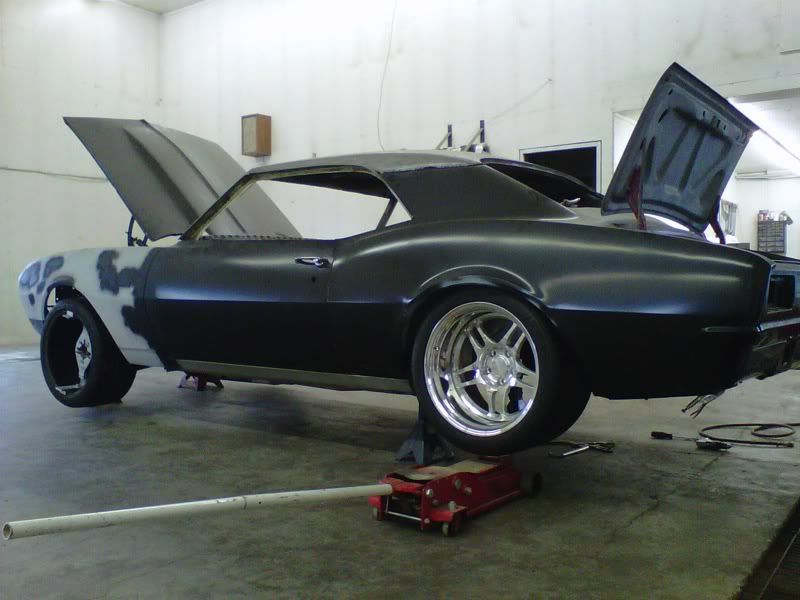
Somewhere along the way things got carried away. I ended up re-skinning the doors, the quarters, roof, and tail pan; installing mini tubs (twice), and stretching the outer wheel tubs to accommodate the 335/30/18's I had planned for the back. here are a few pics.


I have a lot more of this story to share so it will be continued.......


 Brian Hobaugh SCCA National Tour June 2014
 First Hemi 'Cuda Convertible Ever Built
 Short clips: Goodguys Pleasanton autocross and pit videos


 Linear Mode

