...

Go Back   Lateral-g Forums > Lateral-G Open Discussions > Project Updates
User Name
Password


Reply
 
Thread Tools Display Modes
  #1  
Old 09-28-2014, 04:06 PM
6t9 camaro's Avatar
6t9 camaro 6t9 camaro is offline
Senior Member
 
Join Date: Aug 2008
Posts: 125
Thanks: 0
Thanked 0 Times in 0 Posts
Default

I like where this one is going!
__________________
C Wall

69 Camaro (Sinister) Build
https://lateral-g.net/forums/show...light=sinister
Reply With Quote
  #2  
Old 09-28-2014, 05:06 PM
Intimidator3's Avatar
Intimidator3 Intimidator3 is offline
Member
 
Join Date: Apr 2014
Posts: 88
Thanks: 0
Thanked 3 Times in 3 Posts
Default

Thanks guys. @ Curtis - I have settled with going back blue. But this time a more modern GM Color... Luxo Blue.. Here is a reference pic.
http://i202.photobucket.com/albums/a...rebb/C6frt.jpg

I plan for it to be more simple so probably not going back with the rally strips, but something more subtle...when we get to that point.

So here we go. About a year ago at this time, I decided it was time for paint and body and move in a slightly different direction. I knew I did not want this car to end up as just another drag car. That is not why I looked for a 69 Camaro for so long. SO I drove my car over to Camaro Concepts here in Houston. I spoke with Corbin up there and we agreed we agreed I really have to get this baby down to bare metal to see what we are dealing with and go from there. The car is what I would call a 20 footer as in it looked damn good from 20 feet away. Having this car for 10 years I already knew most of the secrets, or at least I hoped... I knew there was body work and rust in some areas, but nothing that Corbin and Roy could not handle. So I began the tear down...

So I pulled the motor and removed my cowl vent. Notice the rust near the bottom of the wind shield....


a little around the back window after I pulled the glass... but not as bad as I thought...whew! Hey look...Butternut Yellow!


The trunk pan...well I knew about that...yeah, kinda hard to haul around any dead bodies in that so I will have to replace that. (J/K)


Pulled the interior and yeah, hard to tell how bad, but someone previously tried to put glass over the pinholes looks like... Not looking good for the floorpan...


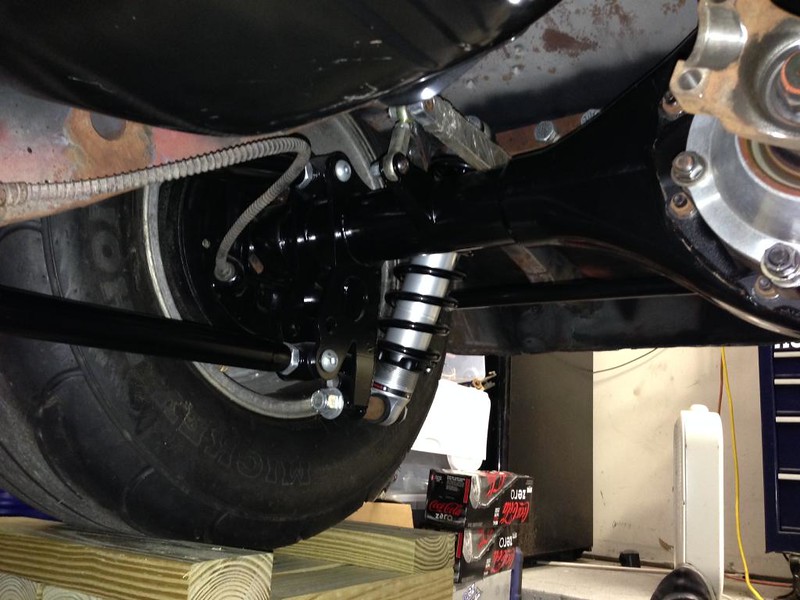
So I got it over to Camaro Concepts and while I was there, they already dropped the rear suspension. Within a week, here is what my car looked like... Ready for blasting!!


I decided to smooth the firewall. Here is a good before pic...


As I feared, I can see the rust damage around the windshield is pretty extensive. It's okay, Roy and Corbin have seen worse.


A little on the lower cowl too...


Car is back from blasting. naked and P-coated. I was worried they would start blasting it and suddenly they would say, "where did it go?" luckily, it still had a bit of medal left.

Some previous bad patch work hidden under the paint...


and the door...


More to come... 15 pic limit per post... Thanks again for reading!

Last edited by Intimidator3; 07-16-2017 at 07:40 AM.
Reply With Quote
  #3  
Old 09-28-2014, 05:52 PM
Intimidator3's Avatar
Intimidator3 Intimidator3 is offline
Member
 
Join Date: Apr 2014
Posts: 88
Thanks: 0
Thanked 3 Times in 3 Posts
Default

Oh yeah, looks like it got attacked by metal eating termites...


Sorry, a little blurry


Lower cowl, floorboards... can see daylight through the holes. Under the fiberglass was sheetmetal patchwork. Oh, yeah, floorpan is outta here...


Doors eaten up from the inside (lower right corner) and the lower left door frame..


Okay, so while all that is going on, I loaded up my subframe and brought it home for disassembly. I am taking it and a few other parts to get powder coating.


Fast Forward... A week later...


Last edited by Intimidator3; 07-16-2017 at 07:47 AM.
Reply With Quote
  #4  
Old 09-28-2014, 06:42 PM
Spiffav8's Avatar
Spiffav8 Spiffav8 is offline
Lateral-g Moderator
 
Join Date: Apr 2007
Location: Las Vegas, NV
Posts: 4,740
Thanks: 583
Thanked 462 Times in 220 Posts
Default

Dig the new color! Looks like the body has seen better days, but we have seen worse around here. It sounds like you've got a good team that will get it back into shape and done correctly. Keep at it!!!
__________________
Curtis
Pilots: We're not better than you, just way cooler.

NO ONE IS COMING. IT'S UP TO US.

http://www.navysealfoundation.org/
Reply With Quote
  #5  
Old 09-28-2014, 06:52 PM
Intimidator3's Avatar
Intimidator3 Intimidator3 is offline
Member
 
Join Date: Apr 2014
Posts: 88
Thanks: 0
Thanked 3 Times in 3 Posts
Default

Meanwhile, back at the fab shop, my car is getting a lot lighter...

Cut out the cowl, right side cowl shoulder, floor pan, trunk pan, and left rear quarter panel...


At this point, with all that out of the way, I decided to go mini tub and 4-Link rear suspension. So Corbin added that to the parts list for me.

New parts came in and the car starts to go back together.


Start of some of the pre-fab work for the minitubs.


Tail pan


Trunk pan fitted


Ready for the tubs


Fixed that rust spot with a new section


To be continued... Thanks for reading!

Last edited by Intimidator3; 07-16-2017 at 07:54 AM.
Reply With Quote
  #6  
Old 09-28-2014, 07:48 PM
Intimidator3's Avatar
Intimidator3 Intimidator3 is offline
Member
 
Join Date: Apr 2014
Posts: 88
Thanks: 0
Thanked 3 Times in 3 Posts
Default

Up on the rotisserie to finalize welds and clean-up to prepare installing the 4-Link rear suspension from TCI.


Couple more tweaks and we're ready to send the whole rear suspension to powder coating.


Time to put the subframe back on for fender fitting.


Starting to look like a car again... decided not to try salvaging the doors, so got these doors from Auto Metal Direct. Body lines are pretty true and like all aftermarket body parts, needed some massaging, but the guys at Camaro Concepts were able to fix them right up.


Tubs looking good


We've got a roller again...


The rear suspension came back from powder coating and finished nicely. I gained an additional 3 inches to accommodate the 19X12's I plan to have on the final product.


Back at home where my work continues. A big thanks to Camaro Concepts for all the help with the sheet metal work and fab work. They are top-notch and easy to work with. Now it is time to do some more fitting and additional prep work before sending it to paint. Room for one more? (don't mind the Cokes in the back ground. lol )

As always, thanks for reading.


Last edited by Intimidator3; 07-16-2017 at 08:00 AM.
Reply With Quote
  #7  
Old 09-28-2014, 08:11 PM
Spiffav8's Avatar
Spiffav8 Spiffav8 is offline
Lateral-g Moderator
 
Join Date: Apr 2007
Location: Las Vegas, NV
Posts: 4,740
Thanks: 583
Thanked 462 Times in 220 Posts
Default

__________________
Curtis
Pilots: We're not better than you, just way cooler.

NO ONE IS COMING. IT'S UP TO US.

http://www.navysealfoundation.org/
Reply With Quote
  #8  
Old 09-28-2014, 08:18 PM
WSSix WSSix is offline
Lateral-g Supporting Member
 
Join Date: Nov 2008
Location: Dunwoody, GA
Posts: 6,577
Thanks: 1,566
Thanked 857 Times in 644 Posts
Default

Welcome to the site. Glad your project is moving along nicely. What all do you have planned for the car? I like the blue you're going with.
__________________
Trey

Current rides: 2000 BMW 540i/6 and 86 C10.

Former ride: 1979 Trans Am WS6: LT1/T56, Kore 3 C5/6 brakes, BMW 18in rims
Reply With Quote
  #9  
Old 09-28-2014, 09:31 PM
Intimidator3's Avatar
Intimidator3 Intimidator3 is offline
Member
 
Join Date: Apr 2014
Posts: 88
Thanks: 0
Thanked 3 Times in 3 Posts
Default

Okay, a few more updates to get y'all to present. Since I got it back this past winter, I worked on seam sealer in the interior and exterior. Also worked on the surface rust in places to help preserve the car for the winter since I did not yet have a paint shop lined up that did not have a 9 month waiting period. So I worked on the interior first. I cleaned and applied #M Seam sealer to all seams. I stripped any rust off and e-coating with a rotary nylon abrasive brush. (Thanks Sonar Chief) I then cleaned, taped off and shot the areas with Eastwood's Epoxy Primer to seal it well.


This was just to get it by as I did not want this thing sitting in Houston humidity and just rust away since I suddenly found out I was going to be traveling quite a bit for work in the first half of the year and will have less time to try to get this finalized to go to paint. (Work always seems to delay major projects like this )


Did some fitting for brake lines, fuel lines and some of my new billet accessories.


Also got my Ice wheels in from Budnik. Thanks Jason Swain.


Fronts are on the way.

Next update will have the latest progress as of 9/26/14. I will then be posting as it moves along. I finally have it at a local paint shop after hunting all summer. Great shop and has been doing excellent work so far and it is getting really close to paint now.

Last edited by Intimidator3; 07-16-2017 at 08:05 AM.
Reply With Quote
  #10  
Old 09-28-2014, 09:48 PM
Intimidator3's Avatar
Intimidator3 Intimidator3 is offline
Member
 
Join Date: Apr 2014
Posts: 88
Thanks: 0
Thanked 3 Times in 3 Posts
Default

Okay, so it has been over at the paint shop where it has gone back on the rotisserie. The bottom sealed, primed, blocked and shot with semi-gloss black. Here's a couple of shots after it was rolled out of the paint booth. Sorry, pics taken from my phone...


More updates coming soon! I'll use a better camera on the next ones!

Last edited by Intimidator3; 07-16-2017 at 08:08 AM.
Reply With Quote
Reply


Posting Rules
You may not post new threads
You may not post replies
You may not post attachments
You may not edit your posts

BB code is On
Smilies are On
[IMG] code is On
HTML code is Off

Forum Jump


All times are GMT -7. The time now is 04:09 AM.


Powered by vBulletin® Version 3.8.11
Copyright ©2000 - 2025, vBulletin Solutions Inc.
Copyright Lateral-g.net