...

Go Back   Lateral-g Forums > Lateral-G Open Discussions > Project Updates
User Name
Password


Reply
 
Thread Tools Display Modes
  #1  
Old 03-04-2015, 09:17 AM
V8TV's Avatar
V8TV V8TV is offline
Lateral-g Supporting Vendor
 
Join Date: Nov 2005
Posts: 1,889
Thanks: 8
Thanked 22 Times in 15 Posts
Default

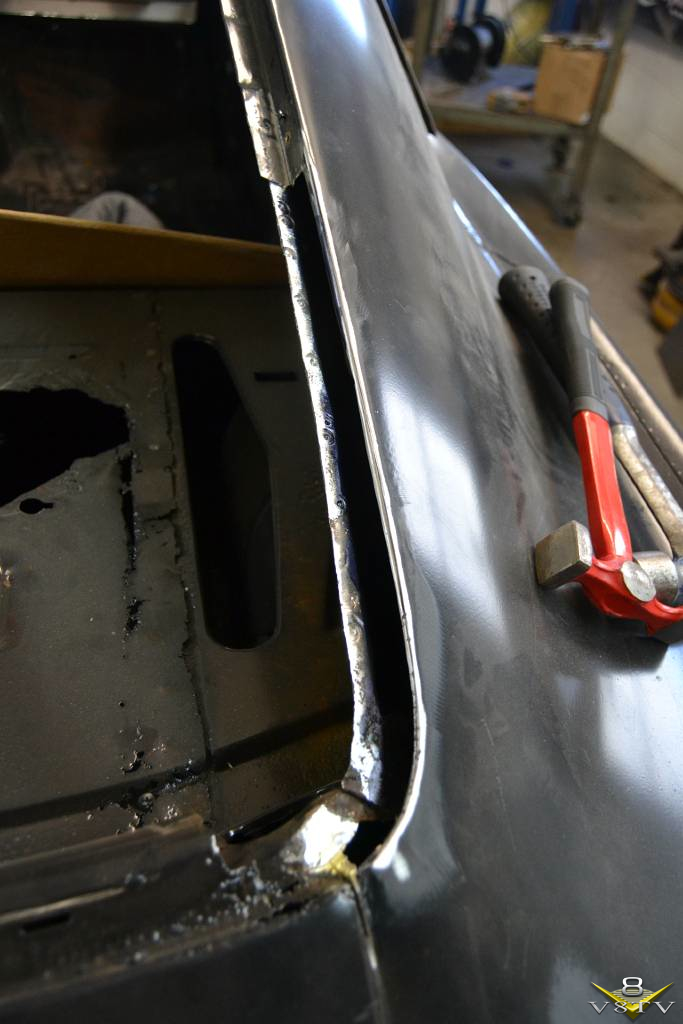
Next, the crew began the rust repairs around the rear window frame. These window channels held water and rusted all the way through. The rusty metal was cut out with a thin 3M cutting disc on an air grinder. A new channel was fabricated using a shrinker/stretcher, welded in, and ground smooth. Gray primer prevented further rust.


__________________
Kevin Oeste
V8 Speed and Resto Shop
V8TV
Muscle Car Of The Week
V8 Radio Podcast

All about us:
https://www.v8speedshop.com

Reply With Quote
  #2  
Old 03-05-2015, 06:46 AM
V8TV's Avatar
V8TV V8TV is offline
Lateral-g Supporting Vendor
 
Join Date: Nov 2005
Posts: 1,889
Thanks: 8
Thanked 22 Times in 15 Posts
Default

Similar repairs were made to the window channel around the windshield in the areas where the metal had rusted thin.


Next, the rear window filler panel was removed for additional rust repair.

__________________
Kevin Oeste
V8 Speed and Resto Shop
V8TV
Muscle Car Of The Week
V8 Radio Podcast

All about us:
https://www.v8speedshop.com

Reply With Quote
  #3  
Old 03-05-2015, 06:47 AM
V8TV's Avatar
V8TV V8TV is offline
Lateral-g Supporting Vendor
 
Join Date: Nov 2005
Posts: 1,889
Thanks: 8
Thanked 22 Times in 15 Posts
Default

The rearmost edge of the structure had rusted away.


A new channel was bent in the Mittler Brothers Box Pan Brake and contoured to the correct shape.


Then it was welded in place with an HTP Quickspot II resistance spot welder.

__________________
Kevin Oeste
V8 Speed and Resto Shop
V8TV
Muscle Car Of The Week
V8 Radio Podcast

All about us:
https://www.v8speedshop.com

Reply With Quote
  #4  
Old 03-05-2015, 06:47 AM
V8TV's Avatar
V8TV V8TV is offline
Lateral-g Supporting Vendor
 
Join Date: Nov 2005
Posts: 1,889
Thanks: 8
Thanked 22 Times in 15 Posts
Default

Next, the middle part of the structure was measured, and a cardboard template was made to assist in fabricating a repair section.


__________________
Kevin Oeste
V8 Speed and Resto Shop
V8TV
Muscle Car Of The Week
V8 Radio Podcast

All about us:
https://www.v8speedshop.com

Reply With Quote
  #5  
Old 03-05-2015, 06:48 AM
V8TV's Avatar
V8TV V8TV is offline
Lateral-g Supporting Vendor
 
Join Date: Nov 2005
Posts: 1,889
Thanks: 8
Thanked 22 Times in 15 Posts
Default

The upper portion of the repair section was punched with a dimple die on a Mittler Brothers brothers punch in order to replace the original flared holes. These holes provided strength for the panel.


Then, the curved lower section was TIG welded to the upper. Soon, the rusty portions of the structure had been completely replaced.

__________________
Kevin Oeste
V8 Speed and Resto Shop
V8TV
Muscle Car Of The Week
V8 Radio Podcast

All about us:
https://www.v8speedshop.com

Reply With Quote
  #6  
Old 10-16-2015, 06:32 AM
V8TV's Avatar
V8TV V8TV is offline
Lateral-g Supporting Vendor
 
Join Date: Nov 2005
Posts: 1,889
Thanks: 8
Thanked 22 Times in 15 Posts
Default

A contoured lip as added to mimic the shape of the original.

[img]http://www.v8tvshow.com/1965_Impala_SK/slides/1965_Impala_SK_10.30.13_17.JPG[img]


Once the piece was welded in place, it was cleaned with a wire wheel and 3M rowlock abrasive discs, and then sprayed it with primer.


A new filler panel was obtained from Classic Industries, and welded in place over the lower structure to complete the repair.


The tail pan section was rusty and damaged, so the crew removed the original panel by drilling out all the spot welds holding it in place.


__________________
Kevin Oeste
V8 Speed and Resto Shop
V8TV
Muscle Car Of The Week
V8 Radio Podcast

All about us:
https://www.v8speedshop.com

Reply With Quote
  #7  
Old 10-16-2015, 06:33 AM
V8TV's Avatar
V8TV V8TV is offline
Lateral-g Supporting Vendor
 
Join Date: Nov 2005
Posts: 1,889
Thanks: 8
Thanked 22 Times in 15 Posts
Default

Note the support rod welded in to keep the decklid opening the correct size.


A new panel was obtained from Classic Industries, and it was fitted and welded in place. Note the fitting of the deck lid and tell light packets in this process to ensure all the panels fit properly before welding.


__________________
Kevin Oeste
V8 Speed and Resto Shop
V8TV
Muscle Car Of The Week
V8 Radio Podcast

All about us:
https://www.v8speedshop.com

Reply With Quote
Reply


Posting Rules
You may not post new threads
You may not post replies
You may not post attachments
You may not edit your posts

BB code is On
Smilies are On
[IMG] code is On
HTML code is Off

Forum Jump


All times are GMT -7. The time now is 06:08 AM.


Powered by vBulletin® Version 3.8.11
Copyright ©2000 - 2025, vBulletin Solutions Inc.
Copyright Lateral-g.net